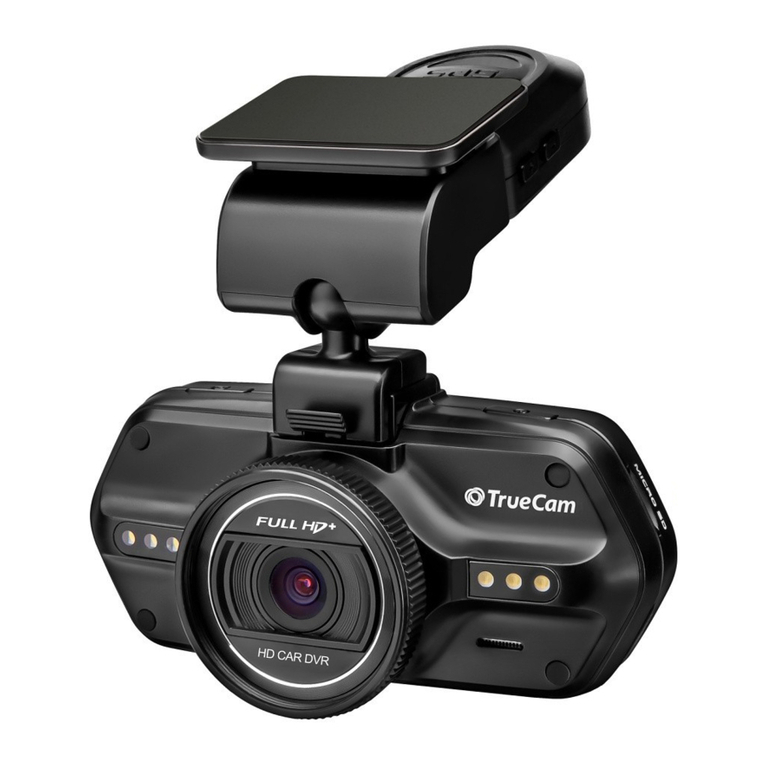
TrueCam A5 PRO WIFI User manual

1
Car DVR with GPS logger
& Speed camera detector
● 1080P Full HD
● GPS lokátor
● Detektor radarů
● Podsvícená klávesnice
● Dostupné objektivy typu CPL & UV
Videokamera do automobilu
s GPS lokátorem & detektorem
radarů
Uživatelská příručka
TrueCam A5 Pro WiFi
User manual
● 1080P Full HD
● GPS lokátor
● Detektor radarů
● Podsvícená klávesnice
● Dostupné objektivy typu CPL & UV
Videokamera do automobilu
s GPS lokátorem & detektorem
radarů
Uživatelská příručka
1080P Full HD
GPS logger
Speed camera detector
WiFi & App
CPL& UV lens available

3
WiFi Connection...............................................................................................1
Product picture & function...........................................................................................2
a) Device introduction..............................................................................................................2
b) Button function......................................................................................................................3
c) LED light status list....................................................................................................................5
d) Package Contents.............................................................................................................5
Basic operation..........................................................................................................5
a) TF card installation.............................................................................................................5
b) GPS / Speed camera detector installation...............................................................................6
c) CPL installation......................................................................................................................7
d) Power Supply............................................................................................................................8
e) Motion detection.................................................................................................................8
f) G-sensor function....................................................................................................8
g) Video mode....................................................................................................................9
h) Photo mode........................................................................................................................10
i) Function SPEEDOMETER.....................................................................................................11
j) Playback mode...............................................................................................................12
k) WiFi Mode.....................................................................................................................12
l) Other functions.................................................................................................................13
Important Functions................................................................................................14
Menu setting..........................................................................................................15
a) Video mode..............................................................................................................15
b) Playback mode...............................................................................................................17

4
Connection..........................................................................................................18
a) TV or monitor connection........................................................................................................18
b) Computer connection.............................................................................................................18
c) WiFi connection...............................................................................................................18
Player.................................................................................................23
Product specication..............................................................................................24

1
WiFi connection
Please scan the following QR code to download the application "FinalCam".
Android App iOS AppFinalCam

2
Product picture & function
a) Device introduction
15 16 17
2
45
18 19 20
8
9
10
13
14
11
6
7
1
3
12
1. TF card slot 2. HDMI port 3. LED light
4. Lens 5. Speaker 6. Status light (blue)
7. Charging light (red) 8. Menu button 9. File protection button
10. Mode button 11. LCD display 12. Up button
13. OK button 14. Down button 15. Power button
16. Holder connector 17. Photo button 18. USB port
19. Reset button 20. Microphone

3
21
22
23
24
25
b) Button function
Power button
Press this button for 2~3 sec. to turn on / o the device.
In video mode press this button to turn on/o speedometer.
Photo button
In video mode, in any time, press this button to take a photo.
In playback mode, when replaying video, press this button to take a photo of the current video.
Reset button
If the device crashes, press this button to reset the device.
Menu button
Press this button during standby status or playback mode, menu list of current mode will appear.
When the device is in recoding, press this button to change the ash light status " ", " ", " ".
File protection button
In the video mode, when the device is recording, press this button to set the recording video to be protected
21. GPS module/Speed camera detector module
22. Voice switch for speed camera detector
23. Power input
24. Sticker holder
25. Camera holder

4
manually, so as to prevent it from being overwritten by loop recording.
In playback mode, press this button to lock or unlock the video le.
When le protection is active, the icon “ ” will appear on LCD display.
Mode button
The device has only two modes, video mode and playback mode.
When this button is pressed during standby, the device will switch between these two modes.
In video mode, press this button to turn on / o LCD display.
Up button
In video mode, press this button to turn on / o WiFi.
In menu settings, press this button to move up.
In playback mode, press this button to choose the previous le.
In playback mode, when playing a video le, press this button to rewind playing.
OK button
In video mode, press this button to start / stop recording.
In playback mode, press this button to play/pause a video le.
In menu settings, press this button to conrm the menu setting.
Down button
In video mode, press this button to start / stop voice recording.
In menu settings, press this button to move down item.
In playback mode, press this button to choose the next le.
In playback mode, when playing video le, press this button to forward playing.
Audio switch
This button is only for speed camera detector.
Push this switch to turn on / o the voice of the speed camera detector.

5
c) LED light status list
LED light Status Description
Status light (blue)
Flash Device is recording
On Device is in standby or playback mode
O Device is o
Charging light (red) On Charging battery
O Charging nished
d) Package Contents
1. Car DVR 1x 2. Car charger 1x 3. DVR mount 1x 4. 3M permanent holder 1x
5. Suction mount 1x 6. 3M sticker 1x 7. USB cable 1x 8. GPS moduel / speed
camera detector 1x
9. 3M holder for charger
cable 5x 10. Protective packaging
Basic operation
a) TF card installation
Insert the Micro SD card into the slot so that the connectors on the card are facing towards the camera display.
When inserting or removing the SD card, keep your camera turned o.
We recommend formatting the SD card while in
use once a month. This will prevent the creation
of defective les and helps to protect the SD card
itself against damage.

6
b) GPS / Speed camera detector installation
Insert GPS / Speed camera detector module into the camera holder, as in the picture bellow:
Install the device on the windshield with the sticker or the sucker holder.
When the device is powered, speed camera detector speaker will provide voice instructions from the speed camera
detector speaker, and the device will automatically start to receive GPS signal.
When not connected to a GPS satellite, GPS icon " " will be shown red on the LCD display.
When connected to a GPS satellite, GPS icon " " will be shown on the LCD display.
Note: GPS module works properly only when it is plugged into the DVR mount adapter that is connected
to a power into the car lighter.
When you want to change the voice alert setting, the GPS module must be connected to power into the car lighter
according to the notes above.
Updating the database of radars and voice alerts can be found at: www.truecam.com/rmware/

7
c) CPL installation (optional)
CPL: Circular-polarizing lter can reduce the inner reection on the car windshield.
Without CPL With CPL
Install the CPL by screwing the filter ring on the
camera's lens.
After installing the CPL on the lens, rotate the CPL
adjustment ring to get an ideal polarized effect.
adjustment circle ring

8
d) Power Supply
Connect the USB cable and car charger with the cigarette lighter port, then start the engine, the device will
automatically power on and start recording.
Note: There are two mini USB ports, one is on the device, another is on the camera holder.
When the charging USB cable is connected to the camera, only the camera will by powered.
When the charging USB cable is connected to the camera holder, both the camera and the GPS/Speed
camera detector will by powered.
e) Motion detection
1. In the recording mode, press the Menu button to enter the settings, then select Motion Detection.
2. If the camera registers moving objects within its range, a ashing red dot “ ” will appear on the display and
the device will begin recording.
Once there are no moving objects detected, the device automatically stops recording.
The intensity of movement depends on the selected motion detection sensitivity. Users must know that selecting high
sensitivity may soon lead to a full memory card.
Note: It is not recommended to use the motion detection and loop recordings together.
f) G-sensor function
In case of an accident, the gravity sensor (G-sensor) can gather direction and other important data of the collision.
According to the value set for the G-sensor sensitivity, the camera will determine whether to turn the protection
mode on or not. If the protection mode is not turned on, the current video may be overwritten by loop recording. Be
careful when setting the G-sensor to a high sensitivity as it may cause le locking even when driving on a rough
road. This might ll up the memory card quickly.
G-sensor directions are shown in the picture bellow:

9
g) Video mode
• In the standby status of the video mode, LCD display will be shown as below:
3
WDR
P
2013/11/06
12M
1080FHD 01:07:38
14:25:30
13
F
AAAAAA
SSID:CR700W
PWD:12345678
Front Camera Resolution
WiFi
on
GPS
icon
TimeDate
WiFi SSID
WiFi Password WiFi
o
Remaining power
Parking control
Sounds on Sounds o
LED light auto
LED light on LED light o
Motion detection
Recording time remaining
(calculated from the card
remaining space)
Video mode
Loop recording time
Picture size
WDR mode
G-Sensor
Auto Exposure
TF card
License plate number
SSID:TrueCam A5W
PWD:12345678
20126/05/2017

10
• In the recording status of the video mode, LCD display will be shown as bellow:
3
WDR
2013/11/06
12M
1080FHD
14:25:30
13
00:01:38
AAAAAA
P
F
SSID:CR700W
PWD:12345678
Front Camera Resolution
WiFi
on
TimeDate
WiFi SSID
WiFi Password WiFi
o
Remaining power
Parking control
Sounds on Sounds o
Motion detection
Recording time
Flashing red dot
indicates that the
device is recording.
Loop recording time
Picture size
WDR mode
G-Sensor
Auto Exposure
TF card
License plate number
LED light
File protection lock
h) Photo mode
Anytime in the video mode, press the photo button to take a photo.
In the playback mode when a video is playing, press the photo button to take a snapshot of the current video.
SSID:TrueCam A5W
PWD:12345678
20126/05/2017

11
i) Function SPEEDOMETER
When in recording mode or standby mode, pressing power button will switch the screen to the picture bellow and
information about current speed, compass and distance to speed camera will be shown.
If the driving speed is above the current speed limit, the below picture will appear.
Compass
Distance to current speed camera
Current Car Speed
Speed Limitation of
current speed camera
Overspeed Icon
Speed Limitation of
current speed camera

12
j) Playback mode
Press the mode button to enter the playback mode, then press the menu button to choose a preview of
a video / photo le on the internal or removable memory card. Use the direction button to control playback options.
Preview in six image grid
Up button Previous le
Down button Next le
OK button Conrm
Menu button Enter menu list
File protection button Lock / Unlock video / photo le
Mode button Change mode
Play
OK button Play / Pause
Menu button Delete menu
File protection button Lock / Unlock video le
Mode button Back to six image grid preview
Photo button Take snapshot of current video
k) WiFi Mode
In WiFi mode, use the direction button to control wi operation.
WiFi Mode
Power Button When the device is turned on, press this button to turn on / o
speedometer

13
File Protection Button Press this button to protect G-Sensor les
Up Button Turn on/o WiFi function
OK Button Press this button to start/pause recording
Down Button Press this button to turn the sounds on/o
Please note: In WiFi mode, other button operations are not accessible. When WiFi function is turned o, other
button operations are available.
l) Other functions
GPS coordinates view - allows to display GPS position within the video. Location is display in the form of
coordinates.
Current speed view - allows to display current speed within the video, usable for future reference.
LED illumination - can be set to automatic or continuous. LED illumination is primarily used for situations such as
monitoring of an accident in the dark, where the device can be used as a still camera.
Video lock - can be used to lock the video from subsequent overwriting by another video in the future. You can
lock the videos either in the recording mode or in the playback mode.

14
Important Functions
a) Parking mode
When the function is activated in the menu, the camera will protect the vehicle during your absence. If the vehicle
moves slightly, the camera begins recording automatically. After 60 seconds, the recording stops and the camera
turns o if the movement is not repeated. The device uses a built-in battery for power. To extend battery life, which is
up to 24 hours when fully charged, connect the device to an external power source, e.g. connect it to a car cigarette
lighter.
b) Timelapse
The Timelapse function can be activated/deactivated in the menu. When the function is activated, the camera
records with the selected speed (fps = frames per second), at 15 fps, 10 fps or 5 fps. The less fps you set, the more
accelerated the resulting recording will be. The advantages of this function are as follows: 1) The total recording time
that can t on a memory card is several times higher. 2) The whole recording can be watched a lot faster, without
you missing any unexpected or unusual situations. Timelapse recording is captured by both the front and rear
camera.
c) Loop settings
The Time Loop allows continuous recording regardless of the memory card capacity. You can choose from three
time intervals: 3 min / 5 min / 10 min. The selected interval determines the length of recording time which the camera
will save. The advantage of using this setup is that you will never run out of space on your memory card. Moreover,
it is very easy to send very small les via e.g. e-mail for use as evidence.

15
Menu setting
The device has two modes, the video mode and the playback mode.
a) In video mode:
Function Menu item Note
Resolution 1080p / 720p / WVGA / VGA Sets the video resolution.
WiFi O/On Set WiFi On or O.
TimeLapse O / 15 fps / 10 fps / 5 fps Sets the number of images for Timelapse.
Loop recording O / 3 minutes / 5 minutes / 10 minutes Sets the length of the video time loop.
Picture resolution 12M / 8M / 5M / 3M / 2MHD Sets the photo resolution.
Exposure
+2.0 ; +5/3 ; +4/3 ; +1.0 ; +2/3 ; +1/3 ; 0 ;
-1/3 ; -2/3 ; -1.0 ; -4/3 ; -5/3 ; -2.0
The "+" increases recording brightness.
The "-" decreases brightness and darkens
the recording.
White Balance Auto / Daylight / Cloudy / Tungsten /
Fluorescent We recommend setting it to Auto. White
Balance depends on light conditions.
WDR O / On WDR settings.
Motion Detection O / Low / Medium / High Motion Detection function settings.
Parking mode O / On Parking mode function settings.
G-Sensor set O / Low / Medium / High G-Sensor sensitivity settings.
Record Audio O / On Audio Recording settings.
Date Stamp O / On Timestamp in the video settings.
Drive name - - - - - - Sets the driver's name.

16
Driver name stamp O / On Sets the display of the driver's name.
Image Rotation O / On Rotates the image 180 degrees.
Date/Time YY/MM/DD Date and Time settings.
Power on delay O / 10 s / 20 s / 30 s
Sets the delay when turning the camera on.
Power o delay O / 10 s / 20 s / 30 s
Sets the delay when turning the camera o.
Auto Power O O / 1 min / 3 min / 5 min
By setting the time, the camera switches o
automatically in the standby mode after a
given period of time if it does not detect any
motion.
Beep Sound O / On Sets the camera's tones On/O.
Screensavers
Speedometer: 1 min / 3 min / 5 min /
Display o: 1 min / 3 min / 5 min / O
Instead of playing recorded footage, the
camera screen can be turned o after a
certain time interval, or the Speedometer
function can be set.
Key backlighting Auto / O / On Sets the backlighting of keys.
LED illumination Auto / O / On Camera illumination settings.
TV mode NTSC / PAL TV mode settings.
Frequency 50Hz / 60Hz Video frequency settings.
Language
English / French / Spanish / Portuguese
/ German / Italian / Hungarian / Czech
/ Polish / Serbian / Chinese / Russian /
Japanese / Lithuanian
Language settings.

17
E-Dog Voice Setting English / German / Polish 1 / Lithuanian
/ Czech 1 / Czech 2 / Hungarian /
Serbian GPS Module language settings.
Time Zone Setting GTM Chooses the time zone.
GPS Watermark O / On Sets the display of the GPS in a video.
Speed Watermark O / On Shows the speed in a video.
Format Cancel / OK Formats data on the memory card.
Default Setting Cancel / OK Resets the camera to the original factory
settings.
Software version TRCM_A5PRO_V## Displays the installed FW version.
b) In playback mode:
Delete Delete current / Delete all
Protect Lock current / Unlock current / Lock all / Unlock all
Format Yes / No
Presentation 2 seconds / 5 seconds / 8 seconds
Table of contents
Languages:
Other TrueCam DVR manuals
