TrueConf Group User manual


5
5
6
6
8
8
9
12
12
12
12
12
13
13
13
13
13
14
14
14
14
15
15
15
15
16
16
16
16
16
17
17
17
18
Table of Contents
1. What Is TrueConf Group?
1.1. Endpoint Purpose
1.2. Configuration
1.3. Endpoint Description
2. How to Control TrueConf Group
2.1. Endpoint Home Screen
2.2. Remote Control Keys
3. TrueConf Group Manager
3.1. Before You Begin
3.1.1. Setting an IP Address
3.1.2. Control Panel Access
3.2. Language and Date Settings
3.3. Restricting Access to Settings
3.4. Hardware Setup
3.4.1. Monitors
3.4.2. Webcam
3.4.3. Microphone
3.4.4. Speakers
3.5. Configuring Protocols
3.5.1. H.323 Settings
3.5.2. SIP Settings
3.5.3. RTP Settings
3.6. Sleep Mode
3.7. Preparing for Conferences
3.7.1. MCU Function Activation
3.7.2. Codecs
3.7.3. Content Preparation
3.7.4. Stream Settings
3.7.5. Recording
3.7.6. Assigning PTZ Camera Presets
3.8. Contact List
3.8.1. LDAP
3.8.2. Address Book
4. Working with the endpoint
TrueConf Group User guide
© 2021 TrueConf. All rights reserved. 2

18
18
19
19
19
20
20
20
20
21
21
22
22
22
22
23
24
24
25
25
25
25
26
26
26
27
27
27
28
28
28
28
30
30
30
30
4.1. How to call another endpoint/device
4.1.1. Call a user or TrueConf conference
4.1.2. Viewing Call Information
4.2. How to Set up a Group Conference
4.2.1. Adding users during a session
4.2.2. Connection Data
4.3. Layout Management
4.3.1. During a point-to-point call
4.3.2. During a group conference
4.4. During a conference
4.4.1. PTZ Camera Control
4.4.2. Content Sharing
4.4.3. Recording
4.5. How to Use Saved Addresses
4.5.1. Address Book
4.5.2. Call History
5. Web-Based Management (Control Panel)
5.1. Hardware Setup
5.2. Device Control Panel
5.3. Information
5.4. Making Calls and Address Book
5.5. Conference Manager
5.5.1. Camera Settings
5.5.2. Screen Sharing
5.5.3. Switching Layouts
5.5.4. List of Participants
5.5.5. PTZ Camera Control
5.6. Video Recordings
5.7. Settings
5.7.1. Power Control
5.7.2. Software Administration and Updates
5.7.3. Performance Diagnostics
6. TrueConf Group Key Features
6.1. Supported Codecs and Protocols
6.1.1. Communication Protocols
6.1.2. Video codecs
TrueConf Group User guide
© 2021 TrueConf. All rights reserved. 3

1. What Is TrueConf Group?
1.1. Endpoint Purpose
TrueConf Group video conferencing endpoint is a hardware-software video conferencing system for
small, medium, and large meeting rooms.
With this endpoint, you can deploy a ready-to-use system to make video calls in high quality up to
1080p@60 fps depending on configuration. It supports SIP, H.323, RTSP, and RTP connections and can
be used as a 12-port MCU.
Using TrueConf Group you can:
Make calls
Run video conferences (if an MCU function is included)
Record conferences
Capture and share content from USB devices and video capture cards
Stream conferences to external resources
Control the endpoint using the web interface
Use two monitors simultaneously
Thanks to the modular configuration, TrueConf Group is compatible with various peripheral devices:
Any compatible PTZ cameras using USB 2.0/USB 3.0/HDMI interfaces and supporting RS232
control (Sony Visca)
USB speakerphones
Analog playback or audio capture devices
Monitors connected via HDMI and DisplayPort
USB keyboard
However, we recommend consulting with our experts on equipment selection matters.
1.2. Configuration
TrueConf Group User guide
© 2021 TrueConf. All rights reserved. 5

1.2. Configuration
TrueConf Group comes in different configurations:
Hardware-software endpoint (with an optional MCU)
Built-in content capture module with two HDMI inputs (optional)
Remote control
Peripheral audio-video equipment (usually these are a PTZ camera and speakerphone)
1.3. Endpoint Description
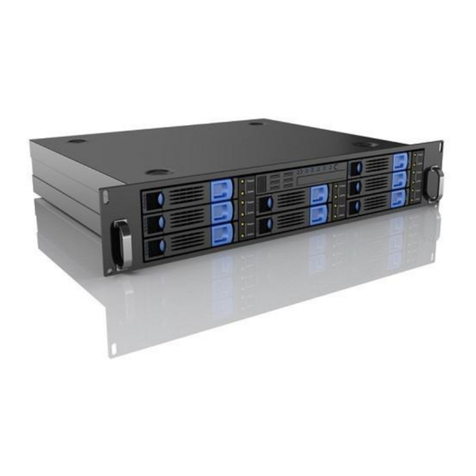
TrueConf Group is a device with a metal case. A power button is located on the left side of the front
panel with an IR receiver of the remote control being behind a decorative plastic panel on the right
side:
The rear panel of the endpoint contains the following connectors:
1. RS-232 to control PTZ cameras
2. HDMI inputs to capture content or connect HDMI cameras (availability depends on configurations)
3. Power connector
4. HDMI output to connect the main screen
5. DisplayPort to connect an additional display
6. USB 3.1 to connect peripheral AV equipment
TrueConf Group User guide
© 2021 TrueConf. All rights reserved. 6

7. USB 2.0 to connect peripheral AV equipment
8. RJ-45 to provide Ethernet connection
9. Additional audio output to connect an audio output device
10. Additional audio input to connect an analog microphone
TrueConf Group User guide
© 2021 TrueConf. All rights reserved. 7

2. How to Control TrueConf Group
There are several ways to control the endpoint:
Meeting room:
Using the remote control (an IR receiver is built in the front of the device)
Using hot keys on a USB keyboard connected to the endpoint
Remotely using the web interface in the local network
The remote control is powered by two AAA batteries (included).
2.1. Endpoint Home Screen
Once you have turned on the device, TrueConf Group home screen should appear:
Upper part: Local network connection state (endpoint IP address if connection is successful or
Contacts otherwise), date, and time
Central part: Main menu
Lower part: Panel containing information about connected monitors (it automatically disappears
after a few seconds) and endpoint notification icons:
Disable microphone
Disable audio output device
Start conference recording
Start RTMP streaming
Start SAP streaming
Start MPEG-TS streaming
Registering on a SIP server or error upon registration
Registering on a H.323 gatekeeper or error upon registration
Image from a webcam connected to the endpoint as a background
To go to any section in the main menu, you need to move the focus to it by using the arrow buttons on
the remote control or keyboard and press <OK.
TrueConf Group User guide
© 2021 TrueConf. All rights reserved. 8

Tip
The remote control has buttons for most menu sections, which allow you to open them in one
click. For example, the above main menu is assigned to the following buttons: Dial, Contacts,
History, Settings.
See below for a complete list of buttons in Remote Control Buttons section.
To choose an item in the drop-down list or enter text, you need to move the focus to the
corresponding element and press OK.
In addition, you can use the onscreen or regular keyboard to enter text. To call the onscreen keyboard,
focus on the field and press Keyboard on the remote control.
Read more about different sections of the menu below in the sections on settings and using TrueConf
Group.
2.2. Remote Control Keys
The remote control has the following keys:
TrueConf Group User guide
© 2021 TrueConf. All rights reserved. 9

Section 1
Power: Turn off the endpoint
Mute: Disable microphone ( icon will appear at the bottom of the screen)
Section 2
Presets: Enable PTZ control mode
Assign: Put into PTZ setting mode
Menu: Open the menu to choose an outgoing video stream between cameras and content sources
Far End: During a call, switch control buttons (arrows and zoom buttons) between different content
sources:
Your PTZ camera
Other user's PTZ camera
Shared presentation
Section 3
Share: During a conference, start streaming content prepared for sharing
Menu: Allow changing a capture device and presentation file
Help: Inactive button
Info:
Display technical information about a call during a communication session
Display system information when working with the menu
Section 4
Arrow keys: Move between interface elements
OK (Enter on the keyboard):
Click the button in focus on the screen
Expand the list in focus on the screen
Section 5
Dial: Click Dial button on the screen
Back:
Return to the previous section and hide it in the topmost section of the menu when working with
the menu
End a communication session during a group conference or call
Hang Up:
End a call during a call with a single user:
Allow choosing and ending one of the connections during a group conference
Return to the previous section and hide it in the topmost section of the menu when working with
the menu
Section 6
Zoom buttons +/- (left): Zoom the image when controlling a PTZ camera or playing a presentation
Contacts: Open the address book
Volume buttons +/- (right): Adjust the volume level of endpoint speakers
Section 7
TrueConf Group User guide
© 2021 TrueConf. All rights reserved. 10

Video: Disable the image from the connected camera
Layout: Change layouts during a call or conference
Selfview: Enable/disable a local video window during a call
Audio: Enable/disable sound from endpoint speakers (when disabled, an icon with a crossed-out
speaker will appear at the bottom)
Keyboard: When [working with the menu], calls the on-screen keyboard if the focus is on the input
field
History: Open the call history
Directory: Open LDAP directory or address book
Settings: When working with the menu, go to Configuration menu
Stream: Enable/disable RTMP streaming
Broadcast: Enable/disable multicast streaming
Selector: Allow one to select a speaker or cascaded video from an upstream MCU
Rec: Start recording video (not only during a call but also while working with the menu) (
button will appear at the bottom of the screen)
TrueConf Group User guide
© 2021 TrueConf. All rights reserved. 11

3. TrueConf Group Manager
This section shows how to set up TrueConf Group using the remote control. To enjoy more convenient
administration and advanced features, we recommend using the control panel in the web interface.
3.1. Before You Begin
Warning!
Turn off equipment before connecting it to TrueConf Group.
Connect the supplied equipment, display, and network interface to the endpoint system unit. In
addition, you can connect a USB keyboard if you want to control the device this way. Then connect
TrueConf Group to 110–240V grid using the power supply unit and turn it on by pressing the power
button on the front panel.
Once you have turned on the endpoint for the first time, you need to configure your network
connection parameters and control panel access.
3.1.1. Setting an IP Address
To set an IP address, gateway and subnet mask for the endpoint, go to
Configuration → Network → IPv4.
If your network has a DHCP network service, check the corresponding box to configure the connection
automatically. Otherwise, configure the following parameters manually:
IP address
Mask
Gateway
Primary DNS
Secondary DNS
Interface settings: To fine-tune the network, you can disable Autonegotiate and set up Network
speed and Duplex mode manually (half duplex or full duplex).
If your network uses IPv6, you can configure it in Configuration → Network → IPv6.
If the network connection is successful, TrueConf Group IP address will be displayed at the top of the
screen.
3.1.2. Control Panel Access
To manage conferences remotely (using the web interface), go to
Configuration → Network → HTTP, enable HTTP access, select a port, and set up authorization
data.
Once this is complete, you can access the control panel at the address specified in IP settings. The
same address will be displayed at the top of the screen when working with the endpoint menu.
Tip
Для настройки доступа к панели управления терминалом по HTTPS воспользуйтесь
соответствующим разделом веб-интерфейса.
3.2. Language and Date Settings
Language settings are available in Configuration → System.
This section also allows you to set date and time settings. This can be done manually, but TrueConf
Group can connect to Internet time services and synchronize parameters via NTP. To that end, indicate
TrueConf Group User guide
© 2021 TrueConf. All rights reserved. 12

the service address in NTP Server field.
3.3. Restricting Access to Settings
To restrict access to endpoint settings for TrueConf Group users in the meeting room, you can set a
password in Configuration → System → Settings password field.
Once the password has been entered, exit Configuration → System. The main menu will be
displayed on the endpoint screen without Configuration, and the new access password will become
active. To manage the settings, you now need to type this password using the remote control or
connected keyboard, while you are in the main menu.
Tip
If you have forgotten the password to access the endpoint settings, you can change or reset it
in the control panel.
3.4. Hardware Setup
Choose your device models from the below sections. If a device is not included in the standard
configuration of TrueConf Group, its name will be displayed with a mark in square brackets in the list,
e.g., [USB] CleverMic.
3.4.1. Monitors
TrueConf Group supports two monitors simultaneously connected using HDMI and DisplayPort. To
configure these monitors, go to Configuration → Video → Output devices section.
If both monitors are connected, choose the monitor to display the main menu of the endpoint in the
drop-down list Main menu on:.
Use Show local video: to choose whether you will see your selfview during a call.
In Secondary display content menu, choose what should be displayed on the additional monitor:
Presentation: Shared content
Local video: Video feed from the webcam connected to the endpoint
Copy primary: Copy the feed from the primary monitor
3.4.2. Webcam
In Configuration → Video → Input devices section, you can set the webcam settings:
1. Choose a webcam in Main device list.
2. Indicate Max. camera resolution to be used.
3. If you use a PTZ camera, choose a control protocol in PTZ control.
4. If you control your camera via VISCA, indicate VISCA address.
3.4.3. Microphone
Go to Configuration → Audio → Input device section.
In Default input list, choose the interface used to connect the microphone. Say a few words, and if
equipment is operational and recognized by the endpoint, Microphone level will change depending
on the voice volume.
You can test your microphone in Configuration → Audio → Diagnostics. Click Start in Loopback
test. Check the volume and playback quality of an audio signal from the endpoint speakers. If the
volume parameters are not suitable, e.g., the volume is too low, adjust the microphone volume in
TrueConf Group User guide
© 2021 TrueConf. All rights reserved. 13

Microphone gain and try to enable Microphone boost.
Warning!
Using the microphone input gain along with the volume can cause noise or sound distortion.
We recommend using this setting only if it is absolutely necessary.
To remove echo, return to Configuration → Audio → Input device section and enable Noise
suppression. If this does not help, use Microphone gain control, AEC, and AEC settings to achieve
the best combination of settings. When using a USB speakerphone, echo and noise cancellation needs
to be disabled, and it should be enabled when using an analog microphone or equivalent connected
via a mini jack. When a speakerphone is used to capture sound, and a device connected via HDMI, e.g.,
TV or monitor speakers, is used for output purposes, a hardware echo canceller can't work, as you
need to use a software one.
Audio settings (noise cancellation, echo cancellation, and volume) are saved for each device
individually.
3.4.4. Speakers
Go to Configuration → Audio → Output device and choose a speaker in Default output.
To test sound playback, click Start in Speaker test. If connection is successful, you should hear a short
piece of music.
Tip
Check your speaker connection in Configuration → Audio → Diagnostics.
3.5. Configuring Protocols
3.5.1. H.323 Settings
The H.323 protocol can be configured in Configuration → Network → H.323 section.
1. Enable H.323 support.
2. In necessary, enable NAT traversal for H.460.18 and H.460.19.
3. To register the endpoint with an external H.323 gatekeeper, choose Discover in Gatekeeper use:
to find its address in the network or Manual to enter the address manually and indicate:
H.323 extension (E.164) and H.323 Alias in case of calls from devices within the gatekeeper
without the need to indicate the endpoint IP address (otherwise the system name will be used as
the default value)
Gatekeeper address (in case of manual input)
Gatekeeper username and Gatekeeper password for authorization (if necessary)
3.5.2. SIP Settings
To enable your endpoint to use the SIP protocol, configure it in Configuration → Network → SIP
section.
1. Enable SIP support.
2. If necessary, enable Spam protection. This feature is useful when the endpoint becomes available
via SIP from outside the local network. In this case, it can be attacked by different types of malware
that looks for poorly protected corporate IP PBX systems to forward traffic. These attacks are spam
calls to the endpoint. When antispam protection is enabled, TrueConf Group software identifies
such calls by their characteristic features and ignores them.
TrueConf Group User guide
© 2021 TrueConf. All rights reserved. 14

3. Choose the protocol to stream content to be shared in BFCP transport menu: UDP or TCP.
4. If necessary, enable SRTP encryption.
5. In NAT traversal menu, you can set how to use ICE and TURN protocols and indicate the NAT
server address and its authorization data.
6. You can register the endpoint with the external SIP server in Registration menu where you can
indicate the registration data and transport protocol to be used.
3.5.3. RTP Settings
In Configuration → Network → RTP section, you can set:
Limited size of MTU data to be transmitted (RTP packet size excluding UDP and IP headers)
QoS DSCP marking on all traffic types
3.6. Sleep Mode
You can change the sleep mode settings. In this case, the endpoint reduces energy consumption and
can take incoming calls. In case of a video call, it wakes up from sleep mode and turn on the peripheral
equipment.
You can change settings in Configuration → Powersave section:
1. Choose the length of time before the endpoint goes into sleep mode.
2. Indicate if this should:
Turn off monitors and cameras
Put the camera into sleep mode (if supported by the manufacturer)
3.7. Preparing for Conferences
3.7.1. MCU Function Activation
By default, TrueConf Group operates in point-to-point mode when the video call is made in full-
duplex mode that allows two parties to see and hear each other simultaneously. If another user calls
the endpoint during the ongoing session, he/she will not be able to join and will see a message that
the device is busy.
At the customer's request, the endpoint can be equipped with an embedded MCU server. When
TrueConf Group operates in this mode, the video call is put into group conference mode. In this case,
users who are calling the endpoint automatically join an ongoing conference (according to the number
of external connections allowed by the license).
Take the following steps to enable this feature:
1. Go to Configuration → Call → MCU settings section.
2. In MCU support, choose On.
3. Indicate Mixing mode for video streams:
Symmetric: All conference attendees see and hear each other
Video lecture: Attendees who joined the conference see and hear only the host represented by
the endpoint
Voice activated: All attendees have a layout as in a symmetric conference, but a speaker will be
displayed in the priority video window.
4. If necessary, enable the display of the volume indicator in each video window.
5. If you do not want a layout to automatically create a new video window for a presentation or
TrueConf Group User guide
© 2021 TrueConf. All rights reserved. 15

desktop being shared by attendees, enable Reject incoming presentation.
3.7.2. Codecs
Learn more about all codecs supported by the endpoint in Supported Codecs and Protocols section.
Go to Configuration → Video → Codecs and leave only those video codecs enabled which are
supported by all conference devices.
Repeat the process for audio codecs in Configuration → Audio → Codecs section.
Warning!
You can't disable G.711 audio codec.
3.7.3. Content Preparation
Go to Configuration → Video → Input device section and choose a device or file that you want to
share in a separate video window during a conference or call in Content. After that, you will a new
video window with a preview of selected content on the endpoint screen.
With TrueConf Group, you can transfer content from devices connected using an HDMI cable
(unavailable in certain configurations) share files from flash drives in PDF, XPS, EPUB, CBZ, HTML,
JPEG, TIFF formats.
Read more about content sharing in Working with TrueConf Group.
3.7.4. Stream Settings
To enable many people to watch your conference, there is no need to add them as attendees. TrueConf
Group allows you to set up conference streaming to corresponding services using RTMP, SAP, MPEG-
TS protocols.
You can configure RTMP streaming in Configuration → Streaming and set the necessary
parameters: server address, RTMP application, stream name/key, login, and password.
Streaming via MPEG-TS and SAP protocols can be configured in Configuration → Broadcast menu.
You will be able to indicate the address and port for each of the protocols.
3.7.5. Recording
To enable conference recording, use Configuration → Recording section. Moreover, there you will
be able to check free disk space and use buttons to set up automatic recording.
If you enable Cycle recording, new conference videos will be recorded and saved to replace the
oldest recordings when the device runs out of free disc space. Recording will be continuous, and you
will not need to worry about how much disk space is left.
3.7.6. Assigning PTZ Camera Presets
You can set typical PTZ camera presets to enable users to switch between them during a call by
pressing one button. To that end:
1. Go to the topmost menu level.
2. Press Back on the remote control to hide the menu. After that, you will be able to control the
camera using the arrows in the center of the remote control and zoom buttons.
3. Press Assign on the remote control. You will see the message Near-end camera indicating that
the endpoint is put into preset assigning mode.
4. Choose the desired camera position and press any number on the numeric keypad. The current
position will be fixed under the corresponding number. Repeat the process for all the positions you
TrueConf Group User guide
© 2021 TrueConf. All rights reserved. 16

need.
Tip
Learn more about how to use saved presets in Working with TrueConf Group.
3.8. Contact List
3.8.1. LDAP
TrueConf Group allows you to use LDAP Н.350 directory service compatible with Polycom.
You can configure integration with the LDAP server in Configuration → LDAP section.
3.8.2. Address Book
The contact list can be configured in Address book section. Read more about the address book in
Working with TrueConf Group".
TrueConf Group User guide
© 2021 TrueConf. All rights reserved. 17

4. Working with the endpoint
Outside a video session, the endpoint can have one of the following statuses:
Put into sleep mode
Displaying main screen with selfview
Playing content from HDMI sources
Any incoming video call disables this status of the endpoint.
4.1. How to call another endpoint/device
Tip
It is convenient to use the address book to call frequently used numbers.
1. In the main menu choose Dial (or press the button on the remote control).
2. Enter the address of the device you want to call and choose the call protocol (SIP or H.323) in the
list on the left.
3. Press Dial on the screen or on the remote control.
Then you can call the same device using the call history.
4.1.1. Call a user or TrueConf conference
To call a TrueConf Server user, use one of the following formats:
<TrueConf_ID>@<server>
<TrueConf_ID>@<server>:<port>
where:
<TrueConf_ID> : User's TrueConf ID
<server> : server IP address or name that you need to call
<port> : Connection port (if it differs from standard 5060 for SIP and 1720 for H.323). Read
more about SIP/H.323 connection settings on TrueConf Server in documentation.
For example:
[email protected]:5070
To join to a video conference on TrueConf Server, use a call string in one of the following formats:
00<Conference_ID>@<server>
00<Conference_ID>@<server>:<port>
<Conference_ID>@<server>
<Conference_ID>@<server>:<port>
, where:
<Conference_ID> : Conference ID
<server> : Server IP address or name
<port> : Connection port (if different from the standard one)
For example:
TrueConf Group User guide
© 2021 TrueConf. All rights reserved. 18

[email protected]:1730
\c\[email protected]:1730
If necessary, you can explicitly specify the call protocol (SIP or H.323) to the left of the address input
field.
4.1.2. Viewing Call Information
You can view technical data right during a video call. To that end, press Infoon the remote control. At
the bottom of the screen, you will see a list of your ongoing call parameters:
User's address
Used codecs
Video resolution and speed
Call duration
4.2. How to Set up a Group Conference
Warning!
Make sure multipoint connections are enabled for the endpoint. This feature is available only
with the MCU module built in the endpoint.
To set up a conference, you need to call any user following the above instructions and then add all the
others one by one.
4.2.1. Adding users during a session
Tip
Learn how to add users to a conference using the control panel in Calling Users and Address
Book section.
By indicating the call string:
1. Press the following button on the remote control: OK.
2. Choose Add participant.
3. In the window that opens, enter the user's address.
4. To the left of the address input field, you can explicitly specify the connection protocol: SIP or H.323.
5. If necessary, limit connection speed for this user.
6. Press Dial
Using the address book:
1. Press the following button on the remote control: Contacts.
2. In the contact list that opens, use navigation buttons on the remote control to choose the required
user and press OK or Dial.
Call history:
1. Press History on the remote control.
2. Choose the required user and press OK or Dial.
TrueConf Group User guide
© 2021 TrueConf. All rights reserved. 19

4.2.2. Connection Data
Connection data on each user can be viewed in the web interface.
4.3. Layout Management
4.3.1. During a point-to-point call
In video call mode, a TrueConf Group user receives only one video window with the endpoint camera
image. Both video windows are displayed to the endpoint screen by default, but you can disallow
displaying your own image using Selfview. Then TrueConf Group screen will display only the second
user's image.
With selfview enabled, you can switch layouts using Layout button on the remote control. You can use
the following schemes where the video window of a user who joins a call is highlighted in turquoise:
4.3.2. During a group conference
During a conference video window layouts are formed depending on the chosen mode of video
stream mixing when setting up MCU functions:
Symmetric: All video streams from users and endpoint are included in the layout
Video lecture: All users receive video and audio signals only from the endpoint that acts as the
only conference host while all video windows are displayed in the endpoint
Voice activated: All video streams from users and endpoint are included in the layout, but only the
speaker will be displayed in the priority video window
In case of symmetric conference and voice activation modes, you can choose one of the following
layout types where the priority video window is highlighted in turquoise:
TrueConf Group User guide
© 2021 TrueConf. All rights reserved. 20
Table of contents
Other TrueConf Conference System manuals
Popular Conference System manuals by other brands
Tunstall
Tunstall Communicall Vision Quick reference card

BMW Motorrad
BMW Motorrad Communication system operating instructions
Barco
Barco CX-20 user guide
Samsung
Samsung SyncMaster VC240 reference guide

Lars Thrane
Lars Thrane Iridium Certus 200 User & installation manual

Creator Electronics
Creator Electronics Digital Conference System user manual

