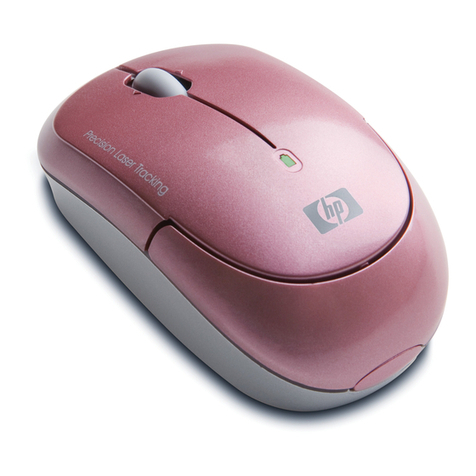
Trust AMI 250SX User manual

TRUST AMI MOUSE 250SX WIRELESS OPTICAL
1
UK
1. Introduction
This instruction manual is for users of the ‘TRUST AMI MOUSE 250SX WIRELESS
OPTICAL‘. This mouse allows you to work optically without the use of wires. The
mouse has two channels and 5 buttons. Empty batteries no longer have to be
replaced. Simply recharge the NiMH batteries by connecting the mouse to the
receiver.
2. Safety
Carefully read the following instructions before use:
1. Do not use this device in a damp environment, such as a bathroom, damp
basement, swimming pool, etc;
2. Do not repair this device yourself;
3. Position the device so that the cables cannot be damaged;
0470
4. This device operates at a frequency of 27.045 ~ 27.095 MHz. It has been
approved according to the European R&TTE guidelines and meets the
essential requirements and other relevant conditions of Directive 1999/5/EC.
This device may be used in all EU countries, NO, CH, PL. The Declaration of
Conformity (DoC) is available at www.trust.com/12630/ce
5. There may be limitations for the use of this device outside of the EU. If this
device is used outside of the EU, check whether this device meets local
regulations. Frequency: 27.045 ~ 27.095 MHz, Bandwidth:
+/- 4,5 KHz, Capacity: 0,07 mW.
3. Installation
3.1 Inserting the batteries
Insert the batteries into the mouse as follows:
1. Open the battery cover on the bottom of the mouse.
2. Insert the batteries into the battery compartment “A” (see figure 1). The
diagram inside the battery compartment shows how the batteries should be
inserted.
3. Close the battery cover.
Note: Inserting the batteries incorrectly may cause damage.

TRUST AMI MOUSE 250SX WIRELESS OPTICAL
2
3.2 Connecting the mouse
Note: The software for your previous mouse must be removed before
connecting the mouse to the PS/2 port.
1. Make sure the computer is turned off and any software for your old mouse has
been removed from your computer system.
2. Connect the receiver to your computer’s PS/2 port.
3. Turn the computer on.
4. All operating systems will detect and install the mouse automatically.
5. Set the channel switch in the inside of the battery compartment to one of the
channels.
6. Set the receiver on the bottom of the mouse to the same channel.
7. Press the ID detection button on the receiver.
8. The LED on top of the receiver will slowly flash.
9. Next, press the ID detection button on the bottom of the mouse (see figure 1).
10. The LED will start to flash more quickly. The LED will remain lit continuously
when the mouse and receiver have identified each other. The mouse is now
ready for use.
Note: If you wish to use channel 1 on the receiver, set switch ‘1’ to ‘On’ and
move switch 2 in the opposite direction. The same applies, but then in
the other direction, if you wish to use channel 2.
3.3 Software installation
1. Insert the CD-ROM into your CD-ROM drive. The Trust Software Installer will
start automatically.
If it does not start automatically, carry out the following:
a) Select 'Run' from the Start menu.
b) Type [D:\SETUP.EXE] and click on 'OK' to start the Trust Software
Installer.
2. Figure 2 will appear.
3. Select the language you wish to use during the installation.
4. Click on 'TRUST AMI MOUSE 250SX WIRELESS OPTICAL‘ to start the
installation.
5. Follow the on-screen instructions.
Note: It has been assumed that your CD-ROM drive has been assigned the
letter “D”. This may be different for your computer.

TRUST AMI MOUSE 250SX WIRELESS OPTICAL
3
UK
4. Use
4.1 Mouse
4.1.1 Function
Table 1 and figure 3 give an explanation of the mouse functions.
Component Function Description
ARight mouse button Right mouse button function.
BLeft mouse button Left mouse button function.
CScroll button Both a scroll function and a
programmable 3rd button.
DLeft button Programmable 4th button.
ERight button Programmable 5th button.
FIndicator Battery recharge indicator.
GConnection Connection for recharging the batteries.
Table 1: Explanation of the mouse components
4.1.2 Recharging
The Ami Mouse 250SX Wireless Optical allows you to recharge the batteries without
having to remove them from the mouse.
1. Connect the recharge cable to the connection on the receiver.
2. Connect the other end of the recharge cable to the mouse. The red light on top
of the mouse will light up when the recharge cable has been connected
correctly.
3. The mouse can also be recharged during use.
4. If your computer has a power-on PS/2 port, it is also possible to recharge the
mouse whilst your computer is turned off. See the instruction manual provided
with your motherboard for more information.
4.2 Software
1. Double-click on the Trust icon in the system tray (see figure B).
Fig. B:
2. The mouse properties window will appear (see figure 4).
3. ‘Scroll wheel’ tab (see figure 4).
•‘Scroll mode’ – You can select: ‘Enhanced scroll’ mode, where you have all
the advantages of the MS-Intellimouse and can scroll in Windows 98/ME/2000
or, ‘Intelli Mouse’ mode, where the mouse works as a MS-Intellimouse.
•‘Scroll speed’ – Sets the number of lines to be scrolled.
4. ‘Buttons’ tab (see figure 5).
•Select a button (3, 4 or 5) and click on the arrow to the right. A pull-down menu
will appear (see figure 6).
•Select the function you wish to use.
•Click on: ‘Apply’.

TRUST AMI MOUSE 250SX WIRELESS OPTICAL
4
•The mouse has now been programmed.
5. Troubleshooting
Problem Cause Possible solution
The batteries have been
installed incorrectly.
Place the batteries into
the battery compartment
as indicated.
The optical module
does not light up
after the batteries
have been inserted. The batteries are empty. Connect the mouse to the
receiver using the
recharge cable to
recharge the batteries.
The receiver has not been
connected to the computer
correctly.
Check the PS/2
connection.
The green LED on
the receiver does
not light up.
The computer is turned off. Turn the computer on.
The recharge cable has not
been connected correctly.
Connect the recharge
cable correctly.
The red light on top
of the mouse does
not light up when
the mouse is
connected to the
receiver.
The computer is turned off. Check in the instruction
manual provided with
your motherboard
whether the computer
has a power-on PS/2 port
so that a voltage is still
applied to the port, even
when the computer is
turned off.
The receiver does
not detect the
mouse and the
green light
continues to flash.
The mouse’s detection
button has not been pressed
for long enough.
Keep the detection button
pressed until the green
LED on the receiver
stops flashing.
The batteries have been
installed incorrectly.
Place the batteries into
the battery compartment
as indicated.
The batteries are empty. Connect the mouse to the
receiver using the
recharge cable to
recharge the batteries.
The receiver does
not detect the
mouse and the
green light
continues to flash.
The selected channel is
disrupted by another RF
signal.
Select a different
channel.
The batteries are empty. Place the mouse in the
recharger. The batteries
are fully recharged when
the red light on the
receiver flashes quickly.
The mouse
movements are
jerky.
The distance between the
receiver and the mouse is
too great.
The distance must not be
greater than 1 metre.

TRUST AMI MOUSE 250SX WIRELESS OPTICAL
5
UK
Problem Cause Possible solution
The mouse is used on a
shiny surface.
Use the mouse on a
different surface.
The selected channel is
disrupted by another RF
signal.
Select a different
channel.
The mouse is in the ‘Sleep’
setting.
Remove the mouse from
the ‘Sleep’ setting by
pressing one of the
mouse buttons.
The mouse arrow
on the monitor does
not move.
The distance between the
receiver and the mouse is
too great.
The distance must not be
greater than 1 metre.
Register your product at www.trust.com so that you are able to receive optimal
guarantee and service support, such as up-to-date FAQ’s and the latest drivers. You
will be automatically informed of developments to your product and other Trust
products. You will also have the chance of winning some spectacular prizes.
If you still have problems after trying these solutions, please contact one of the Trust
Customer Care Centers. You can find more information at the back of this instruction
manual. Please have the following information available:
•The article number. This is 12630;
•Your hardware information; CPU, PS/2, internal memory and operating system;
•A good description of what does not work;
•A good description of when the problem occurs.
Warranty conditions
-Our products have a two-year manufacturer's warranty which is effective from
the date of purchase.
-If there is a fault, return the product to your dealer and include an explanation
of the fault, the proof of purchase and all the accessories.
-During the warranty period, you will receive a similar model, if one is available.
If no similar product is available, your product will be repaired.
-Please contact our help desk for missing components, such as the instruction
manual, software or other components.
-The warranty becomes invalid if the product is opened, if there is mechanical
damage, if the product has been misused, if alterations have been made to the
product, if the product has been repaired by a third party, in the case of
negligence or if the product has been used for a purpose other than that
originally intended.
-Excluded from the warranty:
•Damage caused by accidents or disasters, such as fire, flood, earthquakes,
war, vandalism or theft.
•Incompatibility with other hardware/software which is not stated in the minimum
system requirements.
•Accessories, such as batteries, fuses (if applicable).
-Under no circumstances will the manufacturer be held responsible for any
incidental or consequential damage, including the loss of income or other
commercial losses resulting from the use of this product.
Table of contents
Other Trust Mouse manuals

Trust
Trust GXT 930 User manual

Trust
Trust MI-5300p User manual

Trust
Trust AMI Excellence Series User manual

Trust
Trust 350WB User manual

Trust
Trust 15902 User manual

Trust
Trust MI-2540D User manual

Trust
Trust AMI 240T User manual

Trust
Trust MI-7900Z User manual

Trust
Trust DISAN User manual

Trust
Trust AMI MOUSE 250S MINI Installation and operating instructions

Trust
Trust AMI MOUSE 140T WEB SCROLL User manual

Trust
Trust MI-7900Z User manual

Trust
Trust MI-1550X User manual

Trust
Trust Ami Mouse Wireless 200 User manual

Trust
Trust 17639 User manual

Trust
Trust MI-4550Xp User manual

Trust
Trust MI-2510T User manual

Trust
Trust Laban User manual

Trust
Trust MI-4930Rp User manual

Trust
Trust MI-4150K User manual