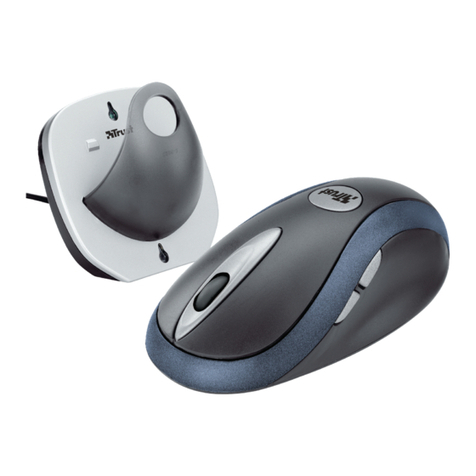
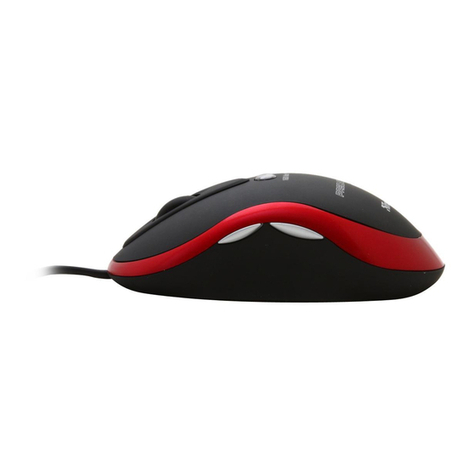
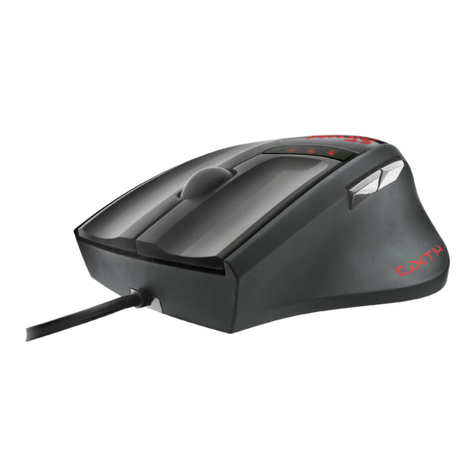
Trust 450L User manual

MI-2450E Optical Combi Mouse
(TRUST 450L MOUSE OPTICAL)
First-time use – procedure in brief Section
1. Connection (4.1)
1
UK
2. De-install old drivers and products (4.2)
3. Install under Windows (4.3)
4. Post-installation check (5)
!
1 Introduction
This manual is intended for users of the ‘TRUST 450L MOUSE OPTICAL‘. The
mouse is suitable to both a PS/2 and a USB port. This mouse has 5 buttons. Of the 5
buttons, 4 can be specially programmed by means of the accompanying software.
2 Safety
Before use, first read the following directions carefully:
- The TRUST 450L MOUSE OPTICAL needs no special maintenance. To clean the
mouse, simply use a lightly moistened, soft cloth.
- Never use aggressive chemicals such as gasoline or turpentine for cleaning.
These can damage the material the product is made of.
- On no account should the equipment be submerged in any liquid. This will damage
the product. Do not use this equipment in the proximity of water.
- Make sure that the cable is free of obstruction and heavy objects. Do not use this
equipment anywhere that the cable can become worn or damaged by people
walking over it.
- Do not attempt to repair the product yourself. By opening this equipment, you can
come into contact with electrically charged parts.
- In the following cases, you should let qualified personnel repair the equipment
- the cable or the plug are damaged or worn.
- the equipment has been in contact with rain, water or other liquids.
3 Approval
- This product complies with all essential requirements and other relevant
stipulations of the pertinent European directives. The Declaration of Conformity
(DoC) is available on www.trust.com/13681
4 Software installation under Windows 98 /
Me / 2000 / XP
This section describes how the mouse should be connected to the USB or PS/2 port,
how the software should be installed, and how to check the installation.
4.1 Connection
The mouse can be used on either the PS/2 or the USB port of your computer. It is
recommended to use the PS/2 port of your computer, if this port is present. This way
you keep a USB port free, which you can use to attach other USB equipment.
4.1.1 Via PS/2 port
This section describes how to connect the mouse to the PS/2 port. In order to
connect the mouse to the PS/2 port, you will need to use the green adapter provided
[USB →PS/2].
1. Make sure the computer is switched off.
2. Connect the PS/2 plug of the mouse to the PS/2 socket of the computer.
3. Turn the computer on.

MI-2450E Optical Combi Mouse
(TRUST 450L MOUSE OPTICAL)
2
4.1.2 Via USB port
In order to connect the mouse to the USB port, you must remove the adapter from
the USB plug of the mouse.
Note: If your PC is running under Windows 98, you may be prompted to
insert the Windows 98 CD-ROM, following connection of the mouse.
Make sure that you have this available.
Note: Under Windows 98, it may happen that Windows does not report
detecting an attached mouse. In that case, use the keyboard to
complete the steps of the wizard. By using the [Alt + Tab] key
combination you can make selections. In most cases, it will be
sufficient to press [enter] several times, to select ‘Next’.
1. Make sure the computer is switched off.
2. Connect the mouse to a free USB port on you computer.
3. Turn the computer on.
4. Windows will detect the mouse, and in most cases, automatically install the
standard Windows USB mouse driver. If this does not happen automatically,
follow the instructions on your screen.
The mouse is now connected to the computer. The mouse will now work as a
standard mouse with scroll function. To make use of the three programmable
buttons, you need to install the software provided. Continue further with section 4.2.
4.2 De-install old drivers and products
The most common cause of installation problems is the presence of a residual driver
for a comparable product that has been removed. The best solution is to first remove
all related drivers for these products before installing the new driver. Take care that
you only remove drivers from old, comparable products that are no longer in use.
1. Activate the Safe Mode of Windows (during system start-up, repeatedly
press F8, and select Safe Mode from the menu that will appear after a short
time.)
2. Activate Start – Settings – Control Panel – Software.
3. Search for all old programs for products of a similar type, and remove these
(button add/delete). Through Safe Mode it is possible that you may even
find multiple entries for the same device. In that case, remove the multiple
entries.
4. Restart the computer.
4.3 Installation under Windows 98 / Me / 2000 / XP
Note: The latest versions of the drivers can always be found on
www.trust.com/13681 . Check beforehand whether a new version is
available, and if so, use this for the installation.
Note: Ensure that all other programs are closed during installation.
Note: During installation under Windows XP you may get a message that an
unsigned driver has been detected. This is not a problem for the
functionality. Continue with the installation.
Note: In the text we use ‘D:\’ to indicate the CD-ROM station; however, this may
differ per computer.
1. Place the CD-ROM in the computer’s CD-ROM station. The installation
program will automatically be started. Should this fail to happen, do the
following:
a) Select ‘Run’ in the Windows Start menu.
b) Type ‘[D:\SETUP.EXÉ]’ and click ‘OK’ to start the Trust software
installation program.
2. The Trust installation screen appears. See figure 1.
3. Select the language in which you want the Trust installation screen to be
displayed.
4. Click on ‘Install driver’ to start installation of the mouse driver.
5. Follow the steps that are indicated on the screen.
MI-2450E Optical Combi Mouse
(TRUST 450L MOUSE OPTICAL)
3
UK
5 Post-installation check
Following complete installation of the product and programs, you should check that
the following have been added to your system:
5.1 With PS/2 connection
Taskbar
- Trust icon below right
Start – Settings – Control Panel – System – Device Manager
- Mice and other pointing devices – 450L MOUSE OPTICAL
Start – Settings – Control Panel – Software
- 450L MOUSE OPTICAL
5.2 With USB port connection.
Taskbar
- Trust icon below right
Start – Settings – Control Panel – System – Device Manager
- Human Interface devices – USB Human Interface device
- Mice and other pointing devices – HID compatible mouse
Start – Settings – Control Panel – Software
- 450L MOUSE OPTICAL
Note: If the installation has been modified (for example, not everything was
installed, or other than standard locations selected) then the data below
may appear different.
Note: Differences may also arise due to the use of updated drivers from the
Internet.
Note: The locations, or names of functions in the control panel may be different,
depending on your operating system.
6 Operation
This section describes how the mouse and the software should be used.
6.1 Mouse
In this section, the use of the mouse buttons is described.
Use table 1 in combination with figure 2 for an explanation of the mouse buttons.
Name Function:
A Mouse button 4 Programmable button 4. Standard
function: “Back” in Internet Explorer /
programmable
B Mouse button 5 Programmable button 5. Standard
function: “Forward” in Internet Explorer /
programmable
C Left mouse button Left mouse button function
D Scroll button Scroll function in Windows compatible
programs.
E Right mouse button Programmable right mouse button
Standard function: “Right mouse button”.
Table 1: explanation of buttons

MI-2450E Optical Combi Mouse
(TRUST 450L MOUSE OPTICAL)
4
UK
6.2 Software
The software enables you to assign specific functions to your buttons A, B, D, and E
from figure 2. This may be a single function per button, or multiple functions per
button. The middle mouse button (D, figure 2) is assigned multiple functions by
default. When you press the mouse button, the ‘lucky jump’ menu will open, in which
a selection of functions is presented. By clicking on any one of the icons, the related
function will be executed. By double-clicking on the Trust icon in the Windows
Taskbar, a window with tabs will be opened. See figure 3.
6.2.1 Assign single function.
1. Double-click on the Trust icon, below right in the Windows Taskbar.
2. A window will open similar to that in figure 3.
3. Select the button (2, 3, 4 or 5) that you wish to program.
4. Click on the pull-down menu and select a function.
5. Click on ‘Apply’ (B, figure 3) to apply the selection.
6. Next click on ‘OK’(C, figure 3).
A single function has now been assigned to the selected mouse button.
6.2.2 Assign multiple functions to single mouse button
You can assign multiple functions at the same time to a single mouse button, by
means of two shortcut menus. By default, two menus have been pre-programmed:
the “Lucky Jump” and the “Net “jump” menu. The “Lucky jump” menu includes mainly
standard Windows commands. The “Net jump” menu includes mainly Internet
functions. Both menus can also be individually modified.
Tip: The “Lucky jump” menu is already assigned by default to the third
mouse button.
6.2.2.1 To assign Net- or Lucky jump menu.
1. Double-click on the Trust icon, below right in the Windows Taskbar.
2. A window will open similar to that in figure 3.
3. Select the button (2,3,4 or 5) that you wish to program.
4. Click on the pull-down menu (for example, A in figure 3) and select ‘NetJump’
or ‘LuckyJump’.
5. Click on ‘Apply’ (B, figure 3) to apply the selection.
6. Next click on ‘OK’(C, figure 3).
You have now assigned the ‘Net jump’ or ‘Lucky jump’ menu to one of the buttons.
By clicking on the relevant button during use of the computer, a menu will appear,
showing a number of icons; by clicking on the appropriate icon, you can activate the
function you wish.
6.2.2.2 To modify the Net- or Lucky jump menu
You can, if you wish, modify the Net- or Lucky jump menu contents. Proceed as
follows:
1. Double-click on the Trust icon, below right in the Windows Taskbar.
2. A window will open similar to that in figure 3.
3. Select the tab ‘settings’. See figure 4.
4. Select a desired function from the window (C, figure 4).
5. Click on one of the cells in A (figure 4) to add the selected function (from C,
figure 4) to the Net jump menu; or a cell in B (figure 4) to add the function to
the Lucky jump menu.
6. Click on ‘Apply’ (D, figure 4) to apply the modification made.

MI-2450E Optical Combi Mouse
(TRUST 450L MOUSE OPTICAL)
5
UK
7 Removal of driver
This section describes how to remove the mouse software correctly. Proceed as
follows:
1. Select: Start – Settings – Control Panel – Software.
2. A window will open similar to that in figure 5. In this window, select “450L
MOUSE OPTICAL”.
3. Click on the button “Remove” to remove the software.
4. Follow the instructions on the screen.
8 Troubleshooting
Procedure
1. Read solutions given below.
2. Check current FAQ, drivers and manuals on
internet (
www.trust.com/13681
)
!
Problem Cause Possible solution
The mouse pointer
does not move
smoothly
The mouse is being used
on a shiny surface. Use the mouse on a
different surface.
Previous mouse software
is still running. First delete the software for
the previous mouse, before
installing this software.
Consult the manual for your
previous mouse.
Software is not installed. Install the mouse software.
Scroll function
does not work.
Application is not 100%
compatible with windows. Use a compatible
application.
If, after having attempted all these solutions, you still have problems, please make
contact with one of the Trust Customer Care Centers. On the rear cover of this
manual you will find more information. You should in any case have the following
information ready:
• The article number, in this case: 13681;
• A good description of exactly what is not working;
• A good description of exactly when the problem occurs.

MI-2450E Optical Combi Mouse
(TRUST 450L MOUSE OPTICAL)
6
9 Conditions of guarantee
- Our products carry a 2-year factory guarantee, starting on the date of purchase.
- In case of defect, return the product to your dealer with an explanation of the
defect, proof of purchase and all accessories.
- During the period of guarantee, you will receive back from your dealer a
comparable model, when this is available. Should this not be available, the product
will be repaired.
- For missing components such as manual, software or other parts, please make
contact with our helpdesk.
- The guarantee ceases to apply in the event of tampering with a product,
mechanical damage, misuse, modifications to the product, repair by third parties,
carelessness and using the product for a purpose other than the intended.
- Exclusions to the guarantee:
• Damage caused by accidents or disasters, such as fire, flood, earthquake, war,
vandalism or theft.
• Incompatibility with other hardware or software that are not mentioned in the
minimum system demands;
• Accessories such as batteries and fuses (when applicable).
- On no account is the manufacturer responsible for any incidental or consequential
damage, including loss of income or other commercial losses, arising from the use
of this product.
Table of contents
Other Trust Mouse manuals

Trust
Trust MI-3500X User manual

Trust
Trust 18483 User manual

Trust
Trust 450LR User manual

Trust
Trust GXT 900 Kudos User manual

Trust
Trust MI-4950R User manual

Trust
Trust AMI 300 User manual

Trust
Trust MI-2650MP User manual

Trust
Trust MI-7770C User manual

Trust
Trust GXT31 User manual

Trust
Trust MI-1200 User manual

Trust
Trust GXT 121 ZEEBO Setup guide

Trust
Trust MI-5300p User manual

Trust
Trust Multimedia Keyboard User manual

Trust
Trust MI-2510T User manual

Trust
Trust Ami Mouse Wireless 200 User manual

Trust
Trust CELOX GXT 165 User manual

Trust
Trust YVI 18519 User manual

Trust
Trust 18040 User manual

Trust
Trust MI-4930Rp User manual

Trust
Trust Sight Fighter Digital Plus User manual