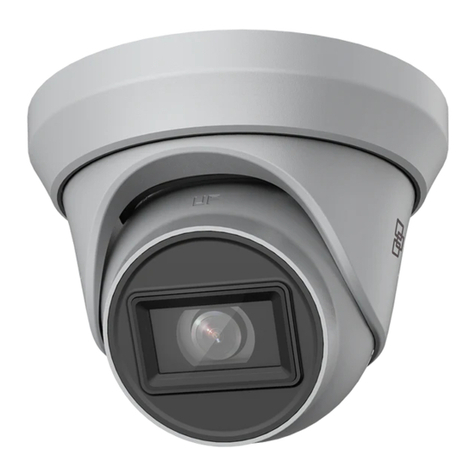
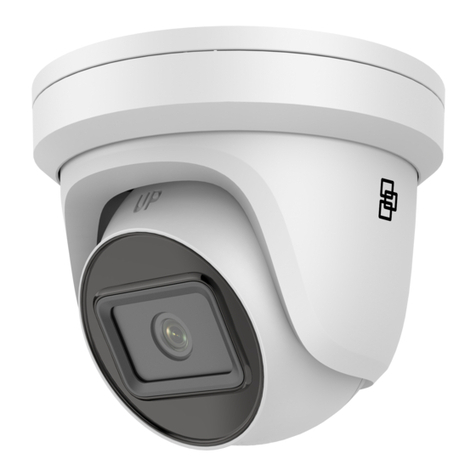
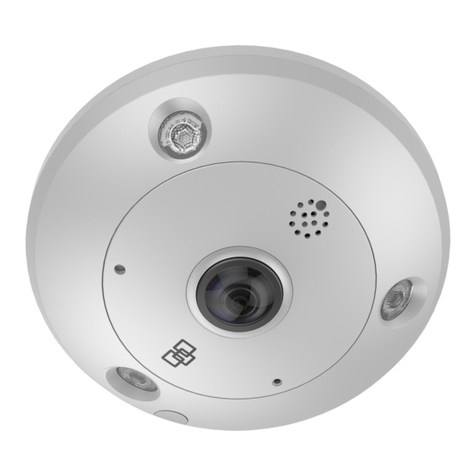
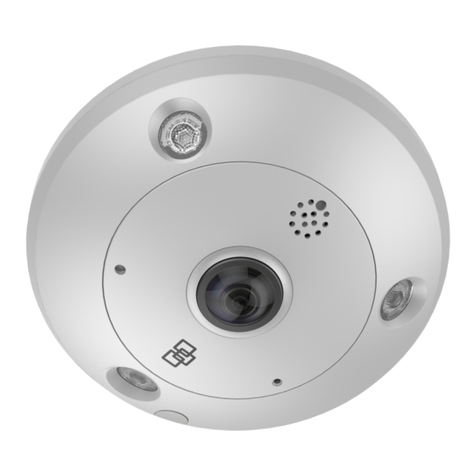
TruVision TVPA-S01-1202-360-G Instruction sheet

TruVision 360° Camera
Configuration Manual
P/N 1093-EN • REV A • ISS 10FEB23

C
opyright
©
2023 Carrier. All rights reserved. The information in this manual is
subject to change without prior notice
.
This document may not be copied in whole or in part or otherwise
reproduced without prior written consent from
Carrier, except where
specifically permitted under US and international copyright law.
Trademarks and
patents
TruVision
names and logos are a product brand of Aritech, a part of Carrier
.
Other trade names used in this document may be trademarks or registered
trademarks of the manufacturers or vendors of the respective products.
Manufactu
rer
PLACED ON THE MARKET BY:
Carrier Fire & Security Americas Corporation Inc.
13995 Pasteur Blvd, Palm Beach Gardens, FL 33418, USA
AUTHORIZED EU REPRENSENTATIVE:
Carrier Fire & Security B.V.
Kelvinstraat 7, 6003 DH Weert, Netherlands
FCC compliance
Cl
ass A: This equipment has been tested and found to comply with the
limits for a Class A digital device, pursuant to part 15 of the FCC Rules.
These limits are designed to provide reasonable protection against harmful
interference when the equipment is oper
ated in a commercial environment.
This equipment generates, uses, and can radiate radio frequency energy
and, if not installed and used in accordance with the instruction manual,
may cause harmful interference to radio communications. Operation of this
equ
ipment in a residential area is likely to cause harmful interference in
which case the user will be required to correct the interference at his own
expense.
FCC conditions
This device complies with Part 15 of the FCC Rules. Operation is subject to
the fo
llowing two conditions:
(1) This device may not cause harmful interference.
(2) This Device must accept any interference received, including
interference that may cause undesired operation.
ACMA compliance
Notice!
This is a Class A product. In a domestic environment this product
may cause radio interference in which case the user may be required to
take adequate measures.
Product warnings and
disclaimers
THESE PRODUCTS ARE INTENDED FOR SALE TO AND
INSTALLATION BY QUALIFIED
PROFESSIONALS. CARRIER FIRE &
SECURITY CANNOT PROVIDE ANY ASSURANCE THAT ANY PERSON
OR ENTITY BUYING ITS PRODUCTS, INCLUDING ANY “AUTHORIZED
DEALER” OR “AUTHORIZED RESELLER”, IS PROPERLY TRAINED OR
EXPERIENCED TO CORRECTLY INSTALL FIRE AND SECURITY
RELATED
PRODUCTS.
For more information on warranty disclaimers and product safety
information, please check https://firesecurityproducts.com/policy/product
-
warning/ or scan the following code:
Certification
EU directives
This product and
- if applicable - the supplied accessories too are marked
with "CE" and comply therefore with the applicable harmonized European
standards listed under the EMC Directive 2014/30/EU, the RoHS Directive
2011/65/EU.

2012/19/EU (WEEE directive):
Products marked with this symbol cannot
be disposed of as unsorted municipal waste in the European Union. For
proper recycling, return this product to your local supplier upon the
purchase of equivalent new equipment, or dispose of it at designated
collection points.
For more information see: www.recyclethis.info.
2013/56/EU & 2006/66/EC (battery directive
): This product contains a
battery that cannot be disposed of as unsorted municipal waste in the
European Union. See the product documentation for
specific battery
information. The battery is marked with this symbol, which may include
lettering to indicate cadmium (Cd), lead (Pb), or mercury (Hg). For proper
recycling, return the battery to your supplier or to a designated collection
point. For more
information see: www.recyclethis.info.
Contact information
EMEA:
https://firesecurityproducts.com
Australian/New Zealand:
https://firesecurityproducts.com.au/
Product
documentation
Please scan the QR code to download the electronic version of
the product
documentation. The manuals are available in several languages
.


TruVision 360° Camera Configuration Manual 1
Content
Important information 1
Limitation of liability 1
Product Warnings 1
Warranty Disclaimers 2
Intended Use 3
Advisory messages 3
Introduction 4
Network access 5
Checking your web browser security level 5
Activating the camera 6
Enabling IE mode in Microsoft Edge 8
Overview of the camera web browser 9
Local configuration 13
System setup 15
System settings 15
Maintenance 17
Security 20
User management 21
Network settings 24
Video/Audio settings 34
Camera image settings 38
Display settings 38
OSD (On Screen Display) 41
Privacy masks 42
Picture overlay 43
Event settings 44
Motion detection alarms 44
Video tampering 51
Alarm inputs and outputs 52
Exception alarms 53
Audio exception detection 55
Intrusion detection 56
Cross line detection 58
Region entry detection 60
Region exiting detection 62
Unattended baggage detection 64
Object removal detection 66

2 TruVision 360° Camera Configuration Manual
Storage settings 69
Recording schedule 69
Snapshot parameters 71
Formatting the storage devices 73
NAS settings 74
Memory card detection 75
People counting 77
Heat map 81
Intersection analysis 84
Application 86
People counting statistics 86
Heat map statistics 88
Intersection analysis report 90
Camera operation 92
Log on and off 92
Live view mode 92
Play back recorded video 96
Snapshots 98
Search event logs 99
Operating PTZ control 101
Index 104

TruVision 360° Camera Configuration Manual 1
Important information
Limitation of liability
To the maximum extent permitted by applicable law, in no event will Carrier be liable for
any lost profits or business opportunities, loss of use, business interruption, loss of
data, or any other indirect, special, incidental, or consequential damages under any
theory of liability, whether based in contract, tort, negligence, product liability, or
otherwise. Because some jurisdictions do not allow the exclusion or limitation of liability
for consequential or incidental damages the preceding limitation may not apply to you.
In any event, the total liability of Carrier shall not exceed the purchase price of the
product. The foregoing limitation will apply to the maximum extent permitted by
applicable law, regardless of whether Carrier has been advised of the possibility of such
damages and regardless of whether any remedy fails of its essential purpose.
Installation in accordance with this manual, applicable codes, and the instructions of the
authority having jurisdiction is mandatory.
While every precaution has been taken during the preparation of this manual to ensure
the accuracy of its contents, Carrier assumes no responsibility for errors or omissions.
Product Warnings
YOU UNDERSTAND THAT A PROPERLY INSTALLED AND MAINTAINED
ALARM/SECURITY SYSTEM MAY ONLY REDUCE THE RISK OF EVENTS SUCH AS
BURGLARY, ROBBERY, FIRE, OR SIMILAR EVENTS WITHOUT WARNING, BUT IT
IS NOT INSURANCE OR A GUARANTEE THAT SUCH EVENTS WILL NOT OCCUR
OR THAT THERE WILL BE NO DEATH, PERSONAL INJURY, AND/OR PROPERTY
DAMAGE AS A RESULT.
THE ABILITY OF CARRIER PRODUCTS, SOFTWARE OR SERVICES TO WORK
PROPERLY DEPENDS ON A NUMBER OF PRODUCTS AND SERVICES MADE
AVAILABLE BY THIRD PARTIES OVER WHICH CARRIER HAS NO CONTROL AND
FOR WHICH CARRIER SHALL NOT BE RESPONSIBLE INCLUDING, BUT NOT
LIMITED TO, INTERNET, CELLULAR AND LANDLINE CONNECTIVITY; MOBILE
DEVICE AND OPERATING SYSTEM COMPATIBILITY; MONITORING SERVICES;
ELECTROMAGNETIC OR OTHER INTERFERENCE, AND PROPER INSTALLATION
AND MAINTENANCE OF AUTHORIZED PRODUCTS (INCLUDING ALARM OR
OTHER CONTROL PANEL AND SENSORS).
ANY PRODUCT, SOFTWARE, SERVICE OR OTHER OFFERING MANUFACTURED,
SOLD OR LICENSED BY CARRIER, MAY BE HACKED, COMPROMISED AND/OR
CIRCUMVENTED AND CARRIER MAKES NO REPRESENTATION, WARRANTY,
COVENANT OR PROMISE THAT ITS PRODUCTS (INCLUDING SECURITY
PRODUCTS), SOFTWARE, SERVICES OR OTHER OFFERINGS WILL NOT BE
HACKED, COMPROMISED AND/OR CIRCUMVENTED.
CARRIER DOES NOT ENCRYPT COMMUNICATIONS BETWEEN ITS ALARM OR
OTHER CONTROL PANELS AND THEIR WIRELESS OUTPUTS/INPUTS INCLUDING
BUT NOT LIMITED TO, SENSORS OR DETECTORS UNLESS REQUIRED BY

2 TruVision 360° Camera Configuration Manual
APPLICABLE LAW. AS A RESULT THESE COMMUNICATIONS MAY BE
INTERCEPTED AND COULD BE USED TO CIRCUMVENT YOUR ALARM/SECURITY
SYSTEM.
THE EQUIPMENT SHOULD ONLY BE OPERATED WITH AN APPROVED POWER
ADAPTER WITH INSULATED LIVE PINS.
DO NOT CONNECT TO A RECEPTACLE CONTROLLED BY A SWITCH.
THIS UNIT INCLUDES AN ALARM VERIFICATION FEATURE THAT WILL RESULT
IN A DELAY OF THE SYSTEM ALARM SIGNAL FROM THE INDICATED CIRCUITS.
THE TOTAL DELAY (CONTROL UNIT PLUS SMOKE DETECTORS) SHALL NOT
EXCEED 60 SECONDS. NO OTHER SMOKE DETECTOR SHALL BE CONNECTED
TO THESE CIRCUITS UNLESS APPROVED BY THE LOCAL AUTHORITY HAVING
JURISDICTION.
WARNING! The equipment should only be operated with an approved power adapter
with insulated live pins.
Caution: Risk of explosion if battery is replaced by an incorrect type. Dispose of
batteries according to the instructions. Contact your supplier for replacement batteries.
Warranty Disclaimers
CARRIER HEREBY DISCLAIMS ALL WARRANTIES AND REPRESENTATIONS,
WHETHER EXPRESS, IMPLIED, STATUTORY OR OTHERWISE, INCLUDING ANY
IMPLIED WARRANTIES, THE WARRANTIES OF MERCHANTABILITY OR FITNESS
FOR A PARTICULAR PURPOSE.
(USA only) SOME STATES DO NOT ALLOW THE EXCLUSION OF IMPLIED
WARRANTIES, SO THE ABOVE EXCLUSION MAY NOT APPLY TO YOU. YOU MAY
ALSO HAVE OTHER LEGAL RIGHTS THAT VARY FROM STATE TO STATE.
CARRIER DOES NOT MAKE ANY CLAIMS OR WARRANTIES TO YOU OF ANY
KIND REGARDING ANY PRODUCT, SOFTWARE OR SERVICE’S POTENTIAL,
ABILITY, OR EFFECTIVENESS TO DETECT, MINIMIZE, OR IN ANYWAY PREVENT
DEATH, PERSONAL INJURY, PROPERTY DAMAGE, OR LOSS OF ANY KIND
WHATSOEVER.
CARRIER DOES NOT REPRESENT TO YOU THAT ANY PRODUCT (INCLUDING
SECURITY PRODUCTS), SOFTWARE, SERVICE OR OTHER OFFERING MAY NOT
BE HACKED, COMPROMISED AND/OR CIRCUMVENTED.
CARRIER DOES NOT WARRANT THAT ANY PRODUCT (INCLUDING SECURITY
PRODUCTS), SOFTWARE OR SERVICE MANUFACTURED, SOLD OR LICENSED
BY CARRIER WILL PREVENT, OR IN ALL CASES PROVIDE ADEQUATE WARNING
OF OR PROTECTION FROM, BREAK-INS, BURGLARY, ROBBERY, FIRE, OR
OTHERWISE.

TruVision 360° Camera Configuration Manual 3
CARRIER DOES NOT WARRANT TO YOU THAT ITS SOFTWARE OR PRODUCTS
WILL WORK PROPERLY IN ALL ENVIRONMENTS AND APPLICATIONS AND DOES
NOT WARRANT ANY PRODUCTS AGAINST HARMFUL ELECTROMAGNETIC
INTERFERENCE INDUCTION OR RADIATION (EMI, RFI, ETC.) EMITTED FROM
EXTERNAL SOURCES
CARRIER DOES NOT PROVIDE MONITORING SERVICES FOR YOUR
ALARM/SECURITY SYSTEM (“MONITORING SERVICES”). IF YOU ELECT TO HAVE
MONITORING SERVICES YOU MUST OBTAIN SUCH SERVICE FROM A THIRD
PARTY AND CARRIER MAKES NO REPRESENTATION OR WARRANTY WITH
RESPECT TO SUCH SERVICES INCLUDING WHETHER OR NOT THEY WILL BE
COMPATIBLE WITH THE PRODUCTS, SOFTWARE OR SERVICES
MANUFACTURED, SOLD OR LICENSED BY CARRIER.
Intended Use
Use this product only for the purpose it was designed for; refer to the data sheet and
user documentation. For the latest product information, contact your local supplier or
visit us online at firesecurityproducts.com.
The system should be checked by a qualified technician at least every 3 years and the
backup battery replaced as required.
Advisory messages
Advisory messages alert you to conditions or practices that can cause unwanted
results. The advisory messages used in this document are shown and described below.
WARNING: Warning messages advise you of hazards that could result in injury or loss
of life. They tell you which actions to take or to avoid in order to prevent the injury or
loss of life.
Caution: Caution messages advise you of possible equipment damage. They tell you
which actions to take or to avoid in order to prevent the damage.
Note: Note messages advise you of the possible loss of time or effort. They describe
how to avoid the loss. Notes are also used to point out important information that you
should read.

4 TruVision 360° Camera Configuration Manual
Introduction
This is the configuration manual for the following TruVision IP camera models:
TVPA-S01-0601-360-G(TruVision 6MP 360° IP Dome, indoor)
TVPA-S01-1201-360-G(TruVision 12MP 360° IP Dome, indoor)
TVPA-S01-0602-360-G(TruVision 6MP 360° IP Dome, outdoor)
TVPA-S01-1202-360-G(TruVision 12MP 360° IP Dome, outdoor)

TruVision 360° Camera Configuration Manual 5
Network access
This manual explains how to configure the camera over the network with a web
browser.
TruVision IP cameras can be configured and controlled using Microsoft Internet
Explorer (IE) and other browsers. The procedures described use Microsoft Internet
Explorer (IE) web browser.
Checking your web browser security level
When using the web browser interface, you can install ActiveX controls to connect and
view video using Internet Explorer (or Microsoft Edge in IE compatibility mode).
However, you cannot download data, such as video and images due to the increased
security measure. Consequently, you should check the security level of your PC so that
you can interact with the cameras over the web and, if necessary, modify the Active X
settings.
Configuring IE ActiveX controls
You should confirm the ActiveX settings of your web browser.
To change the web browser’s security level:
1. In Internet Explorer click Internet Options on the Tools menu.
2. On the Security tab, click the zone to which you want to assign a website under
“Select a web content zone to specify its security settings”.
3. Click Custom Level.
4. Change the ActiveX controls and plug-ins options that are signed or marked as
safe to enable. Change the ActiveX controls and plug-ins options that are
unsigned to Prompt or Disable. Click OK.
- Or -
Under Reset Custom Settings, click the security level for the whole zone in the
Reset To box, and select Medium. Click Reset.
Then click OK on the Internet Options Security tab window.
5. Click Apply in the Internet Options Security tab window.
Windows users
Internet Explorer operating systems have increased security measures to protect your
PC from any malicious software being installed.
To have complete functionality of the web browser interface with Windows 7, 8, and 10,
do the following:
• Run the Browser interface as an administrator in your workstation
• Add the camera’s IP address to your browser’s list of trusted sites

6 TruVision 360° Camera Configuration Manual
To add the camera’s IP address to Internet Explorer’s list of trusted sites:
1. Open Internet Explorer.
2. Click Tools, and then Internet Options.
3. Click the Security tab and then select the trusted sites icon.
4. Click the Sites button.
5. Clear the “Require server verification (https :) for all sites in this zone” check box.
6. Enter the IP address in the “Add this website to the zone” field.
7. Click Add, and then click Close.
8. Click OK in the Internet Options dialog window.
9. Connect to the camera for full browser functionality.
Activating the camera
When you first start up the camera, the Activation window appears. You must define a
high-security admin password before you can access the camera. There is no default
password provided.
You can activate a password via a web browser and via TruVision Device Manager.
Warning: When the 360° camera is operating, the surface of the housing will be hot to
the touch. The heat buildup is due to the processing power that is required to operate
the camera
To activate the camera via the web browser:
1. Power on the camera and connect the camera to the network.
2. Input the IP address into the web browser address bar and click Enter to enter the
activation interface.
Note:
The default IP address of the camera is 192.168.1.70.

TruVision 360° Camera Configuration Manual 7
For the camera to enable DHCP by default, you must activate the camera via
TruVision Device Manager. Please refer to the following section, “Activation via
TruVision Device Manager”.
3. Enter the password in the password field.
Note: A valid password range must meet the following conditions:
Between 8 and 16 characters
At least 1 lower-case letter
At least 1 upper-case letter
At least 1 of the following special characters _ : - , . * & @ / $ ? Space.
We recommend that you do not use a space at the start or end of a password, and
that you reset your password regularly. For high-security systems, it is particularly
recommended to reset the password monthly or weekly for better protection.
4. Confirm the password.
5. Click OK to save the password and enter the live view interface.
To activate the camera via TruVision Device Manager:
1. Run TruVision Device Manager 9.1SP1 or newer to search for TruVision cameras
on your local network.
2. After launching Device Manager, the number of inactive TruVision devices
(unconfigured devices recently connected to the network) can be displayed by
clicking the Activate Device button. From there you can select the cameras you
want to activate.
3. Enter the password in the password field and confirm it.
Note: A valid password range must meet the following conditions:
Between 8 and 16 characters
At least 1 lower-case letter
At least 1 upper-case letter
At least 1 of following special characters : _ - , . * & @ / $ ? Space.
The password is case-sensitive.

8 TruVision 360° Camera Configuration Manual
We recommend that you do not use a space at the start or end of a password, and
that you reset your password regularly. For high-security systems, it is particularly
recommended to reset the password monthly or weekly for better protection.
4. Change the device IP address, subnet mask, and gateway or check the box “Enable
DHCP” if you want the camera to automatically receive IP settings from the DHCP
server on the network.
5. Click Apply to save the password and the new network settings.
A pop-up window appears to confirm the activation. If activation fails, confirm that
the password meets the requirements and try again.
Enabling IE mode in Microsoft Edge
The 360° camera does not support the plugin-free option for Google Chrome, Mozilla
Firefox, Microsoft Edge, and Apple Safari.
It is recommended to use the IE Edge compatibility mode with this camera. Using this
mode allows you to open certain websites in IE within a tab in Edge.
To use Microsoft IE mode in Edge:
1. Open Microsoft Edge.
2. Click on the three dots in the top right corner of the window.
3. Select Settings from the drop-down menu.
4. Click Default browser.
5. Go to Allow sites to be reloaded in Internet Explorer mode (IE mode) and click
Allow.
6. Restart Edge.
7. Click on the three dots in the top right corner of the window.
8. Select Reload in Internet Explorer mode from the dropdown menu.
9. Type in the URL of the website you want to open in IE and press Enter.
The website will open in a new tab within Edge, but it will be rendered using the IE
engine.

TruVision 360° Camera Configuration Manual 9
Overview of the camera web browser
Use the camera web browser to view, record, and play back recorded videos as well as
manage the camera from any PC with access to the same network as the camera. The
browser’s easy-to-use controls provide quick access to all camera functions.
If there is more than one camera connected over the network, open a separate web
browser window for each camera.
Note: For accurate analysis Ceiling Mount should be selected when setting up the
camera. See “Display control” on page 10. If Ceiling Mount is not selected, the
Application tab will not be visible during setup.
Figure 1: Browser interface (Live view shown)
Name
Description
1. Live view Click to the view live video.
2. Playback Click to play back video.
3. Picture Click to search snapshots.
4. Application Click to enter the heat map statistics interface and search, view, and
download the counting data stored in the local storage or network storage.
5. Log Click to search for event logs. There are three main types: Alarm,
Exception, and Operation.
6. Configuration Click to display the configuration window for setting up the camera.
7. Admin Displays current user logged on.
8. Help Click to find the function.
9. Logout Click to log out from the system. This can be done at any time.
10. Live view toolbar
Click to manually capture the snapshot.
Click to manually start/stop recording.

10 TruVision 360° Camera Configuration Manual
Name
Description
Click to start/stop the digital zoom function.
Note: This appears when using the hardware display mode only.
Click to select live view with main stream or substream.
Audio on and adjust Volume/Mute.
Manual alarm.
The window size is 4:3.
The window size is 16:9.
The original window size.
Self-adaptive window size.
11. Display control
panel
Use this panel to select a display mode for the layout of the live view
window.
See Table 1 below for further information.
12. PTZ control See “Operating PTZ control” on page 101 for further information.
Display control
There are two tabs in the display control panel, Software, and Hardware.
Software means that the obtained live view video is decoded using the CPU of your PC
that is running the web browser. The live view performance depends on the decoding
ability of your PC. This mode is only available in Internet Explorer or Edge in IR
compatibility mode.
Hardware means that the obtained live view video is decoded by the camera itself.
You can select a display mode for the layout of the live view window. The description of
each display mode is shown in the table below.
360° View: In 360° View mode, the entire wide-angle view of the 360° camera is
displayed.
Panoramic View: In Panoramic View mode, the round 360° image is transformed into
a rectangular 180° image.
PTZ View: The PTZ View is the close-up view of a defined area within the 360° View or
Panoramic View.
They can be selected in both the Software, via IE or Edge browser in Internet Explorer
compatibility mode, and Hardware tabs. There is a greater selection available for
Software.
Table 1: Description of the display control panel
Name
Description
Mount Type Ceiling mount.
Wall mount.
Table mount.

TruVision 360° Camera Configuration Manual 11
Name
Description
Software tab:
Display Mode 360° view.
180° panoramic view.
360° panoramic view.
Live view with a 360° panoramic view and a PTZ view.
Live view with a 360° panoramic view and eight PTZ views.
Live view with a 360° panoramic view and six PTZ views.
Live view with a 360° panoramic view and eight PTZ views.
Live view with two PTZ views.
Live view with four PTZ views.
Live view with one 360° view and three PTZ views.
Live view with one 360° view and eight PTZ views.
Live view with sphere view.
Live view with AR half-sphere view.
Live view with a cylinder view.
Hardware tab:
Display Mode 360° view.
180° panoramic view
Panoramic view.
Live view with four PTZ views.
Live view with one 360° view and three PTZ views.
Live view with a four-PTZ-fusion view.
Camera Displays the cameras
Note: When the selected mount type is Table and the hardware display mode is Live
view with four PTZ views or Live view with one 360° view and three PTZ views, the
pan operation is opposite from what is expected. When the pan moves left, the real
direction is right. When the pan moves right, the real direction is left.
Some examples of the different software display modes:

12 TruVision 360° Camera Configuration Manual
180° panoramic view 360° panoramic view
Live view with one 360° view and eight PTZ views Live view with AR half-sphere view.
Live view with a cylinder view Live view with one 360° view and three PTZ views

TruVision 360° Camera Configuration Manual 13
Local configuration
Once the camera hardware has been installed, configure the camera’s settings through
the web browser. You must have administrator rights to configure the cameras over the
internet.
The camera web browser lets you configure the camera remotely using your PC. Web
browser options may vary depending on the camera model.
Use the Local Configuration menu to manage the protocol type, live view performance,
and local storage paths. In the Configuration panel, click Local Configuration to
display the local configuration window. See Figure 2 below for descriptions of the
different menu parameters.
Figure 2: Local Configuration window
Parameters Description
1.
Live View Parameters
Protocol
Specifies the network protocol used.
Options: TCP, UDP, MULTICAST, and HTTP.
TCP: Ensures complete delivery of streaming data and better
video quality, yet the real-time transmission will be affected.
UDP: Provides real-time audio and video streams.
HTTP: Allows the same quality as TCP without setting specific
ports for streaming under some network environments.
MULTICAST: It’s recommended to select MCAST type when
using the Multicast function.
Live View Performance
Set the live view performance to Shortest Delay, Auto, Fluent,
or Custom. For Custom, you can set the frame rate for live
view.

14 TruVision 360° Camera Configuration Manual
Parameters Description
Meta Data Overlay
Enable this option to detect real-time alarms such as motion
detection. The area which detected the alarm will be
highlighted as green.
Display POS
Information Enable the function, and feature information of the detected
target is dynamically displayed near the target in the live
image.
The feature information of different functions is different. For
example, ID and waiting time for Queue Management, height
for People Counting, etc.
Snapshot
Image Format Specifies the snapshot format as JPEG or BMP.
2.
Record File Settings
Video
File Size Specifies the maximum file size.
Options include 256 MB, 512 MB, and 1G.
Save
Video Files in Live View to Specifies the directory for recorded files.
Save
Downloaded Files to Specifies the directory for downloaded files.
3.
Picture
and Clip Settings
Save
Snapshots In Live
View To
Specifies the directory for saving snapshots in live view mode.
Save
Snapshots during
Playback To
Specifies the directory for saving snapshots in playback mode
.
Save Clips
during Playback To Specifies the directory for saving video clips in playback mode.
This manual suits for next models
3
Table of contents
Other TruVision Digital Camera manuals

TruVision
TruVision TVGP-P01-0201-PTZ-G User manual

TruVision
TruVision M Series User manual

TruVision
TruVision TVPA-S01-0601-360-G User manual

TruVision
TruVision TVW-DVM User manual

TruVision
TruVision S Series User manual

TruVision
TruVision TVF-5201 Instruction sheet

TruVision
TruVision HD-TVI User manual

TruVision
TruVision TVD-CB3 Cup Base User manual