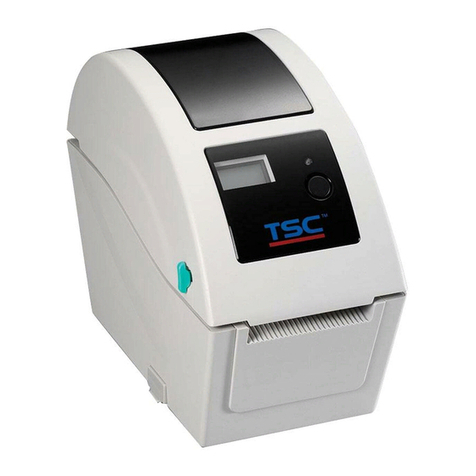
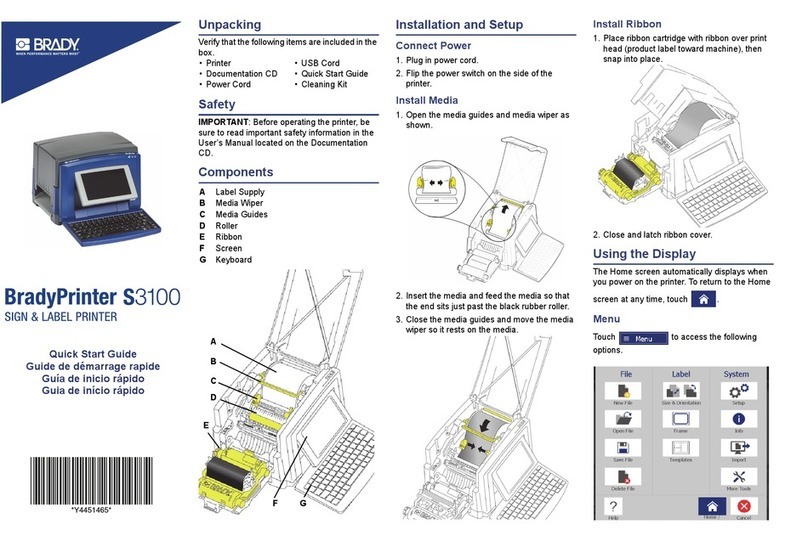
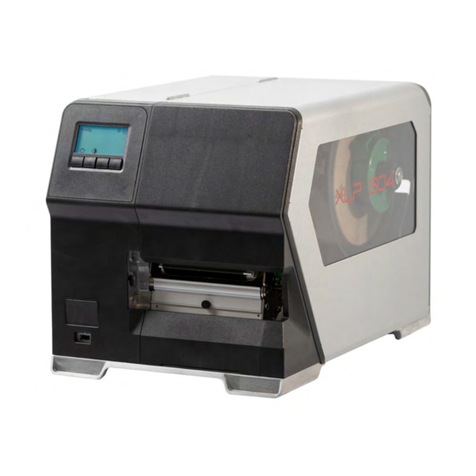
TSC TX200 Series User manual

TX200 Series
Desktop Barcode Printers
User Manual
Series Lists:
TX200 / TX300 / TX600
Thermal Transfer
Direct Thermal

I
Copyright information
© 2021 TSC Auto ID Technology Co., Ltd.
The copyright in this manual, the software and firmware in the printer described are owned by TSC Auto ID Technology Co., Ltd.
All rights reserved.
CG Triumvirate is a trademark of Agfa Corporation. CG Triumvirate Bold Condensed font is under license from the Monotype
Corporation. Windows is a registered trademark of Microsoft Corporation.
All other trademarks are the property of their respective owners. Information in this document is subject to change without
notice and does not represent a commitment on the part of TSC Auto ID Technology Co. No part of this manual may be
reproduced or transmitted in any form or by any means, for any purpose other than the purchaser’s personal use, without the
expressed written permission of TSC Auto ID Technology Co.

II
Table of Contents
1. Introduction .......................................................................................................................................................................................................1
1.1 Product Specification...................................................................................................................................................................................2
1.1.1 Printer Optional Features ......................................................................................................................................................................3
1.2 General Specification...................................................................................................................................................................................4
1.3 Print Specification........................................................................................................................................................................................4
1.4 Ribbon Specification....................................................................................................................................................................................5
1.5 Media Specification......................................................................................................................................................................................5
2. Operation Overview...........................................................................................................................................................................................6
2.1 Unpacking and Inspection............................................................................................................................................................................6
2.2 Printer Overview ..........................................................................................................................................................................................7
2.2.1 Front View.............................................................................................................................................................................................7
2.2.2 Interior View ..........................................................................................................................................................................................8
2.2.3 Rear View..............................................................................................................................................................................................9
3. Setup...............................................................................................................................................................................................................10
3.1 Setting up the Printer.................................................................................................................................................................................10
3.2 Loading the Ribbon....................................................................................................................................................................................11
3.3 Loading the Media .....................................................................................................................................................................................14
3.4 Loading the Media in Cutter Mode (Option)................................................................................................................................................16

III
4. LED and Button Functions...............................................................................................................................................................................17
4.1 LED Indication and Key..............................................................................................................................................................................17
4.2 Regular Button Function ............................................................................................................................................................................18
4.3 Power-on Utilities.......................................................................................................................................................................................19
5. TSC Console...................................................................................................................................................................................................20
5.1 Start TSC Console.....................................................................................................................................................................................20
5.2 Setup Ethernet Interface............................................................................................................................................................................22
5.3 Set WiFi and Add to TSC Console Interface ..............................................................................................................................................24
5.4 Initialize the Printer WiFi Setting ................................................................................................................................................................27
5.5 Printer Function .........................................................................................................................................................................................28
5.6 Setting Post-Print Action............................................................................................................................................................................29
6. LCE Menu Function.........................................................................................................................................................................................30
6.3 TSPL..........................................................................................................................................................................................................32
6.4 ZPL2..........................................................................................................................................................................................................34
6.5 Sensor.......................................................................................................................................................................................................37
6.6 Interface.....................................................................................................................................................................................................38
6.6.1 Serial Comm........................................................................................................................................................................................39
6.6.2 Ehernet................................................................................................................................................................................................40
6.7 File Manager..............................................................................................................................................................................................41
IV
6.8 Diagnostic..................................................................................................................................................................................................42
6.9 Advanced...................................................................................................................................................................................................43
6.10 Service.....................................................................................................................................................................................................44
7. TroubleShooting..............................................................................................................................................................................................45
8. Maintenance....................................................................................................................................................................................................48
9. Angency Complicance and Approvals .............................................................................................................................................................50
10. Revise History...............................................................................................................................................................................................53

1
1. Introduction
Thank you very much for purchasing TSC bar code printer.
The TX200 series of thermal transfer desktop barcode printers supports more printing applications than any other printer in its class.
With three models available, the four inch wide TX200 series can address everything from higher volume 4x6 shipping labels,
higher resolution product marking and graphic solutions, to high resolution labels used in electronics marking applications.
The printers use a large 300 meter ribbon supply on a one inch core that saves both time and money. The TX200 series features a
user-friendly spring-loaded center-biased clamshell design for easy drop-in media loading of 5-inch rolls of media. The printer
construction features a rugged double-wall design that is stronger and more durable than other thermal transfer mechanisms on the
market. Its strong motor is powerful enough to handle a 300-meter-long ribbon.
This document provides an easy reference for operating this printer. TSC printers include the Windows labeling software for
creating your label template. For system integration, the TSPL/TSPL2 printer programming manual or SDKs can be found on TSC
website at: https://www.tscprinters.com.

2
1.1 Product Specification
Product standard feature
203 dpi
models
300 dpi
models
600 dpi
models
Thermal transfer/ or direct thermal
V
V
V
LED icon panel with 1 button
V
V
V
3.5”TFT LCD with 6 buttons
V
V
V
32-bit RISC high performance processor
V
V
V
Gap transmissive sensor (Fixed, center of offset 4 to right or 7 mm to left from center)
V
V
V
Black mark reflective sensor (Position adjustable)
V
V
V
See-through ribbon end sensor
V
V
V
Ribbon encoder sensor
V
V
V
Head open sensor
V
V
V
128MB Flash memory
V
V
V
128 MB DDR2 DRAM
V
V
V
Micro SD card reader for memory expansion, up to SDHC 32GB
V
V
V
RS-232 interface (Max. 115,200 bps)
V
V
V
USB 2.0 interface (Hi-speed mode)
V
V
V
Internal Ethernet print server (10/100 Mbps) interface
V
V
V
USB host
V
V
V
Real time clock & Buzzer
V
V
V
Standard industry emulations right out of the box including Eltron®and Zebra®language
support
V
V
V
Internal 8 alpha-numeric bitmap fonts
V
V
V
Fonts and bar codes can be printed in any one of the four directions (0, 90,180, 270 degree)
V
V
V
Internal Monotype Imaging®true type font engine with one CG Triumvirate Bold
Condensed scalable font
V
V
V
Downloadable fonts from PC to printer memory
V
V
V
Clean print head warning
V
V
V

3
1.1.1 Printer Optional Features
The printer offers the following optional features.
Product option feature
User
option
Dealer
option
Factory
option
Peel-off kit
Note: This peel-off module is supported for the thermal/ plain label only.
V
Regular cutter (full cut guillotine cutter)
Media thickness: 0.06 ~ 0.19 mm
Media type: receipt and label liner w/o glue
Note: Except for the linerless cutter, all regular/heavy duty/care label cutters DO NOT cut
on media with glue.
V
802.11 a/b/g/n wireless module (slot-in)
V
KP-200 Plus keyboard display unit
V
KU-007 Plus programmable smart keyboard
V
Bluetooth module (serial interface)
V
External label roll mount
V
Parallel port
V
3.5” color TFT display (For 200 dpi and 300 dpi models)
V
Real time clock (For 200 dpi and 300 dpi models)
V
See-through ribbon end sensor (For 200 dpi and 300 dpi models)
V
Note: Except for the linerless cutter, all regular/heavy duty/care label cutters DO NOT cut on media with glue.

4
1.2 General Specification
General Specifications
200 dpi & 300 dpi
model
600 dpi
model
Physical dimensions
226 mm(W) x 198 mm(H) x 332 mm(D)
226 mm(W) x 200 mm(H) x 332 mm(D)
Weight
3.75 kg (8.27 lbs)
4.08 kg ( 8.99 lbs)
Mechanism
Clamshell with Double-walled plastic
Power
External power adapter
• Input: AC 100-240V/ 2.5A
• Output: DC 24V/ 3.75A
External power adapter
• Input: AC 100-240V, 2.5A
• Output: DC 24V/ 5.41A
Environmental condition
Operation: 5 ~ 40˚C (41 ~ 104˚F), 25~85% non-condensing
Storage: -40 ~ 60 ˚C (-40 ~ 140˚F), 10~90% non-condensing
Environmental concern
Comply with RoHS, WEEE
1.3 Print Specification
Print Specifications
203 dpi
models
300 dpi
models
600 dpi
model
Print head resolution
(dots per inch/mm)
203 dots/inch
(8 dots/mm)
300 dots/inch
(12 dots/mm)
600 dots/inch
(24 dots/mm)
Printing method
Thermal transfer/ or direct thermal
Dot size
(width x length)
0.125 x 0.125 mm
(1 mm = 8 dots)
0.084 x 0.084 mm
(1 mm = 12 dots)
0.042 x 0.042 mm
(1 mm = 24 dots)
Print speed
(inches per second)
Up to 8 IPS
Up to 6 IPS
Up to 4 IPS
Print speed
(inches per second)
Max. 3 ips for peeler mode
Max. print width
108 mm (4.25”)
105.6 mm (4.15”)
Max. print length
25,400 mm (1000”)
11,430 mm (450”)
2,540 mm (100”)
Printout bias
Vertical: 1 mm max.
Horizontal: 1 mm max.

5
1.4 Ribbon Specification
Ribbon Specifications
Ribbon outside diameter
Max. 67 mm OD
Ribbon length
300 meter
Ribbon core inside diameter
1“ (25.4 mm) ID core
Ribbon width
40 mm ~ 110 mm
Ribbon wound type
Ink coated outside wound
1.5 Media Specification
Media Specifications
203 dpi models
300 dpi models
600 dpi models
Media roll capacity
Max. 5”OD
Media core diameter
1”& 1.5”ID core
Media type
Continuous, die-cut, black mark, external fan-fold, notch
Media wound type
Outside wound
Media width
19 mm ~ 112 mm
Media thickness
0.055 mm ~ 0.254 mm
Label length
3 ~ 25,400 mm
(0.1“ ~ 1,000“)
3 ~ 11,430 mm
(0.1“ ~ 450“)
3 ~ 25,400 mm
(0.1“ ~ 1,000“)
Label length (peeler mode)
25.4 mm ~ 152.4 mm (1” ~ 6”)
Label length (cutter mode)
25.4 ~ max. print length
Black mark
Min. 8 mm (W) x 2 mm (H)
Gap height
Min. 2 mm

6
2. Operation Overview
2.1 Unpacking and Inspection
This printer has been specially packaged to withstand damage during shipping. Please carefully inspect the packaging and
printer upon receiving the bar code printer. Please retain the packaging materials in case you need to reship the printer.
Unpacking the printer, the following items are included in the carton.
1 printer unit
1 Windows labeling software/Windows driver CD disk
1 quick installation guide
1 power cord
1 auto switching power supply
1 USB interface cable
2 ribbon spindles
1 paper core
If any parts are missing, please contact the Customer Service Department of your purchased reseller or distributor.

7
1. LED indicators
2. Feed/ Pause button
3. Paper exit chute
4. Top cover open lever
5. Power switch
2.2 Printer Overview
2.2.1 Front View
2
1
4
5
3

8
2.2.2 Interior View
1. Ribbon rewind gear
2. Gap sensor (transmitter)
3. Media holder
4. Platen roller
5. Ribbon access cover
6. Ribbon rewind hub
7. Print head
8. Ribbon supply hub
9. Media cover
10. Media holder locking switch
11. Media guides
12. Black mark sensor/ Gap sensor (receiver)
13. Media guide adjustment button
7
6
1
2
3
4
10
12
8
5
9
13
11
Caution:
Keep fingers and other body parts
away from the printer cover.

9
2.2.3 Rear View
1. External label entrance chute
2. Power jack socket
3. RS-232C interface
4. Ethernet interface
5. * Micro SD card socket
6. USB interface
7. USB host
8. Centronics interface
Note: The interface picture here is for reference only. Please refer to the product specification for the interfaces availability.
4
5
2
3
6
8
7
1
Caution:
Keep fingers and other
body parts away from the
external label entrance
chute.

10
3. Setup
3.1 Setting up the Printer
1. Place the printer on flat surface.
2. Make sure the printer is power off.
3. Connect the printer to the computer with the provided USB cable.
4. Plug in the power cord.
Note: Please switch OFF the printer before plugging in the power cord to printer power jack.

11
3.2 Loading the Ribbon
1. Open the printer’s top cover
2. Open the ribbon access cover and the media cover.
3. Insert the rewind spindle into the paper core.

12
4. Install the paper core right side onto the rewind hub
first then align the notches on the left side and
mount onto the spokes.
5. Insert the ribbon spindle into the ribbon core.
Note: The yellow part of spindle is in left side.
6. Install the ribbon right side onto the supply hub first
then align the notches on the left side and mount
onto the spokes.

13
7. Stick the ribbon onto the ribbon rewind paper core.
8. Turn the ribbon rewind gear until the ribbon plastic
leader is thoroughly wound. Close the ribbon
access cover and the top cover.
Loading path for ribbon

14
3.3 Loading the Media
1. Open the printer top
cover by pulling the
tabs.
2. Separate the media holders to
the label roll width.
3. Place the roll between
the holders.
4. Place the paper, printing side
face up, through the media
sensor and place the label
leading edge onto the platen
roller.
5. . Move the media
guides to fit the label
width by pushing the
media guide adjustment
button.
6. Gently close the top cover,
using hardware or softeare to
make calibration.(Please refer
to chapter 4&5)

15
3.4 Loading the Media in Peel-off Mode (Option)
1. Please refer to section
3.3 to install the media
and get calibration.
2. Move the media guides to fit
the label width by pushing
the media guide adjustment
button.
3. Pull the label through
the front of the printer
and take some labels
off only leave the liner.
4. Open the peel-off cover.
Feed the liner into peel-off
cover slot.
5. Close the peel-off cover
and printer cover, using
software to set ptinter’s
post action to Peel Off
mode. (Please refer to
chapter 5)
6. Print a label for test.
Other manuals for TX200 Series
2
This manual suits for next models
2
Table of contents
Other TSC Label Maker manuals

TSC
TSC TDP-225 User manual

TSC
TSC M23 series Owner's manual

TSC
TSC CPX4D Series Operating and maintenance manual

TSC
TSC PEX1000 Series User manual

TSC
TSC ME240 series User manual

TSC
TSC CPX4D Series User manual

TSC
TSC TTP-243 Series Owner's manual

TSC
TSC ALPHA 4L User manual

TSC
TSC TDP-225 User manual

TSC
TSC Alpha-3R User manual
Popular Label Maker manuals by other brands

Casio
Casio LPCW-100 application user guide

BIXOLON
BIXOLON BXLLIBX.CAB API Manual

Dymo
Dymo LabelWriter 400 Turbo quick start guide

Brother
Brother PT 1700 - Electronic Labeler user guide

Novexx Solutions
Novexx Solutions XLP 504 Service manual

Casio
Casio CW-L300 - Disc Title Printer B/W Thermal... user guide