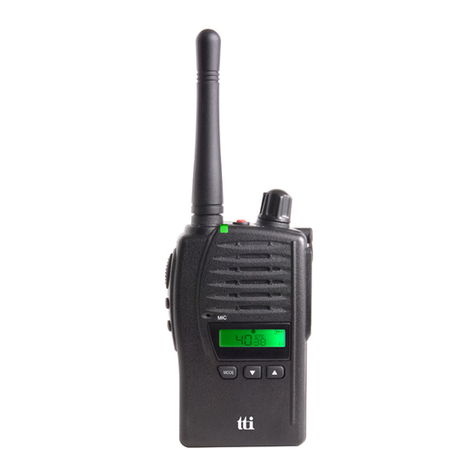
TTI TCB-H100 User manual

4. Transceiver Controls, Display and Functions
4WCOMPACTHANDHELD
CBTRANSCEIVER
TCB-H100
INSTRUCTION MANUAL
www.ttikorea.co.kr
Our Thanks to You
Thank you for purchasing a TTI CB TRANSCEIVER radio.
Properly used this TTI product will give you many years of reliable service.
All our products are built to offer excellent value by combining advanced features, great design and
manufacturing quality.
To ensure you are familiar with the operation and features of your radio, and in order to obtain the
best performance, please read this manual carefully before operation.
1. Supplied Accessories
TCB-H100 is supplied with a full range of accessories to help you get started and virtually benefit
from all the features straight away.
> Charger Package
TCB-H100 transceiver
Antenna
Li-Ion rechargeable battery
Charging cradle
Power cable
Belt clip
2. Fitting the Battery Pack / Battery Eliminator
> Fitting
Ensure that your radio is switched off.
Align the battery pack with the battery guide
and Slide the battery pack up to the top until
you hear the snapping sound.
> Removal
Ensure that your radio is switched off.
Press down on the battery release catch
and separate the battery pack from the radio.
3. Battery Charging
1) Connect the power adaptor to the main power supply and connect the adaptor charger jack to
the charging cradle.
2) Disconnect any radio accessories and ensure the radio is switched off.
3) Insert the radio into the charging cradle until it clicks home. The charger LED will glow red
and charging will start. If the charger LED blinks red or green or the charger LED does not light,
re-insert the radio into the charging cradle.
4) The battery charging time is about 4-5 hours. When the battery is fully charged the charger
LED will turn green.
Power Adaptor
- Input : 230VAC
- Output : 12VDC 1Ah
Note :
- Upon the red LED blinking, there is a doubt on the battery quality.
- Upon the orange LED blinking, there is a doubt on the high temperature of the battery.
In this case, separate the battery from the cradle and try again after cooling.
1) Power On/Off & Volume Control Knob
Turn this knob clockwise to switch on. The more you turn this knob clockwise, the bigger the audio
sound grows.
2) Squelch Adjuster and DSS (Dynamic Squelch Tuning System)
DSS : Default. The squelch level of your transceiver is dynamically adjust to get the best receive
condition.
Squelch Adjuster : Turn this knob clockwise to the max. Turn counter-clockwise until you hear
background noise and then turn the knob to the opposite direction until the noise disappears.
3) Emergency Button
Press this button to go to emergency channel (9 or 19). To return to the previous operation mode,
press EMG button again.
4) PTT Button
While pressing this button, you can transmit. The Red LED lights during the PTT press.
5) Backlighting & Scan Button
Short press to change backlighting color (Red / Green / Amber / Off)
Long press to activate/deactivate channel scan. While scanning, press Up/Down button to change
scanning direction.
6) Menu / Lock Button
Short press to access menu mode. Use the Up/Down button to change the setting.
Long press to activate/deactivate keypad lock function.
<MENU>
Display Functions Settings
Band See next band chart
Power FM : High and Low
AM : Low only
Roger Beep Tone On and Off
Key Beep Tone On and Off
VOX Off, Low, Middle, High
<BAND Chart>
Setting Display Settings
EC Europe 40ch. FM 4W
EU Europe 40ch. AM/FM 4W
D Germany 80ch. FM 4W, 40ch. AM 4W
I2 Italy 34ch. AM/FM 4W
I Italy 40ch. AM/FM 4W
UE(EU/UK) UK 40ch. FM 4W (British Frequencies)
+ CEPT 40ch. FM 4W(EC)
UK UK 40ch. FM 4W (British Frequencies)
PL Poland 40ch. AM/FM 4W
(Polish Frequencies : 5KHz)
F France 40ch. FM 4W, 40ch AM 4W
E Spain 40ch. AM/FM 4W
7) Channel Up/Down Button
Short press to change channel.
Long press to speed up channel change.
8) Echo & AM/FM Button
Short press to activate/deactivate Echo TX sound.
Long press to switch AM/FM mode.
9) Signal Strength Meter (S-RF)
Low transmitting power shows four S-RF meters.
High transmitting power shows full eight S-RF meters.
While receiving signal, actual reception signal strength is on display.
10) Low Batter Alert
In case Low battery, LED and battery indicator are blinking with alert sound for every 15 seconds.
5. Trouble Shooting
If you experience problems with your TCB-H100, first check the battery power level or connection of
battery eliminator as low batteries can cause problems such as poor transmission, weak reception
and reduced sound quality. Then check the manual and radio display to ensure that a function (such
as VOX or Lock) has not been activated by accident.
1) Switch off the transceiver.
2) Press and hold PTT button and Backlighting button, switch on the transceiver.
3) Wait for a while until reset display appears.
All the memories are erased by this reset and the parameters return to the initial factory setting.
In case of further difficulty, please consult your dealer or visit our website at www.ttikorea.co.kr.
6. Safety Requirement
For charging the rechargeable battery, only a CE approved AC adaptor complying with the following
specifications must be used.
INPUT : 230VAC 50Hz
OUTPUT : 12VDC 1Ah
For direct operation by battery eliminator, following cigar adaptor must be used.
INPUT : 12/24VDC
OUTPUT : 12VDC 3Ah
7. Specifications
G
E
N
E
R
A
L
Channel 40 (See the frequency band chart)
Frequency Range 26.56 MHz ~ 28 MHz
Operating mode F3E (FM), A3E (AM)
Frequency Control PLL Synthersizer
Frequency Tolerance 0.002%
Operating Temperature Range -10 to +55℃
Power Supply 7.4V (Li-Ion Battery) 12/24VDC (Battery Eliminator)
Size 57 (W) x 116 (H) x 39 (D)
Weight 224 grams with Battery pack
Antenna Connector SMA type
T
R
A
N
S
M
I
T
T
E
R
Power Output Duty cycle 10% 4 Watts @ 13.2V DC
Modulation AM: from 85% to 95%
FM: 1.8KHz ± 0.2KHz
Frequency Response 300Hz to 3000Hz
Output Impedance 50ohms, Unbalanced
Harmonic Suppression Less than -54dBm
Current Drain AM Full Mod. 1.6A Max.
R
E
C
E
I
V
E
R
Receiving System Dual conversion superhterodyne
IF Frequencies Double conversion 1st 10.695MHz/2nd 455KHz
Sensitivity 1.4㎶for 10dB(S+N)/N in AM Mode
0.8㎶for 20dB SINAD in FM Mode
Audio Output Power 1W @ 16ohm
Audio Distortion Less than 8% @ 1KHz
Image Rejection More than 60dB
Adjacent Channel Rejection More than 60dB
Conducted Spurious Less than -57dBm
Frequency Response 300Hz to 2500Hz
Built-in Speaker 16ohms, Round
Squelch Adjustable; Threshold less than 1㎶
DSS; Less than 2㎶
* Specification is subject to change without prior notice.
P/N 820-TCH0-000
> Battery Eliminator Package
TCB-H100 transceiver 1unit
Battery Eliminator 1unit
with Antenna connector
1unit
1unit
1unit
1unit
1unit
1unit
Antenna
TX / RX
/ Low battery alert LED
PTT Button
Backlighting (Short press)
Scan Button (Long press)
Menu (Short press)
Lock (Long press)
Down Up
Echo (Short press)
AM/FM (Long press)
Squelch Adjuster & DSS Knob
Power & Volume Control Knob
Emergency Button
Accessory Jack
Speaker
Mic
Display
Channel Lock
Scan
Roger Beep Emergency
DSS
Battery Indicator
Echo
Low PowerBand
VOX
External Accessory
AM Mode FM ModeSignal Strength Meter

10. Restrictions on the use
Country Band Use restrictions and other comments
BELGIUM
SWITZERLAND EU F
EC 40 Ch - 4W FM - Individual licence is required
40 Ch - 4W AM - Individual licence is required
DENMARK,NORWAY
LUXEMBOURG,CZECH EC 40 Ch - 4W FM - Free use
FINLAND,PORTUGAL
FRANCE,NETHERLANDS EU F
EC 40 Ch - 4W FM - Free use
40 Ch - 4W AM - Free use
GERMANY D80 Ch - 4W FM - Individual licence is required
40 Ch - 4W AM - Individual licence is required
EU 40 Ch - 4W AM - Use ch 4-15 only
D2
EC 40 Ch - 4W FM - Free use
12 Ch - 4W AM - Individual licence is required
fx Allowed: from 26.960 to 27.410 MHz “BAPT 222 ZV 104”
GREECE E EU F I
EC 40 Ch - 4W FM - Free use
40 Ch - 4W AM - Free use
T/R 20-02
IRELAND E EU F I
EC 40 Ch - 4W FM - Free use
40 Ch - 4W AM - Free use
S.I. No 436 of 1998. WIRELESS TELEGRAPHY ACT, 1926 (SECTIONS)
(EXEMPTION OF CITIZENS’ BAND (CB) RADIOS) ORDER, 1998
ITALY E EU F I
EC 40 Ch - 4W FM - General authorization is required
40 Ch - 4W AM - General authorization is required
I2 34 Ch - 4W FM
34 Ch - 4W AM(ERP) *AM mode allowed on ch1-23 only
PNF issued on DM 08.07.02 NOTES 49 A-B-C-D-E-G
SPAIN E EU F
EC 40 Ch - 4W FM - Individual licence is required
40 Ch - 4W FM - Individual licence is required
Art. 57 - Law 11/1998 dated 24th April
SWEDEN EU F
EC 40 Ch - 4W FM - Free use
40 Ch - 4W AM - Individual licence is required
UK UK
EU
EC 40 Ch - 4W FM - Free use
40 Ch - 4W AM - Free use
POLAND PL EU EC 40 Ch - 4W FM / AM - Free use
<< Declaration of Conformity >>
We, TTI Tech Co., Ltd. (B-912, Indeokwon IT Valley, 40 Imi-ro, Uiwang-si, Gyeonggi-do, Korea)
declare on our sole responsibility that this equipment complies with the essential requirements
of the Radio Equipment Directive (RED) 2014/53/EU, and that any applicable Essential Test Suite
measurements have been performed.
Kind of equipment : HANDHELD CB TRANSCEIVER
Type-designation : TCB-H100
Version (where applicable) :
This complicance is based on
conformity with the following
standards, specifications or
documents :
N. Y. Kim
Director
Korea, Dec. 31, 2019
Signature
EN 62311:2008
EN 300 433 V2.1.1
EN 301 489-1 V2.2.0
EN 301 489-13 V1.2.1
EN 60950-1:2006+A11:2009 +A1:2010+A12:2011+A2:2013
Other manuals for TCB-H100
1
Table of contents
Other TTI Transceiver manuals
TTI
TTI TCB-550N User manual
TTI
TTI TCB-R2000 User manual
TTI
TTI TCB-771 User manual
TTI
TTI Freequency TCB-880 User manual
TTI
TTI Freequency TCB-770 User manual
TTI
TTI Freequency PMR-500TX User manual
TTI
TTI TX-1446 Plus User manual
TTI
TTI Freequency TCB-880 User manual
TTI
TTI Freequency TCB-770 User manual
TTI
TTI PMR-506TX User manual
