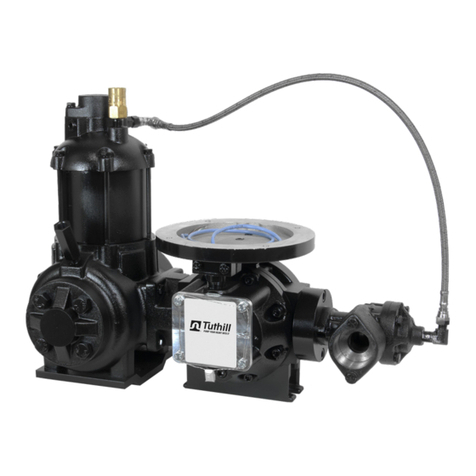
Tuthill Sotera TS06AS83 Guide

Installation,
Operation &
Parts Manual
Non-Compensated With Thermo Well
Assembly No., Single __ TS06AS83 __ TS06AS86
Twin __TS06AS84 __ TS06AS88
forregister __ TS06AE83 __ TS06AE86
withEMR³ __ TS06AE93 __ TS06AE96
with ELNC __ TS06AE71
__ TS06AE72
__ TS06AE73
S/No.: __________________
The flow meter shipped under this general manual, has specifically:
ACCESSORIES REGISTER
Backpressure Valve None
Strainer RADregisteradaptor
VaporEliminator EMR³Register
DifferentialValve ELNCRegister
TS06AS86
with thermo well
TS06A, LPG
Anodized Aluminum,
Electronic Dispenser Meter
TS06LPG 6/22/2012

INDEX
SafetyProcedures 3
Installation & Operations 4-6
Torque & Wrench Chart 5
MeterMaintenance 7-10
Disassembly Flow Meter 9
InletCheckValve 10
Strainer 10
VaporEliminator 10
DifferentialValve 10
Parts List: Meter & Strainer 13
DifferentialValve 11
InletCheckValve 11
VaporEliminator 11
Troubleshooting 14
SCL(PulserAssembly) 15-16
Metercalibration 16

This manual provides warnings and procedures that are intended to inform the owner/operator of
the hazards present when using the Tuthill Transfer Systems, TUTHILL meters and other products.
The reading of these warnings and the avoidance of such hazards is strictly in the hands of the
owner/operator of the equipment. Neglect of that responsibility is not within the control of the
manufacturer of the flow meter.
Read this manual as well as the literature provided in your
owner’s manual. If you have any questions, consult with
your full-service distributor or call the Service Department at
Tuthill Transfer Systems, TUTHILL meters at 888-578-3258.
Please have the following information available when you
make inquiries, order replacement parts, or schedule ser-
vice. If a specific meter accessory is involved, please pro-
vide the model and serial number of the accessory in ques-
tion.
Meter Serial Number: ____________________________
Your Full Service Distributor:
Name: ________________________________
Telephone: _________________________________
IN THE EVENT OF A GAS LEAK
In the event of a large gas leak:
Evacuate the area and notify the fire department or oth-
er appropriate authorities.
In the event of a small, contained gas leak:
Isolate and stop the leak
Prevent accidental ignition
Prevent entrance of gas into other portions of the build-
ing. Be aware that LPG is heaver than air and will seek
lower levels
Evacuate all people from the danger zone
See that the gas is dispersed before resuming the busi-
ness and operations. If in doubt, notify your local au-
thorities.
IN THE EVENT OF A GAS FIRE
In the event of large fires or fires that are spreading:
Evacuate the building and notify your local fire department.
Stop the leakage only if you can safely reach the equipment.
In the event of small, contained fires that you can safely
control:
Stop the leakage if you can safely reach the equipment.
Then use the appropriate extinguisher: Class B fire extin-
guisher, water, fog, etc. depending on the equipment. If in
doubt, call your local fire department.
The meters non-shock maximum operating pressure is indi-
cated on the meter name plate. The meter should never be
operated in excess of this pressure. Care should be taken
to eliminate thermal and hydraulic shock conditions, so that
they do not exceed the meters maximum working pressure.
3
S A F E T Y P R O C E D U R E S

Installation:
Before Start-up of the Meter, make certain:
The meter is properly mounted, secured and piped
All shipping plugs are removed and lines are clean of all
debris.
All connections are tight and there are no leaks
All bleed and drain valves are closed
Do NOT smoke near the meter, or use the meter near
an open flame when metering flammable fluids. Fire or
explosions could result.
This meter is not intended for use with fluids for human
consumption.
Make sure that all necessary safety precautions have been
taken including proper clothing, personal safety equipment
and fire safety equipment if required.
Before shipment, protective thread caps were placed in the
meter and accessories openings for protection. They should
remain in place until your are ready to attach the piping.
The meter must always be securely bolted to a platform or
supporting member, regardless of the mounting position.
Never “hang” a meter on the connecting pipe.
Position the meter with service in mind. Provide ample work
space. Removing covers can be difficult when work space
is not available. Always supply a platform or support for the
meter mounting.
Prior to meter installation, the entire piping system should be
thoroughly flushed of all debris with a liquid that is compati-
ble with the construction of the meter.
Keep all external surfaces of the meter clean.
Positive displacement meters are designed to operate full of
liquid. The meter should be installed in a manner such that
it remains full of liquid at all times.
Install the companion flanges. Tighten to a position that
allows the meter to bolt to the companion flanges, free of
pipe stress. The meter should always be supported by bolt-
ing to a platform. Never use the connecting pipe as the
means of support.
It is recommended that a strainer be installed upstream of
each meter to prevent damage from foreign matter such as
weld slag, pipe scale, etc.
A means to calibrate and prove the meter should be provid-
ed during installation. An easy means for diverting flow into
a calibration vessel should be considered.
Operation Requirements:
Upstream lines must be maintained full to prevent air from
entering the meter. If the upstream or inlet lines are con-
structed in a manner which allows reverse flow, foot or back
check valves should be installed.
Underground tanks that are furnished with a submersible
pump will eliminate many problems that occur with positive
displacement pumps with suction pipes when the suction
piping is incorrectly sized creating too large a lift.
*** Install the Meter and Accessories in Compli-
ance with all applicable local, state and federal
construction, electrical and safety codes. Addi-
tionally, the LPG meter must be installed in ac-
cordance with the requirements of ANSI-NFPA 58
In critical installation, block valves and by-pass lines
are recommended. This allows the meter to be ser-
viced without interruption of flow in a critical process
application.
Thermal and or over pressure relief valves are recom-
mended and should be installed whenever it is possi-
ble to block the meter between two valves. Thermal
pressures many times the operating pressure are pos-
sible with only a small rise in temperature.
Hydraulic shock like thermal expansion can be harmful
to the meter components. Consideration should be
given to designing pumping and piping systems to
eliminate hydraulic shock.
4
Installation & Operation
WIRING
If the flow meter is part of a dispenser, please refer
to dispenser manufacturer wiring diagram.
If the flow meter is used as a ‘stand-alone’ dispens-
ing meter, please refer to:
Page for TS06A with ELNC register
Page for TS06A with EMR register
Page for TS06A used with other registers

Every meter should be calibrated under actual service and
installation conditions. Follow your local Weights and
Measures recommendations.
Provide a means of conveniently diverting liquid for calibra-
tion purposes.
Give careful attention to your system’s pumping equipment
and piping because of their influence on the liquid being
measured as it enters the meter assembly. Systems should
be made free of conditions that cause or introduce entrained
air or vapor.
Follow the manufacturer’s recommendation fully when in-
stalling pumps. Give particular attention to factors like: use
of foot valves, pipe size to the inlet and conformance to net
positive suction head (NPSH) conditions when suction
pumping is required. Following the manufactures’ recom-
mendations will minimize air and vapor elimination prob-
lems.
Start-Up:
Fill the system slowly to avoid operation on air or vapor.
This can be accomplished in the following manner:
Throttle the meter inlet valve, and allow the meter and pip-
ing to fill slowly by gravity.
Crack open the outlet valve and start the pump, then slowly
open the inlet valve until the system is up to pressure. Open
the outlet valve fully to establish full flow. Check the flow
rate to assure the meter is operating within specified rates.
The meter is not designed to operate on air, but the design
and materials of construction of the TUTHILL meter allows
for operation on vapor for short periods of time without dam-
age to the elliptical gears or other meter internals.
Note: Over- speed and hammer caused by the presence
of vapor in the system can cause internal damage to the
meter.
5
Part # Discription Torque Wrench
FS2801 1/4"-20 x 1" Hex Bolt 12 ft-lbs 7/16" Box/Open End Wrench
FS2800 1/4"-20 x 1" SHCS 12 ft-lbs 3/16" Allen Wrench
FS2910 1/4"-20 x 5" Hex Bolt 12 ft-lbs 7/16" Box/Open End Wrench
FS2911 1/4"-20 x 2 1/2" SHCS 12 ft-lbs 3/16" Allen Wrench
FS2914 1/4"-20 x 1 1/2" SHCS 12 ft-lbs 3/16" Allen Wrench
FS2919 1/4"-20 x 1 1/2" SHCS 3/16" Allen Wrench
FS2959 1/2"-13 x 1 1/4" Hex Bolt 80 ft-lbs 3/4" Box/Open End Wrench
Installation & Operation continued
Torque Chart

Where the TS06A is used in a commercial or retail LPG dis-
penser, the flow meter will be shown in dispenser manufac-
turer wiring diagram.
When the TS06A-EDM is used as a free-standing dispenser
meter, it can be used with many different electronic regis-
ters, which can be either installed on the flow meter, or re-
mote.
In wiring diagrams on these 2 pages, we show the flow me-
ter used with registers available through Tuthill. it can of
course also be used with many other registers.
6
Installation & Operation continued
#1
EL0300-5-?
#6
#2 & #3
#5 #4
EMR³ ground
1. The SCL is model specific, and in some cases also application specific. Do NOT transfer to another flow
meter without consulting with Tuthill.
2. Use 4 conductor shielded cable.
3. Terminate shields at receiving instrument (register).
4. Move W1 shunt (jumper) to match operating voltage:
5. S1 must be in Qposition.
6. Output signal has an internal pull-up resistor (1000 Ω) on each channel.
7. If the receiving instrument (register) is more than 200’ (60 m) cable distance from the flow meter, an amplifier is
required on the pulse signal. If this option was not ordered, please consult with Tuthill prior to start-up.
1pin exposed: 5.5 - 12 VDC
= EL0300-5-1
Both pins covered: 5VDC Regulated
= EL0300-5-3
TS06A with SCL, to EMR³

7
Installation & Operation continued
TS06A with SCL & ER9044 (ELNC-1141) register,
AC powered through EL2057
ELPS-2057
AC power
supply
& barrier
EL0300-5
SCL inside
flow meter
front cover
1. This drawing does not guarantee compliance for intrinsically safe apparatus. Refer to CD1000, CD1001 and
State & National electrical codes.
2. Terminate shields only at J1-4.
3. Cable lengths are limited by entity parameters.

8
Installation & Operation continued
TS06A with SCL & ER-9044-2 (ELNC-1141E) register, with Backlight Display & 10:1 Pulse,
AC powered through EL2057
1. This drawing does not guarantee compliance for intrinsically safe apparatus. Refer to CD1000, CD1001 and-
State & National electrical codes.
2. Cable lengths are limited by entity parameters.
3. ELPS output option: Install U1, R3, TB6.

Theory of Operation;
The TUTHILL meters LPG metering system combines an
oval gear positive displacement meter, differential valve,
strainer and vapor eliminator in one assembly. The differen-
tial valve incorporates a piston type construction with the
piston moving away from its seat when at least 15 PSI pres-
sure (above product vapor pressure) is maintained at the
meter outlet. The soft seat valve assures measurement
accuracy by requiring pump operation for delivery, by requir-
ing adequate back pressure to prevent product vaporization
during measurement and by requiring blockage of flow when
the vapor eliminator release valve is open. The strainer
prevents foreign particulate from entering and damaging the
meter. The meters close tolerance machine construction
and no metal to metal contact provides accurate liquid
measurement.
Installation, Flow Meter:
Install the meter assembly in a dispenser cabinet, or a truck
deck to a secure base using the bolt holes on the “feet” of
the strainer assembly base. Make inlet and outlet connec-
tions at the flanged surfaces on the strainer and differential
valve, respectively. Leave a minimum of 12 inches be-
tween he strainer flange and any obstacle for servicing
the strainer.
Installation, Vent Line:
The vent line from the meter’s vapor vent to the vapor space
on the supply tank should a minimum of 1/4” inside diameter
tube or pipe. A shutoff valve must be installed in the vapor
vent line to allow removal of the strainer or service on the
meter. The vapor release vent line must be returned to the
vapor space of the supply tank and normally should not be
made common with the other vapor return lines or pump by-
pass lines.
When properly installed, this line must permit free flow in
either direction. If the vent line is closed the meter will not
function, as the differential valve will not open. These in-
structions must be followed to maintain proper function of
the differential valve.
Support:
Prevent pipe strain or stress from occurring when making
connections to meter or accessories and during repairs.
Pipe strain and stress occurs when the pipes are not sup-
ported or are not aligned correctly to the meter. The weight
of the pipes must always be supported independent of the
meter. This meter and accessories can easily be removed
without affecting the pipes or the pipe alignment. Never
leave any of the pipes hinging.
Storage:
If the meter is used for seasonal work, at the end of each
season the meter should be removed from the system and
thoroughly flushed with a compatible liquid. This includes
removing the drain on the front and rear covers. Then flush
the product from the front and rear covers. If flushing with
water is preferred, extra care should be taken to drain the
meter completely and to dry all internal parts. Immediate
refilling with a compatible liquid (or oil misting) is essential to
prevent corrosion as well as ice damage to parts from mois-
ture that was overlooked after flushing and drying.
9
Installation & Operation continued

Preparing for Service:
Close the belly valve of the supply tank.
Close the valve on the vapor return line.
Close the manual valve in the supply line on eh inlet
side of the meter. If no manual valve exists on the inlet
side, consult the dispenser manufacturer on installer for
procedures to depressurize the system.
Slowly open the valve/nozzle on the end of the supply
line
After product is bled off, close the valve/nozzle at the
end of the supply line.
Open the bleed valve provided by your installer to re-
lieve the system pressure. Product will drain from the
meter system.
As product is bleeding from the bleed valve, slowly reo-
pen and close the valve/nozzle on the discharge line.
Repeat this step until the product stops draining from
the bleed valve and discharge line valve/nozzle.
Leave the discharge line valve/nozzle open while work-
ing on the system.
General Service:
Do not scratch or mar any of the precision machined
surfaces by prying or sanding parts.
Torque specifications. All fasteners such as screws and
bolts should be torqued to proper specifications. See
the “Torque Chart” in this manual.
Stone the machined surfaces when reassembling the
meter to assure the machined surfaces are free of burrs
and scratches.
Repair pulled threads with threaded insert fasteners.
These can be used in many instances. Contact your full
-service distributor for advice if this occurs.
Coating threads: When removing and replacing bolts
and screws in a meter, always coat the threads with anti
-seize.
Removing flange seals: When removing the flange
assembly, always carefully remove the O-ring seal.
Make sure that the flange surface is clean. Discard and
replace the old O-ring seals if it is nicked or scratched in
any way. It is undamaged, it can be re-used.
Examine all fasteners: make sure fasteners are not
bent, rusted, or have pulled or burred threads. The
threads should all appear evenly placed. If the bolts are
bent, check the housing and cover for flatness. Use a
straight edge to determine flatness. Use a stone to
remove any burrs on the flat surfaces for the housing.
Look for gaps: When disassembling a meter, use a
feeler gauge to check for gaps between the post and
gear plates and housing. If you do find gaps, check the
plates for flatness with a straight edge. Gaps can be
caused by shock problems that must be resolved. Con-
tact your full service distributor, or the Service Depart-
ment at TUTHILL meters for assistance if this occurs.
Check the O-Rings: O-rings should be smooth.
Cracked or worn O-rings should be replaced. However,
a more serious problem of shock my have occurred if
the O-rings are nibbled or extruded. Shock problems
must be verified and resolved. Contact your full service
distributor, or the Service Department at TUTHILL me-
ters for assistance if this occurs.
Check the post and gear plates: Check the plates for
flatness. Use a straight edge. Warped plates can be
caused by hydraulic shock problems that must be re-
solved. Contact your full service distributor, or the Ser-
vice Department at TUTHILL meters for assistance if
this occurs.
Weights & Measures: Check with the regulatory agency
that governs Weights and Measures in your area. Re-
moving a seal wire may require Weight & Measures
recalibration.
Danger!! Danger!! Danger!!
Relieve all internal pressure before servicing.
Line pressure must be 0.0 PSI
Serious injury or death from fire or explosion could result from maintenance of an
improperly de-pressurized and evacuated system.
10
Flow Meter Maintenance

11
Flow Meter Maintenance

Meter Disassembly:
If your meter is equipped with an electronic register,
remove the register and register housing assembly.
Disconnect the outlet flange (30) and the vapor tube
connecting the differential valve and the vapor return
line.
Remove the four bolts (26) and (27) and the dust cover
(25).
Disconnect the outlet wiring from the electronic pulser
assembly (SCL) terminal TB1 (See SCL service manu-
al)
Note: If the SCL does not require service, and there is
no damage to the meter cover (22), it is possible to re-
place the meter using the existing meter cover. In this
case it is not necessary to disconnect the outlet wiring.
Remove the four bolts (23) and the SCL housing (22).
Inspect the internal parts for wear. Gear may be re-
placed at this point if all other components are good.
Remove the bolts ( ) and remove the differential valve.
Remove the four bolts (20) and the meter assembly
(body (19) and post plate (14).
Clean all surfaces using a brush or fine (200 grit) emery
cloth.
Inspect and repair the inlet check valve if you have this
option.
Inspect the meter body for damage. Use 200 grit paper
to remove small scratches and blemishes, if the dam-
age is more than superficial, replace the body.
Inspect the post and post plate. Replace if there is any
wear.
Inspect the O-ring seals, and replace any damaged or
brittle seals.
Reinstall the meter in reverse order.
Install a new oval gear set (17) if necessary. Gears
should be perpendicular to each other. The gears will
not rotate a complete revolution if not installed properly.
Once installed, the gears should rotate freely with out
binds or rubs. Check the clearance between the gears
and the body. There should be a minimum of .003 inch
between gears (17) and the meter cover (22). If there is
any binds or rubs between the gears and the meter
body, it is recommended that the meter be replaced.
Reinstall the meter cover (22).
Reinstall the differential valve.
It is recommended that all O-rings and seals be re-
placed during service, but a good inspection is critical if
seals are reused.
Calibrate the meter and return to service.
12
Flow Meter Maintenance
Danger!! Danger!! Danger!!
Relieve all internal pressure before servicing.
Line pressure must be 0.0 PSI
Serious injury or death form fire or explosion could result from maintenance of an

Inspect the slide valve. Remove and build–up of salts or
dirt which may cause the valve to stick. The valve
should slide freely without any signs of sticking. There
should be no scratches or burrs on the valve assembly.
Replace if there are signs of damage.
Inspect all seals, and replace if damaged or brittle.
Re-assemble the meter in the opposite direction making
sure all bolts are torqued to the proper specifications.
Differential Valve Service (see page 11):
Remove the outlet piping flange.
Remove the connecting tube between the differential
valve and the vapor eliminator.
Remove the Screws (1) securing the cover (2) from the
valve body (4).
Remove the differential valve piston assembly (8) and
spring (7).
Inspect the valve body and cover for damage. Clean all
surfaces of dirt or deposits using a fine (200 grit) emery
cloth if necessary. If damage is more than superficial,
replace the valve.
Inspect all seals and replace any brittle or damaged
seals. It is recommended that all seals be replaced
during service.
Replace the U-Cup seals (8a). Note proper position of
the seals. Use a small amount of Teflon lubricant to
help install the seals.
Replace the square cut seal (8b). Use thread sealer
(Locktite Blue) when installing the fastener (7e).
Re-assemble the valve in the opposite manner.
13
Inlet Check Valve Service: (Optional component)
Disconnect the outlet piping from the meter assembly at
the differential valve outlet flange.
Remove the meter as detailed in the METER DISAS-
SEMBLY section.
Remove the back check valve assembly (11).
Manually open and close the valve to assure proper
operations.
Inspect for dirt of salt build-up and clean if necessary.
Inspect the seals for wear or damage. Replace worn or
brittle seals.
Reassemble the valve and install in the strainer hous-
ing. This valve is optional and will not retrofit into strain-
er housing not originally supplied with the valve.
Reassemble the system making sure bolts are torqued
to the proper specifications
Strainer Service: (See page 8)
Remove the four bolts (37) from the rear cover and re-
move the cover (7).
Inspect the seal (12) and replace if damaged or brittle
Remove the strainer (10). Clean the strainer with low
pressure air, blowing out all loose sediment. Wash the
strainer with solvent.
Inspect the strainer for holes or other damage and re-
place if necessary.
Re-assemble making sure the bolts are torqued to the
proper specifications.
Vapor Eliminator Service: (See pages 8 & 11)
Disconnect the vapor return line flange and the differen-
tial valve tubing.
Remove the five bolts (3) from the vapor eliminator
housing.
Remove the cover (4) from the vapor eliminator hous-
ing.
Remove the float and valve assembly (34) from the
cover for inspection.
Inspect the float for damage or leakage. A crack will
allow the float to fill with liquid and sink thus prevent the
valve form closing. A collapsed float is an indication of
over pressure or hammer and these operation condi-
tions must be corrected before reusing the meter.
Flow Meter Maintenance

Air Eliminator Assembly
3/4” Back Check Valve Assembly (Optional)
Differential Valve Assembly
Item # Qty Description Part #
1 Complete Backcheck Valve Assy. VP3075
1 1 Piston, 3/4" Backcheck Valve MP4001
2 1 Spring MS8031
3 1 "O" Ring SL3114-UL
4 1 Body, 3/4" Backcheck Valve MP3075-1
5 1 Poppet, 3/4" Backcheck Valve MP3076
6 1 10-32 x .375 SHCS FS9651
7 1 "O" Ring SL218
14
Item # Qty Description Part #
1 Complete valve assembly DV6100
1 6 Bolt, 1/4"-20 x 1" ALSTPL SHCS FS2801
2 1 Cover, 2/4" Differential Valve CP6101
3 1 "O" Ring, UL Buna SL3224
4 1 Valve Body, 3/4" Differential Valve MP6100
5 1 "O" Ring, UL Buna SL3132
6 1 Spring, 3/4" Differential Valve MS8035
7 1 Repair Kit, Piston, 3/4" Differential Valve RK4000
7a 2 U-Cup Seal, UL Viton SL1212-U
7b 1 "O" Ring, Sq. Cut, UL Buna SL3212-SQ
7c 1 Seal Retainer ST6102
7d 1 Piston, Brass, 3/4" Differential Valve MP4000
Item # Qty Discription Part #
1 A/E Assembly AE8201
1 1 Outlet Port, 3/4" A/E Assembly MP4060
2 1 Valve Sleeve, 3/4" A/E Assembly MP5200
3 1 3/32 Roll Pin MS9260
4 1 Float Connector MP1582
5 1 1/16 Cotter Pin FS9213
6 1 Float MS9100
Flow Meter Maintenance

15
Exploded View

16
Parts List
Item # Description QTY
SINGLE
QTY
TWIN
1 Relief Valve
1
MS8400
1
MS8400
R
2.a Flange 1" FNPT(ALUM)
1
MP2568
1
MP2568
Flange 1" FBSP (ALUM)
1
MP2569
1
MP2569
3 1/4-20 x 5" Hex Bolt
6
FS2910
6
FS2910
4 Cover, Vapor Eliminator
1
MP2561
1
MP2561
5 Housing, Vapor Eliminator
1
MP2565
1
MP2565
6 O-Ring, Buna
2
SL3156
1
SL3156
R
7 Strainer Flange, Blind
1
MP2562
0
MP2562
8 Thermowell
in S83, S84, E83, E93, E71-73
00
in S86, S88, E86 & E96
1
MP2564-1
1
MP2564-1
9StrainerHousing
1
MP2560
1
MP2560
10 Strainer Basket
1
SA8010-200
1
SA8010-200
11 O-Ring, Buna
2
SL3123
1
SL3123
R
12 O-Ring, Buna, Square Cut
2
SL3324-SQ
1
SL3324-SQ
R
2 & 13 Included inflange kits:
3/4" NPT
1
FK2075UA
1
FK2075-1UA
3/4" BSP
or
FK2075UB
or
FK2075-1UB
1" NPT
or
FK2100UA
or
FK2100-1UA
1" BSP
or
FK2100UB
or
FK2100-1UB
14 Post Plate Assembly
1
CP25952
2
CP25952
R
15 Dowel Pins
2
MS2119-8
4
MS2119-8
16 included in #14 nss nss
17 Gear Set
1
GS550CC
2
GS550CC
R
18 O- Ring, Buna
2
SL3151
4
SL3151
R
19 Meter Body
1
MB2551
2
MB2551
20 1/4" - 20 x 3.25 SHCS
4
FS2911
4
FS2911
21 Dowel Pins
2
MS2001
4
MS2001
22 Cover, Chamber
1
MP2574
2
MP2574
22b SCL Assembly, 5V regulated ***
1
EL0300-5-1-3
2
EL0300-5-1-3
R
SCL Assembly, 6-12 V ***
or
EL0300-5-3-3
or
EL0300-5-3-3
23 1/4" - 20 x 1.25 SHCS
4
FS1803
8
FS1803
24 Gasket,Dust Cover
1
SL7000
2
SL7000
25 Dust Cover
1
ST1301
2
ST1301
26 1/4" - 20 x 0.5 SHCS
2
FS9812
4
FS9812
27 1/4" - 20 x 0.375 SHCS w/hole
2
FS9810
4
FS9810
28 Differential Valve
1
DV6100
2
DV6100
R
Differential Valve Hose Assy.
1
MS5075
2
MS5075
29 O- Ring, Buna
2
SL3127
4
SL3127
R
31 1/4" - 20 x 1"- Hex Bolt
4
FS2801
8
FS2801
33
Cover Blind
1
MP2573 MP2573
34
Vapor Eliminator Float Assy
1
AE8201 AE8201
R
35
1/4" Lock Washers
10
FS9302 FS9302
37
1/2" - 13 x 1.25" Hex Bolt
9
38
Strainer Basket Magnet
1
MP5008 MP5008
39
Magnet Holder
1
MS7017 MS7017
*** Not all SCL software is the same. Output type and frequency may vary.
Please have meter model and S/N available for your specific product.
R= Recommended Spare Parts

Problem
Leakage from seal cover.
Product flows through meter but the regis-
ter does not operate
Breaking teeth on gears.
No flow or low flow through the meter
Meter operates too slowly:
Product flows through the meter but regis-
ter does not record properly:
Probable Cause and Solution
Seal has been damaged due to shock
Cover bolts have not bee tightened sufficiently
Replace seal and /or re-torque bolts
Pulser is not functioning properly
Meter gears are jammed and not turning
Replace the pulser, inspect internal meter parts
Starting or stopping flow too rapidly.
Normal wear after long service
Replace gears
Correct system operation
Check pump by-pass setting.
Faulty non-functioning pump
Differential vale not open or not functioning. Replace valve
Meter “frozen” due to build up of salts or frozen material. Clean meter
internals and inspect for damage
Vapor vent line valve shut or obstruction in vapor vent line. Open valve
or remove obstruction
Strainer dirty and plugged. Clean Strainer
U-Cups on differential valve leaking. Replace U-Cups
Differential valve internal mechanism faulty. Valve does not open fully.
Meter gears or rotors partially “salted”, enough to slow the rotating
gears. To correct, clean gears.
Strainer partially plugged. Clean strainer basket.
Pump not functioning properly. Repair pump
Pulse output board faulty, or not calibrated for electronic register.
Vapor release valve sticking.
Differential valve leaking.
Repair or replace as necessary.
17
Trouble Shooting

18
SCL & Pulser Assembly
SCL (Scaler/Calibrator/Linearizer)
Description: Tuthill SCL is a small electronic device de-
signed to provide the function of a pulse Scaler, an electron-
ic Calibrator and Linearizer. This electronics package
replaces a mechanical gear plate and mechanical calibrator
while at the same time providing the ability to improve the
accuracy of a metering device during low flow operation,
thus improving the overall meter accuracy, and extending
the flow range of the metering device. The SCL may be
used in conjunction with other Tuthill electronics to solve
many of your electronic interface requirements.
Specifications:
Input Voltage : 5Vdc and 6 to12 Vdc
Input Current : 25ma @ 5Vdc
Operating Temperature: -40
oC to +85°C
(U/L T4 upper limit is +40C)
Input signal : Hall Effect sensors, single or
dual, or single ended input
from5Vdclogic
Input Frequency : 2000 Hz (max)
Output:
Quadrature Pulse
Output Voltage : Proportional to
power supply voltage
Duty Cycle : Symmetrical Quadrature
with 50/50 D.C.
Output Frequency : (Input Frequency) X (ECF)
Scaled to application
Linearizer : 32 points maximum
Calibrator Range : +/- 3.0%
Output pulse on-time : Fixed by firmware
OPERATION:
The SCL may be used to perform a number of functions
depending upon the users application. The following is a
brief description of several of the SCL functions.
SCALER MODE:
When operating in the Scaler mode only, the SCL applies a
single error correction factor (ECF) to the incoming pulse
signal. If a single correction factor is applied to the entire
range of meter frequency inputs then the output frequency is
proportional to the input frequency times the ECF (SCL
Pulses out = SCL Pulses in times ECF). If the ECF is 1.0
(no scaling factor) the output frequency is equal to the input
frequency.
As an example, use this feature when the customer’s elec-
tronics requires a precise frequency or pulse resolution in-
put. If the customer’s electronics required 100 pulses per
liter, then 100 PPL becomes the base pulse resolution
based on which all input pulses are scaled. If, as an exam-
ple, the meter is providing 108 pulses per liter, then an ECF
of 0.925 (100/108) would be programmed into the SCL, and
the output pulse frequency would be equivalent to the se-
lected base resolution of 100 PPL.
LINEARIZER MODE:
If a metering device is not producing an output within the
limits of accuracy required for an application, the SCL may
be used as a linearizer. A linearizer is a device, which rec-
ognizes the output frequency of the metering device, and
applies a correction factor (ECF), chosen for that frequency
to improve the accuracy of the metering device.
The number of ECF points chosen for a specific application
depends upon the accuracy of the metering device. In
weights and measure applications, there is an ECF applied
at each flow rate point where the meter accuracy varies by
0.25% from the previous flow rate point.
The ECF data is stored electronically in the SLC at the facto-
ry . The electronic chip storing this data is permanently at-
tached to the printed circuit board. The ECF chip is marked
with a code, that is used to reference the exact set of ECF
data, that is supplied in your SCL device.
CALIBRATOR MODE:
The SCL is equipped with two rotary switches S3 and S4,
and a two position switch S2. The three switches allow the
SCL to adjust the pulse output up or down by 3%.
This allows the operator, or W&M authorities to calibrate the
meter without having to alter scale factors in customer elec-
tronics. This feature is designed to replace mechanical cali-
brators used in the field for years to adjust the meter output
to accurately match the volume in a proving vessel.
The calibrator feature may be used if the SCL in being used
as a scaler only, or as a scaler/linearizer.
SWITCHES:
S1 : Allows the choice of either a single channel input,
or a two channel quadrature input.
S2 : Is used in conjunction with S3 and S4.
If in the minus (-) position, an increase in the S3 and
S4 switch settings will decrease the pulse output. A
decrease in pulse output will increase the volume in
a prover vessel. If in the plus (+) position, an in-
crease in the S3 and S4 will increase the pulse out-
put. An increase in pulse output will decrease the
volume in the prover vessel.
S3/S4 Adjust the SCL pulse output up or down +/-3.0%.
S3 and S4 will allow for 00-99 settings. Each incre-
ment changed in this setting, changes the SCL
pulse output by approximately 0.03%

19
Flow Meter Calibration
METER CALIBRATION:
Flow meter re-calibration should be on a volume
equal to 1 minute of flow at maximum flow rate.
All tests should be performed 3 times under identi-
cal conditions to confirm repeatability.
Maintain a permanent file for each flow meter, and
record % change each time the meter is re-
calibrated.
When the change is significantly higher than that
found in previous re-calibrations, it is time to re-
build the flow meter (replace the two oval gears).
METER CALIBRATION:
The calibrator allows you to adjust the output of the SCL up
or down, like a mechanical calibrator, +/- 3% in increments
of 0.03%.
After calibrating a known volume (X) into an accurate
prover (or through a master meter with adequate resolu-
tion), compare with register reading (Y) and calculate
correction:
To reduce the volume in a prover vessel (can), place
switch S2 in the plus(+) position.
Adjust the S3 and S4 to the position required for the
necessary volume reduction in the prover can. Switch
S3 and S4 represent readings of 00 to 99, and each
increment will adjust the output approximately 0.03%.
Example:
Using a 20 gallon (75.7 liter) can, the can reads 113.5
ml high. The meter error is (113.5/75700) = 0.0015
or .15%. To adjust the meter output, place S2 in the
positive position, and set S3 and S4 to read 05. This is
approximately a 0.15% adjustment.
Activate the Reset push button switch to enter the new
program settings. Retest the flow meter.
To increase the volume in the prover vessel. Place
switch S2 in the negative (-) position, and set switches
S3 and S4 to the proper settings to adjust the output.
Activate the Reset push button switch to enter the new
data.
NOTE: If S2 is in the plus (+) position, and S3 and S4
are at 15 as an example, then moving the posi
tion of S3 and S4 to 00 will provide a (0.03 x 15)
=.45% increase in the prover volume. To obtain
a greater increase in the prover volume, S2
must be placed in the minus (-) position and S3
and S4 rotated to the proper position to obtain
the desired change in pulse resolution. The
opposite is true if S2 is already in the minus (-)
position at the beginning of calibration.
Finally:
Re-seal the flow meter.
Enter date and % correction on the permanent flow
meter record.
As long as degree of change is moderate, the flow meter is
in good condition.
If there is a sudden significant jump in correction required,
the rotors are likely about worn out. Rotor replacement
should be considered now, rather than letting further wear
cause rotors to start rubbing on flow meter housing.
METER CALBRATION: INCREASED PRECISION.
The standard method for calculating the single point adjust-
ment is to obtain the error as a percentage of the desired
test volume. In the previous examples, an excess volume in
the prover vessel of 113.5 ml became 0.15% and the adjust-
ment was 05 on S3 and S4.
However, the 0.15% correctly needs to be applied to the
nominal ECF for the particular meter profile in order to more
precisely calculate the adjustment for S3 and S4. The nomi-
nal ECF is the particular profile base divided by the natural
meter pulse resolution.
As an example, a meter type which is scaled to 100 ppl and
has 410 ppg pulse resolution, has a nominal ECF of
378.5/410 = 0.9232. 0.15% of 9232 is 13.84. When divided
by 3, the switch setting is 04.6. In this example, 4.6 is
rounded up to 05. This is the same result as before be-
cause the ECF is close to unity (1.0000). If the ECF was
0.4200, then the switch setting would be 02.
There are applications where the nominal ECF is not near
unity. In those cases, the nominal ECF needs to be known
and used for the calculation. If the standard calculation is
used, the adjustment would be excessive and the meter
technician would have to estimate the reduction in his set-
tings and perform an additional test run.
X-
Y
Xx 100
= % correction

20
NOTES
This manual suits for next models
10
Table of contents
Other Tuthill Measuring Instrument manuals

Tuthill
Tuthill FILL-RITE TN700 Series Use and care manual

Tuthill
Tuthill Fill-Rite 900 Series Use and care manual

Tuthill
Tuthill FILL-RITE TT10A Use and care manual

Tuthill
Tuthill Sotera 900 Series Use and care manual

Tuthill
Tuthill FILL-RITE 900DB Use and care manual

Tuthill
Tuthill TT10P Use and care manual

Tuthill
Tuthill TS10A Guide

Tuthill
Tuthill FILL-RITE 900CD User manual

Tuthill
Tuthill FILL-RITE TT10AN Use and care manual

Tuthill
Tuthill FILL-RITE TT10A Use and care manual