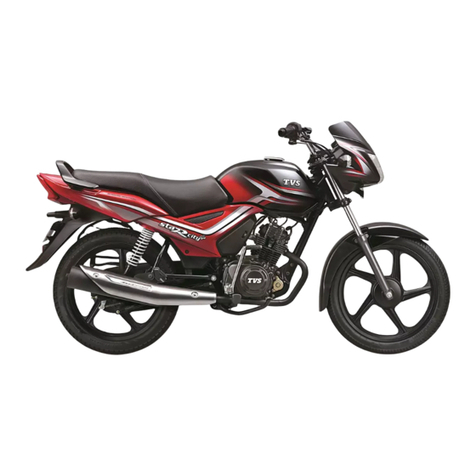
TVS HLX PLUS 2019 User manual

FOREWORD
1
FOREWORD
Dear Friend,
Thank you for choosing the TVS HLX PLUS, strongest and most reliable motorcycle.
As a proud owner of TVS HLX PLUS, you are now part of a family of millions of satisfied TVS customers.
TVS HLX PLUS designed to deliver superior mileage and long-lasting performance. It also comes with
refreshing looks.
This manual explains the features and operations of your TVS HLX PLUS. Please read it carefully and follow the
instructions to enjoy years of safe riding.
To ensure reliable performance, we urge you to get your TVS HLX PLUS serviced only at TVS Motor Company
Authorised Distributor or Dealer / Authorised Service Centers at specified regular intervals.
Happy Riding!
TVS MOTOR COMPANY LIMITED

SAFETY INFORMATION
SAFETY INFORMATION
2
Operating this vehicle safely is an important responsibility of the rider. To help you make decisions about safety,
we have provided operating procedure and other information in this manual. This information alerts you on
potential hazards that could hurt you or others. Since it is not possible to warn you about all hazards associated
with operating or maintaining the vehicle, you must use your own judgement.
You will find important safety information in following form with corresponding connotations in this manual.
Disregarding this message might result in injury to the rider.
This message indicates special procedures or precautions to be followed to avoid damage to the vehicle.
This message provides further clarification for clearer understanding of any particular information.
Caution
Warning
Note

NOTICE
3
NOTICE
All information, illustrations, photographs and specifications contained in this owner‘s manual are based on the
latest product information available at the time of this publication. TVS Motor Company Limited may, however
incorporate modifications or improvements on its vehicles at any time without notice and therefore, in such
events it is possible that the relevant part of the owner‘s manual does not apply to your vehicle.
Prior permission of TVS Motor Company Limited is required for quoting, copying or reproducing any part of this
owner‘s manual.
Part number:- N6211060 Revision 0, October 2018
Accessories shown in the picture may not be a part of standard equipment.
Note

Running-in information 05
Safe Riding Tips 06
Know your TVS HLX PLUS 09
Riding your TVS HLX PLUS 23
Maintenance 27
Service Record Sheet 40
Technical Specifications 42
CONTENTS
CONTENTS
4

The first 1000 km is a crucial part for the life of your TVS HLX PLUS. Proper running-in operation during this
period helps in ensuring maximum life and smooth performance of your motorcycle.
The reliability and performance of your TVS HLX PLUS depends on the special care and restraint exercised
during the running-in period. It is especially important that you avoid operating the engine in a manner, which
could expose the engine parts to excessive stress. Maximum recommended speed during the running-in is:
Maximum 50 kmph speed upto 1000 km (vary the engine speed for better mating of parts).
The first service at 500 ~ 750 km is most important. During running-in period all the engine components and
other parts will have set in. All adjustments to be restored, all fasteners to be tightened. Engine cum
transmission oil to be replaced. Timely performance of the first service will ensure optimum service life and
performance from the engine.
RUNNING-IN INFORMATION
5
RUNNING-IN INFORMATION
Replacing the engine cum transmission oil during first service is most important for better life of engine. Always
use TVS TRU4 DURALIFE oil (SAE 20W50 API-SL) for better performance and life.
Caution

SAFE RIDING RECOMMENDATIONS
Any two wheeler riding requires some precautions to be taken to ensure the safety of the rider, pillion rider and other road
users. These precautions are:
Riding apparel
Loose, fancy clothing can be uncomfortable and unsafe when riding a two-wheeler. Choose good quality two wheeler riding
apparel.
Familiarise yourself with new TVS HLX PLUS
Riding skill and your mechanical knowledge form the foundation of safe riding practices. We suggest you to practice riding in a
low-traffic condition until you are thoroughly familiar with your vehicle and its controls. Remember practice makes you
perfect.
Know your limits
Ride within the boundaries of your own skill at all times. Knowing these limits and staying within them will help you to avoid
accidents.
SAFE RIDING TIPS
SAFE RIDING TIPS
6
Two wheeler safety starts with wearing a good quality helmet. One of the most serious injuries that can happen is a head
injury. Always wear an good quality helmet that should fit your head comfortably and securely. You should also have good
quality goggles to protect your eyes and help your vision.
To prevent or minimize accident, never consume alcohol or drugs before or during the operation of your vehicle. Even minimal
consumption of these will affect the rider’s ability to control the vehicle.
Warning

7
SAFE RIDING TIPS
Posture
Proper vehicle riding starts with proper posture:
1. Keep your elbows inside close to the body and kept
flexible.
2. Hold your arms at an angle of about 120°.
3. Hips should be in a position so that arms and shoulders
are relaxed.
4. Look widely instead of gazing at one point.
5. Relax to guard against a sudden impact.
6. Hold the tank tightly with knees.
7. Point the toes straight ahead.
Cornering
When cornering, centrifugal force works in a direction
perpendicular to the direction in which the vehicle is
moving.
Centrifugal force increases in proportion with speed and
shorter the radius of the corner, the greater it becomes.
During cornering, reduce speeds so as to lessen the effects
of centrifugal force. By all means, avoid abrupt application
of brakes or sudden steering.
SAFE RIDING TIPS
One-hand riding is dangerous. Keep both hands firmly on
the handle bar and both feet securely on the foot rest.
Under no circumstances should both the hands be
removed from the handle bar, as it is very dangerous.
Warning
Warning
Avoid use of mobile phones while riding as it could lead to
fatal accident.
Do not downshift the gears in the midst of cornering. Slow
down to a safe speed before negotiating a corner. If this is
the first time that you are riding a vehicle of this type, we
suggest that you practice on a safe, open area to become
thoroughly familiar with the operation of the vehicle.
Braking
For safe riding, it is very important to master the braking
techniques:
1. Close / release the throttle.
2. Hold the vehicle upright as you apply the brake.
3. Progressive application of brakes is safer.
4. Never depress the clutch lever while braking at higher
speeds.
5. Apply both the brakes.
6. Riding down hills and while cornering, close throttle
and down shift the gear to take advantage of gearbox
and engine which acts as an additional brake. This will
avoid the loss of control over the vehicle due to over
speed.

SAFE RIDING TIPS
SAFE RIDING TIPS
8
Causes for poor braking:
1. If the brake shoes or drum are worn out or if there is
water or oil on them, sufficient friction does not
develop and brakes do not work well.
2. Even when the brake works normally, if the road
surface is wet or the tyre surface is worn-out, tyres do
not take a firm hold on the surface, prolonging the
stopping distance.
3. Approximately 60% braking effect is from front brake.
Non-usage of front brake causes poor braking.
Warning
ACCESSORY INSTALLATION AND SAFETY TIPS
Use extreme caution while selecting and installing the
accessories for your TVS HLX PLUS.
The addition of unsuitable accessories can lead to unsafe
operating conditions. Your friendly dealer will assist you in
selecting quality accessories and installing them correctly.
While selecting the accessories, make sure the
accessories should not obstruct lighting, steerability and
suspension level.
Additional electrical equipments and controls should not
exceed the specified electrical system load of the vehicle.
EMISSION CONTROL
All the TVS motorcycles are tested in the factory for
optimum fuel efficiency and lowest possible CO levels.
Kindly do not disturb the Carburettor settings as this may
lead to higher fuel consumption and also higher CO levels.
If the vehicle needs any adjustments, please consult
nearest your TVS Motor Company Authorised Dealer or
Authorised Service Centre.
While adequate care is exercised at the factory to ensure
that the emissions are within the limits, it is essential for the
owner to always maintain TVS HLX PLUS motorcycle in
good condition by getting it periodically serviced and
checked by TVS Motor Company Authorised Distributor or
Dealer / Authorised Service Centre so that the emission and
fuel consumption levels are maintained as per norms.
As the vehicle speed increases, the stopping distance also
increases progressively. Be sure that, you have sufficient
distance between you and the vehicle or obstruction ahead
of you.
Using only the front or rear brake is dangerous and can
cause skidding and loss of control. Apply both the brakes
together and with great care on a wet road or other slippery
surfaces. Any abrupt braking on slippery or irregular roads
can cause loss of rider control.
9
KNOW YOUR TVS HLX PLUS
Control key number
Engine number
Please fill the above box now for future reference
VEHICLE IDENTIFICATION NUMBER
Serial numbers of both frame and engine are required for vehicle identification. They are also required to assist your
Distributor or dealer for operating parts or referring to special information.
Frame number
The frame serial number is stamped on the left side of the
steering head tube.
The engine serial number is stamped on the surface of left hand
side crank case near the cylinder block mounting.
For Electric Starter Model For Kick Starter Model

KNOW YOUR TVS HLX PLUS
10
6. Speedometer cable
7. Front brake cable
8. Lock cover frame L
9. Handle pillion
1. Spark plug
2. Gauge oil level
3. Rear brake pedal
4. Kick starter lever
5. Cover frame R screw
6. Rear shock absorber R
7. Pillion foot rest R
8. Muffler assembly
9. Fuel tank cap
VEHICLE LEFT SIDE VEHICLE RIGHT SIDE
765 4
8
3 2 1
9
8765 4 3 2 1
LOCATION OF PARTS
1. Pillion foot rest L
2. Rear shock absorber L
3. Chain inspection window
4. Gear shift lever
5. Fuel cock
9

11
KNOW YOUR TVS HLX PLUS
VEHICLE REAR SIDE
1. Mirror R
2. Tail / brake lamp assembly
3. Rear turn signal lamp R
4. Rear number plate
5. Pillion foot rest L
6. Rear turn signal lamp L
7. Mirror L
2
1
3
4
5
2
71
5
63
4
LOCATION OF PARTS
VEHICLE FRONT SIDE
1. Front turn signal lamp L
2. Head lamp assembly
3. Front number plate
4. Rider foot rest
5. Front turn signal lamp R

KNOW YOUR TVS HLX PLUS
12
CONTROL KEY
TVS HLX PLUS comes with a pair of identical control keys.
These keys are to operate ignition switch cum steering
lock, fuel tank cap and cover frame L.
IGNITION SWITCH CUM STEERING LOCK
The ignition switch cum steering lock has three positions:
1. ‘OFF’ position
All the electrical circuits are turned ‘OFF‘ in this position.
Key can be taken out.
2. ‘ON’ position
Key cannot be removed in this position, you can start the
engine and operate turn signal lamp, brake lamp and horn.
3. ‘LOCK’ position
TVS HLX PLUS steering can be locked in both left and right
directions.
To lock the steering, turn the handle bar all the way to the
left or right. Insert the key into the lock, push in, hold and
turn it to ‘LOCK’ position. Take out the key once the
steering is locked.
Turning the key to ‘OFF’ or ’ON’ position unlocks the
steering .
Caution
Leaving the key in ‘ON’ position will drain the battery when
vehicle is not in use . So “Switch off” and take the key out
when the vehicle is not in use.
Warning
Never attempt to move the vehicle when the steering is
locked, you may lose the balance.

13
KNOW YOUR TVS HLX PLUS
SPEEDOMETER ASSEMBLY
1. Speedometer
Indicates the road speed in kilometers per hour.
2. Odometer
Registers the total distance covered by the vehicle in
kilometers.
Last digit of the odometer denotes one tenth of a kilometer.
3. Turn signal indicator left
When the turn signal lamp switch knob is pushed to the left
side ( ), the left side turn signal indicator lamp flashes.
1
2
4. Fuel gauge
Fuel gauge indicates the approximate quantity of fuel
available in the fuel tank.
5. Turn signal indicator right
When the turn signal lamp switch knob is pushed to the
right side ( ), the right side turn signal indicator lamp
flashes.
6. Neutral indicator (N)
The green lamp glows when the vehicle is in neutral
condition and the ignition key is in ‘ON’ position. This lamp
will not glow when the vehicle is in gear.
7. High beam indicator
When the head lamp high beam is ‘ON’, a blue indicator
( ) glows.
HANDLE BAR LEFT SIDE FOR ES & KS MODELS
1. Choke lever for ES & KS
Choke is required for starting a cold engine.
Choke lever is provided on the left side of handle bar. Pull
the lever to the extreme left to switch ‘ON’ the choke. Once
the vehicle is started and engine is running at stable speed,
release the lever to its original position.
2. Horn button for ES & KS
Press the knob ‘ ’ to operate the horn.
45
6 7
3

23 1
5 6
4
KNOW YOUR TVS HLX PLUS
14
3. Turn signal lamp switch for ES & KS
When the turn signal lamp switch knob is pushed to the left
side ( ) or right side ( ), the turn signal lamps flashes
along with the indicator.
4. Clutch lever for ES & KS
Use clutch lever to disengage the drive to the rear wheel
while shifting the gears. Pressing the lever disengages the
drive.
5. Pass by switch for ES & KS
The head lamp high beam glows when the pass by switch
knob ( PASS ) is pressed.
Press the knob intermittently while overtaking another
vehicle during day time to give signal to the opposite
vehicles.
6. Head lamp high/low beam switch for ES & KS
Press the knob towards ‘ ’ to operate the head lamp high
beam.
Press the knob towards ‘ ’ to operate the head lamp low
beam.
4
1
57
23
6
Note
ES - Electric Starter.
KS - Kick Starter.
Handle bar left side for ES model Handle bar left side for KS model

15
KNOW YOUR TVS HLX PLUS
7. Head lamp switch for KS
Head lamp switch has two positions ‘ ’ and ‘ ’ to
control head lamp.
Off : Head lamp, speedometer lamps and tail lamp
are ‘OFF’ when the knob is positioned at ‘ ’.
On: Head lamp, speedometer lamps and tail lamp
glows when the knob is positioned at ‘ ’ and
engine is running.
Always use choke for cold starting.
Never open the throttle when the choke is applied, it may
lead to flooding of engine and difficulty in starting.
Always use the appropriate turn signal lamp when you
intend to change lanes or take turns. Be sure to switch
‘OFF’ the lamp after negotiating the lanes or turns.
Use appropriate head lamp high/low beam as per the traffic
and road conditions for your safety and to avoid
inconvenience to the opposite riders.
Caution
Warning
HANDLE BAR RIGHT SIDE FOR ES & KS MODELS
1.Electric Starter Switch for ES
Press the switch to start the engine electrically even when
the vehicle is in any gear.
2. Head lamp switch for ES
Head lamp switch has two positions ‘ ’ and ‘ ’ to
control head lamp.
Off : Head lamp, speedometer lamps and tail lamp
are ‘OFF’ when the knob is positioned at
‘ ’.
On: Head lamp, speedometer lamps and tail lamp
glows when the knob is positioned at ‘ ’
and engine is running.
3
12
Handle bar right side for ES model
4

KNOW YOUR TVS HLX PLUS
16
3. Throttle grip for ES & KS
Engine speed is controlled by the rotation of the throttle
grip. Twist it towards you to increase the engine speed.
Twist it away from you or release it to decrease the engine
speed.
4. Front brake lever ES & KS
The front brake is applied by pressing the front brake lever
gently towards the throttle grip. Brake lamp also glows on
application of brake.
3
4
Handle bar right side for KS model
Note
ES - Electric Starter.
KS - Kick Starter.
FUEL TANK CAP
To open the fuel tank cap, move away the protection lid (A)
from its position. Insert the key into the lock and turn it in
clockwise. The tank cap ejects automatically. Take out the
cap along with the key.
To close, press the cap back to its original position by
keeping the front end (arrow marked) towards handle bar.
Take out the key and close the production lid.
Avoid spilling of fuel on the hot engine. Never refill fuel near
open flame. Do not smoke while refueling. Do not use cell
phones while refueling.
Warning
A

17
KNOW YOUR TVS HLX PLUS
Caution
Whenever refueling the bike, fill upto the bottom of neck
portion of the fuel tank. Filling above the neck may result in
improper breathing of fuel tank.
FUEL COCK
Fuel cock has the following three positions:
ON: Fuel flows in this position when the fuel is above
the reserve level in the tank.
RES: Turn the fuel cock lever to this position when the
fuel stops flowing in ‘ON’ position.
OFF: Fuel flow cuts off from the tank to carburettor.
While riding with fuel cock lever in ‘ON’ position and if the
fuel in the tank reaches reserve level, you may experience
engine sluggishness and jerky feeling. Take the vehicle to
the left side of the road while taking care of traffic and
change the fuel cock lever position to ‘RES’.
ON
RES
Do not position the fuel cock lever in between ‘ON’ and
‘OFF’ position as this may drain off entire fuel while riding
the vehicle.
It is good practice to turn the fuel cock lever to “OFF”
position, when the engine is not running.
Caution
Note
KICKSTARTER LEVER
The kickstarter lever is located on the right side of the
engine. The engine can be started by kicking the lever while
the ignition key is in ‘ON’ position and keeping the
transmission in neutral.

It is recommended always to start the vehicle keeping the
gear in neutral position.
KNOW YOUR TVS HLX PLUS
18
Warning
GEAR SHIFT LEVER
Gear shift lever is located on the left side of the vehicle.
ALL GEAR UP (except Nigeria): Shifting into the higher
gears from neutral position is accomplished by depressing
the clutch lever and pressing the rear end of shifting lever
by heel and down shifting to lower gears by pressing the
front end of the lever by toe once for each gear.
ALL GEAR DOWN (exclusively for Nigeria): Shifting into
the higher gears from neutral position is accomplished by
depressing the clutch lever and pressing the front end of
shifting lever by toe and down shifting to lower gears by
pressing the rear end of the lever by heel once for each
gear.
N
1
2
3
4
4
3
2
1
NLower gears Higher gears
N
1
2
3
4
4
3
2
1
N
Higher gears
Lower gears
ALL GEAR
DOWN for KS
model to
exclusive for
Nigeria
ALL GEAR UP
for KS & ES
model to all
countries, except
Nigeria

19
KNOW YOUR TVS HLX PLUS
REAR BRAKE PEDAL
Rear brake pedal is located on the right side of the vehicle.
Press the rear brake pedal with your right foot to apply the
rear brake. The brake lamp glows on application of brake.
Warning
Brakes are items of personal safety and should always be
maintained in proper condition.
CENTRE STAND AND SIDE STAND
TVS HLX PLUS is equipped with centre and side stand. To
place the vehicle on the centre stand (1), hold the handle bar
left grip with left hand and pillion handle with right hand.
Place your foot firmly on the centre stand extension (1a) and
press down with adequate effort. Ensure both the legs of
centre stand are touching ground before placing the vehicle
on the stand.
Side stand (2) can be operated with your foot by pushing it
away from the vehicle till it stops.
2
1
1a
Warning
Always release side stand to its full up position before
putting the vehicle in motion.

KNOW YOUR TVS HLX PLUS
20
Caution
Never sit on the vehicle when it is supported by side stand.
Always park the vehicle on a flat, firm surface.
COVER FRAME L
TVS HLX PLUS is provided with lockable cover frame on the
left side. Open the cover frame to access tool kit, first aid kit
and battery assembly.
1. Insert the key in the cover frame at lock (1) and rotate it
in clockwise direction.
2. Pull out the cover frame gently at (2), slide it forward at
(3) and take out.
2
3
1
Reassembly
1. Assemble the cover frame by carefully sliding the rear
portion (3) on to the hook on the frame while ensuring
the availability of rubber cushion on the hook.
2. Locate its lug (2) on the hole provided in the fuel tank
while ensuring the availability of rubber cushion on the
hole, gently press and lock with the key by rotating in
anti-clockwise direction.
While reassembling the cover frames, ensure that the
rubber cushions provided for the cover lugs are in place.
Caution
COVER FRAME R
Cover frame R can be removed by removing the mounting
screw. Follow the procedure of cover frame L for removal
and reassembly.
Table of contents
Other TVS Motorcycle manuals

TVS
TVS Apache RTR 200 4V Installation guide

TVS
TVS RONIN User manual

TVS
TVS Apacha RTR 310 User manual

TVS
TVS Apache RR 310 User manual

TVS
TVS TVS XL 100 User manual

TVS
TVS DAZZ User manual

TVS
TVS Stryker 3V 2021 User manual

TVS
TVS Metro Plus User manual

TVS
TVS RAIDER User manual

TVS
TVS Racing Apache RTR 160 User manual

TVS
TVS NEO Series User manual

TVS
TVS Sport BS-VI User manual

TVS
TVS APACHE RTR 200 Fi 4V User manual

TVS
TVS TVS StaR HLX 150 User manual

TVS
TVS Apache RTR 200 4V User manual

TVS
TVS Apache RTR 200 4V User manual

TVS
TVS RTR 200 Fi4V 2018 User manual

TVS
TVS ZT125 User manual

TVS
TVS TVS XL 100 User manual

TVS
TVS ETFi VS-VI Radeon User manual