Twine TS-1800 User manual

TS-1800 User Guide
December, 2022
Draft 1 Revision 2.0
© 2022 Twine Solutions Ltd. All rights reserved.
This document and the information contained herein is CONFIDENTIAL to TWINE Solutions Ltd, and shall
not be used, published, disclosed, or disseminated outside TWINE in whole or in part without TWINE’s
consent. This document contains TWINE trade secrets. Reverse engineering based on any of the
information in this document is prohibited.
This copyright notice does not imply publication of this document.
This document shall not be circulated in part or whole outside TWINE.
:

Contents
Confidential
TS-1800 Site Preparation Guide
Page 2
Hatnufa 7, Kiryat Arie, Petach Tiqva, 4951025, Israel
P.O. Box 3391 | +972 3 5589505/606 | twine-s.com
Contents
1. Introduction ........................................................................................................ 4
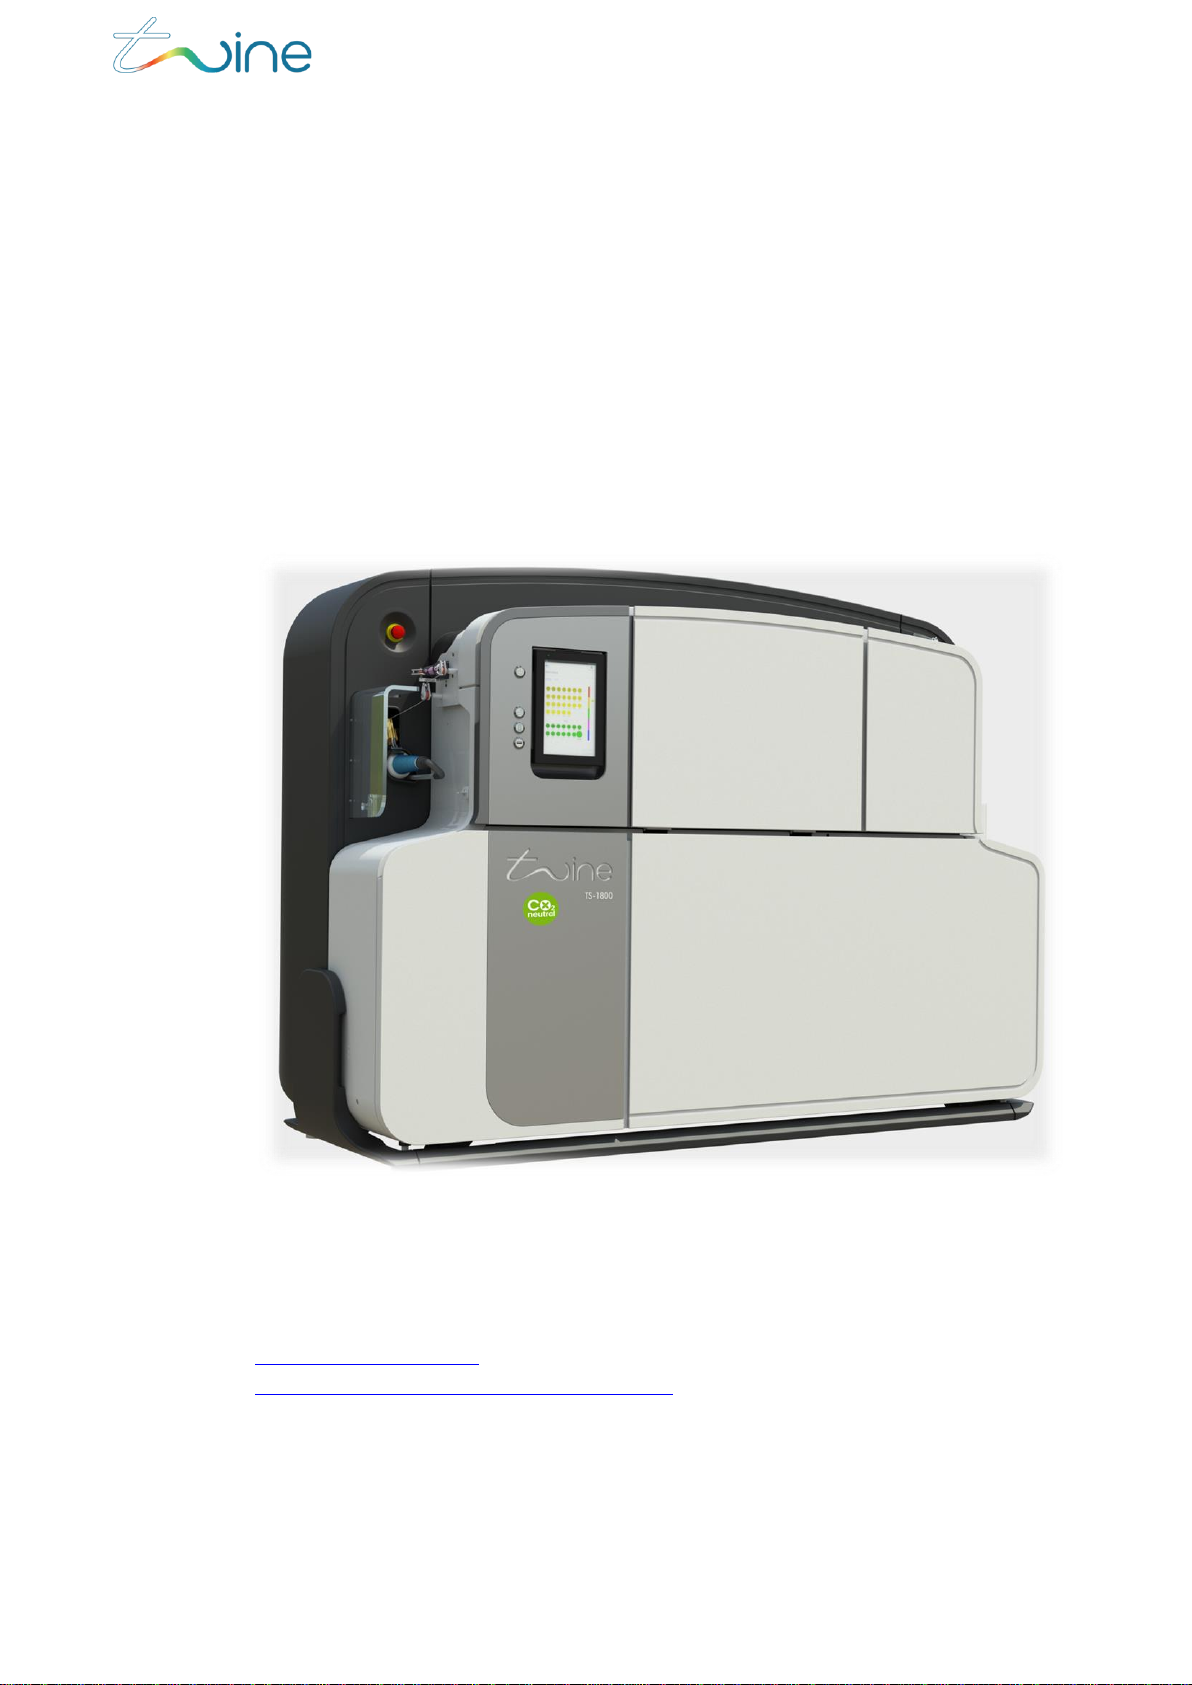
1.1 About the TS-1800 ...................................................................................................................4
1.2 Contacting Twine Support ................................................................................................4
1.3 System Specifications..........................................................................................................5
1.4 Terms and Abbreviations ..................................................................................................5
1.5 Supported Color Spaces ................................................................................................... 6
1.6 Supported Ink............................................................................................................................. 6
1.7 Supported Thread Types................................................................................................... 6
1.8 TS-1800 Parts Overview .......................................................................................................7
1.9 Safety Considerations......................................................................................................... 8
1.9.1 Disclaimer................................................................................................................ 8
1.9.2 Designated Purpose......................................................................................... 9
1.9.3 Regulations............................................................................................................. 9
1.9.4 Safety Notice Definitions............................................................................... 9
2. Operating the TS-1800.....................................................................................10
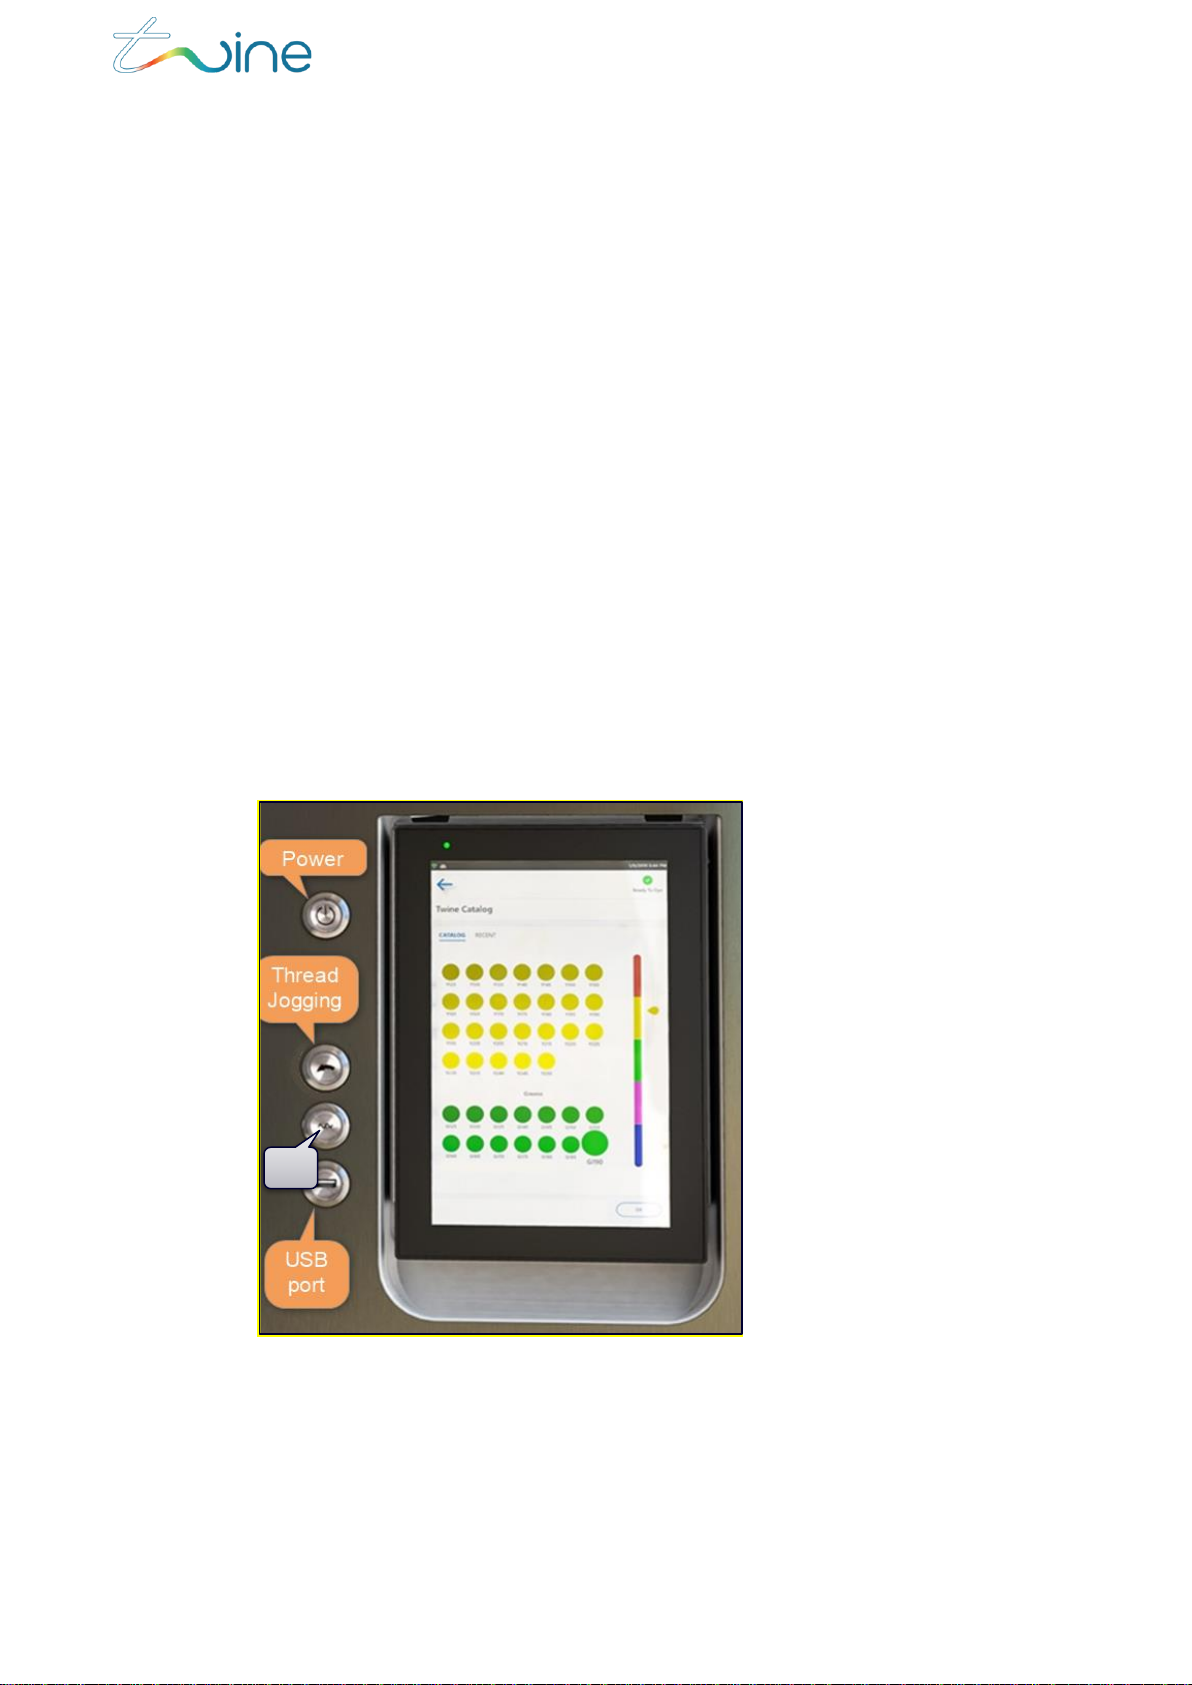
2.1 TS-1800 Operating Panel Button Definition and Functionality.............10
2.1.1 Definition.......................................................................................................................................10
2.1.2 Functionality........................................................................................................... 11
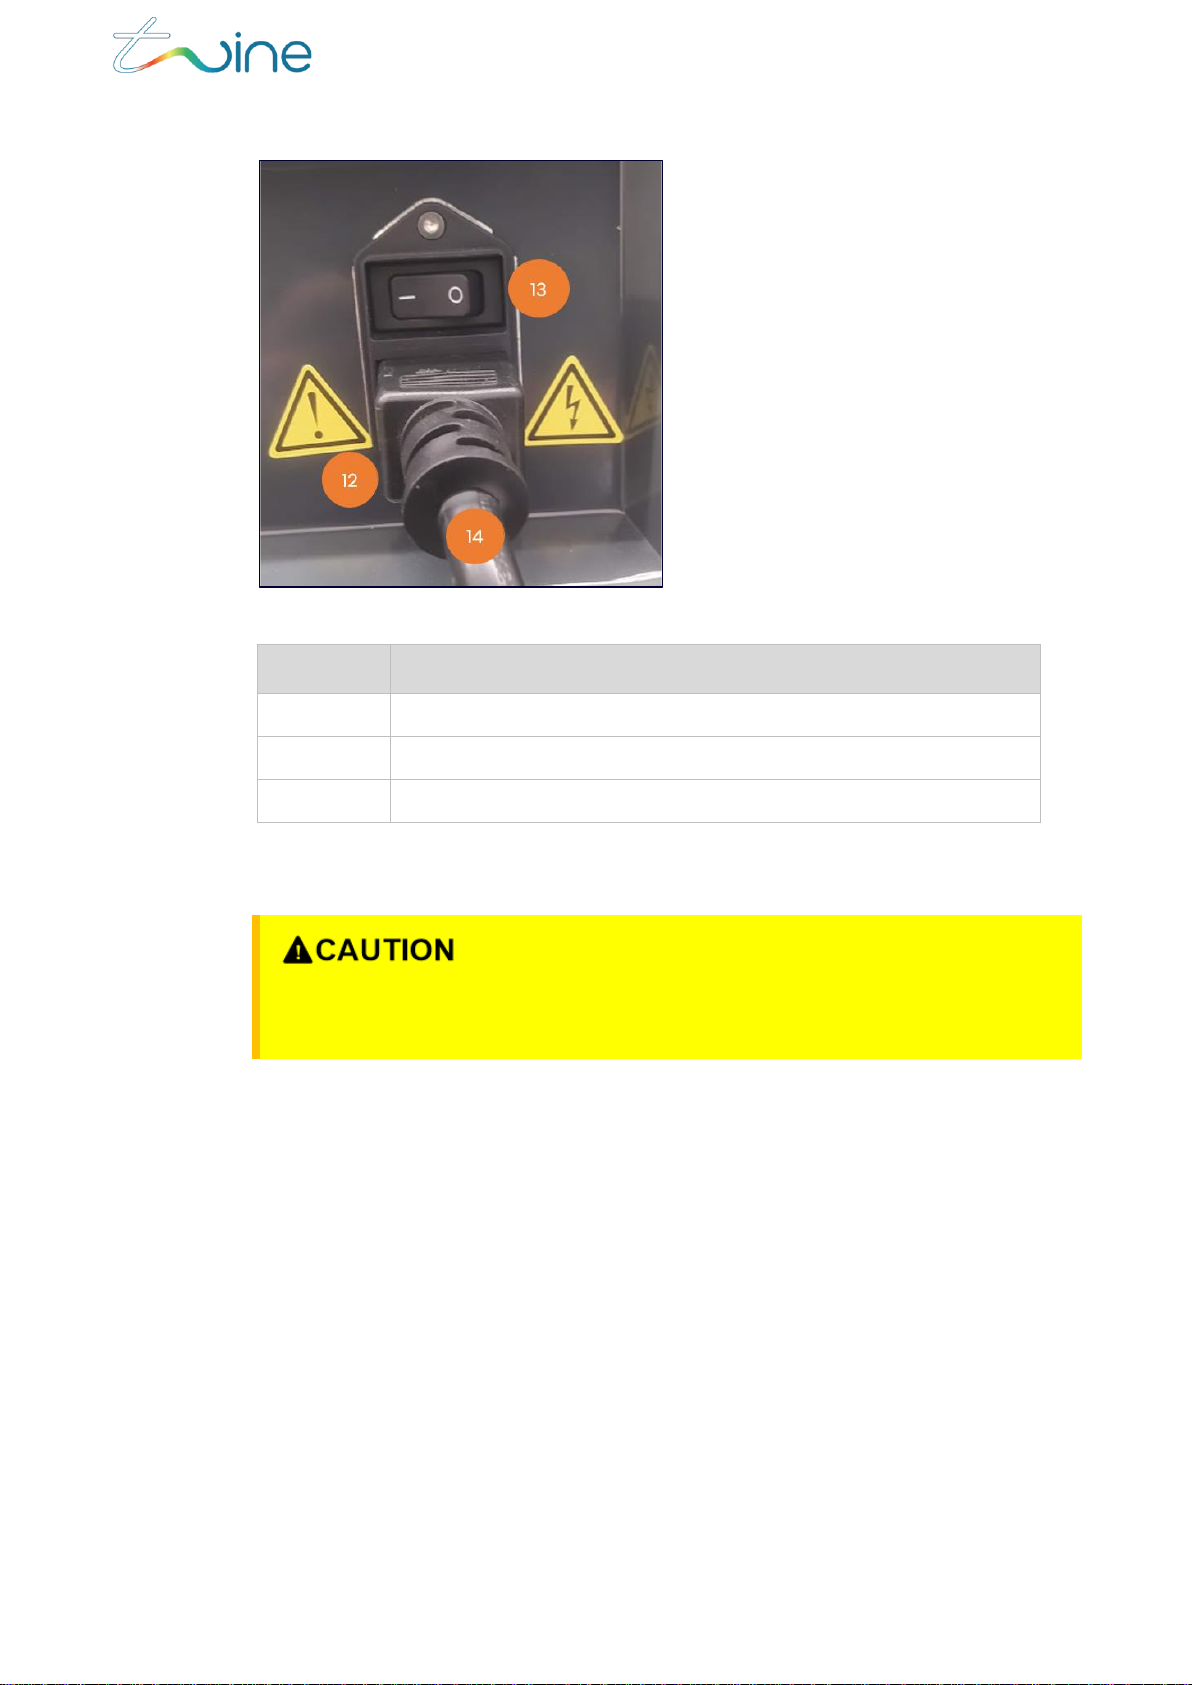
2.2 Powering Up and Down ...................................................................................................... 11
2.2.1 Powering Up ........................................................................................................... 11
2.2.2 Powering Down ...................................................................................................13
2.3 Loading the TS-1800 with Ink or Lubricant...........................................................14
2.3.1 Preliminary Steps...............................................................................................15
2.3.2 Loading an Ink Cartridge.............................................................................16
2.4 Handling Waste......................................................................................................................22
2.4.1 Removing a Waste Cartridge .................................................................22
2.5 Lubricant Filling.......................................................................................................................25
2.6 Thread Loading steps........................................................................................................27
2.7 Inserting an Empty Cone.................................................................................................37
2.8 Replacing the Thread ........................................................................................................38
2.9 Releasing the Current Collecting Cone ...............................................................43
3. Home Screen & Menu ......................................................................................45
3.1 Using the Home Screen.................................................................................................... 45
3.2 Using the Main Menu ......................................................................................................... 46
4. Creating a New Job..........................................................................................48
4.1 Defining the Job..................................................................................................................... 48
4.1.1 White Gap (Spacing).................................................................................... 49
4.2 Color and Length.................................................................................................................. 50

Contents
Confidential
TS-1800 Site Preparation Guide
Page 3
Hatnufa 7, Kiryat Arie, Petach Tiqva, 4951025, Israel
P.O. Box 3391 | +972 3 5589505/606 | twine-s.com
4.2.1 Adding a Solid Color(s) ...............................................................................52
4.2.2 Editing a Solid Color(s) ............................................................................... 56
4.2.3 Unsupported Color(s).................................................................................. 58
4.2.4 Selecting Color from a Catalog ........................................................... 59
4.3 My Colors Libraries ................................................................................................................61
4.3.1 Edit my Color Libraries.......................................................................................................63
4.3.2 Creating a Color Gradient........................................................................ 66
4.3.3 Color Fine Tuning Tool ................................................................................. 68
4.3.4 Job Summary....................................................................................................... 71
4.4 Advanced Segments Management.......................................................................72
4.4.1 Multi Segment Job Loading......................................................................72
4.4.2 Segment Management...............................................................................74
4.5 Managing the Job List ....................................................................................................... 77
5. Update................................................................................................................ 79
6. Maintenance.....................................................................................................80
6.1 Cleaning the Dyeing Head V Groove:....................................................................83
6.2 Cleaning the Dryer Inner Mesh Filters................................................................... 86
6.3 Cleaning the Dyeing Head............................................................................................ 88
6.4 Resetting Thread Loading ............................................................................................. 88
6.5 Operators Guides and Machine Counters........................................................ 88
6.6 Cleaning the Lubrication Tunnel .............................................................................. 89
6.7 Replacing the Carbon Filter ......................................................................................... 90
6.8 Preventive Maintenance (PM) Table ......................................................................93
6.9 View Built in Test (BIT) Results .....................................................................................93
6.10 Collecting Cone not in place error ..........................................................................93
7. Appendix A: Technical Specification...........................................................95
7.1 Electrical Specifications:................................................................................................. 95
7.2 Inputs and Outputs............................................................................................................. 95
7.3 System Environmental Conditions: ........................................................................ 95
7.4 Safety Hazards....................................................................................................................... 95
8. Appendix B: Color Measurement Guidelines and Specification............ 99
8.1 Setup and Measurement............................................................................................... 99
8.2 Preparing the Card for Measurement.................................................................100
9. Customer Acknowledgement......................................................................103

TS-1800 User Guide
Page 4
Introduction
1. Introduction
1.1 About the TS-1800
Twine’s TS-1800 is a unique and revolutionary textile dyeing machine offering on-
demand Digital Thread Dyeing capabilities. You can set the TS-1800 to dye a
single color, multiple colors, or gradient colors, as needed for your particular
dyeing job. The TS-1800 supports various types of raw or standard white polyester
thread and yarn for the sewing, knitting, embroidery and other sectors of the
textile industry.
Figure 1: The TS-1800 thread and yarn dyeing machine
1.2 Contacting Twine Support
In case of any technical question or problem, contact Twine Customer care at
Support@twine-s.com / your Twine representative (contact details at
https://twine-s.com/contact/contact-us/).

TS-1800 User Guide
Page 5
Introduction
1.3 System Specifications
The following are the System Specifications for the TS-1800:
Parameter
Specification
Definition
Digital Thread and yarn Dyeing System
Dye Technology
DST™
Ink
Twine Digital Ink™(TDI)
Certification
CE, ZDHC and Intertek
Pre & Post Treatment
Integrated
Yarn Loading System
Automatic loading system
Yarn Winding System
Integrated winder
Yarn Fiber Type
Polyester
Operator Interfaces
Industrial grade touch screen
Network
Wi-Fi
Remote Support
Secured connection
1.4 Terms and Abbreviations
The following terms and abbreviations are used throughout this document:
Term /
Abbreviation
Definition
BIT
Built-In Test
Coats
The Coats catalog colors
Color space
System for defining colors
EMO
Emergency off button
GUI
Graphical User Interface
LAB
The “CIELAB” color space
MSDS
Material Safety Data Sheets
N/A
Not Applicable
PPC
Panel PC
RFID
Radio Frequency Identification
RGB
The “Red, Green, Blue” color model
RML
Recommended Media List
TGU
Thread Guiding Unit
Job Factor
Percentage of thread added to a job to allow for a certain amount
of spare thread

TS-1800 User Guide
Page 6
Introduction
Term /
Abbreviation
Definition
Color Proofing
Method of checking and approving colors by dyeing a small
sample of each color before dyeing the whole job
Unit
The amount of thread needed to make one complete item
1.5 Supported Color Spaces
Use Twine’s Digital dye-to-match technology to select from an almost unlimited
color gamut. You can dye a solid color or color gradients in single or multiple
segments. The TS-1800 enables you to easily program thread length, sequence,
and more.
TS-1800 currently supports colors from the following color spaces:
Twine
Coats
LAB
RGB
1.6 Supported Ink
The TS-1800 supports Twine’s proprietary TDITM ink cartridges only. It automatically
checks that the ink cartridge inserted is authentic. If the cartridge is not authentic,
it will not proceed with the dyeing process.
USE ONLY TWINE TDITM INK CARTRIDGES. ATTEMPTING TO USE A NON-TWINE
TDITM INK CARTRIDGE MIGHT CAUSE DAMAGE TO THE MACHINE AND COULD
RESULT IN DEGRADED PERFORMANCE.
1.7 Supported Thread Types
Since the TS-1800 supports many types of threads and thread thicknesses, it can
be used to dye thread for sewing, embroidery, and knitting applications. A list of
supported threads can be found in the Recommended Media List (RML).

TS-1800 User Guide
Page 7
Introduction
1.8 TS-1800 Parts Overview
The following tables describe the different parts of the TS-1800, as shown in the
diagrams.
Figure 2: TS-1800 parts front view
Part
Description
1
PPC
2
Dryer Cover
3
Cartridge Cover
4
Thread Feeding Unit
5
Front Service Cover
6
Electrical cabinet Cover
7
Thread Winding Unit
8
Emergency Button
9
Thread Groove
10
TS-1800 Operating Panel (Power / Thread jogging / Thread loading / USB port)
11
Operating Panel Cover

TS-1800 User Guide
Page 8
Introduction
Figure 3: TS-1800 parts rear view
Part
Description
12
AC Power Socket
13
AC Power Switch
14
AC Power Cable with Plug
1.9 Safety Considerations
Do not start using the TS-1800 or attempt to perform any service or
maintenance action before carefully reading through this section.
1.9.1 Disclaimer
It is the customer’s responsibility:
To ensure that the TS-1800 is used for the purpose it was intended (see section
1.9.2 “Designated Purpose”)
To ensure that all Twine instructions and guides are carefully and accurately
followed
Twine assumes no responsibility:
If the TS-1800 is used for any purpose other than that for which it is
intended
If Twine instructions and guidelines are not carefully and accurately
followed

TS-1800 User Guide
Page 9
Introduction
1.9.2 Designated Purpose
The TS-1800 is deemed to be used for its designated purpose if it is used in
accordance with its product documentation and within its performance limits.
It is essential that only trained personnel be allowed to use this system because of
the technical skills and fair level of English comprehension required.
1.9.3 Regulations
To prevent accidents while operating the system, observe all applicable local and
national safety rules and regulations.
1.9.4 Safety Notice Definitions
The following table describes the safety labels used throughout the TS-1800
documentation.
Notice
Definition
Indicates a hazardous situation which will result in death
or serious injury.
Indicates a hazardous situation which might result in
death or serious injury.
Indicates a hazardous situation which can result in minor
or moderate injury.
Indicates a situation where incorrect operation of the
system can result in damage to the product. The label
ATTENTION is used synonymously.
Indicates information related to proper use of the system.
NOTE:
A description of specific product hazards can be found in Appendix A-
Technical Specification
DANGER
WARNING

TS-1800 User Guide
Page 10
Operating the TS-1800
2.Operating the TS-1800
Operating the TS-1800 and preparing it for dyeing involves the following main
steps:
1. Powering it up and down. (Section 2.2 “Powering Up and Down”)
2. Loading ink. (Section 2.3 “Loading the TS-1800 with Ink or Lubricant”).
3. Handling the waste. (Section 2.4 “Handling Waste”)
4. Filling the Lubricant (Section 2.5 “Lubricant Filling”)
5. Loading the thread (Section 2.6 “Thread Loading Steps”)
6. Replacing a cone (Section 2.7 “Inserting an Empty Cone”)
2.1 TS-1800 Operating Panel Button Definition and
Functionality
2.1.1 Definition
The TS-1800 panel buttons are defined in Figure 4.
Figure 4: TS-1800 panel buttons
Not
active

TS-1800 User Guide
Page 11
Operating the TS-1800
2.1.2 Functionality
The functionality of each of the TS-1800 panel buttons is summarized in the tables
below.
2.1.2.1 Power Button
Function
Description
Method
Button Light
Indication
Power up
Powering up the
system
Short press
Blue
Power down
Safe powering
down sequence
Long press (5
seconds)
No light
Standby
Switch to standby
mode
N/A
Blinking Blue
Wake up from
standby
Switch to normal
system operation
Short press
Blue
2.1.2.2 Thread Jogging Button
Function
Description
Method
Button Light
Indication
Thread Jog
Thread is jogging
Press and hold
Blinking Blue
Thread jog locked
Thread is jogging
without pressing
the button
Long Press (5 sec)
Blinking Blue
Jog function
disabled
Function is
disabled when
system is running
Button is disabled
while job is running
Off
2.2 Powering Up and Down
2.2.1 Powering Up
To power up the TS-1800:
1. Make sure that the power cable is connected to the machine power inlet and
to the wall outlet.
2. On the machine panel, press the Power button.

TS-1800 User Guide
Page 12
Operating the TS-1800
Figure 5: Power button
The TS-1800 powers up and performs its startup procedures.
When it has completed its startup procedure successfully, the green Ready to Dye
icon will appear on the upper right side of the operating panel (PPC) screen.
Figure 6: Ready to Dye indicator

TS-1800 User Guide
Page 13
Operating the TS-1800
2.2.2 Powering Down
During normal operation there is no need to power down the system. The TS-1800
enters standby mode when not in use. However, it is necessary to power down the
system during routine maintenance in order to replace or clean parts.
Note that after powering down the system, it can take up to 30 minutes for the
machine to cool down to a temperature suitable for working on the machine.
There are several ways to power down the TS-1800.
From the front panel
Press the Power button (see Figure 5 )and hold for approximately five seconds
until the blue light turns off.
From the main menu of the PPC
Tap the Power button at the bottom of the main menu and select Turn Off to
power down .
This process takes approximately 45 minutes.
Figure 7: Turning off the machine from the PPC

TS-1800 User Guide
Page 14
Operating the TS-1800
SELECTING RESTART FROM THE PPC SCREEN WILL RESTART THE PPC ONLY.
YOU CANNOT RESTART THE SYSTEM FROM THE PPC.
The Emergency Button (EMO)
The EMO button is a safety mechanism used to shut off the machine in an
emergency when it cannot be shut down in the usual manner. It is not safe to
use for a routine shutdown.
Do not use the EMO button for routine power down. Only use the EMO button in
an emergency situation.
2.3 Loading the TS-1800 with Ink or Lubricant
NOTE:
Although “Lubricant” is not an ink color, it is consumable and is therefore
included in this section.
You can load the following TDITM ink cartridges/bottles:
Cyan (C)
Magenta (M)
Yellow (Y)
Light Cyan (LC)
Light Magenta (LM)
Light Yellow (LY)
Black (K)
Transparent Ink (TI)
Lubricant (L)
Load ink in the following situations:
Before using the TS-1800 for the first time.
When the PPC displays a low ink level.
The procedure for loading ink cartridges is the same for all of the above-
mentioned cartridges.
WARNING
Handle cartridges with care and avoid situations that can damage them!

TS-1800 User Guide
Page 15
Operating the TS-1800
2.3.1 Preliminary Steps
1. To determine if the machine needs ink, check the PPC. If the color tank empty
message (see Figure 8) is displayed at the top of the PPC, load the indicated ink color.
Figure 8: Low ink message
NOTE:
You can also check the status of the ink level in the maintenance/diagnostics
screen on the PPC.
IF THE TS-1800 IS CURRENTLY IN OPERATION, YOU MUST MAKE SURE THAT
WASTE EMPTYING IS NOT IN PROCESS. IF THE TS-1800 IS NOT CURRENTLY
OPERATING, SKIP TO STEP 2.3.2 BELOW.
2. Determine if waste emptying is in process by checking the PPC. If the first
message below is shown, wait until the second message appears.
Figure 9: Waste emptying in progress

TS-1800 User Guide
Page 16
Operating the TS-1800
Never open the cartridge cover while waste emptying is in process!
2.3.2 Loading an Ink Cartridge
To load an ink cartridge, do the following:
1. Open the Cartridge cover.2. If there is an ink cartridge in the slot, remove it.
If there is an empty waste cartridge slot available, you can insert the removed
empty ink cartridge into the waste cartridge slot. the direction in step Error! R
eference source not found. below.
3. Insert a full ink cartridge into the upper ink loading cartridge slot as shown.
THE CARTRIDGE MUST BE ORIENTED CORRECTLY TO BE INSERTED. DO NOT
FORCE THE CARTRIDGE INTO THE SLOT. THIS MIGHT DAMAGE THE CARTRIDGE.
Figure 10: Loading an ink cartridge

TS-1800 User Guide
Page 17
Operating the TS-1800
Make sure that the cartridge locks into place. You will hear a click as the latch
locks.
When properly inserted, the LED indicator to the left of the ink cartridge will blink
once.
Figure 11: Ink cartridge loaded
4. Close the cartridge cover.
The TS-1800 will ask you to approve which TDITM ink cartridge has been inserted.

TS-1800 User Guide
Page 18
Operating the TS-1800
Figure 12: Validate cartridge type
Validate the cartridge ink by selecting the correct color and proceed with the
Confirm button as shown in Figure 13.
Relevant ink selection will be highlighted from the other ink options.
Figure 13: Ink selection
Ink loading begins and a progress bar appears on the PPC screen.
The ink filling process takes up to 10 minutes.

TS-1800 User Guide
Page 19
Operating the TS-1800
Figure 14: Ink filling progress
When the process is complete the LED indicator will turn off. The following
message is displayed:
Figure 15: Ink filling progress completed
5. Push the OK button, open the cartridge cover, and remove the empty ink
cartridge.

TS-1800 User Guide
Page 20
Operating the TS-1800
The Waste icon in the Current Status section of the Maintenance screen will show
a dotted gray outline for each empty waste cartridge slot (Figure 16).
Figure 16: Waste Cartridge icon
6. When promoted by a PPC message to insert the Waste cartridge, do so into
an available slot. If there is no empty slot, store the empty ink cartridge in an
allocated cabinet.
Figure 17: Empty ink cartridge moved to a waste catridge slot
Other manuals for TS-1800
3
Table of contents
Other Twine 3D Printer manuals
Popular 3D Printer manuals by other brands

DIYElectronics
DIYElectronics PRUSA I3 ELECTRONICS AND SOFTWARE GUIDE

STEPCRAFT
STEPCRAFT 10046 Operating/safety instructions

FELIXprinters
FELIXprinters Pro Series Firmware update

YIDIMU
YIDIMU Panther user manual

Elegoo
Elegoo NEPTUNE 4 PRO user manual

Prusa Research
Prusa Research Original Prusa i3 MK2 manual