Tyco RV-1A User manual

Model RV-1APressure Relief Valve
Pilot-Operated
Page 1 of 12 MAY 2021 TFP1586
Worldwide
Contacts
www.tyco-fire.com
IMPORTANT
Refer to Technical Data Sheet
TFP2300 for warnings pertaining to
regulatory and health information.
General
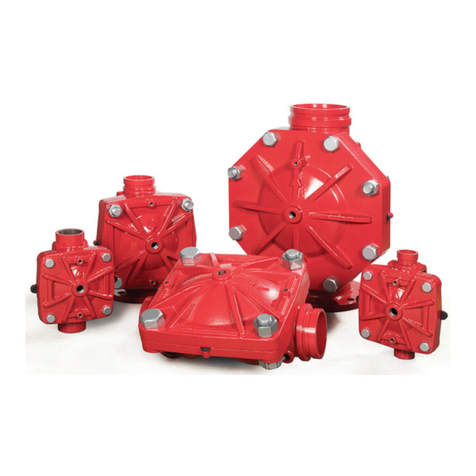
Description
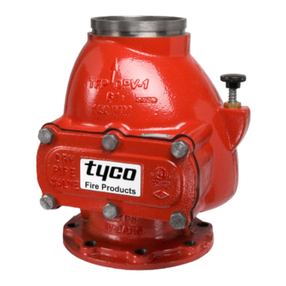
The TYCO Model RV-1aPressure
Relief Valves, 2 in. to 8 in. (DN50 to
DN200), are factory assembled and
fully trimmed valve arrangements for
relief of excess water pressure. These
valves are typically used to automati-
cally relieve excess pressure in a fire
protection system that utilizes a fire
pump.
The DV-5aWater Control Valve is the
central component in the fully-trimmed
assembly. For information on the DV-5a
Valve assembly, see Figure 2.
Pilot-controlled, the Model RV-1aValve
maintains a relatively constant system
pressure at the pump discharge as flow
demands change.
The Model RV-1avalve is factory set to
approximately 175 psi (12,1 bar). The
valve may be field-set to a nominal
relief “set pressure” of 30 to 250 psi
(2,1 to 17,2 bar).
Features
• One-piece, one-moving-part
diaphragm
• Epoxy-coated interior and exterior
• Accurate pressure control
• In-line service
• No need to bleed trapped air from
the diaphragm chamber
• One pilot valve sub-assembly
that provides for any outlet “set
pressure”; that is; 30 to 250 psi
(2,1 to 17,2 bar)
NOTICE
The TYCO Model RV-1aPressure
Relief Valves described herein must be
installed and maintained in compliance
with this document and with the appli-
cable standards of the NATIONAL FIRE
PROTECTION ASSOCIATION (NFPA),
in addition to the standards of any
authorities having jurisdiction. Failure
to do so may impair the performance
of these devices.
The owner is responsible for main-
taining their fire protection system
and devices in proper operating con-
dition. Contact the installing contrac-
tor or product manufacturer with any
questions.
Technical
Data
Approvals
UL Listed
FM Approved
Field Relief “Set Pressure” Range
30 to 250 psi (2,1 to 17,2 bar)
Temperature Range
50°F to 175°F (10°C to 80°C)
Maximum System Pressure
300 psi (20,6 bar)
Note: The system pressure is the maximum
pressure the valve is expected to be exposed
to. The valve cannot be set to relieve at any
pressure greater than 250 psi (17,2 bar).
NFPA 20 Recommended
Maximum Flow
2 in. (DN50) ............. 250 gpm (946 Lpm)
3 in. (DN80) .............500 gpm (1893 Lpm)
4 in. (DN100) ...........1000 gpm (3785 Lpm)
6 in. (DN150) .......... 2500 gpm (9462 Lpm)
8 in. (DN200) ..........5000 gpm (18925 Lpm)
See Graph A for inlet pressure versus flow
characteristics.
End Connections
Flanged end connections are available as
drilled per Table A.
Valve Materials of Construction
See Figure 2
Body
Epoxy-coated ductile iron per ASTM
A536-77, Grade 65-45-12
Diaphragm Cover
Epoxy-coated, ductile iron per ASTM
A536-77, Grade 65-45-12
Diaphragm
Polyester fabric-reinforced, TEFLON
coated, EPDM rubber per ASTM D2000
Diaphragm Cover Fasteners
Aluminium-zinc coated steel
Trim Materials of Construction
See Figure 6
Pilot Valve
Cast bronze and stainless steel with fabric
reinforced, EPDM rubber per ASTM D2000
diaphragm
Pressure Gauges
3 3/4 in. (95 mm) diameter, UL and FM
listed, 0 to 300 psi (20,7 bar)
Strainer, Tube, and Fittings
Stainless steel
All manuals and user guides at all-guides.com

TFP1586
Page 2 of 12
Operation
The TYCO Model RV-1aPressure Relief
Valve is normally installed on-line in a
tee configuration, as shown in Figure 1,
after the fire pump and before the sys-
tem’s check valve.
When the Model RV-1aPressure Relief
Valve opens to permit excess flow and
to relieve pressure to the atmosphere
within the water tank, the fire protec-
tion system is accurately maintained at
the desired preset pressure. In case the
demand of the fire system completely
stops, the Model RV-1aPressure Relief
Valve remains fully open, relieving
100% of the pump’s capacity.
The check valve then closes, isolating
the system from the pump. The pump
shuts off safely, avoiding the risk of
system surges. As the pump shuts,
the Model RV-1aPressure Relief Valve
slowly closes.
The operation sequence, shown in
Figure 3, is as follows:
• When inlet pressure is below the
relief “set pressure”, the Model RV-1a
Pressure Relief Valve Diaphragm
Seat is closed and the Pilot Valve
Seat is closed. With the Pilot Valve
Seat closed, pressure is trapped in
the Diaphragm Chamber to seat the
Diaphragm, and the Model RV-1a
Pressure Relief Valve remains closed.
• When inlet pressure is above the
relief “set pressure”, the Pilot Valve
Seat opens to relieve pressure from
the Diaphragm Chamber faster than
pressure can be re-established. Loss
of pressure in the Diaphragm Cham-
ber allows the Model RV-1aPressure
Relief Valve to open.
• Subsequent to relieving excess pres-
sure, when the inlet pressure starts
to fall below the relief “set pres-
sure”, the Pilot Valve Seat closes to
allow the Diaphragm Chamber to re-
pressurize automatically and close
the Model RV-1aPressure Relief
Valve. The restriction orifice con-
trols the speed at which the Model
RV-1aValve closes to provide a slow
re-closure.
Item
Available End Connections
Nominal Valve Size
in. (DN)
2 (50) 3 (80) 4 (100) 6 (150) 8 (200)
Groove ✓✓✓✓✓
Flange (ANSI) N/A ✓ ✓ ✓ ✓
Flange (PN)1N/A ✓ ✓ ✓ ✓
NOTES:
1. EMEA and APAC only.
WATER
TANK
ISOLATION
VALVE
MODEL RV-1A
PRESSURE
RELIEF VALVE
TO FIRE
PROTECTION
SYSYEM
FIRE
PUMP
CHECK
VALVE
ISOLATION
VALVE
PRESSURE
RELIEF
0
50
100
150
200
250
300
350
0 5000 10000 15000 20000
0 30000 60000
FLOW RATE IN GALLONS PER MINUTE (GPM)
FLOW RATE IN LITERS PER MINUTE (LPM)
(1 GPM = 3,785 LPM)
0
4
8
12
16
20
24
NOMINAL INLET PRESSURE
IN OUNDS PER SQUARE INCH
(PSI)
NOMINAL INLET PRESSURE IN BAR
(1 PSI = 0,06895 BAR)
2 IN.
3 IN.
4 IN.
6 IN.
8 IN.
FIGURE 1
RV-1aPRESSURE RELIEF VALVES
TYPICAL APPLICATION
GRAPH A
MODEL RV-1aPRESSURE RELIEF VALVE
INLET PRESSURE VERSUS FLOW CHARACTERISTICS
All manuals and user guides at all-guides.com

TFP1586
Page 3 of 12
Item Description Qty.
Nominal Valve Size ANSI Inch (DN)
2 (DN50) 3 (DN80) 4 (DN100) 6 (DN150) 8 (DN200)
P/N P/N P/N P/N P/N
1Valve Body 1N/R N/R N/R N/R N/R
2Diaphragm 1545000020 545000030 545000040 545000060 545000080
3Diaphragm Cover 1N/R N/R N/R N/R N/R
4 Hex Bolt, Short 2a545100001 545100002 545100003 545100004 545100003
5Hex Bolt, Long 2545100011 545100012 545100013 545100014 545100015
6Lift Washer 2bN/A 545100021 545100022 545100023 545100022
7Hex Nut 2545100031 545100032 545100033 545100034 545100033
8Hoist Ring 2545100041 545100041 545100041 545100041 545100041
9Flat Washer 2N/A 545100024 545100025 545100026 545100025
NOTES:
a. Hex Bolt, Short, Qty. 6 in 6 and 8 inch (DN150 and DN200) assemblies
b. Lift Washer not used in 2 inch (DN50) assembly
c. N/R = Not Replaceable
d. Order replacements parts only via Part Numbers given, do not
replace Hex Bolt, Hex Nut, Lift Washer or Hoist Ring with com-
mon hardware parts
Nominal
Valve
Size
ANSI
in.
(DN)
Flange Drilling
Specification
Nominal Dimensions in.
(mm)
ANSI B16.1a
(Class 125)
A B N
3
(80)
6.00
(152,4)
0.75
(19,0) 4
4
(100)
7.5 0
(190,5)
0.75
(19,0) 8
6
(150)
9.50
(241,3)
0.88
(22,2) 8
8
(200)
11.75
(298,5)
0.88
(22,2) 8
NOTES:
a. Same drilling as for ANSI B16.5 (Class 150)
and ANSI B16.42 (Class 150)
b. Same drilling as for BS 4504 Section 3.2 (PN16)
and DIN 2532 (PN16)
Nominal
Valve
Size
ANSI
in.
(DN)
Flange Drilling
Specification
Nominal Dimensions in.
(mm)
ISO 7005-2
(PN16)b
A B N
3
(80)
6.30
(160,0)
0.75
(19,0) 8
4
(100)
7. 0 9
(180,0)
0.75
(19,0) 8
6
(150)
9.45
(240,0)
0.91
(23,0) 8
8
(200)
11.61
(295,0)
0.91
(23,0) 12
2 INCH
VALVE ONLY
6 AND 8 INCH
VALVES ONLY
79 5
6
3
4
1
75
3
1
1
2
5
9
1
2
3
8
4
7
6
Dim. A
Bolt Circle
Diameter
Dim. B
Bolt Hole
Diameter
Qty. N
Number of
Bolt Holes
FIGURE 2
DV-5aVALVE ASSEMBLY AND REPLACEMENT PARTS
(See Figure 6 For RV-1aTrim Assembly)
TABLE A
FLANGE DRILLING SPECIFICATIONS
All manuals and user guides at all-guides.com

TFP1586
Page 4 of 12
*
*
OPERATED CONDITION
SET CONDITION
OPEN TO
ATMOSPHERE
DIAPHRAGM
CHAMBER
RV-1A VALVE
WATERWAY
WATER SUPPLY
PRESSURE
GAUGE PORT
PILOT VALVE
RESTRICTION
ORIFICE
FORCE OF WATER
SUPPLY PRESSURE
GREATER THAN FORCE
OF SPRING TENSION
DIAPHRAGM RETRACTS
OPENING VALVE WATERWAY
OVER-PRESSURE
WATERFLOW
FROM WATER SUPPLY
UPSTREAM WATER SUPPLY PORT
OVER-PRESSURE TO PILOT VALVE
SET PRESSURE
FROM WATER SUPPLY
PRESSURE RELIEF
WATERFLOW
PILOT VALVE
SEAT CLOSED
WATER SUPPLY PRESSURE
TO DIAPHRAGM CHAMBER
PILOT VALVE
SEAT OPEN
FORCE OF SPRING
TENSION GREATER
THAN FORCE OF WATER
SUPPLY PRESSURE
SHOWN 90°
OUT OF POSITION
FOR DETAIL
WATER SUPPLY
PRESSURE
WATER SUPPLY
OVER-PRESSURE
PRESSURE RELIEF WATERFLOW FROM PILOT
VALVE TO PRV-1A VALVE DOWNSTREAM PORT
UPSTREAM WATER SUPPLY PORT TO
PILOT VALVE AND DIAPHRAGM CHAMBER
DOWNSTREAM PRESSURE RELIEF
PORT OPEN TO ATMOSPHERE
VALVE WATERWAY CLOSED
BY SEATED DIAPHRAGM
PRESSURE RELIEF
PORT OPEN TO
ATMOSPHERE
THROUGH VALVE
DOWNSTREAM
PORT
PRESSURE
RELIEF PORT
WATERFLOW TO
PRV-1A VALVE
DOWNSTREAM
PORT
WATER SUPPLY
PRESSURE
FROM RV-1A VALVE
UPSTREAM PORT
WATER SUPPLY
OVER-PRESSURE
FROM RV-1A VALVE
UPSTREAM PORT
FIGURE 3
MODEL RV-1aPRESSURE RELIEF VALVE
OPERATION
All manuals and user guides at all-guides.com

TFP1586
Page 5 of 12
HIGHER SET PRESSURE RELIEF CONDITIONLOWER SET PRESSURE RELIEF CONDITION
TURN
ADJUSTING
SCREW
COUNTERCLOCKWISE
TO DECREASE
RV-1A VALVE
RELIEF
PRESSURE
TURN
ADJUSTING
SCREW
CLOCKWISE
TO INCREASE
RV-1A VALVE
RELIEF
PRESSURE
PRESSURE RELIEF
GAUGE PORT
WATER SUPPLY
INLET PORT
DIAPHRAGM
CHAMBER
OUTLET PORT
PRESSURE
RELIEF
OUTLET PORT
(FAR SIDE)
RESTRICTION
ORIFICE
DIAPHRAGM
SUPPORT
STEM
HEX NUT
SPRING
SUPPORT
TAMPER
CAP
ADJUSTING
SCREW LOCK
NEX NUT
ADJUSTING
SCREW
COVER
SCREW
STEM
BODY
SEAT
GASKET
BASE
DIAPHRAGM
VENT SPRING
COVER
SEAL
FIGURE 4
MODEL RV-1aPRESSURE RELIEF VALVE
MODEL R1 PILOT VALVE ASSEMBLY AND ADJUSTMENT
All manuals and user guides at all-guides.com

TFP1586
Page 6 of 12
Design
Considerations
The following items must be consid-
ered and applied accordingly for an
installation that will be using the TYCO
Model RV-1aPressure Relief Valve:
• When planning the positioning of
the Model RV-1aValve, it is recom-
mended that consideration be given
to the viewing of the pressure gauge.
Consideration should also be given
to positioning the Model RV-1aValve
so that the diaphragm cover is facing
up. With the cover facing up, internal
access is more easily achieved.
• The installation of an isolation valve
in the inlet connection to the Model
RV-1aPressure Relief Valve is rec-
ommended to facilitate performing
preventative maintenance on the
Model RV-1aValve. Isolating valves
installed per Figure 1 will meet this
recommendation in addition to pro-
viding isolation means for the fire
pump, water tank, and fire protec-
tion system.
• The Model RV-1aPressure Relief
Valve must be in an area that is
easily accessible for maintenance
purposes, not subject to freezing
temperatures, and not subject to
physical damage.
• The Model RV-1aPressure Relief
Valve is designed for fresh water ser-
vice. When corrosive atmospheres
and/or contaminated water supplies
are present, responsibility lies with
owners to verify compatibility with
the pressure relief valve, pilot valve,
and trim.
Installation
Note: The valve may be installed in any ori-
entation provided the gauges are readable
from a safe position and the valve can be
adequately inspected in accordance with
NFPA 25.
The TYCO Model RV-1aPressure Relief
Valve must be installed with the flow
arrow located on the Diaphragm Cover
pointing in the intended direction of
flow. Installation dimensions are pro-
vided in Figures 7 and 8.
Before installing the Model RV-1aPres-
sure Relief Valve, flush pipe lines to
remove all chips, scale, and foreign
matter. Exercise care to assure that the
trim is not damaged during installation.
NOTICE
Do not lift the valve by its trim. Other-
wise, the trim may be damaged and
impair system operation.
Make the inlet and outlet connections
based on the direction of arrow pro-
vided on the Diaphragm Cover. The
valve cannot operate if connected
backwards.
Do not alter the trim. Altering the trim
will render the valve ineffective and
impair system operation.
8 Inch (DN200)
6 Inch (DN150)
4 Inch (DN100)
3 Inch (DN80)
2 Inch (DN50)
22-3/8"
(569 mm)
16-3/4"
(425 mm)
13-3/4"
(349 mm)
10-3/16"
(260 mm)
27-7/16"
(697 mm)
DIMENSIONS SHOWN
ARE APPLICABLE TO
ALL END CONNECTION
CONFIGURATIONS
AVAILABLE PER
VALVE SIZE
FIGURE 5
RV-1aVALVE
TAKE-OUT DIMENSIONS
All manuals and user guides at all-guides.com

TFP1586
Page 7 of 12
Placing the
Valve in
Service
Perform Steps 1 to 4 when placing the
TYCO Model RV-1aPressure Relief
Valve in service.
NOTICE
Pressure relief adjustment is only to be
performed by experienced personnel
who understand the impact of adjusting
the pressure relief setting and who take
full responsibility of the relief setting.
Prior to pressurizing the Model RV-1a
Pressure Relief Valve, make sure the
necessary pressure gauges to measure
pressure in the system are installed as
required by the system designer.
Note: If adjusting the set pressure, venting
any trapped air from the Diaphragm
Chamber is not necessary.
If not adjusting the set pressure, air may
need to be bled from the system by
cracking the flare fittings on either side of
the pilot valve (only necessary if valve is
not shut when installed).
Step 1. Loosen the Pilot Valve Locknut,
then completely loosen the Adjusting
Screw. Tighten the Adjusting Screw
three turns beyond the point at which
spring resistance is encountered.
Step 2. Start the pump. One hundred
percent of pump capacity will now
ow through the Model RV-1aPressure
Relief Valve into the tank.
Step 3. Slowly tighten the Pilot Valve
Adjusting Screw until the desired relief
“set pressure” is achieved on the
Pilot Valve Pressure Gauge. Make all
pilot adjustments slowly and in small
increments.
Step 4. Tighten the Locknut and shut
off the pump.
Note: After any pressure adjustment, the
following items are to be recorded on a
tag attached to the valve:
• Valve installation location
• Inlet static pressure
• Relief set pressure
The tag is not to be removed until after the
system has been accepted by the Authority
Having Jurisdiction. It is recommended
that the tag not be removed even after
acceptance by the Authority Having
Jurisdiction unless another means of
record-keeping is maintained.
ITEM QTY DESCRIPTION CH 2 IN. (DN50) 3 IN. (DN80) 4 IN. (DN100) 6 IN. (DN150) 8 IN. (DN200)
1 1 DV-5aAUTOMATIC WATER CONTROL VALVE
2 1 R1 PILOT VALVE 545100069 545100069 545100069 545100069 545100069
3 1 WATER PRESSURE GAUGE, 300 PSI / 2000 kPa 92-343-1- 005 92-343-1- 005 92-343-1-005 92-343-1- 005 92-343-1- 005
4 1 TUBING ASSEMBLY, DV-5aR1 INTERCONNECT TUBE 1 545100087 545100088 545100089 545100090 545100091
5 1 TUBING ASSEMBLY, DV-5aR1 INTERCONNECT TUBE 2 545100092 545100093 545100094 545100095 545100097
6 1 FLARE FITTING REDUCER 1/2” TUBE x 1/4” NPT 545100086 545100086 545100086 545100086 545100086
7 1 FLARE FITTING STRAINER 1/2” NPT x 1/2” TUBE 545100073 545100073 545100073 545100073 545100073
8 1 FLARE FITTING 1/2” NPT x 1/2” TUBE 545100061 545100061 545100061 545100061 545100061
9 1 1/2” UNION ✓1/2” 1/2” 1/2” 1/2” 1/2”
10 21/2” x CLOSE PIPE NIPPLE ✓1/2” x CLOSE 1/2” x CLOSE 1/2” x CLOSE 1/2” x CLOSE 1/2” x CLOSE
11 1 1/2” SOCKET HEAD PIPE PLUG ✓1/2” 1/2” 1/2” 1/2” 1/2”
12 2 3/4” SOCKET HEAD PIPE PLUG ✓3/4” 3/4” 3/4” 3/4” 3/4”
13 1PIPE PLUG ✓3/4” 1 1/4” 2” 2” 2”
A1 1SIGHT GLASS KIT 54 510 0111 54 510 0111 5 45100111 54 510 0111 54 510 0111
12
13
11
10
10
1
9
32
8
8
5
7
41
A
6
4
7
A1
12
45°
A1
REQUIRED FOR
AON APPROVAL
FIGURE 6
MODEL RV-1aPRESSURE RELIEF VALVE
TRIM ASSEMBLY
All manuals and user guides at all-guides.com

TFP1586
Page 8 of 12
Nominal
Valve
Size
Inches
(DN)
O.D.
Pipe
Size
in.
(mm)
Nominal Installation Dimensions
in.
(mm)
Weight
lb
(kg)
A B C D E
2
(DN50)
2.88
(60,3)
10-3/16
(260)
2.80
(71,1)
11.17
(283,7)
5.93
(150,6)
6.53
(165,9)
34.0
(15,4)
3
(DN80)
3.50
(88,9)
13-3/4
(349)
2.95
(74,9)
12.84
(326,1)
8.05
(204,5)
8.05
(204,5)
71.0
(32,2)
4
(DN100)
4.50
(114,3)
16-3/4
(425)
3.00
(76,2)
14.11
(358,4)
8.93
(226,8)
9.53
(242,1)
106.0
(48,1)
6
(DN150)
6.62
(168,3)
22-3/8
(569)
4.52
(114,8)
15.50
(393,7)
12.43
(315,7)
11.0 3
(280,2)
182.0
(82,6)
8
(DN200)
8.62
(219,1)
27-7/16
(697)
5.29
(134,4)
18.20
(462,3)
14.43
(366,5)
15.03
(381,8)
336.3
(152,5)
Nominal
Valve
Size
Inches
(DN)
Nominal Installation Dimensions
in.
(mm)
Weight
lb
(kg)
A B C D E
3
(DN80)
13-3/4
(349)
4.00
(101,6)
12.84
(326,1)
8.05
(204,5)
8.05
(204,5)
83.0
(37,6)
4
(DN100)
16-3/4
(425)
4.42
(112,3)
14.11
(358,4)
8.93
(226,8)
9.53
(242,1)
127.0
(57,6)
6
(DN150)
22-3/8
(569)
5.41
(137, 4)
15.50
(393,7)
12.43
(315,7)
11.0 3
(280,2)
209.0
(94,8)
8
(DN200)
27-7/16
(697)
6.76
(171,7)
18.20
(462,3)
14.43
(366,5)
15.03
(381,8)
374. 3
(169,8)
B
A
C
D
E
A
C
B
D
E
FIGURE 7
MODEL RV-1aPRESSURE RELIEF VALVE
GROOVE x GROOVE END CONNECTIONS
NOMINAL INSTALLATION DIMENSIONS
FIGURE 8
MODEL RV-1aPRESSURE RELIEF VALVE
FLANGE x FLANGE END CONNECTIONS
NOMINAL INSTALLATION DIMENSIONS
All manuals and user guides at all-guides.com

TFP1586
Page 9 of 12
Care and
Maintenance
Inspection, testing, and maintenance
must be performed in accordance
with the requirements of the NFPA. Any
impairment must be immediately cor-
rected. See Table C for information on
troubleshooting valve problems.
The owner is responsible for the
inspection, testing, and maintenance
of their fire protection system and
devices in compliance with this doc-
ument, as well as with the applicable
standards of any authorities having
jurisdiction. Contact the installing con-
tractor or product manufacturer with
any questions.
Automatic sprinkler systems are rec-
ommended to be inspected, tested,
and maintained by a qualified Inspec-
tion Service in accordance with local
requirements and/or national codes.
Note: Before closing a fire protection
system maincontrol valve for maintenance
work on the fire protection system that
it controls, obtain permission to shut
down the affected fire protection systems
from the proper authorities and notify all
personnel who may be affected by this
decision.
The TYCO Model RV-1aPressure Relief
Valve requires no lubrication, packing
or preventative maintenance. However,
replacement of the diaphragm every
ten years is recommended.
Inspections
• Inspect the Model RV-1aPressure
Relief Valve on a weekly basis.
• Check the valve under static condi-
tions to assure that the Model RV-1a
Pressure Relief Valve is not unnec-
essarily relieving pressure. If nec-
essary, re-adjust the Model RV-1a
Pressure Relief Valve by following the
instructions in the section Placing the
Valve in Service. If the desired pres-
sure cannot be achieved, the Dia-
phragm and/or Pilot Valve should be
replaced.
• During pump start-ups, check that
the Model RV-1aPressure Relief
Valve relieves pressure as nec-
essary. If necessary, re-adjust the
Model RV-1aPressure Relief Valve
by following the instructions in the
section Placing the Valve in Ser-
vice. If the desired pressure cannot
be achieved, the Diaphragm and/or
Pilot Valve should be replaced.
• Check that the Model RV-1aPres-
sure Relief Valve, Pilot Valve, Tube,
Fittings, and Pressure Gauge are in
good condition and do not exhibit
signs of damage or leakage.
• Make sure that the Pilot Valve Lock-
nut is securely tightened.
Diaphragm Replacement
Prior to replacing the Diaphragm, the
Model RV-1aPressure Relief Valve must
be taken out of service and completely
drained.
When reinstalling the Diaphragm Cover,
the Diaphragm Cover Fasteners must
be uniformly and securely tightened
using a cross-draw sequence. After
tightening, double check to make cer-
tain that all Diaphragm Cover fasteners
are securely tightened.
After cleaning and inspecting valve
interior, and replacing parts as nec-
essary, reinstall the Diaphragm Cover
by completing the following steps to
assure the Diaphragm Cover Fasteners
are uniformly and securely tightened.
Step 1. Ensure that the Diaphragm is
properly oriented and that the proper
hardware arrangement is utilized when
assembling the Diaphragm Covers. The
hardware arrangements differ depend-
ing on the size of the DV-5aValve.
Step 2. By first using the Long Hex
Bolts, support of the Diaphragm Cover
will be provided before installing the
Short Hex Bolts. Align Diaphragm in
proper orientation with Valve Body, and
then align Diaphragm Cover in proper
orientation with Valve Body. Hand-
tighten all fasteners.
Step 3. Using crossdraw sequence
to assure uniformity, wrench-tighten
Long Hex Bolts and Short Hex Bolts
to appropriate torque values. Repeat
crossdraw sequence two to three
times at incremental torque valves
until reaching the torque valves found
in Table B.
Step 4. Inspect to assure all Hex Bolts
are securely tightened.
Step 5. Using the union, secure the
RV-1Ato the Diaphragm cover.
Step 6. Using the union, secure the
RV-1Atrim.
Step 7. Ensure that the unions and
pipe nipples flare fittings are securely
tightened.
Pilot Valve Replacement
Prior to removing the Pilot Valve, the
Model RV-1aPressure Relief Valve must
be taken out of service and completely
drained.
When installing the replacement Pilot
Valve, the trim components must be
replaced exactly as they were. After
reinstalling the Pilot Valve and before
returning the Model RV-1aPressure
Relief Valve into service, completely
unscrew the Adjusting Screw. Then, to
place the Model RV-1aPressure Relief
Valve in service, follow the instruc-
tions in the section Placing the Valve
in Service.
NOTICE
The Pilot Valve is not field repairable.
Attempting to repair the Pilot Valve may
render the valve ineffective and impair
the system operation.
Completely unscrewing the Adjusting
Screw of the replacement Pilot Valve
will help to avoid an accidental over-
pressurization of the system piping
prior to achieving the desired relief “set
pressure”.
Nominal
Valve Sizes
ANSI
Inches
(DN)
Torque
lb-ft
(N∙m)
Nuts Short
Hex
Bolts
2
(50)
44
(59,7)
35
(47,5 )
3
(80)
188
(254,9)
150
(203,4)
4
(100)
396
(536,9)
316
(428,4)
6
(150)
265
(359,3)
212
(287,4)
8
(200)
545
(738,9)
436
(591,1)
TABLE B
DIAPHRAGM COVER BOLTS
MINIMUM TORQUE
All manuals and user guides at all-guides.com

TFP1586
Page 10 of 12
Problem Cause Solution
Valve fails to open 1. Water connections are blocked
2. Pilot adjustment is too high
3. Pilot diaphragm or seal is damaged
1. Dismantle and clean downstream tubing*
2. Reset pressure by turning pressure adjusting
screw CCW
3. Replace pilot valve*
Valve fails to close 1. Water connections are blocked
2. Blocked nger lter
3. Foreign object stuck under valve diaphragm
4. Valve diaphragm is leaking
5. Pilot seal is damaged.
1. Dismantle and clean upstream tubing*
2. Dismantle and clean nger lter*
3. Loosen cover bolts, remove cover and diaphragm,
and dispose of foreign object*
4. Loosen cover bolts and replace diaphragm*
5. Replace pilot valve*
NOTES:
* Prior to performing a solution, the Model RV-1amust be taken out of service and completely drained.
6 INCH (DN150)
3 INCH (DN80)
2 INCH (DN50)
4 INCH (DN100)
8 INCH (DN200)
200 400 1000 3000200060010050
50002000 3000 1000070001000600400200
4000
15000
9.0
8.0
4.0
6.0
5.0
7.0
3.0
2.0
1.0
0.7
0.9
0.8
0.5
0.4
0.6
0.3
NOMINAL PRESSURE DROP IN BAR
(1 PSI = 0,06895 BAR)
FLOW RATE IN LITERS PER MINUTE (LPM)
(1 GPM = 3,785 LPM)
NOMINAL PRESSURE DROP IN POUNDS PER SQUARE INCH (PSI)
FLOW RATE IN GALLONS PER MINUTE (GPM)
0,022
0,080
0,030
0,040
0,060
0,050
0,070
0,100
0,090
0,200
0,300
0,400
0,500
0,600
TABLE C
TROUBLESHOOTING PROCEDURES
GRAPH B
MODEL RV-1aPRESSURE RELIEF VALVE
NOMINAL PRESSURE LOSS VERSUS FLOW
All manuals and user guides at all-guides.com

TFP1586
Page 11 of 12
Limited
Warranty
For warranty terms and conditions, visit
www.tyco-fire.com.
Ordering
Procedure
Contact your local distributor for avail-
ability. When placing an order, indicate
the full product name and Part Number
(P/N).
North America
Pressure Relief Valve
Specify: Model RV-1aValve, size
(specify), Connection Type (specify
Grooved or Flanged, including flange
drilling specification from below), and
P/N (specify):
• Valve Size
2, 3, 4, 6, or 8 in.
•
Connection Type - Grooved or
Flanged
For flanged, identify flange drilling
specification as follows:
ANSI B16-1 (Class 125)
Note: See Table A for flange drilling
dimensional specifications.
2 in. G x G
Grooved .....................55-001-3-020
3 in. G x G
Grooved .................... 55-001-3-030
4 in. G x G
Grooved .....................55-001-3-040
6 in. G x G
Grooved .................... 55-001-3-060
8 in. G x G
Grooved .................... 55-001-3-080
3 in. F x F
ANSI Flange ................. 55-002-3-030
4 in. F x F
ANSI Flange ................. 55-002-3-040
6 in. F x F
ANSI Flange ................. 55-002-3-060
8 in. F x F
ANSI Flange ................. 55-002-3-080
Replacement Valve Parts
See Figure 6 for replacement parts.
Specify: Model RV-1aPressure Relief
Valve, (specify size), (specify part
description), P/N (specify, see Figures
2 and 6)
South America, Central
America and Eastern Hemisphere
Pressure Reducing Valve
Specify: Model RV-1aValve, size
(specify), Connection Type (specify
Grooved or Flanged, including flange
drilling specification from below), and
P/N (specify):
• Valve Size
2, 3, 4, 6, or 8 in.
•
Connection Type - Grooved or
Flanged
For flanged, identify flange drilling
specification as follows:
ANSI B16-1 (Class 125)
ISO 7005-2 (PN16)
Note: See Table A for flange drilling
dimensional specifications.
2 in. G x G
Grooved .....................55-001-3-020
3 in. G x G
Grooved .................... 55-001-3-030
4 in. G x G
Grooved .....................55-001-3-040
6 in. G x G
Grooved .................... 55-001-3-060
8 in. G x G
Grooved .................... 55-001-3-080
3 in. F x F
ANSI Flange ................. 55-002-3-030
3 in. F x F
ISO (PN16) Flange . . . . . . . . . . . . 55-004-3-030
4 in. F x F
ANSI Flange ................. 55-002-3-040
4 in. F x F
ISO (PN16) Flange . . . . . . . . . . . . 55-004-3-040
6 in. F x F
ANSI Flange ................. 55-002-3-060
6 in. F x F
ISO (PN16) Flange . . . . . . . . . . . . 55-004-3-060
8 in. F x F
ANSI Flange ................. 55-002-3-080
8 in. F x F
ISO (PN16) Flange . . . . . . . . . . . . 55-004-3-080
Valve Trim Accessories
Separately ordered Model RV-1A valve
trim accessories.
Specify: Model RV-1A Sight Glass Kit
for AON Approval, P/N 545100111
Note: Sight Glass Kit required for AON
Approved applications.
Replacement Valve Parts
See Figure 6 for replacement parts.
Specify: Model RV-1aPressure Relief
Valve, (specify size), (specify part
description), P/N (specify, see Figures
2 and 6)
All manuals and user guides at all-guides.com

TFP1586
Page 12 of 12
NATIONAL FIRE PROTECTION ASSOCIATION and NFPA are registered trademarks of National Fire Protection Association;
TEFLON is a registered trademark of DuPont
1400 Pennbrook Parkway, Lansdale, PA 19446 | Telephone +1-215-362-0700
© 2021 Johnson Controls. All rights reserved. All specifications and other information shown were current as of document revision date and are subject to change without notice.
All manuals and user guides at all-guides.com
This manual suits for next models
1
Table of contents
Other Tyco Control Unit manuals