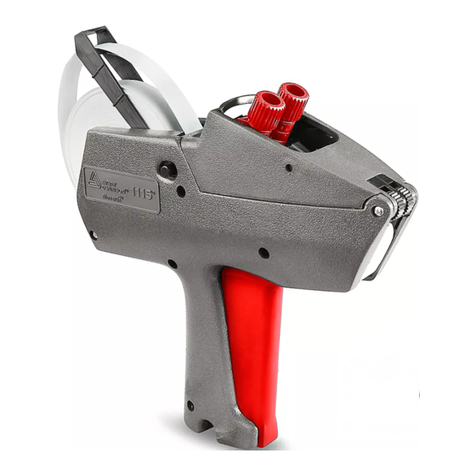
U-Line MONARCH 1110 User manual

PAGE 1 OF 6 0713 IH-707
πH-707
M ON A RCH 1110
ONE LINE LABEL GUN
1-800-295-5510
uline.com
CHANGE THE INK ROLLER
1. Turn latch to release
ink roller door and
carefully pull ink roller
completely out of
labeler. (See Figure 1)
2. Insert folded backing
paper between ink
roller and carrier. Pull
to snap old ink roller
free. (See Figure 2)
3. Cut off end of ink
roller package. Using
package to protect
fingers, slide carrier
into package and
snap new ink roller into
place. (See Figure 3)
4. Slide ink roller door
back into place and
turn latch to lock.
SET PRINT CHARACTERS
1. Pull knob until indicators
are on the desired
band. (See Figure 4)
2. Turn the knob until
the desired character
appears black on a
white background
between the indicators.
(To print a blank, select
the blank space for
that band).
3. Repeat steps 1-2 for each band.
4. Push in the knob when you are done.
LOAD LABELS
1. For loading a new roll of labels, tear off and discard
the first 10 inches of label and liner. Tear backing
evenly between cuts.
2. Peel the first 12 labels from liner and discard.
3. Place the label roll
between the hubs and
click into place. (See
Figure 5)
4. Squeeze and hold the
trigger while feeding
the label strip into the
slot below the brake
wheels until about 6
inches come out of the
front. (See Figure 6)
5. Feed label strip under
the plate and pull
through until loop is
removed. (See Figure 7)
6. Squeeze and hold the
trigger while feeding
the label strip into the
slot below the arrow
until it stops/hits the
back. (See Figure 8)
7. Hold the strip in place
and squeeze the
trigger eight times or
until label strip feeds
through the rear exit.
(See Figure 8)
8. Remove any loose
labels.
NOTE: If backing paper does not become
taut and exit at rear, turn labeler upside down,
squeeze trigger and pull backing paper out of
slot. Repeat steps 5, 6 and 7.
Figure 1
Figure 2
Figure 3
LABEL EXIT
TRIGGER
BRAKE
WHEELS
HUB
Figure 5
Figure 6
Figure 4
INSTRUCTIONS
SLOT
BACKING
PAPER EXIT
LOOP
PLATE
LABEL EXIT
Figure 8
Figure 7
Para Español, vea páginas 3-6.

PAGE 2 OF 6 0713 IH-707
LUBRICATE
PRINT ADJUSTMENT
1. Print location is correct when extreme righthand and
lefthand characters are located as shown.
2. Place small coin in
feedwheel button slot.
(See Figure 9)
3. Push feedwheel button in completely and turn
slightly clockwise if print is too far left or slightly
counterclockwise if print is too far right. Adjustments
made without completely depressing button are
temporary.
4. Repeat steps 2 and 3 until print is correctly
aligned.
REMOVE SUPPLIES
1. Tear label strip at label
roll as shown and pull
label roll from between
hubs. (See Figure 10)
2. Tear backing paper
strip. Pull label strip
from labeler. (See
Fig u re 11)
3. Squeeze and release
trigger until backing
paper is free to be
pulled out. (See
Figure 11)
CLEAR JAMS, CLEANING AND
LUBRICATION
1. With label roll removed,
check label track and
backing paper track
for stray labels.
2. Clear label track by squeezing trigger and feeding
label removal strip under brake wheels and out front
of labeler. (See Figure 12)
3. To clear backing
paper track:
a. Insert label removal
strip in end of track
to loosen stray
labels. (See
Figure 13)
b. Insert label removal
strip as shown,
using corner to
remove stray labels.
(See Figure 13)
4. If adhesive buildup occurs, lubricate with one drop
of a commercial 100% silicone lubricant as shown
with labels loaded.
LUBRICATE
One drop each side of
label chute between
spring and backing
paper. (See Figure 14)
LUBRICATE
One drop each spot
on backing paper
(total of four drops).
Spread with finger.
(See Figure 15)
NOTE: DO NOT OVER LUBRICATE!
LUBRICATE
FRONT
EXIT
BRAKE
WHEELS REMOVAL
STRIP
Figure 12
Figure 14
Figure 15
FEEDWHEEL
BUTTON SLOT
Figure 9
INSTRUCTIONS CONTINUED
END OF
TRACK
Approx. 1/16 inch (1.6 mm)
FOR
+TX
993
c
TEAR
Figure 10
TEAR
BACKING
PAPER
Figure 13
Fi g ure 11

PAGE 3 OF 6 0713 IH-707
Regular Font (5 MM)
1st Line
1 2 3 4 5 6 7 8 9 10 11 12 1 2 3 4 5 6
A N A N A N A N A N A N A N A N A N A N A N A N 1 1 1 1 1 1
B O B O B O B O B O B O B O B O B O B O B O B O 2 2 2 2 2 2
C P C P C P C P C P C P C P C P C P C P C P C P 3 3 3 3 3 3
D Q D Q D Q D Q D Q D Q D Q D Q D Q D Q D Q D Q 4 4 4 4 4 4
E R E R E R E R E R E R E R E R E R E R E R E R 5 5 5 5 5 5
F S F S F S F S F S F S F S F S F S F S F S F S 6 6 6 6 6 6
G T G T G T G T G T G T G T G T G T G T G T G T 7 7 7 7 7 7
H U H U H U H U H U H U H U H U H U H U H U H U 8 8 8 8 8 8
I V I V I V I V I V I V I V I V I V I V I V I V 9 9 9 9 9 9
J W J W J W J W J W J W J W J W J W J W J W J W 0 0 0 0 0 0
K X K X K X K X K X K X K X K X K X K X K X K X $ $ . .
L Y L Y L Y L Y L Y L Y L Y L Y L Y L Y L Y L Y - -
M Z M Z M Z M Z M Z M Z M Z M Z M Z M Z M Z M Z
#3 Bold Font
NOT INDICATIVE OF
FONT SIZE AND STYLE
¢
FOR
¢
FOR
KNOB POSITION
+TX
+TX
CHARACTER KEY
π CHICAGO • ATLANTA • DALLAS • LOS ANGELES • MINNEAPOLIS • NYC/PHILA • SEATTLE • MEXICO • CANADA
1-800-295-5510
uline.com

PAGE 4 OF 6 0713 IH-707
πH-707
ETIQUETADORA
M ON A RCH 1110
DE UNA LÍNEA
01-800-295-5510
uline.mx
CAMBIAR EL RODILLO DE TINTA
1. Gire el seguro para
liberar la puerta del
rodillo de tinta y jale
cuidadosamente
el rodillo de tinta
completamente fuera
de la etiquetadora.
(Vea Diagrama 1)
2. Inserte el respaldo de
papel doblado entre
el rodillo de tinta y el
cargador. Jale para
sacar el rodillo de tinta
viejo. (Vea Diagrama 2)
3. Corte el extremo del
empaque del rodillo de
tinta. Usando el paquete
para proteger los dedos,
deslice el cargador
dentro del empaque y
ponga el rodillo de tinta
nuevo en su lugar. (Vea
Diagrama 3)
4. Deslice la puerta del rodillo de tinta de regreso a su
lugar y gire el seguro para cerrar.
CONFIGURAR LOS CARACTERES DE IMPRESIÓN
1. Jale la perilla hasta que los indicadores estén en la
banda deseada. (Vea Diagrama 4)
2. Gire la perilla hasta que
el caracter deseado
aparezca negro sobre
fondo blanco entre
los indicadores. (Para
imprimir un espacio en
blanco, seleccione el
espacio en blanco en
esa banda).
3. Repita los pasos 1-2 por cada banda.
4. Empuje la perilla hacia adentro cuando haya terminado.
CARGAR LAS ETIQUETAS
1. Para cargar un rollo de etiquetas nuevo, rasque y
deseche las primeras 10 pulgadas de etiqueta y
respaldo. Rasque el respaldo de manera uniforme
entre los cortes.
2. Despegue las primeras
12 etiquetas del
respaldo y deséchelas.
3. Coloque el rollo de
etiquetas entre los
núcleos y presione en
su lugar hasta hacer
clic. (Vea Diagrama 5)
4. Apriete y sostenga
el gatillo mientras
alimenta la tira de
etiquetas dentro de la
ranura debajo de las
ruedas de freno hasta
que salgan por el frente
aproximadamente
6 pulgadas. (Vea
Diagrama 6)
5. Alimente la tira de
etiquetas debajo de la
placa y jale a través
hasta que el lazo
sea eliminado. (Vea
Diagrama 7)
6. Presione y sostenga
el gatillo mientras
alimenta la tira de
etiquetas dentro de la ranura debajo de la flecha
hasta que se detenga/pegue en la parte posterior.
(Vea Diagrama 8)
7. Sostenga la tira en el lugar y apriete el gatillo ocho
veces o hasta que la tira de etiquetas se alimente a
través de la salida posterior. (Vea Diagrama 8)
8. Retire cualquier etiqueta suelta.
NOTA: Si el respaldo de papel no se tensay sale
por la parte posterior, voltee la etiquetadora de
cabeza, apriete el gatillo y jale el respaldo de
papel fuera de la ranura.
Repita los pasos 5, 6 y 7
.
NÚCLEO
Diagrama 1
Diagrama 2
Diagrama 3
INSTRUCCIONES
Diagrama 4
Diagrama 5
SALIDA DE
ETIQUETA
GATILLO
RUEDAS
DE FRENO
Diagrama 6
LAZO
PLACA
SALIDA DE
ETIQUETA
Diagrama 7
RANURA
SALIDA DEL
PAPEL DE
RESPALDO Diagrama 8

PAGE 5 OF 6 0713 IH-707
AJUSTE DE IMPRESIÓN
1. 1. La ubicación de impresión está correcta cuando
los caracteres del extremo derecho e izquierdo
están ubicados como se muestra.
2. Coloque una moneda
pequeña en el botón
de la rueda de
alimentación. (Vea
Diagrama 9)
3. Empuje completamente hacia adentro el botón de
la rueda de alimentación y gire levemente en el
sentido de las manecillas del reloj si la impresión
está muy lejos del lado izquierdo o levemente en
el sentido contrario a las manecillas del reloj si la
impresión está muy lejos del lado derecho. Los
ajustes hechos sin presionar completamente el
botón son temporales.
4. Repita los pasos 2 y 3 hasta que la impresión esté
alineada correctamente.
ELIMINAR SUMINISTROS
1. Rasque la tira de
etiquetas del rollo
de etiquetas como
se muestra y jale el
rollo de etiquetas de
entre los núcleos. (Vea
Diagrama 10)
2. Rasque
la tira del
respaldo de papel. Jale
la tira de etiquetas de
la etiquetadora. (Vea
Diagrama 11)
3. Apriete y libere el
gatillo hasta que el
respaldo de papel esté
libre para ser jalado
hacia afuera. (Vea
Diagrama 11)
DESPEJAR ATASCOS, LIMPIEZA Y LUBRICACIÓN
1. Retire el rollo de
etiquetas, revise en el
carril de etiquetas y en
el carril del respaldo
de papel si hay
etiquetas desviadas.
2. Despeje el carril de etiquetas apretando el gatillo
y alimentando la tira de extracción de etiquetas
debajo de las ruedas de freno y hacia afuera al
frente de la etiquetadora. (Vea Diagrama 12)
3. Para despejar el carril
del respaldo de papel:
a. Inserte la tira de
extracción de
etiquetas para
liberar las etiquetas
desviadas sueltas.
(Vea Diagrama 13)
b. Inserte la tira de extracción de etiquetas como
se muestra, utilizando la esquina para eliminar
las etiquetas desviadas. (Vea Diagrama 13)
4. Si llega a acumularse el adhesivo, lubrique con una
gota de lubricante comercial 100% de silicón como
se muestra con las etiquetas cargadas.
LUBRIQUE
Una gota a cada
lado del conducto
de etiquetas entre el
resorte y el respaldo
de papel. (Vea
Diagrama 14)
LUBRIQUE
Una gota en cada
punto del respaldo
de papel (un total de
4 gotas). Distribuya
con el dedo. (Vea
Diagrama 15)
NOTE: ¡NO LUBRIQUE EN EXCESO!
LUBRIQUE
SALIDA
FRONTAL
RUEDAS DE FRENO
TIRA DE
ELIMINACIÓN
Diagrama 12
Diagrama 14
RANURA DEL BOTÓN
DE LA RUEDA DE
ALIMENTACIÓN
Diagrama 9
CONTINUACIÓN DE INSTRUCCIONES
FINAL DEL CARRIL
LUBRIQUE
Aprox. 1/16 pulgada (1.6mm)
FOR
+TX
993
c
RASQUE
Diagrama 10
RASQUE
PAPEL DE
RESPALDO
Diagrama 13
Diagrama 11
Diagrama 15

PAGE 6 OF 6 0713 IH-707
Regular Font (5 MM)
1st Line
1 2 3 4 5 6 7 8 9 10 11 12 1 2 3 4 5 6
A N A N A N A N A N A N A N A N A N A N A N A N 1 1 1 1 1 1
B O B O B O B O B O B O B O B O B O B O B O B O 2 2 2 2 2 2
C P C P C P C P C P C P C P C P C P C P C P C P 3 3 3 3 3 3
D Q D Q D Q D Q D Q D Q D Q D Q D Q D Q D Q D Q 4 4 4 4 4 4
E R E R E R E R E R E R E R E R E R E R E R E R 5 5 5 5 5 5
F S F S F S F S F S F S F S F S F S F S F S F S 6 6 6 6 6 6
G T G T G T G T G T G T G T G T G T G T G T G T 7 7 7 7 7 7
H U H U H U H U H U H U H U H U H U H U H U H U 8 8 8 8 8 8
I V I V I V I V I V I V I V I V I V I V I V I V 9 9 9 9 9 9
J W J W J W J W J W J W J W J W J W J W J W J W 0 0 0 0 0 0
K X K X K X K X K X K X K X K X K X K X K X K X $ $ . .
L Y L Y L Y L Y L Y L Y L Y L Y L Y L Y L Y L Y - -
M Z M Z M Z M Z M Z M Z M Z M Z M Z M Z M Z M Z
Letra Negrita #3
NO INDICA EL TAMAÑO
Y ESTILO DE LETRA
¢
FOR
¢
FOR
POSICIÓN DE LA PERILLA
+TX
+TX
CLAVE DE CARACTERES
π CHICAGO • ATLANTA • DALLAS • LOS ANGELES • MINNEAPOLIS • NYC/PHILA • SEATTLE • MEXICO • CANADA
01-800-295-5510
uline.mx
This manual suits for next models
1
Table of contents
Languages:
Other U-Line Label Maker manuals

U-Line
U-Line Dymo LabelWriter 450 Twin Turbo User manual

U-Line
U-Line BROTHER H-8754 User manual

U-Line
U-Line H-1276 User manual

U-Line
U-Line ZEBRA ZM400 User manual

U-Line
U-Line DYMO 450 User manual

U-Line
U-Line H-8783 User manual

U-Line
U-Line H-1276 User manual

U-Line
U-Line MONARCH 1115 User manual

U-Line
U-Line DYMO LABELWRITER 550 TURBO User manual