[Note: In case the Com port no. assigned is not within 1 to 4, go to the control
panel to adjust. You can view the port number by first clicking the ‘ Control
Panel ’ and choose ‘ System ’. Then, click the ‘ Hardware ’ in the System
Properties and choose ‘ Device Manager ’. The port number can be found in
the ‘ USB to Serial Bridge Controller ’ inside the Ports (COM&LPT).
6)
Double click the 'DigiLink' icon on the desktop.
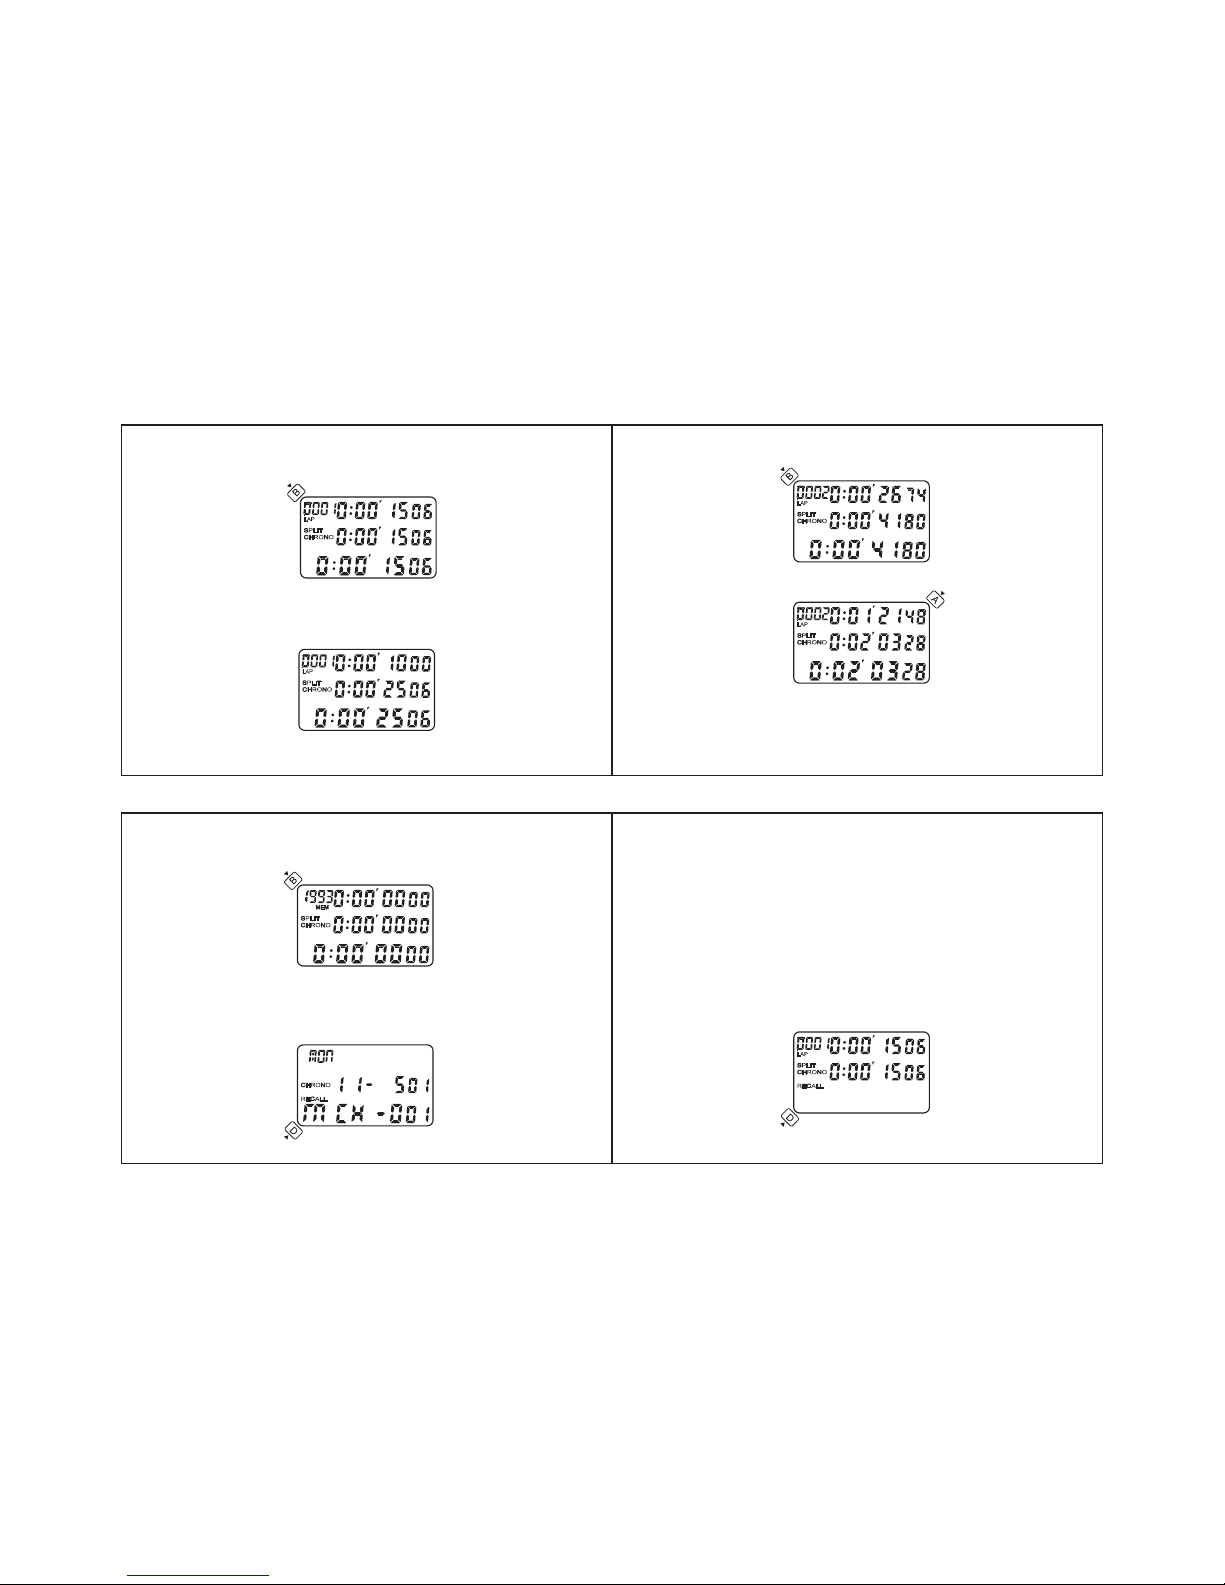
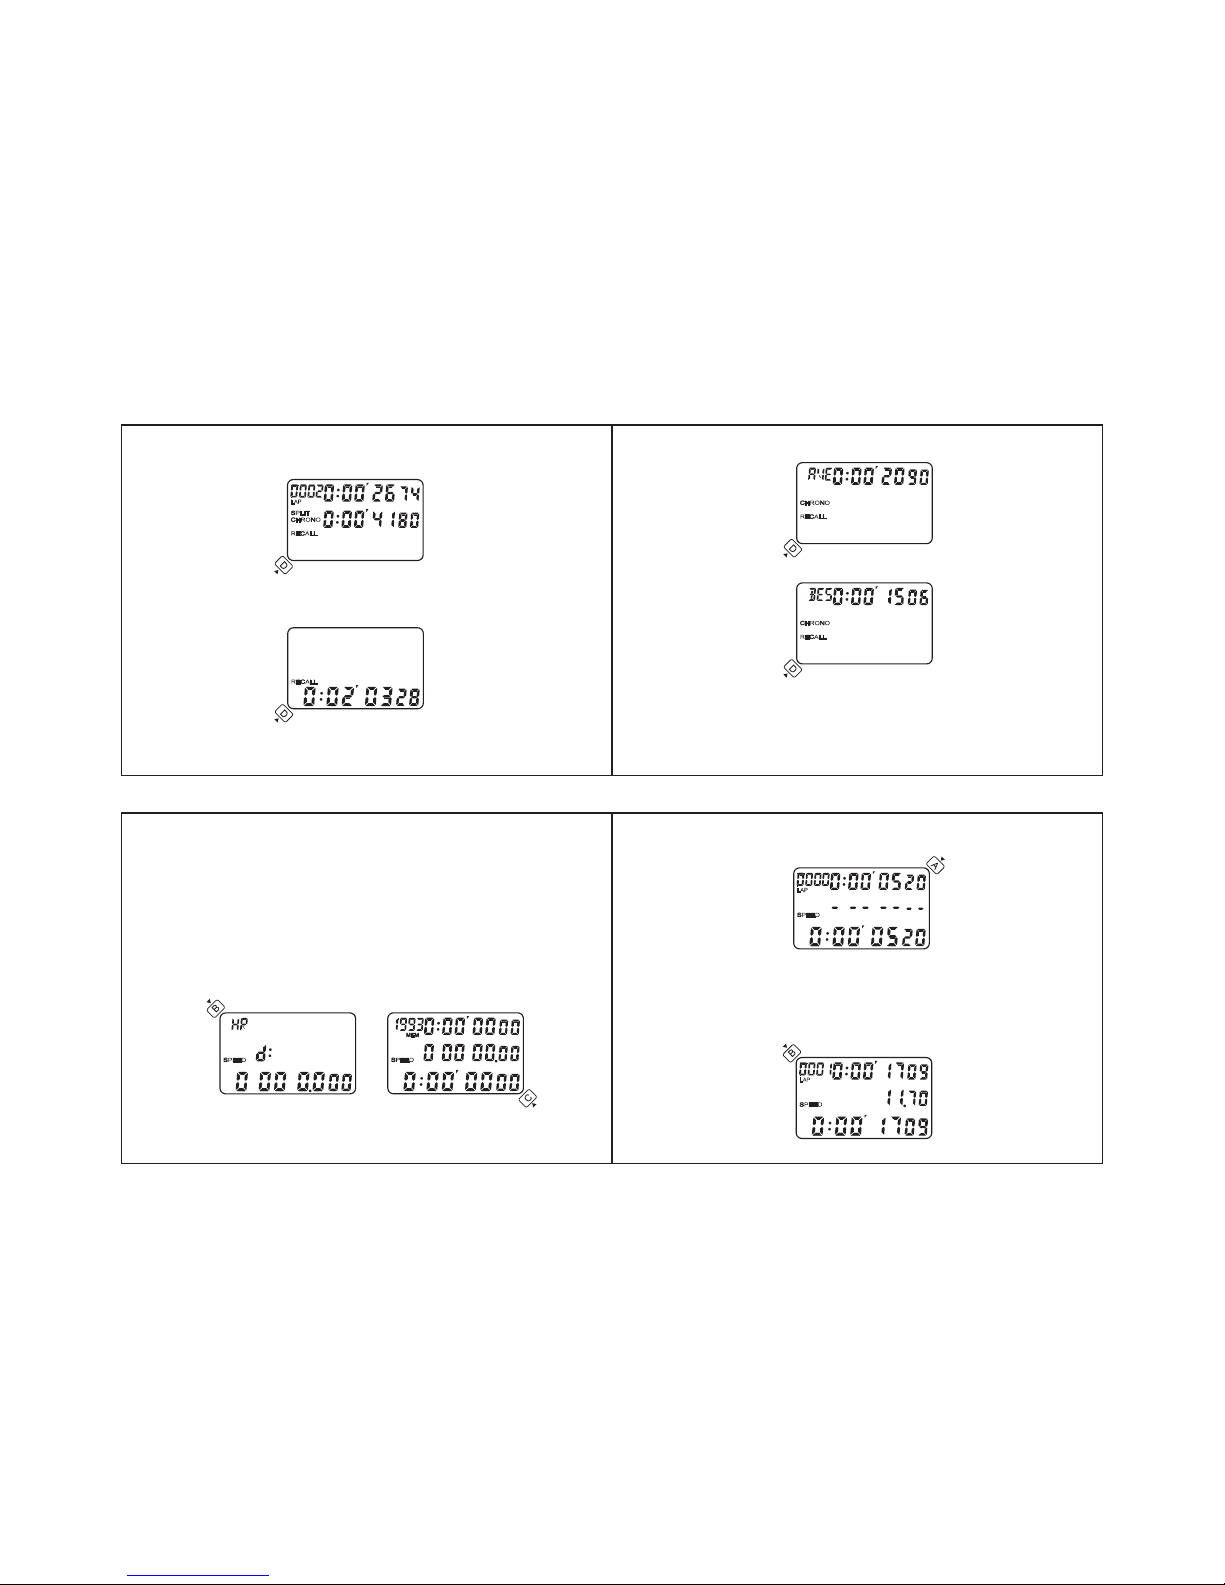
21
2322
20
**: Do not pull paper out from the printer, this will cause damage to the printer.
For replacing the paper roll before it is used up, tear the paper off and press the
‘ PAPER FEED SWITCH ’ until the remaining paper is out completely.
**: Do not touch the surface of the paper as it may cause poor printing.
**: Always store the paper rolls in a cool, dry place and keep away from direct
sunlight.
OPTIONAL ACCESSARY(FOR UPLOAD):
To upload data to computer, the computer must have the ‘ DigiLink Upload Software ’
installed (please see DigiLink upload program).
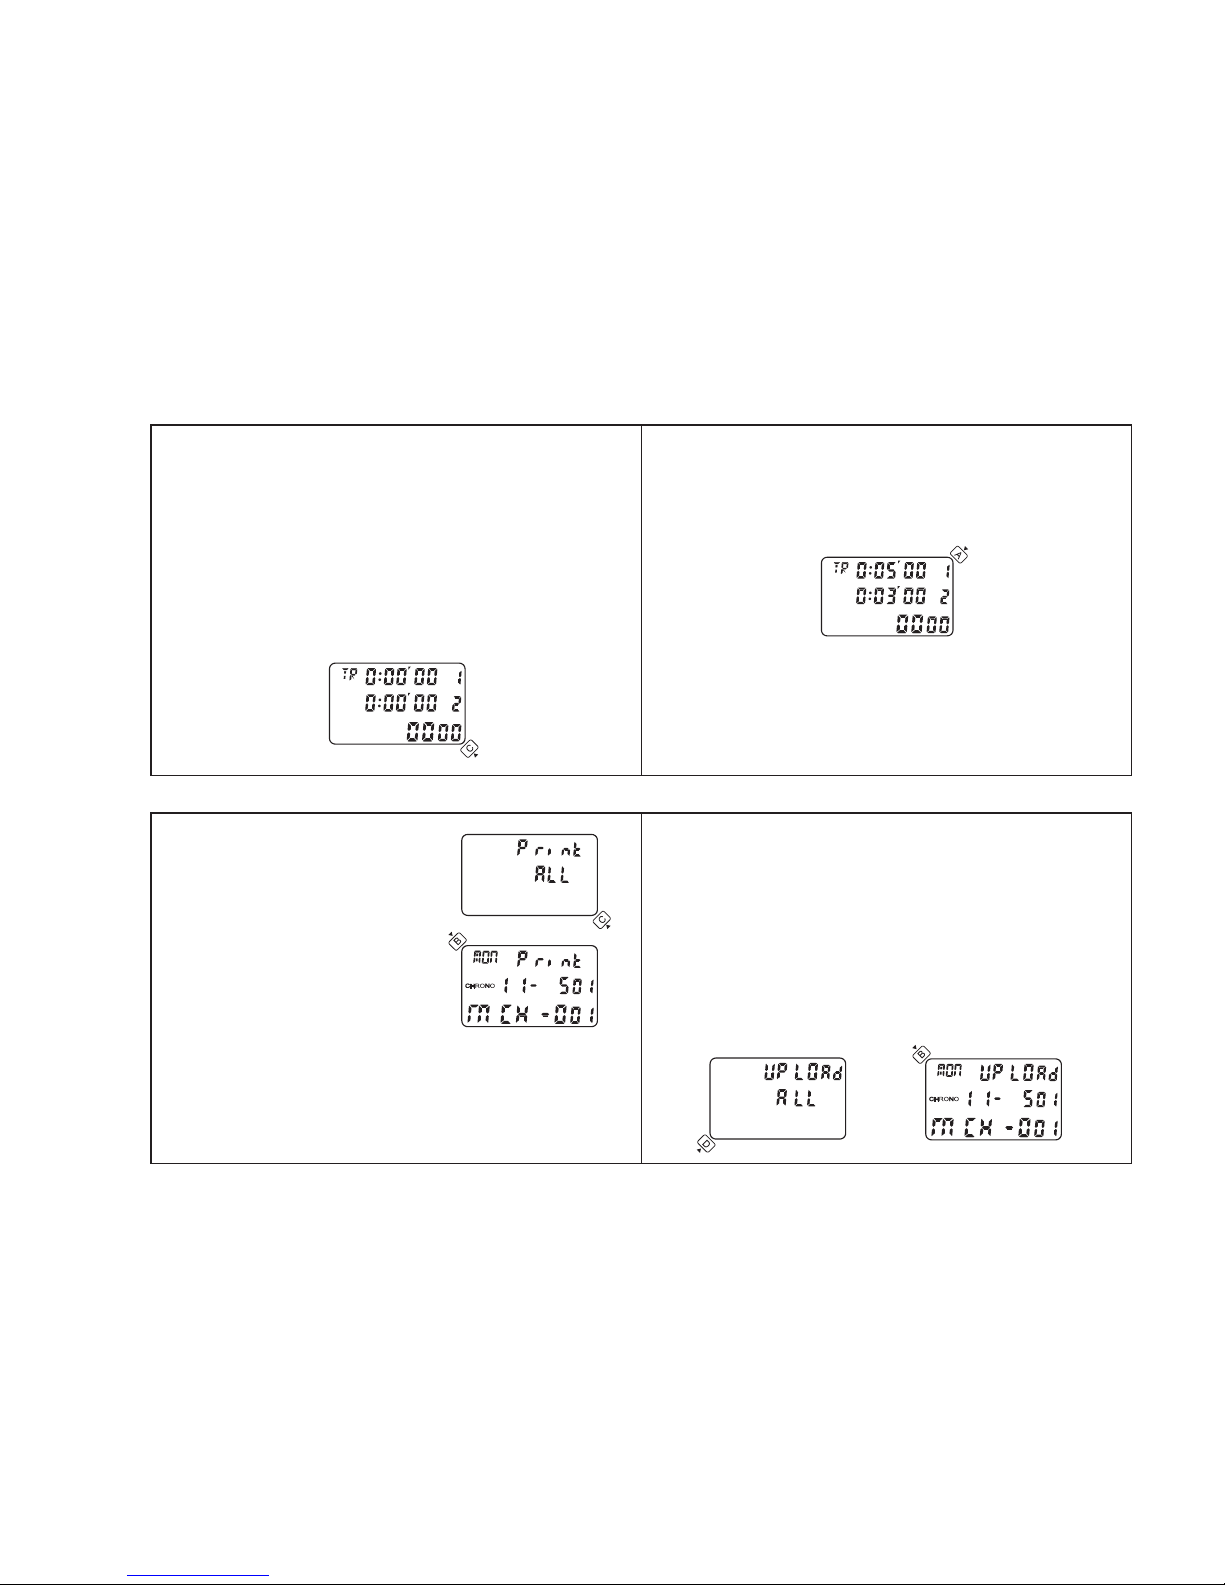
Fig. 30 Fig. 31
Follow the steps below to connect the computer and the stopwatch:
1. Shut down the computer.
2. Plug the USB upload cable into the USB socket of the computer.
3. Insert the telephone-plug end of the connector cable into the right hand side of the
stopwatch labeled ‘ PC ’ (Fig. 30)
4. Plug the jack end of the connector cable into the socket of the upload cable completely
(Fig. 31).
DigiLink UPLOAD PROGRAM MANUAL
A) Digilink program & driver installation
B) Program Functions:
1) Download memorized records
2) Real time Download
3) Saving records
4) Delete record
5) Export file
6) Print Setup/Print
C) Program uninstallation
A) Digilink program & driver installation:
1) Insert the CD disk labelled DigiLink program to the CD Rom drive.
2) Follow the on-screen instructions to install the Digilink program and the
AU9720 driver to the PC.
3) Restart
4) After restart, plug in the USB upload cable with the stopwatch connected.
5) Take note from the display the COM port no. through which the driver is
connected to the PC.
7) From the program pull down menu, click 'SETTING'and select 'PORT'.
The port number can be changed by right clicking the ‘ USB to Serial Bridge
Controller ’ and choose ‘ Properties ’. The Communication Port properties
window will pop up, choose ‘ Port Settings ’ and click ‘ Advanced ’.
Then, you can choose another port (COM1-COM4) in the Com port number.]
A list of COM port no.(COM1-COM4) will be displayed. Match this COM
port no. to the one noted in A5 and click 'OK' to accept. If an incorrect
port number is selected, nothing will be transferred to the computer.
8) Continue function. This function located in the 'SETTING' pull down menu.
Click 'Continue' for either enable or disable. This function affects the way of
saving race record into file.
A 'tick' symbol appearing next to 'Continue' means it is enabled. All race
records will be saved in one file, each time executing 'Download' function.
DigiLink program will not prompt the userto save file unless start download
new record or exit program. If tick symbol is not appearing (disabled).
DigiLink will prompt the user to save each race record into a file before next
race record start transferring to the computer. For example, if user transfers
3 racerecords to the computer, DigiLink program will prompt the user to save
the first and second record. The user has to save the last recordby clicking
'Save' or 'Save as' in the pull down menu, or the computerwill prompt to save
the last record until the user start transfer new race record or exit the DigiLink
program.
B) Program Functions:
1) Download memorized records from stopwatch:
At the main screen of the DigiLink program click 'FILE' from the pull
down menu and then select 'Download'. Press stopwatch start button to
transfer all records stored in the stopwatch. When all records have
been transferred to the computer, the stopwatch will show 'UPLOAD END'
on the display for 2 second. Click "Disconnect" then 'Back' button to
return to main screen.
2) Real time Download:
User can transfer data to computer simultaneously when operate the
stopwatch in Chrono mode. Please note that the record number in
DigiLink program always start from MCH-000 every time in this mode.
Therefore the race record number can be different in DigiLink program
and stopwatch. DigiLink program allows user to record maximum 10000
laps from stopwatch. Any laps exceeding 10000 will not be saved in
the record.
3) Saving files:
When saving files to computer. Default file name format will be
suggested by DigiLink e.g. file name MCH-001-010925, will be suggested
for record number MCH-001 and recorded on 25th September 2001.
User can change the file name if needed.