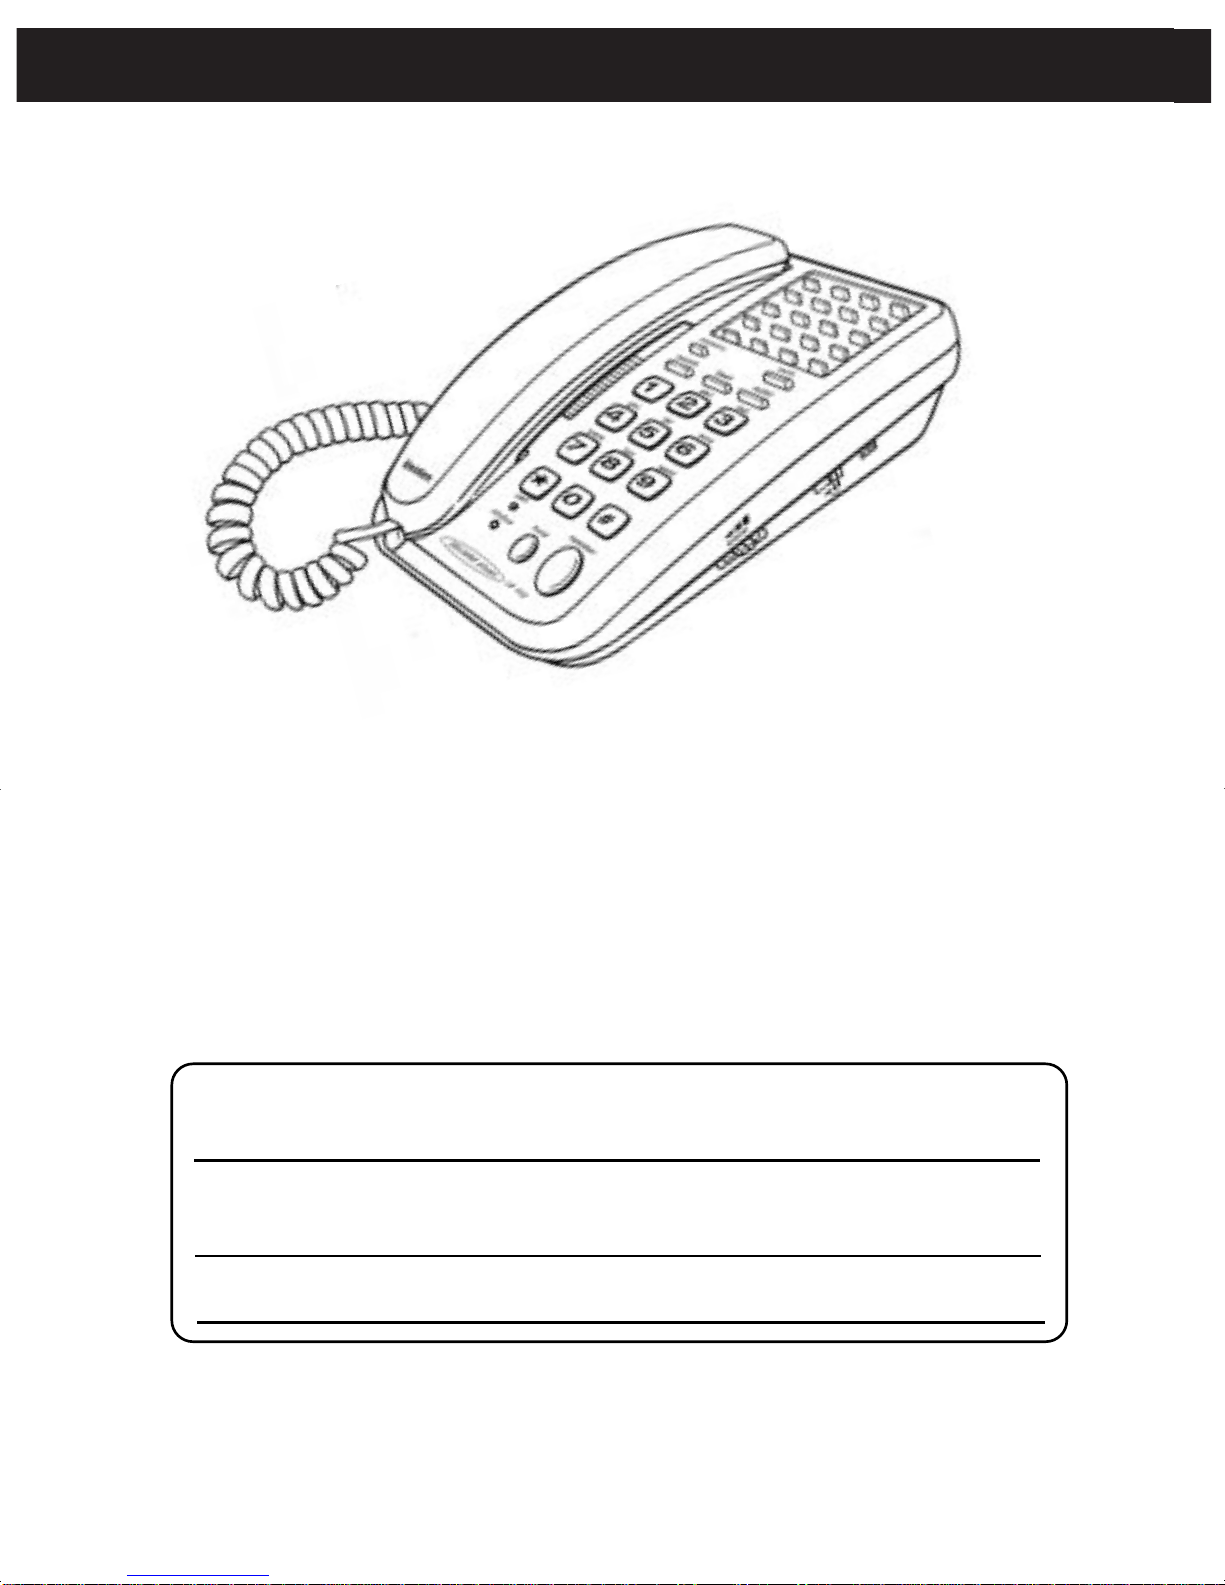
Uniden FP102 User manual

FP102
Hands Free Speaker Phone
with Pre-Programmed 5+15 Memory
Operating Guide
Feature•Phone Series
FP102-OM.qxd 7/12/98 09:26 Page 1

2
INTRODUCTION
Congratulations on the purchase of your Uniden FP102 Telephone.
The FP102 has been designed and engineered to exacting standards for
reliability, long life and outstanding performance.
To obtain the full benefit from your new telephone, please read this Operating
Guide thoroughly. For your future reference, please fill in the panel below and
attach your Purchase Receipt/Sales docket.
Serial No. Date of purchase
(found on the bottom of the unit)
Name and address of dealer
FP102-OM.qxd 7/12/98 09:26 Page 2

3
CONTENTS
CONTENTS
Introduction . . . . . . . . . . . . . . . . . . . . . . . . . . . . . . . . . . . . . . . .2
Contents . . . . . . . . . . . . . . . . . . . . . . . . . . . . . . . . . . . . . . . . . . .3
Important Information . . . . . . . . . . . . . . . . . . . . . . . . . . . . . . .5
Important Notes . . . . . . . . . . . . . . . . . . . . . . . . . . . . . . . . .6
Caring for your Telephone . . . . . . . . . . . . . . . . . . . . . . . . . .6
Parts Checklist . . . . . . . . . . . . . . . . . . . . . . . . . . . . . . . . . . . . . .7
Parts Checklist (For New Zealand Model) . . . . . . . . . . . . . .7
Parts Checklist (For Australian Model) . . . . . . . . . . . . . . . . .8
Features . . . . . . . . . . . . . . . . . . . . . . . . . . . . . . . . . . . . . . . . . . .9
Functions . . . . . . . . . . . . . . . . . . . . . . . . . . . . . . . . . . . . . . . . .11
Installation . . . . . . . . . . . . . . . . . . . . . . . . . . . . . . . . . . . . . . . .13
Handset Cord Connection . . . . . . . . . . . . . . . . . . . . . . . . .13
Telephone Line Cord Connection . . . . . . . . . . . . . . . . . . . .13
Wall Mounting . . . . . . . . . . . . . . . . . . . . . . . . . . . . . . . . . .14
Using your FP102 . . . . . . . . . . . . . . . . . . . . . . . . . . . . . . . . . . .15
Memory Dial Numbers . . . . . . . . . . . . . . . . . . . . . . . . . . .15
Storing One-Touch Speed Dial Memories . . . . . . . . . . . . . .15
Memory Storage Card . . . . . . . . . . . . . . . . . . . . . . . . . . . .15
Pause . . . . . . . . . . . . . . . . . . . . . . . . . . . . . . . . . . . . . . . .16
Dialing Stored Numbers . . . . . . . . . . . . . . . . . . . . . . . . . . .16
Chain Dialing . . . . . . . . . . . . . . . . . . . . . . . . . . . . . . . . . .16
Adjusting the Ringer Volume Control . . . . . . . . . . . . . . . . .17
Adjusting the Ringer Tone Control . . . . . . . . . . . . . . . . . . .17
Adjusting the SpeakerPhone Volume Control . . . . . . . . . . . .17
LED Indicators . . . . . . . . . . . . . . . . . . . . . . . . . . . . . . . . .18
Placing a Telephone Call . . . . . . . . . . . . . . . . . . . . . . . . . .18
Redial . . . . . . . . . . . . . . . . . . . . . . . . . . . . . . . . . . . . . . . .18
FP102-OM.qxd 7/12/98 09:26 Page 3

4
CONTENTS
CONTENTS
Receiving a Telephone Call . . . . . . . . . . . . . . . . . . . . . . . .18
Accessing Call Waiting (New Zealand Model only) . . . . . . .18
Accessing Call Waiting (Australian Model only) . . . . . . . . . .19
Mute . . . . . . . . . . . . . . . . . . . . . . . . . . . . . . . . . . . . . . . . .19
Placing a Call on Hold . . . . . . . . . . . . . . . . . . . . . . . . . . . .19
Music on Hold . . . . . . . . . . . . . . . . . . . . . . . . . . . . . . . . .19
SpeakerPhone . . . . . . . . . . . . . . . . . . . . . . . . . . . . . . . . . .19
Using the Pre-Programmed Feature Buttons
(New Zealand Model only) . . . . . . . . . . . . . . . . . . . . . . . .20
Using the Pre-Programmed Feature Buttons
(Australian Model only) . . . . . . . . . . . . . . . . . . . . . . . . . .23
Troubleshooting . . . . . . . . . . . . . . . . . . . . . . . . . . . . . . . . . . . .27
Specifications . . . . . . . . . . . . . . . . . . . . . . . . . . . . . . . . . . . . . .28
New Zealand Model . . . . . . . . . . . . . . . . . . . . . . . . . . . . . .28
Australian Model . . . . . . . . . . . . . . . . . . . . . . . . . . . . . . . .28
Warranty . . . . . . . . . . . . . . . . . . . . . . . . . . . . . . . . . . . . . . . . . .29
FP102-OM.qxd 7/12/98 09:26 Page 4

5
IMPORTANT INFORMATION
When using your telephone equipment, basic safety precautions should always be
followed to reduce the risk of fire, electrical shock, and injury to persons,
including the following:
1. Read and understand all instructions.
2. Follow all warnings and instructions marked on the product.
3. Unplug this product from the wall outlet before cleaning. Do not use
liquid cleaners or aerosol cleaners. Use a soft damp cloth for cleaning.
4. Do not use this product near water; for example, near a bath tub,
wash bowl, kitchen sink or laundry tub, in a wet basement, or near a
swimming pool.
5. Do not place this product on an unstable cart, stand, or table.
The telephone may fall, causing serious damage to the unit.
6. Slots and openings in the cabinet and the back or bottom are provided
for ventilation. To protect the product from overheating, these openings
should never be blocked or covered. This product should never be
placed near or over a radiator or heat register. This product should
not be placed in a built-in installation unless proper ventilation is provided.
7. Never push objects of any kind into this product through cabinet slots,
as they may touch dangerous voltage points or short out parts that
could result in a risk of fire or electrical shock. Never spill liquid of any
kind on the product.
8. Do not disassemble this product. Take it to qualified service personnel
when service or repair work is required. Opening or removing covers may
expose you to dangerous voltages or other risks. Incorrect re-assembly can
cause electrical shock when the appliance is subsequently used.
IMPORTANT INFORMATION
FP102-OM.qxd 7/12/98 09:26 Page 5

6
9. Unplug this product and refer servicing to qualified service personnel
under the following conditions:
A. If liquid has been spilled into the product.
B. If the product has been exposed to rain or water.
C. If the product does not operate normally when following the
operating instructions. Adjust only those controls that are
covered by the operating instructions. Improper adjustment of
other controls may result in damage, and will often require
extensive work by a qualified technician to restore to normal operation.
D. If the product has been dropped, or the cabinet has been damaged.
E. If the product exhibits a distinct change in performance.
CARING FOR YOUR TELEPHONE
Clean your telephone using a soft damp cloth.
Do Not Use solvents, detergents, sprays, abrasive pads,
scouring powder or other products that may damage
your telephone.
Do Not place the telephone in direct sunlight.
Do Not Use in extreme humidity.
CAUTION
NOTE: You must not connect your phone to any of the following:
• Coin operated systems
• Party-line systems
• Most electronic key phone systems
IMPORTANT NOTES
We have designed your telephone to conform to local regulations, and you can
connect it to most telephone lines. However, each device that you connect draws
power from the phone line. We refer to the power drawn as the device’s Ringer
Equivalence Number (REN or RN). This number is shown on the bottom of your
telephone. If you are using more than one phone or other device on the line,
add up all the REN’s. If the total is more than three, your phones may not ring.
IMPORTANT INFORMATION
PLEASE READ BEFORE USE AND
SAVE THESE INSTRUCTIONS
FP102-OM.qxd 7/12/98 09:26 Page 6

7
PARTS CHECKLIST (For New Zealand Model)
PARTS CHECKLIST
2 x Wall Mounting
Screws and Wall Plugs
Operating Guide
Telephone Line Cord Wall Mounting Bracket
FP102
Hands Free Speaker Phone
with Pre-Programmed 5+15 Memory
Operating Guide
Feature•Phone Series
Base Unit Handset Curly Cord
Memory Storage Card
FP102-OM.qxd 7/12/98 09:26 Page 7

8
PARTS CHECKLIST
PARTS CHECKLIST (For Australian Model)
Telephone Line Cord
and Plug
Operating Guide
Wall Mounting Bracket
Base Unit Handset Curly Cord
2 x Wall Mounting
Screws and Wall Plugs
FP102
Hands Free Speaker Phone
with Pre-Programmed 5+15 Memory
Operating Guide
Feature•Phone Series
Memory Storage Card
FP102-OM.qxd 7/12/98 09:27 Page 8

9
FEATURES
FEATURES
•Pre-Programmed Feature Buttons
Instant access to some of Telecom’s / Telstra’s most popular network service
features* have been factory programmed into this telephone for your
convenience.
* Some of these services will require subscription.
•15 One Touch Speed Dial Buttons
Your most important numbers can be programmed into the memory, for one
touch speed dialling.
•HandsFree Speakerphone
Great for the home or office when handsfree speakerphone conversations are
an important part of your telephone communications.
•Adjustable Speakerphone Volume Control
During a Speakerphone conversation you can adjust the speaker volume to
suit your operating environment.
•Adjustable Ringer Volume and Tone Controls
The ringing volume and tone can be adjusted to suit different home or
office situations.
•Music on Hold
When you place a call on hold, the telephone will play a popular melody to
reassure your caller that the call has not been disconnected.
• Wall Mountable
This telephone can be simply wall mounted, using the enclosed wall mounting
bracket and screws.
• Mute
Press and hold this button to turn off the handset microphone, allowing
private and confidential conversations with others in the same room.
s
FP102-OM.qxd 7/12/98 09:27 Page 9

10
•Last Number Redial
If the number you are dialing is engaged, simply end the call. Then pickup
the handset and press the redial button. The telephone will automatically
redial the last number called.
•Hearing Aid Compatible
Inductive transducer coil handsets provide hearing aid compatibility.
•Status LED
Dual coloured LED provides visual indication and differentiation for calls
'In Use' or 'On Hold' or in ‘SpeakerPhone’ mode.
•Call LED
Bright red LED provides visual indication of an incoming call.
•Pause Button
Allows you to store a timed pause in the memory dialing sequence for
PABX and Banking Services.
•Advanced Build Quality
This telephone has been assembled using the latest state of the art Surface
Mount Device (SMD) technology for your additional assurance of quality
that goes the distance.
•Call Waiting Button
Allows you to access Call Waiting services.
(In New Zealand, Call Waiting is a subscription service)
FEATURES
FEATURES
FP102-OM.qxd 7/12/98 09:27 Page 10

11
FUNCTIONS
FUNCTIONS
6
3
72
1
4
5
AUSTRALIAN MODELS
1. Button
2. Button
3. Button
4. Button
5. Button
6. One Touch Speed Dial Buttons
7. Memory Storage Card
6
3
72
1
4
5
NOTE: If required the Memory Storage Card can be turned over to give 20 One Touch
memory buttons, as shown below
NEW ZEALAND MODELS
1. Button
2. Button
3. Button
4. Button
5. Button
6. One Touch Speed Dial Buttons
7. Memory Storage Card
FP102-OM.qxd 7/12/98 09:27 Page 11

12
FUNCTIONS
FUNCTIONS
8
13
9 10
15
16
1718 19
20
21
23
8. Button
9. Button
10. Button
11. Button
12. Handset Retainer Tab
13. Button
14. Telephone Number Card
15. Numeric Keypad
16.
call
LED
14
22
17.
status
LED
18. Button
19. Button
20. Not used
21.
tone
Slide Switch
22.
speaker
Volume Slide Switch
23. Telephone Line Jack
24.
ringer
Volume Switch (Hi/Med/Low)
11
12
24
FP102-OM.qxd 7/12/98 09:27 Page 12

•Never install telephone wiring during a lightning storm.
• Never touch uninsulated telephone wires or terminals unless
the telephone line has been disconnected.
• Use caution when installing or modifying telephone lines.
CAUTION
13
INSTALLATION
INSTALLATION
HANDSET CORD CONNECTION
Plug one end of the Handset Cord (curly) into the Handset and the other end
into the jack on the side of the telephone.
TELEPHONE LINE CORD CONNECTION
Plug one end of the line cord (straight) into the telephone line jack on the back
of the telephone and the other end into the wall outlet.
NOTE: Most phone equipment available now use modular jacks. Phone cords are fitted
with a molded plastic connector which plugs into this type of jack. If you do not
have modular phone jacks, contact your local telephone company for information
about their installation.
FP102-OM.qxd 7/12/98 09:27 Page 13

INSTALLATION
INSTALLATION
WALL MOUNTING
You can mount your phone directly on a wall. Before mounting your phone,
consider the following:
• Select a location away from electrical cables, pipes or other items behind
the mounting location that could cause a hazard when inserting screws
into the wall.
• Make sure the wall material is capable of supporting the weight of the
Telephone.
• Use the screws (supplied) with anchoring devices suitable for the wall
material where the Telephone will be placed.
1. Insert two mounting screws 85mm apart. Allow
about 5mm between the wall and screw heads for
mounting the phone.
14
2. Gently pull and turn the Handset Retainer
Tab 180° and release.
4. Place the Base Unit on the screws and push down until it’s firmly seated.
3. Fit the Wall Mounting Bracket to the
Bottom of the telephone as shown.
FP102-OM.qxd 7/12/98 09:27 Page 14

MEMORY DIAL NUMBERS
20 one touch speed dial numbers can be stored into the memory of your telephone.
STORING ONE-TOUCH SPEED DIAL MEMORIES
1. To program One-Touch Memories ( ~ ).
a. Pickup the Handset or press the button.
b. Press the button.
c. Enter telephone number that you want to program.
d. Press the button.
e. Press the speed dial button ( ~ ).
Example: To programme telephone
number 273 8383 into one touch memory
location number 3.
Pick up the Handset from the Base or press the
button.
Press the button.
Enter using the keypad,
then press the button, then press the
speed dial button to complete the process.
15
USING YOUR FP101
USING YOUR FP101
NOTE: There are 5 x Pre-Programmed memories and 15 x One Touch Memories.
Each memory location can store a maximum of 32 digits.
MEMORY STORAGE CARD
When you have programmed a number into the speed dial memory, please write
the name of the person on the Memory Storage Card (supplied).
FP102-OM.qxd 7/12/98 09:27 Page 15

USING YOUR FP102
USING YOUR FP102
16
PAUSE
During the memory storage procedure you may enter a 4 second delay between
numbers (for accessing a switchboard, or long distance service) by pressing the
button on the Handset at the point in the number sequence you wish to
pause. The button counts as one digit. Pressing more than
once will increase the length of the pause between numbers.
DIALING STORED NUMBERS
For example, to dial memory 3 from the telephone
1. Pick up the Handset.
2. Press the button.The telephone will dial
the number stored in this memory location.
3. After you have completed the Phone call, place the Handset back on the Base.
CHAIN DIALING
On certain occasions, after dialing a number, you may be requested by the party
or service you are calling to enter a special access code, such as when
performing a banking transaction. Simply store this number in another memory
location, refer to “Storing Memory Dial Numbers” on Page 15.
In this way you can recall both numbers that are stored into their own memory
locations at the relevant times.
NOTE: If you select a memory location that does not have a stored number, the telephone
will not dial.
FP102-OM.qxd 7/12/98 09:27 Page 16

ADJUSTING THE SPEAKERPHONE VOLUME CONTROL
During a SpeakerPhone conversation, adjust the
speaker
volume of your
telephone by moving the
speaker
slide control until you hear the desired volume.
NOTE: When the telephone is switched to Speakerphone Mode, the
status
LED
turns green.
17
USING YOUR FP102
USING YOUR FP102
ADJUSTING THE RINGER VOLUME CONTROL
While the phone is ringing, you can adjust the ringer volume of your telephone by
moving the
ringer
switch to the desired low/medium/high position.
ADJUSTING THE RINGER TONE CONTROL
While the phone is ringing, you can adjust the Ringer Tone of your telephone by
moving the
tone
slide control to the desired position.
FP102-OM.qxd 7/12/98 09:27 Page 17

18
USING YOUR FP102
USING YOUR FP102
LED indicators
1.
call
LED indicator: Red light which flashes when the
telephone is ringing.
This is sometimes referred to as a ‘Visual Ringing Indicator’.
2.
status
LED indicator:
a. Solid red light when ‘In Use’.
b. Solid green light when in Speakerphone mode.
c. Flashing green light when on ‘Hold’.
PLACING A TELEPHONE CALL
1. Remove the Handset from the Base, or press the button.
2. Press the keypad buttons to dial the phone number you want.
3. After you have completed the phone call, place the Handset back on the Base.
REDIAL
If you want to redial the last number dialed, simply pick up the Handset or
press the button, then press the button. The telephone
will automatically redial the last number dialled.
RECEIVING A TELEPHONE CALL
When the phone rings, pickup the Handset from the Base, or press the
button and begin the conversation.
ACCESSING THE CALL WAITING SERVICE USING THE
CALL WAITING BUTTON (New Zealand Model only)
While talking you hear the Call Waiting beep signal.
Press the button. This feature sends a 600mS timed “hook-flash”
on the telephone line for accessing services such as Call Waiting, etc.
NOTE: You must subscribe to Telecoms Call Waiting Service before you can use this feature.
FP102-OM.qxd 7/12/98 09:27 Page 18

ACCESSING THE CALL WAITING SERVICE USING THE
CALL WAITING BUTTON (Australian Model only)
1. While talking, you hear the call waiting signal (series of beep tones).
2. Press the button then to switch call and put the current
call on hold.
3. To switch back to original call, press the button then .
MUTE
Press and hold the button to turn off the Handset microphone, allowing
private and confidential conversations in the same room without the calling party
hearing. Release the button to resume the conversation with the calling
party.
PLACING A CALL ON HOLD
1. To place a call on hold, press the button. The
status
LED will
flash green and you can hang up. (The Party on Hold will hear music).
2. To begin the conversation again:
Pick up the Handset or press the button or pick up an extension
phone, the hold function will then be automatically released.
MUSIC ON HOLD
When a call is placed on Hold, the
status
LED flashes and the telephone
will play a popular melody to reassure your caller that the call has not been
disconnected.
SPEAKERPHONE
To answer an incoming call, press the button and begin your
hands free SpeakerPhone conversation. Lift the Handset to resume normal
conversation
19
USING YOUR FP102
USING YOUR FP102
NOTE: The + call waiting procedure toggles call between the incoming
and the original call (vice versa). The + procedure will drop the
current call connection and pick up the incoming call or the call on hold.
FP102-OM.qxd 7/12/98 09:27 Page 19

20
USING YOUR FP102
USING YOUR FP102
USING THE PRE-PROGRAMMED FEATURE BUTTONS
(New Zealand Model only)
Instant access to some of Telecom’s most popular network service features have
been factory programmed into this telephone for your convenience.
Call Minder
Telecom’s Call Minder Message Centre is available for leaving and retrieving
messages.
Pick up the handset or press the button. Wait for the dial tone then
press the button.
The telephone will automatically dial the access code ‘083210’ to connect you
with Telecom’s ‘Call Minder’ service. Telecom’s ‘Call Minder’ Service will talk you
through the rest.
Divert On
Telecom’s ‘Immediate Call Diversion’ Service is available for diverting calls to
another number.
To make a SpeakerPhone call, press the button, listen for the dial tone
then use the keypad to dial the number you want to call. Lift the Handset to
resume normal conversation.
During a regular telephone conversation you can press the button and
replace the Handset. The
status
LED turns green and you can begin your
SpeakerPhone conversation.
NOTE: It is not recommended to operate the function under
noisy conditions.
NOTE: The
status
LED turns green during SpeakerPhone use, and red during
normal use.
NOTE: During a conversation you can adjust the
speaker
Volume Control on the side of
the telephone to increase or reduce the other parties voice.
FP102-OM.qxd 7/12/98 09:27 Page 20
Table of contents
Other Uniden Telephone manuals

Uniden
Uniden 1360 User manual

Uniden
Uniden TRU9565 Series Service manual

Uniden
Uniden EVOC2 User manual

Uniden
Uniden D1789 series User manual

Uniden
Uniden 3162 Series User manual

Uniden
Uniden DS810 User manual

Uniden
Uniden UCIS 3000 User manual

Uniden
Uniden Slimline 1260 User manual

Uniden
Uniden FP1220 User manual

Uniden
Uniden XDECT SSE25 Series User manual

Uniden
Uniden XS215 User manual

Uniden
Uniden D1680 User manual

Uniden
Uniden CEZ260 User manual

Uniden
Uniden DXAI4588-2 User manual

Uniden
Uniden DSS8955 User manual

Uniden
Uniden CEZ260 User manual

Uniden
Uniden CEZ260 Service manual

Uniden
Uniden D1680-4XTA User manual

Uniden
Uniden 9035 User manual

Uniden
Uniden XDECT 6145BT Series User manual