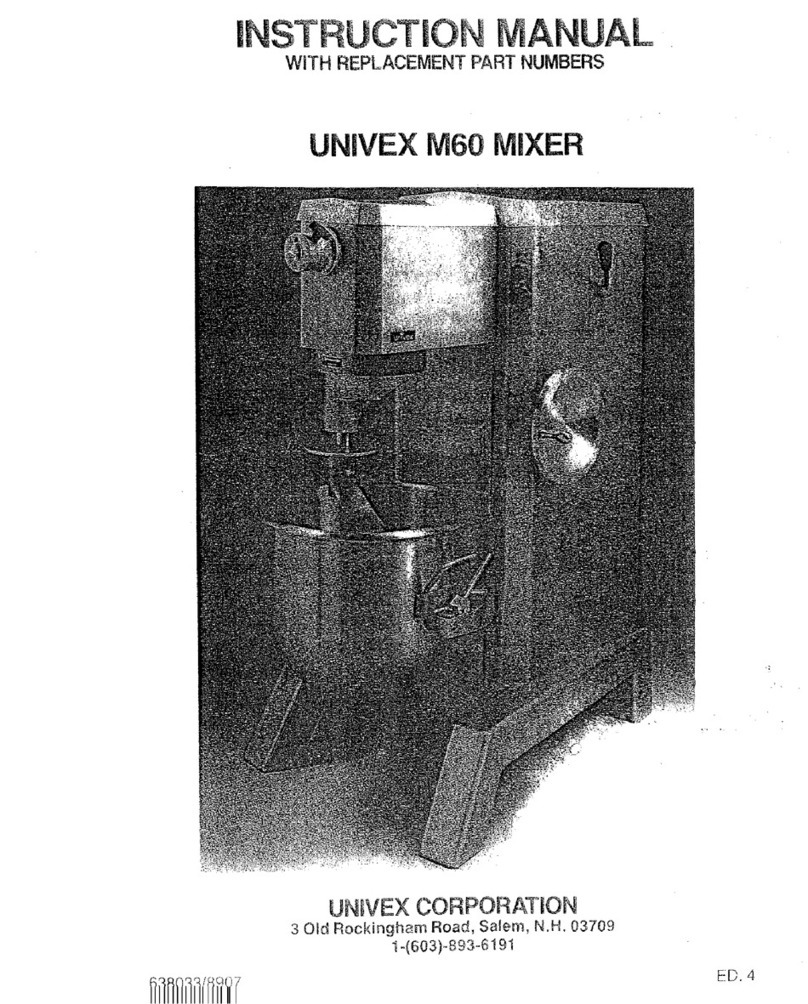
Univex SRM80+ User manual

SRM80+ PLANETARY MIXER
MAINTENANCE & PARTS MANUAL
Persons under age 18 are not permitted to operate or have accessibility to operate this
equipment per U.S. Dept. Of Labor Employment Standards Administration Fact Sheet No.
ESA913.
SRM60/80 SERVICE REV A

TABLE OF CONTENTS
DESCRIPTION PAGE
TABLE OF ONTENTS............................................................................................................I
LIST OF ILLUSTRATIONS.....................................................................................................II
1. TROUBLE SHOOTING GUIDE...........................................................................................1.1
2. ME HANI S MAINTENAN E
VT BELTS......................................................................................................................2.1
BELT REPLA EMENT...................................................................................................2.2
BELTADJUSTMENT......................................................................................................2.2
MOTOR............................................................................................................................2.4
BOWL LIFTADJUSTMENT...........................................................................................2.4
LUBRI ATION................................................................................................................2.5
REMOVAL OF TOP OVER ..........................................................................................2.6
3. TRANSMISSION
REMOVAL .......................................................................................................................3.1
TRANSMISSION PARTS LIST.......................................................................................3.3
BEATER HEAD ASSEMBLY..........................................................................................3.5
BEATER HEAD PARTS LIST.........................................................................................3.6
POWER TAKE-OFF ASSEMBLY...................................................................................3.7
POWER TAKE-OFF PARTS LIST ..................................................................................3.8
INPUTASSEMBLY.........................................................................................................3.9
INPUTASSEMBLY PARTS LIST...................................................................................3.10
VERTI AL SHAFT ASSEMBLY....................................................................................3.11
VERTI AL SHAFT ASSEMBLY PARTS LIST .............................................................3.12
REASSEMBLY ................................................................................................................3.13
4. BOWL SUPPORT ASSEMBLY
BOWL SUPPORT REMOVALAND DISASSEMBLY...................................................4.1
BOWL SUPPORT ASSEMBLY PARTS LIST.................................................................4.3
5. BOWL LIFT SLIDE & FRAMEASSEMBLY
REMOVALAND DISASSEMBLY..................................................................................5.1
BOWL LIFT SLIDE & FRAMEASSEMBLY PARTS LIST ..........................................5.3
6. POWER BOWL LIFT SLIDE & FRAMEASSEMBLY
REMOVALAND DISASSEMBLY..................................................................................6.1
ASSEMBLYAND INSTALLATION...............................................................................6.2
POWER BOWL LIFT SLIDE & FRAMEASSEMBLY PARTS LIST ...........................6.5
7. SPEED ONTROLASSEMBLY
REMOVALAND DISASSEMBLY..................................................................................7.1
ASSEMBLYAND INSTALLATION...............................................................................7.3
SPEED ONTROLASSEMBLY PARTS LIST...............................................................7.5
8. DRIVE ASSEMBLY
REMOVALAND DISASSEMBLY..................................................................................8.1
DRIVE ASSEMBLY PARTS LIST ..................................................................................8.2
9. MIXER HOUSING ASSEMBLY
MIXER HOUSING...........................................................................................................9.1
MIXER HOUSING ASSEMBLY PARTS LIST...............................................................9.1
10. APPENDIX
ELE TRI AL INSTALLATION FOR 3 PHASE MIXERS .........................................10.1
Page I

LIST OF ILLUSTRATIONS
DESCRIPTION PAGE
FIGURE 1 OVERALL VIEW OF MIXER....................................................................................III
FIGURE 2 UTAWAY VIEW OF MIXER...................................................................................IV
FIGURE 3 LUBRI ATION DIAGRAM......................................................................................2.5
FIGURE 4 TRANSMISSION ASSEMBLY.................................................................................3.4
FIGURE 5 BEATER HEAD ASSEMBLY....................................................................................3.6
FIGURE 6 POWER TAKE-OFF ASSEMBLY (PTO)..................................................................3.8
FIGURE 7 INPUTASSEMBLY.................................................................................................3.10
FIGURE 8 VERTI AL SHAFTASSEMBLY............................................................................3.12
FIGURE 9 TRANSMISSION AND SHAFTS ASSEMBLY DIAGRAM..................................3.14
FIGURE 10 BOWL SUPPORT ASSEMBLY.................................................................................4.4
FIGURE 11 BOWL LIFT SLIDE AND FRAME ASSEMBLY .....................................................5.4
FIGURE 12 POWER BOWL LIFT SLIDE AND FRAME ASSEMBLY......................................6.6
FIGURE 13 SPEED ONTROLASSEMBLY...............................................................................7.6
FIGURE 14 DRIVE ASSEMBLY...................................................................................................8.2
FIGURE 15 MIXER HOUSING ASSEMBLY...............................................................................9.2
FIGURE 16A WIRING DIAGRAM 208-230V, 60HZ, 1PH / 220-240V, 50HZ, 1PH..................10.2
FIGURE 16B WIRING DIAGRAM 208-230V, 60HZ, 3PH / 220-240V, 50HZ, 3PH..................10.3
FIGURE 16 WIRING DIAGRAM 460V, 60HZ, 3PH / 280-400V, 50HZ, 3PH .........................10.4
FIGURE 16D WIRING DIAGRAM WITH POWER BOWL LIFT
208-230V, 60HZ, 1PH / 220-240V, 50HZ, 1PH..............................................10.5
FIGURE 16E WIRING DIAGRAM WITH POWER BOWL LIFT
208-230V, 60HZ, 3PH / 220-240V, 50HZ, 3PH...............................................10.7
FIGURE 16F WIRING DIAGRAM WITH POWER BOWL LIFT
460V, 60HZ, 3PH / 380-400V, 50HZ, 3PH ...............................................10.9
Page II

OVERALLVIEW OF MIXER
FIGURE 1
1. BEATER HEAD 12. START BUTTON
2. HUTE 13. STOP BUTTON
3. SAFETY RING ASSEMBLY 14. BOWL LIFT HANDLE
4. MAGNET 15. REAR A ESS PANEL
5. No.12 HUB 16. AP
6. THUMB S REW 17. BOWL SUPPORT
7. UPPER MOUNTING BRA KET 18. BOWL LAMP
8. TIMER (OPTIONAL) 19. BOWL
9. SPEED ONTROL LEVER 20. BOWL SUPPORT PIN
10. SPEED INDI ATOR LABEL 21. BOWL MOUNTING BRA KET
11. ORD 22. LOWER MOUNTING BRA KET
Page III

CUTAWAY VIEW OF MIXER
FIGURE 2
Page IV

SRM60+ / SRM80+ TROUBLESHOOTING GUIDE
TROUBLE POSSIBLE CAUSE REMEDY
1. Mixer will not operate. 1.1 Timer not turned on.
1.2 Burned switch contacts.
1.3 Electrical service down.
1.4 Motor capacitor defective.
1.5 Burned out motor.
1.6 Magnetic starter tripped
due to overload.
1.7 Safety ring not mounted
or closed.
1.8 Bowl not raised.
1.1 Turn timer on.
1.2 Replace.
1.3 heck electrical service.
Replace fuse or reset circuit
breaker if necessary.
1.4 Replace motor.
1.5 Remove, test, repair or
replace.
1.6 Wait several minutes and
push start button.
1.7 Install safety ring.
1.8 Raise bowl completely.
2. Mixer runs but agitator
will not turn. 2.1 Drive belt off pulley
broken or slipping.
2.2 Key or pin sheared on
input shaft, input gear,
bevel pinion, bevel gear,
vertical shaft or beater
head shaft.
2.3 Shifting speed with mixer
not running.
2.1 Reinstall drive belt on motor
pulley and adjust mounting
center distance or replace.
2.2 Locate by step inspection and
replace defective part.
2.3 With mixer running, slowly
move speed control lever to
speed 4 then back to speed 1
to reengage belt.
3. Agitator stalls during
mixing. 3.1 Mixer bowl is overloaded.
3.2 Speed is set to high for
the mix.
3.3 Loose belt.
3.4 ontamination of belt
with grease.
3.1 Adjust contents of bowl.
3.2 Shift speed lower till action
rotates smoothly.
3.3 Readjust pulley center
distance to tighten belt.
3.4 lean pulleys and replace
belt.
4. Speed does not change
properly. 4.1 Loose belts.
4.2 Vari-speed pulley
inoperative.
4.1 Tighten or replace belts.
4.2 Remove, clean and lubricate
or replace.
5. Mixer runs, but
repeatedly cuts out and
stops.
5.1 Bowl overloaded.
5.2 Speed is set too high for
the mix.
5.3 Service voltage too low or
fluctuating.
5.4 Starter improperly set.
5.1 Adjust contents of bowl.
5.2 Reduce speed.
5.3 heck electrical voltage.
5.4 Adjust amp setting on starter.
6. Attachments contact
bottom of bowl. 6.1 Dented bowl.
6.2 Bowl height is set too
high.
6.1 Remove dent or replace bowl.
6.2 Readjust bowl height.
Page 1.1

SRM60+/ SRM80+ TROUBLESHOOTING GUIDE ( ONTINUED)
7. Attachments contact
side of bowl 7.1 Dented bowl.
7.2 Insufficient clearance
between bottom of bowl
and beater.
7.1 Remove dents or replace bowl.
7.2 Adjust bowl height.
8. Excessive noise 8.1 Gears need to be repacked
with grease.
8.2 Badly worn or frayed drive
belts.
8.3 Attachments hitting bowl.
8.4 Overloaded mixing bowl.
8.5 Defective bearings
8.1 Locate source by inspection
and repack with grease.
8.2 Replace belts.
8.3 Inspect for cause in items
6 & 7 above.
8.4 Adjust contents of bowl
8.5 Locate the defective bearings
and replace the assembly
Page 1.2

MECHANICS MAINTENANCE
Every six months a mechanic should perform the following inspection and maintenance.
CVT BELT
1. WARNING Start the mixer and adjust the speed control lever (Figure 1 [9]) to the lowest speed
(speed 1). Stop the mixer.
FOR SAFETY, DISCONNECT THE ELECTRICALPOWER SUPPLY CORD.
2. Remove the top cover (Figure 15 [4]) per section 2 mechanics maintenance “REMOVAL OF
TOP OVER” on page 2.6.
3. Remove the rear access panel (Figure 15 [5]).
4. Inspect the drive belt (Figure 14 [3]). If the belt is excessively frayed or has a heavily glazed
surface, replace it.However it is generally the best judgement to leave a drive belt in the machine
if it is performing well, even if it shows moderate wear. Inspect the gripping surface of the belt
for excessively glazed surfaces or contamination by grease or oil.
5. heck the belt for proper tension. The outer edge of the belt should be flush to 1/16 inch below
the outer diameter of the upper variable speed pulley when the mixer is in speed “1”. If not,
adjust the belt using the “Belt Adjustment” procedure on page 2.2.
6. Start the mixer and shift the speed control from speed “1” to speed “4” and shut the mixer off.
7. heck the position of the belt on the lower vari-speed pulley. The belt should be flush to 1/16
inch below the outer flange of the pulley. If not adjust the belt using the “Belt Adjustment”
procedures on page 2.2.
Page2.1
Check upper
vari-speed pulley
Check lower
vari-speed pulley

BELT REPLACEMENT
1. Run the mixer and shift to first speed “1” and shut the mixer off.
FOR SAFETY, DISCONNECT THE ELECTRICALPOWER SUPPLY CORD.
NOTE MIXERS WITH POWER BOWLLIFT:
Loosen the four 5/16-18 Kep nuts (Figure 12 [11]) and slide the bracket (Figure 12 [16]) all the
way toward the front of the mixer housing and remove the chain (Figure 12 [10]).
2. With the mixer OFF, shift the mixer to fourth speed “4”.
3. Unwrap the belt from the top pulley. Slide the belt between the top pulley and the speed control
cam (Figure 13 [15]).
4. Remove the belt from the lower vari-speed pulley. NOTE: the bowl slide must be in the lowered
position for the belt to clear the nose of the pulley.
WARNING The pulley flanges are spring loaded. Keep your fingers away from the pulley
while removing the belt.
5. Install the new belt in the reverse of the above procedure. Place the new belt around the lower
vari-speed pulley and pull the belt into the pulley to sperate the flanges of the pulley and allow
installation of the belt on the upper vari-speed pulley.
6. Adjust the belt as described below.
BELT ADJUSTMENT
1. Upper Vari-Speed pulley
a. With the mixer in speed 1, loosen the nuts holding the speed control bracket (Figure []), de-
tent housing [] and strap [].
b. If the belt was riding outside the pulley flanges, tap the bracket lightly towards the rear of the
mixer. If the belt was riding more than 1/16 inch below the pulley flanges, lightly tap the
bracket towards the front of the mixer. Shifting the speed control to speed 2 may help.
NOTE Move both the bracket [] and the detent housing [] the same amount. The assembly
must remain perpendicular to the mixer housing or binding of the speed control will result.
c. Retighten the nuts and run the mixer in speed 1 and check the belt position on the upper
pulley. Repeat the procedure if necessary until the belt is flush to 1/16 inch below the upper
pulley flange.
2. Lower Vari-Speed pulley
Once the upper vari-speed pulley is adjusted the lower pulley must be checked and adjusted as
necessary.
Page2.2

d. Start the mixer and shift the speed control to speed 4 and stop the mixer. heck the position
of the belt on the lower vari-speed pulley. The belt should be flush to 1/16 inch below the
outer edge of the pulley flanges.
e. If adjustment is needed, loosen the nuts (Figure []) and raise or lower the motor using the
nuts on the under side of the motor.
NOTE The base of the motor must remain parallel to the base of the mixer. If the base of the
motor is not parallel to the mixer base the belt life will be reduced and the mixer may shift
poorly.
f. Retighten the top nuts and run the mixer in speed 4 and check the belt position on the lower
vari-speed pulley. Repeat the procedure if necessary until the belt is flush to 1/16 inch below
the upper pulley flange.
Page 2.3
Motor Base
Nuts
Speed control
Bracket Mounting Nuts
Strap Detent Housing
Mounting Nuts

MOTOR
heck the motor (Figure 14 [4]) for overheating, noise and excessive end play of the shaft.
Replace the motor if it is found to be defective with a factory approved motor. Replacing the
motor with a nonapproved motor will void the warranty.
3. BOWL LIFT ADJUSTMENT (Figure 11 and 12)
FOR SAFETY, DISCONNECT THE ELECTRICALPOWER SUPPLY CORD.
a. Place mixing bowl on the bowl support (Figure 1 [17]) and a batter beater on the beater head
shaft (Figure 1 [1]).
b. Raise the bowl support to the up position.
c. heck the clearance between the bottom of the bowl and the lowest point of the batter beater.
The clearance should be 3/16 inch, plus or minus 1/16 inch.
d. If adjustment is required, loosen the jam nut and turn the stop screw until the correct clearance is
obtained. Tighten the jam nut.
Stop Screw
Page 2.4
Jam nut

LUBRICATION
1. The lubrication instructions are listed in Figure 3.
2. Remove the top cover per Removal Of Top over on page 2.6 and remove the rear access panel.
3. In order to service the gearbox, it will be necessary to remove the transmission cover. A thin blade
putty knife will prove helpful in separating the silicone sealant between the cover and the gearbox.
Do not bend the cover. Thoroughly remove all dried sealant before applying new sealant when rein-
stalling the cover. Do not allow sealant to enter the gearbox. Silicone sealant such as Dow orning
Silastic® 732RTV or Permatex® Form-A-Gasket® are recommended when resealing the
transmission.
4. Use care to avoid getting lubricant on the drive belt and pulleys. Lubricants will deteriorate the belt
grip and affect the mixer performance.
WARNING NEVER WORK ON THE TRANSMISSION WITH THE MIXER RUNNING.
IT IS RE OMMENDED THAT THE ELE TRI AL SERVI E POWER ORD BE DIS ON-
NE TED TO PREVENTA IDENTAL START UP.
LUBRICATION INSTRUCTIONS
FIGURE 3
Beater head D
C
top of the housing.
to be 6 inches from the
Oil level in transmission
shaft
A
Bowl clamp
Internal gear
Bowl Lift Slide
and lead screw
Grease every 6 months
lubricant.
Redistribute grease
as needed or when
40 weight gear oil.C
Da light coat of food grade
After every wash apply
A
performed on the
B
A
maintenance is
machine grease.
with general purpose
B
beater head assembly.
Lubricate the motor every
ten years with high quality
bearing grease. One or
two full strokes in each of
the fittings on the ends of
the motor.
Page 2.5

ME HANI S MAINTENAN E
REMOVAL OF TOP COVER
a. The top cover (Figure 15 [4]) must be removed to perform maintenance operations on the mixer.
It is secured by a spring clip at its front end and a screw in back. Before removing the top cover
DIS ONNE T THE ELE TRI AL POWER ORD. Remove the screw in the rear, lift the rear
of the cover and push it forward about 2 inches and lift it off.
b. Reinstall the top cover in the reverse of the above procedures using care to insure that the cover
sits squarely and uniformly on the mixer housing.
Rear ccess Panel
Top Cover Screw
Top Cover
Page 2.6

REPAIR INSTRUCTIONS
TRANSMISSION (Figure 4)
REMOVAL
1. Run the mixer and shift to low speed (speed 1) and shut the mixer off.
2. WARING DIS ONNE T THE ELE TRI AL POWER SUPPLY ORD.
3. Remove the drain plug (Figure 4 [18]) and drain the transmission oil.
4. Remove the mixer top cover (Figure 15 [4]) per section 2, Mechanics Maintenance “REMOVAL
OF TOP OVER” instructions on page 2.6 and remove the rear access panel (Figure 15 [5]).
5. Remove the drive belt per section 2, Mechanics Maintenance “BELT REPLA EMENT”
instructions on page 2.2.
6. Remove the speed control assembly per “SPEED ONTROL ASSEMBLY” Removal and
Disassembly on page 7.1.
7. Loosen the two set screws in the upper vari-speed pulley and remove the pulley.
8. Remove the transmission cover (Figure 4 [4]) and remove the remaining oil from the
transmission housing.
9. CAUTION: The transmission assembly is very heavy weighing approximately 260 pounds and
must be supported prior to starting step (10). It is recommended that a portable hydraulic lift of
sufficient capacity be used when removing the transmission.A lifting strap or sling of suitable
strength may be used on the PTO shaft (Figure 6 [12]) at mid span to support the transmission
housing.
10. Remove the four 1/2-20 hex head cap screws (Figure 4 [12]) and washers and remove the
transmission assembly from the mixer housing and place it on a work bench.
11. Rotate the gear train by hand and inspect it for worn or chipped gears, bent shafts, worn bearings
and excessive backlash. Backlash, measured at the gear teeth, exceeding .030 inch is considered
excessive. After inspecting the gear train to isolate any problems, proceed to disassembly.
Page 3.1

Page 3.2
2 Set Screws Upper Vari-Speed Pulley
Transmission Mounting Bolts
Oil Drain Plug

TRANSMISSION ASSEMBLY
FIGURE 4
ILLUS. No. PART No. DESCRIPTION QTY.
1064035 Transmission Assembly with shafts (SRM 60) 1
1080500 Transmission Assembly with shafts (SRM 80) 1
1 1065009A Transmission Housing Assembly & Vertical Shaft Assembly (SRM60) 1
1080502A Transmission Housing Assembly & Vertical Shaft Assembly (SRM80) 1
2 Oil Tube 1
3 Set Screw #8-32 x 1/4 cup point 1
1065000 Transmission cover assembly (SRM60) 1
1080022 Transmission cover assembly (SRM80) 1
4 Transmission over 1
5 Phillips pan head screw #10-32 x 3/8 8
6 Spring lip 1
7 Flat Washer #10 2
8 Lock Washer #10 2
9 Phillips pan head screw #10-32 x 3/8 2
10 Plug 1
11 Seal 1
12 Hex Head ap Screw 1/2-20 x 1 4
13 Lock Washer 1/2 4
14 Flat Washer 1/2 4
15 Dowel Pin 1/2 x 3/8 2
1012439A Magnet Kit 1
16 Magnet Holder 2
17 Magnet 2
18 Drain Plug 1/4 NPT 1
1061111A Internal Gear Kit 1
19 Internal Gear 1
20 Socket Head ap Screw 1/4-20 x 1/2 8
21 Splash Ring 1
22 Label 1
23 Transmission Wrap (SRM60 only) 1
24 Label 1
Page 3.3

TRANSMISSION ASSEMBLY
FIGURE 4
Page 3.4

Beater head assembly (Figure 5)
1. Remove the 1/2-20 hex head cap screw (Figure 5 [14]), (left hand thread), and washer [13]
and remove the beater head assembly using the two jack screws (Figure 5 [12]) if
necessary.
2. Remove the drive pin (Figure 5 [3]) with the tool T6012.
3. Remove one retaining ring [11], beater head pinion gear [9] and the key [10] from the
beater head shaft [2].
Do not pry against the outer rim of the beater head housing as this may crack the casting.
NOTE If the gear requires replacement, always replace it’s mating gear.
Jack Screws
1/2-20 Cap Screw
NOTE: left hand thread
Page 3.5

BEATER HEAD ASSEMBLY
FIGURE 5
ILLUS. No. PART No. DESCRIPTION QTY.
1064075 Beater Head Assembly 1
1 Beater Head Housing 1
2 Beater Head Shaft 1
3 1200310 Dowel Pin 1/2 x 2 1
4 Bearing 1
5 Spacer 1
6 Bearing 1
7 Retaining Ring, Internal N5002-281 1
8 Seal 1
9 1061003A Pinion Gear Assembly 1
10 Key 1
11 Retaining Ring, External 5101-137 3
12 Socket Head Set Screw 5/16-18 x 1-3/4 2
1064075A Beater Head Hardware Kit 1
13 Washer 1
14 Hex Head ap Screw 1/2-20 x 1-1/4 left hand thread 1
Page 3.6

POWER TAKE-OFFASSEMBLY (Figure 6)
1. Remove the retaining ring Figure 6 [14]) from the end of the PTO shaft [12] and remove the
helical gear [13] from the PTO shaft.
2. Remove the three 5/16-18 hex head cap screws [7], Washers [6],. Thread two of the 5/16-18
screws into the threaded holes in the transmission housing and turning the screws alternately,
jack the power take-off assembly from the transmission housing.
NOTE Gear [13] should be replaced as a set with the input shaft and gear PN1064532.
bevel gear
5/16-18 hex screws
helical gear
Page 3.7
power take-off assembly
power take-off housing bevel gear power take-off shaft
threaded jack
screw holes
Table of contents
Other Univex Mixer manuals

Univex
Univex Swing Ring SRM20 User manual
Univex
Univex Swing Ring SRM20 User manual
Univex
Univex SRM12M-1 User manual
Univex
Univex SRM12 User manual
Univex
Univex ME130 User manual
Univex
Univex SRM3O+ User manual
Univex
Univex Swing Ring SRMF20 User manual
Univex
Univex GL50 User manual
Univex
Univex SRM8 User manual

Univex
Univex M130 User manual
Univex
Univex RBM User manual
Univex
Univex SRM30+ User manual
Univex
Univex SRM60+ User manual
Univex
Univex SRM40+ User manual

Univex
Univex SRM12 Quick start guide
Univex
Univex GL50 User manual
Univex
Univex Swing Ring Series User manual

Univex
Univex SRM60+ User manual

Univex
Univex SILVER 50 User manual

Univex
Univex SRM12 User manual
