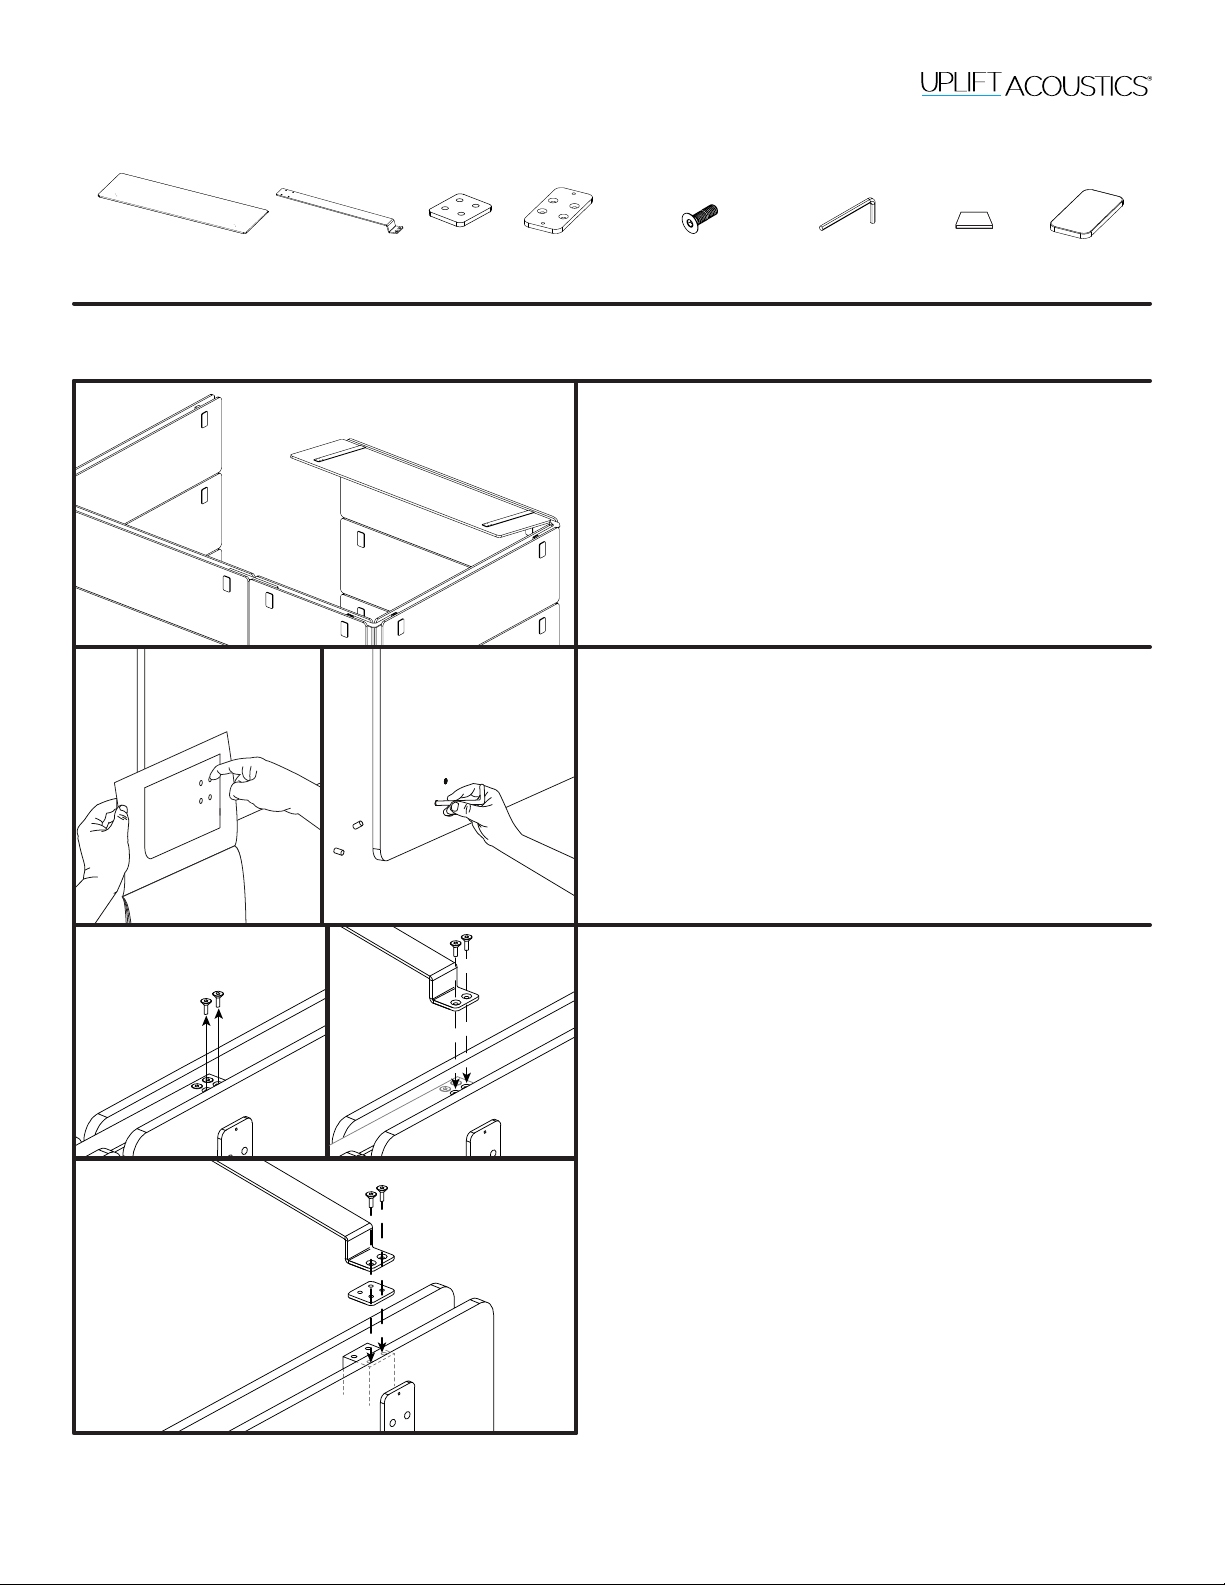
Step 2
If a post already has a Cubicle connector attached to the
top (L, S, T, or 4-Way), remove the two M5x25 screws oppo-
site the side your Canopy will be located on. Place a Canopy
bracket over the Cubicle connector bracket and replace the
two removed screws through both brackets and into the top
of the Post.
If a Post does not have a Cubicle connector attached to the
top, place a Spacer on top of the Post and then a Canopy
bracket over the Spacer and install two M5x25 screws through
both pieces and into the top of the Post.
Notes Before Assembly
The Canopy is an add-on for your OneWall Acoustic Ofce
Cubicle Partition. It provides a panel that hangs over your
workspace to further reduce ambient noise and provide a
more quiet space.
Before you begin, make sure that the panel used for the Can-
opy is the same width as the panels of the OneWall assembly
to which you are attaching the Canopy.
Package Contents
OneWall Canopy
ACU013-CONNECT-CANOPY
M5x25 Machine screw
(qty 8)
Allen wrench
(3mm)
Panel plate
(qty 2)
Canopy bracket
(qty 2)
Spacer
(optional. qty 1)
Acoustic panel
(qty 1. Sold separately)
Adhesive strips
(optional. qty 2)
Panel cap
(qty 2)
The Canopy is designed for Cubicles only.
Attaching the Canopy to a Mobile Wall could present a tipping hazard.
Step 1
Prepare the Acoustic panels for assembly by removing the mount-
ing hole plugs.
If you still have your instruction book from assembling your Cu-
bicle, use the template from the center pages to help locate the
holes. Line up the template along a corner on one of the long edg-
es. Press at the set of holes opposite the corner. If that creates in-
dentations making the hole locations visible, poke them out with
the Allen wrench. If you don’t see any indentations, try again
on the other long edge.


