6
ENCIENDA Y APAGUE EL DISTANCIOMETRO
LASER DIGITAL.
1. Presione el botón para encender la herra-
mienta, esta establecerá por default la modali-
dad de medición de distancia sencilla, indican-
do que la herramienta esta lista para tomar
medidas.
2. Presione el botón cerca de 2 segundos
para apagar la herramienta.
3. Cuando la herramienta esta inactive por 5
minutos, este se apagara automáticamente
para guardar batería.
PARA CAMBIAR LA MEDIDA
DE REFERENCIA
El ajuste de referencia predeterminada es des-
de la parte trasera de la herramienta.
Presionando la tecla repetidamente, el ajus-
te se puede cambiar entre la posición de la par-
te frontal de la herramienta y la parte trasera
de la herramienta. Por lo que la siguiente me-
dida puede ser tomada desde la posición que
usted se encuentre.
Después de apagar, el punto de referencia por
defecto automáticamente de nuevo a la parte
posterior.
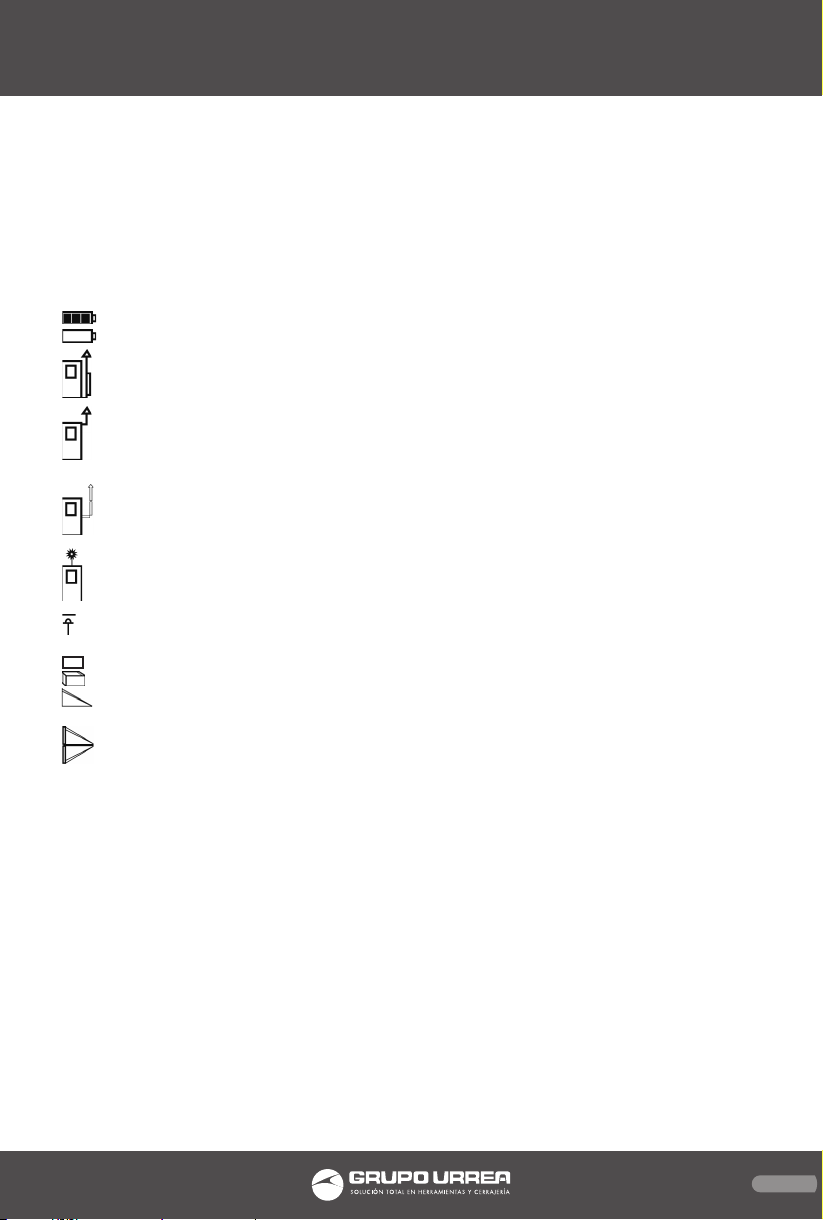
PARA CAMBIAR UNIDADES / ENCENDER Y
APAGAR LA LUZ DEL LCD
Presione la tecla , la luz del LCD puede ser
apagada o encendida, Un usuario en ambiente
oscuro puede activar esta función en cualquier
momento, se muestran claramente los datos
de medición en la pantalla Presione la tecla
y mantenga presionando por 3 segundos para
cambiar las unidades de medidas m, ft, in, ft+/
in. *in=pulgadas, ft=pies, m=metros.
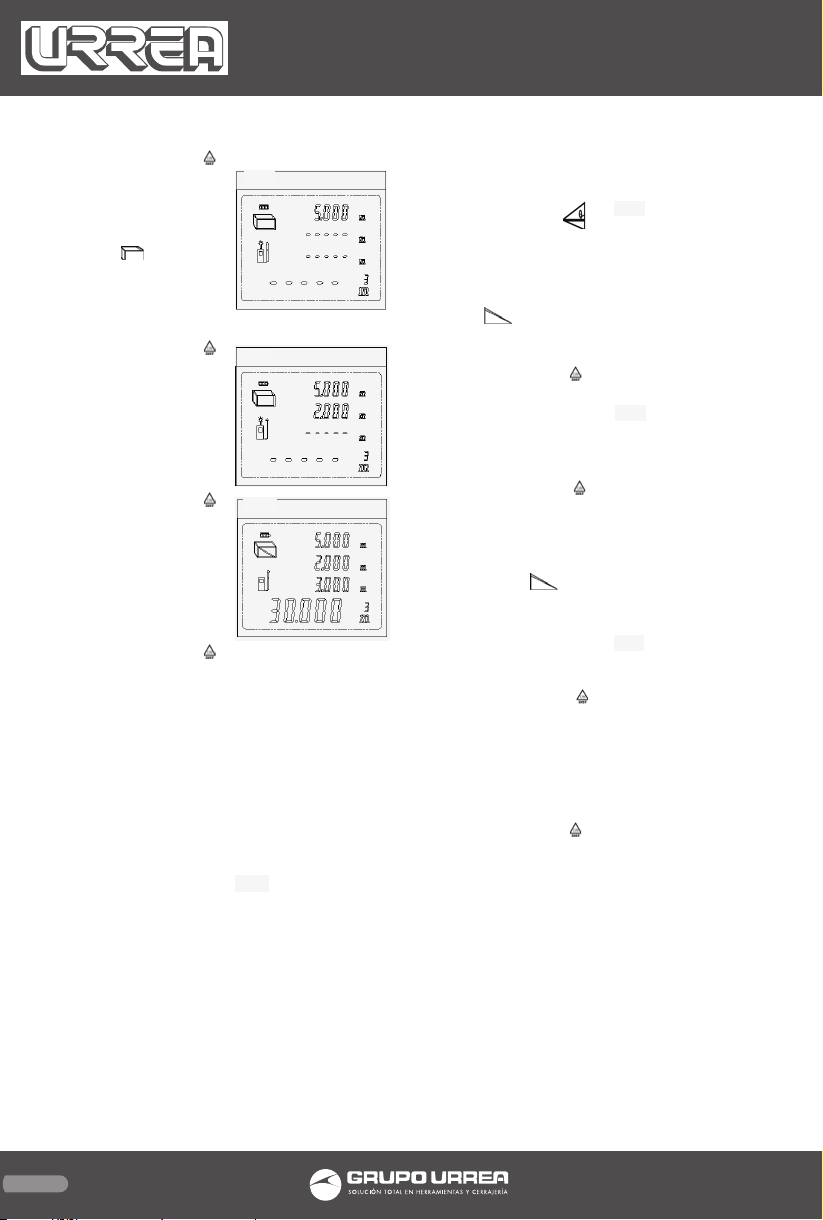
PARA TOMAR MEDIDAS
Coloque la herramienta en el punto donde
quiera medir, Presione la tecla para la salida
del láser, presione nuevamente para tomar la
medición.
NOTA:El láser se apagara después de 20 segun-
dos de inactividad. Si la medida no ha sido to-
mada con los 20 segundos previos, presione la
tecla nuevamente para encender el láser.
PRECAUCIÓN: No apunte el láser a perso-
nas o animales y no mire jamente el rayo lá-
ser o examine directamente con instrumentos
ópticos.
ENCIENDA Y APAGUE EL DISTANCIOMETRO
LASER DIGITAL.
1. Presione el botón para encender la herra-
mienta, esta establecerá por default la modali-
dad de medición de distancia sencilla, indican-
do que la herramienta esta lista para tomar
medidas.
2. Presione el botón cerca de 2 segundos
para apagar la herramienta.
3. Cuando la herramienta esta inactive por 5
minutos, este se apagara automáticamente
para guardar batería.
PARA CAMBIAR LA MEDIDA
DE REFERENCIA
El ajuste de referencia predeterminada es des-
de la parte trasera de la herramienta.
Presionando la tecla repetidamente, el ajus-
te se puede cambiar entre la posición de la par-
te frontal de la herramienta y la parte trasera
de la herramienta. Por lo que la siguiente me-
dida puede ser tomada desde la posición que
usted se encuentre.
Después de apagar, el punto de referencia por
defecto automáticamente de nuevo a la parte
posterior.
PARA CAMBIAR UNIDADES / ENCENDER Y
APAGAR LA LUZ DEL LCD
Presione la tecla , la luz del LCD puede ser
apagada o encendida, Un usuario en ambiente
oscuro puede activar esta función en cualquier
momento, se muestran claramente los datos
de medición en la pantalla Presione la tecla
y mantenga presionando por 3 segundos para
cambiar las unidades de medidas m, ft, in, ft+/
in. *in=pulgadas, ft=pies, m=metros.
PARA TOMAR MEDIDAS
Coloque la herramienta en el punto donde
quiera medir, Presione la tecla para la salida
del láser, presione nuevamente para tomar la
medición.
NOTA:El láser se apagara después de 20 segun-
dos de inactividad. Si la medida no ha sido to-
mada con los 20 segundos previos, presione la
tecla nuevamente para encender el láser.
PRECAUCIÓN: No apunte el láser a perso-
nas o animales y no mire jamente el rayo lá-
ser o examine directamente con instrumentos
ópticos.