Ushio Midori UDC365 User manual

OPERATING MANUAL
UDC PORTABLE SPOT CURE
LED LIGHT SOURCE

Midori™UDC Portable Spot Cure www.ushio.com2
SECTION 1 INTRODUCTION .............................................................................. 3
1.1 SYSTEM SYMBOL DESCRIPTIONS ................................................... 3
1.2 WARNING AND PRECAUTIONS ......................................................... 4
SECTION 2 UDC PSC UNIT DESCRIPTION AND SPECIFICATIONS ............... 5
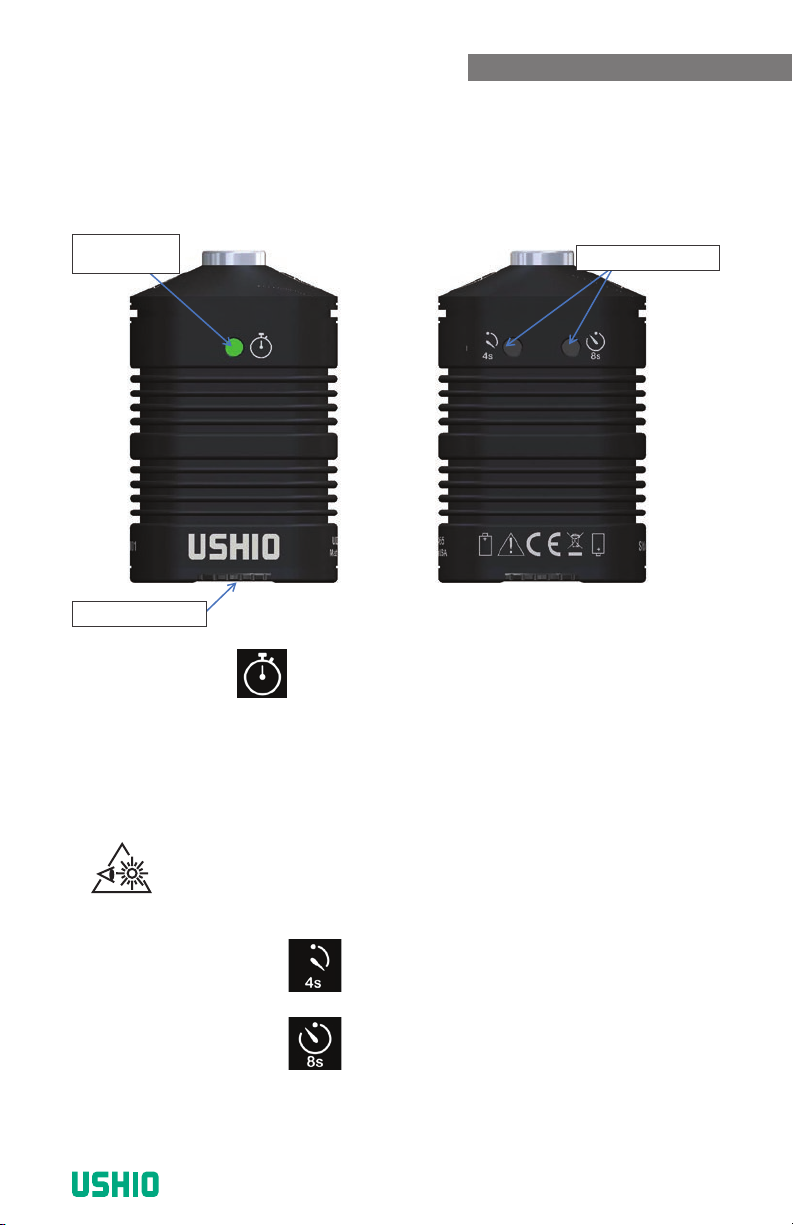
2.1 BODY DIAGRAM AND DESCRIPTIONS............................................. 5
2.2 SPECIFICATIONS ............................................................................... 6
2.3 PRODUCT ORDERING INFORMATION............................................. 8
SECTION 3 UDC PSC OPERATION, BATTERIES AND CHARGER.................. 9
3.1 OPERATION ........................................................................................ 9
3.2 BATTERIES ....................................................................................... 11
3.3 CHARGER......................................................................................... 13
SECTION 4 CARE AND MAINTENANCE ......................................................... 18
4.1 CLEANING ........................................................................................ 18
4.2 DRYING ............................................................................................. 19
SECTION 5 TROUBLESHOOTING.................................................................... 20
SECTION 6 LIMITED WARRANTY.................................................................... 21
SECTION 7 REGULATORY ............................................................................... 22
SECTION 8 MANUFACTURE CONTACT INFORMATION................................ 23
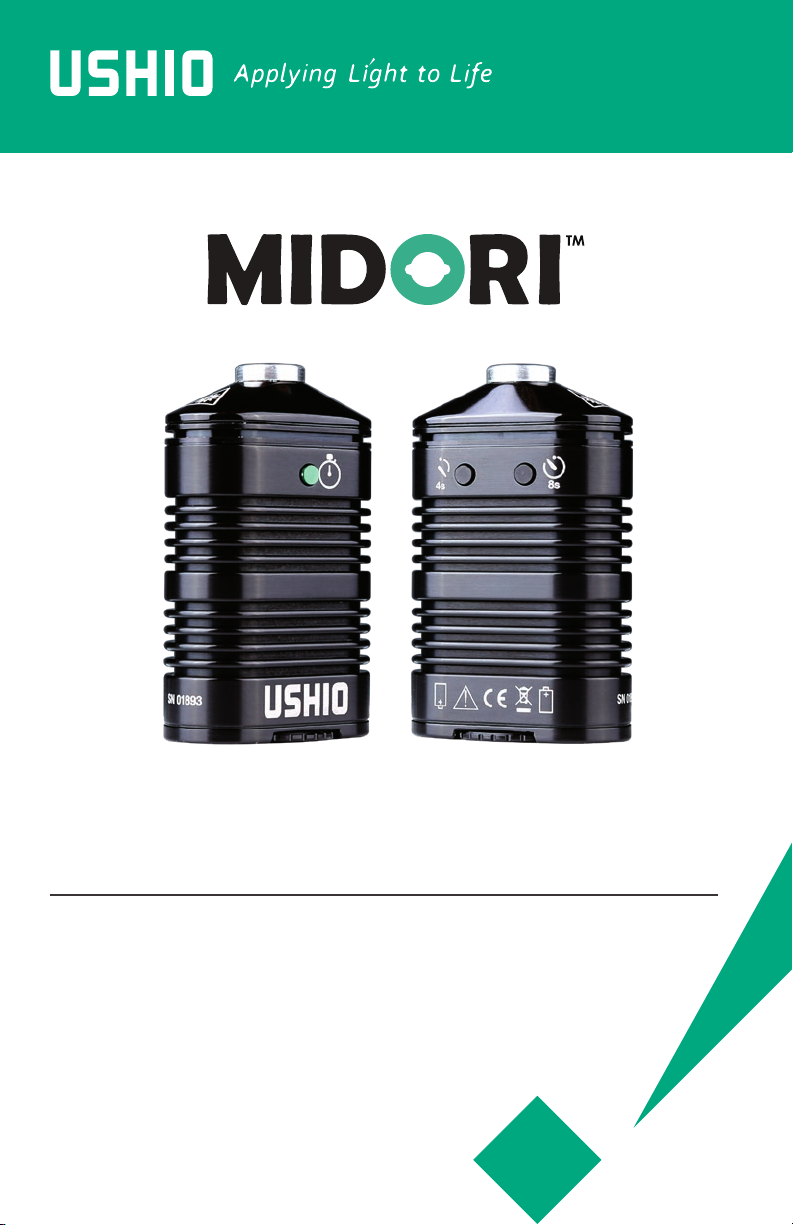
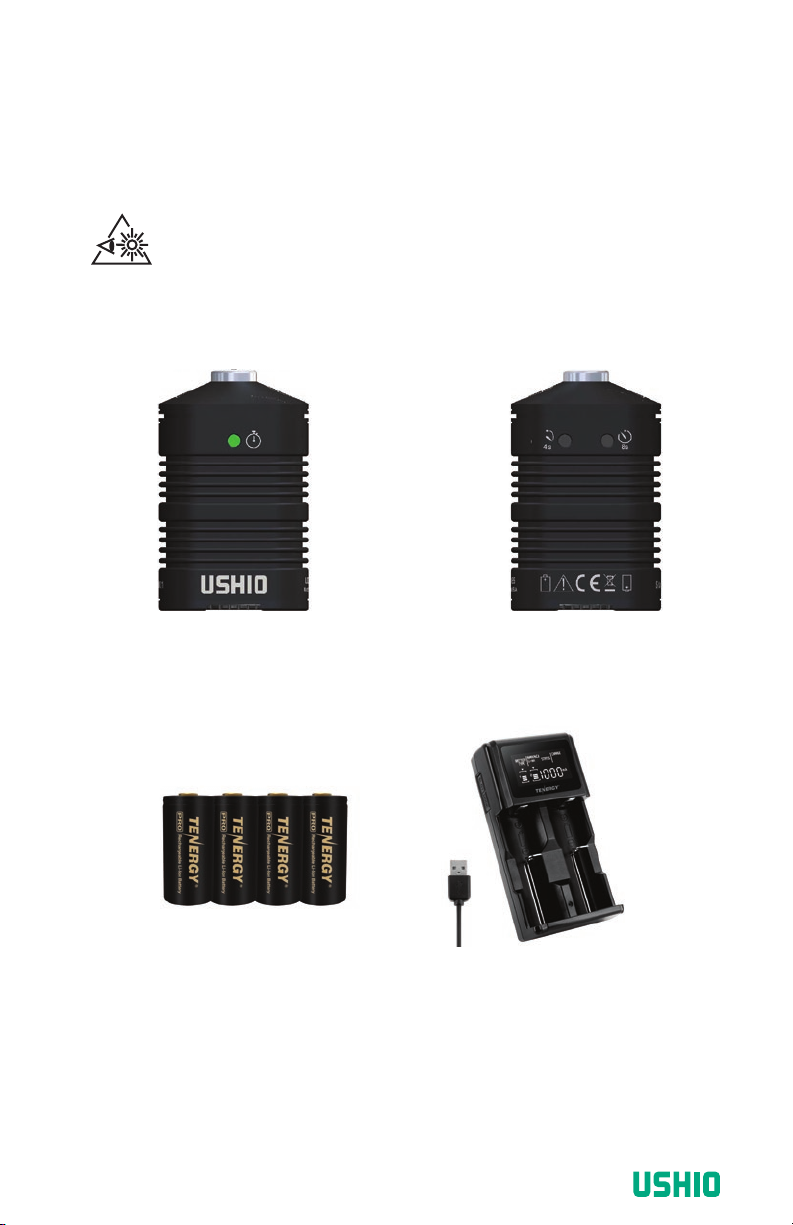
Thank you for purchasing the Midori™UDC Portable Spot Cure series LED Light
Source utilizing solid-state UV technology. The UDC UV spot cure illuminators are
intended for industrial applications that require a handheld device which features
high output, efficient, compact, and lightweight ultra-violet light emitting radiation.
The UDC spot cure units exhibit instant-on and long operating lifetime for direct
spot curing of common UV & UVV light activated adhesives. Please read this
operating manual in its entirety before using the product for operation and safety
precautions.
PREFACE
TABLE OF
CONTENTS

Operating Manualwww.ushio.com 3
Caution
Caution: Hot Surface
Manufacturer
Safety Glasses Advised CAUTION. Possibly hazardous optical
radiation emitted from this product. Do not stare at operating lamp.
May be harmful to the eye.
Hazard Warning
Bright Light
Important Information
UV
WARNING. UV emitted from this product, Avoid eye and skin
exposure to unshielded product.
Do not dispose of this product as unsorted municipal waste.
Prepare this product for reuse or separate collection as specified
by Directive 2002/96/EC of the European Parliament and the
Council of the European Union on Waste Electronic and Electrical
Equipment (WEEE). If this product is contaminated, this directive
does not apply.
INTRODUCTION
SECTION 1
1.1 SYSTEM SYMBOL DESCRIPTIONS

Midori™UDC Portable Spot Cure www.ushio.com4
Please be sure to handle UDC PSC unit with care at all times. The
electrical and optical components may be damaged by physical
trauma, extreme temperatures, or fluid invasion.
This manual describes the proper procedures for using the UDC
PSC unit. This also contains pertinent information on the proper
care and handling during use and storage.
Please read this entire manual carefully before using the UDC PSC
unit. If you have any questions concerning the material contained
in this manual or the operation or safety of the equipment, please
contact our Customer Service Department at CustomerService@
Ushio.com.
Check all items upon receipt to assure damage has not occurred
during shipment. Verify compatibility of all components and
accessories used with the UDC PSC unit.
Since the UDC PSC unit uses proprietary components, there are
no user serviceable or replaceable parts inside the unit.
Avoid storing or using the UDC PSC unit in areas of heavy traffic
where it may sustain physical damage.
Unit MAY GET HOT. Provide adequate ventilation to prevent
overheating.
DO NOT IMMERSE or store liquids above or on the UDC PSC unit.
Any changes or modifications made to this UDC PSC that are not
expressly approved by manufacturer will void the warranty.
The high intensity light at the front of the UDC PSC unit will create
bright light.To minimize risk of injury, avoid direct viewing or contact.
Safety glasses advised.
This equipment is not suitable for use in the presence of flammable
mixture.
1.2 WARNINGS AND PRECAUTIONS

Operating Manualwww.ushio.com 5
Stopwatch Button: The GREEN stopwatch button can be used to program
a custom LED on-time duration. Pressing and holding the stopwatch button for over
half a second will turn on the UV output and keeps the UV on until the button is
released. The amount of time that the button was held down is recorded. The next
time, tapping the stopwatch button for a short time will turn on the UV output for the
recorded amount of time instead of the default of 4 seconds. This recorded time is
stored until the batteries are removed.
WARNING!
Upon power up, the UDC UV drives the LED to full intensity. Avoid
looking directly at the LED when turning ON.
Preset Timer Buttons:
Pressing momentary button next to this
symbol turns on the unit for 4 seconds
preset duration.
Pressing momentary button next to this
symbol turns on the unit for 8 seconds
preset duration.
Battery Hatch Door: The battery cover seals the battery and electronics within the
body of the UDC PSC.
2.1 BODY DIAGRAM AND DESCRIPTIONS
Battery Hatch Door
Preset Timer Buttons
Programmable
Timer Button
Figure 1: UDC PSC Body Diagram
UDC PSC UNIT DESCRIPTION AND
SPECIFICATIONS
SECTION 2

Midori™UDC Portable Spot Cure www.ushio.com6
2.2 SPECIFICATIONS
Dimensions
Length: 24mm (0.94”)
Width: 46mm (1.8”)
Height: 74mm (2.9”)
Weight: 126.8g (4.5 oz)
Illumination System
Type & Power Rating: Light Emitting Diode (LED)
Wavelength: 365 or 405nm
LED Electrical Power: 3 Watts
Power System
Power Source: Battery Powered (2 x RCR123A)
Battery Type: (2) Lithium Ion RCR123A 3.7V,
750mAh Minimum
Battery Life for Continuous Runtime: 80 Minutes
Battery Charge Time: 2 Hours
Battery Recharge Cycles: 500 Charge Cycles
Environment
Operating Ambient Temperature Range: 10°C to 40°C (50°F to 104°F)
Storage Temperature Range: -15°C to 55°C (-5°F to 131°F)
Humidity: 0 – 95% RH
Mode of Operation: Continuous
Mechanical Dimensions
[27.5]
Ø 1.08
[73.7]
2.90
[46.0]
1.81
Dimensions are inches [mm]

Operating Manualwww.ushio.com 7
Typical Spectrum
Wavelength (nm)
250
0%
20%
40%
60%
80%
100%
275
300
325
350
375
400
425
450
475
500
525
550
365nm 405nm
REF: Relative Normalized Output
Nominal Peak Wavelength
— 365nm —405nm
Working Distance
FWHM Spot Size
Relative Intensity
Irradiance (mw/cm^2) - UDC365
Irradiance (mw/cm^2) - UDC405
0”
0.35" (9mm)
100%
2300
3000
1” (25 mm)
0.44" (11 mm)
15%
350
450
2” (51 mm)
0.75" (19 mm)
5%
125
160
Nominal Specifications

Midori™UDC Portable Spot Cure www.ushio.com8
2.3 PRODUCT ORDERING INFORMATION
Order Code #9500037 - UDC365 Spot Cure Pak (Basic Kit Configuration)
QTY Item # Product ID Description
1 T130-5014 UDC365 UDC365 UAI GB; PSC
1 5002491 UPC-02 2-bay Smart Charger
4 5002490 UPS-02 UPS-02 RCR123A Li-Ion Battery
Order Code #9500038 - UDC405 Spot Cure Pak (Basic Kit Configuration)
QTY Item # Product ID Description
1 T130-5015 UDC405 UDC405 UAI GB; PSC
1 5002491 UPC-02 2-bay Smart Charger
4 5002490 UPS-02 UPS-02 RCR123A Li-Ion Battery
Order Code Product ID Description
T130-5014 UDC365 UDC365 Portable Spot Cure Unit
T130-5015 UDC405 UDC405 UAI GB; PSC
5002490 UPS-02 UPS-02 RCR123A Li-Ion Battery
5002491 UPC-02 2-bay Smart Charger
5002532 UPS-04 AC Main Adapter

Operating Manualwww.ushio.com 9
The UDC PSC unit’s internal LED operates on 2 rechargeable Lithium-Ion batteries
and provides approximately 80 minutes of continuous operation when used with
new or fully charged batteries.
Battery Installation
1. At the bottom of the UDC’s battery hatch door, rotate the locking knob
counterclockwise until the line on the knob is pointing 90° from the indentation
mark on the hatch. Remove the hatch. Refer to figure 2.
2. Insert the batteries into the unit using the battery symbol orientation as
a guide. The negative terminal of each battery should be in contact with the
spring on each circuit board, refer to figure 3. Attach the hatch door then rotate
the locking knob clockwise until the line on the knob is pointing toward the
indentation mark.
Note: For added safety,the battery hatch door may only be inserted into
the UDC PSC body in one direction. If the door does not easily slide into
the case, rotate the hatch door 180°. This ensures the battery polarity
cannot be reversed.
To remove batteries, rotate the battery hatch door knob counterclockwise a quarter
turn until it stops, remove the door and allow the batteries to slide out.
Figure 2: Bottom View
Figure 3: UDC PSC Battery Installation
UDC PSC OPERATION, BATTERIES
AND CHARGER
SECTION 3
3.1 OPERATION

Midori™UDC Portable Spot Cure www.ushio.com10
Using the UDC PSC
1. Turn the UDC PSC ON by pressing any of the 3 buttons; either the GREEN
Stopwatch button or the 4 second or 8 second timer buttons, refer to figure 5
and 6.
WARNING!
Upon power up, the UDC PSC operates the LED to full intensity.
Avoid looking directly at the LED when turning ON.
2. Pressing any button while the UV output is on turns off the LED.
Batteries and Charger (Included)
Figure 5: GREEN Programmable Timer Button Figure 6: Preset Timer Control Buttons

Operating Manualwww.ushio.com 11
3.2 BATTERY
Standard Part: RCR123A (Circuit Protected)
Type: Li-Ion
Capacity: 750mAh
Output Voltage: 3.7V
Operation Temperature: -4°F to 140°F, or -20°C to 60°C
Battery Recharge Cycles: 500 Charge Cycles
Battery Charge Time: Up to 4 Hour
Dimensions: Diameter: 16.9mm x Length: 34.3mm
Battery Weight: 40g
Manufacturer / Part Number: Tenergy Item #34253
WARNING!
USE ONLY APPROVED BATTERIES.
Use only pairs of fully charged batteries. Do not mix newly charged
and depleted batteries.
Never mix rechargeable battery with non-rechargeable batteries.
Do not incinerate, disassemble, overcharge or short circuit the
battery.
Do not expose the battery to high temperatures above 122ºF/50ºC.
CAUTION!
The batteries should be removed from the UDC PSC unit if it will not
be used for extended time.
RCR123A Li-Ion Rechargeable Battery

Midori™UDC Portable Spot Cure www.ushio.com12
Charging the Batteries
1. Connect charger to a powered USB port or adapter. LCD on the charger will
turn on to indicate it’s properly powered.
2. Insert 1 ~ 2 battery into the slot, make sure + / - are correctly used.
3. Charging will auto start,
– Battery type screen will show the battery type being detected.
– (CHARGE) will show on the [status] screen.
4. When charging is done, ( ) will be displayed on the digital screen of the LCD.
5. Remove battery after it’s fully charged.
Reverse / Bad Cell / Short Circuit
Reverse the battery polarity, incorrectly inserting the battery, inserting alkaline
battery or short circuit will result in charging failure, the “Error” icon will be shown
on the LCD display and capacity gauge for the corresponding slot will flash rapidly.
Should this occur, please reposition / replace / remove the battery from the slot.

Operating Manualwww.ushio.com 13
3.3 CHARGER
Quick Reference
ALCD Display
BSLOT BUTTON Press to switch charging status between slot 1 and 2
CMODE BUTTON Press to change charging speed (Li-ion. LiFeP04, IMR only)
B+CActive / Deactivate LiFePO4 Mode
DCharging slot 1
ECharging slot 2
FMicro USB input port 5V DC 2A
Charger Features
• Manufacturer supplied charger is a 2-bay battery smart charger with MCU control
which features:
– Independent charging channels;
– Constant current and constant voltage charging;
– Ensures the quality and safety of charging process.
• Two-color LEDs indicate charging status.
• Each LED indicates the corresponding channel.

Midori™UDC Portable Spot Cure www.ushio.com14
Input/Output Characteristics of Charger
Input: 5V DC 2A
Output: 4.2V DC 500mA/1 000mA (Li-ion/I MR)
3.7V DC 500mA/1 000mA (LiFePO4)
1.48V DC 500mA (Ni-MH/Ni-CD)
Status Display: Backlit LCD
Built-In Protections: Short-circuit, Reverse Polarity, Bad Cell
Detection, Safety Timer
Compatible Rechargeable Battery
Ni-MH / Ni-Cd: AA / AAA / AAAA / CID / Sub C
IMR / Li-ion / LiFeP04: 18650, 26650, 22650, 18490,18350, 17670,
17500, 14500, 10440, 16340
Electrical Characteristics
Tenergy 2-bay Battery Smart Charger
Mechanical Dimensions
Dimensions
Length: 130mm
Width: 68mm
Height: 38.5mm
Weight: 130g

Operating Manualwww.ushio.com 15
Important Safety Instructions
1. SAVE THESE INSTRUCTIONS & CAREFULLY FOLLOW THEM, TO REDUCE
THE RISK DANGER OF FIRE OR ELECTRIC SHOCK.
2. This charger is intended for Ni-MH, Ni-CD, Li-ion, and LiFePo4 rechargeable
batteries only. Attempting to charge non-rechargeable batteries may cause
personal injury and damage to the charger.
3. Do not expose charger to water or moisture. For indoor usage only.
4. Remove from power when not in use.
5. Do not operate the charger if it has been subjected to shock or damage. Take it
to a qualified serviceman for repair.
6. Do not disassemble the charger. Incorrect reassembly may result in a risk of
electric shock or fire.
7. Unplug the charger from USB port before attempting any maintenance or
cleaning. Use damp cloth to clean the surface, do not immerse into water.
8. Before scrapping your charger, remove batteries from the unit and recycle or
dispose the batteries safety.
9. This appliance is not recommended for children under 8 years old or persons
with reduced physical, sensory, or mental capabilities. Adult supervision is
recommended to prevent hazards that may be involved.
10. Do not let children play with the appliance, it is not a toy.
11. Cleaning and user maintenance shall not be made by children without adult
supervision.
CAUTION!
• DO NOT use charger to charge other type of batteries.
• DO NOT operate the charger when the temperature is higher
than 40°C. We recommend operating when the temperature is
lower than 35°C. Batteries may get warm during charging.
• USE ONLY Tenergy Battery #96116.
• DO NOT use charger and batteries in any acidic, alkaline or
corrosive environment.
• DO NOT expose charger to rain, snow, water, gas, oil, etc.
• DO NOT short circuit charging terminals.
WARNING!
• Do not expose charger to fire, water or moisture.
• To avoid electrical shock, do not disassemble the charger.
• No user-serviceable parts inside the charger.
• Follow local regulations for disposal of electrical components or
batteries.

Midori™UDC Portable Spot Cure www.ushio.com16
When 2 batteries are charging at the same time, press
SLOT to select the charging slot (1) or (2). Then you
can view the individual charging information (ie. Battery
Type, Charging Status, Charging current, Charging
voltage & Charging time) for the selected charging slot.
To change charging speed: Default charging speed is
500mA, this can be increased to 1000mA for Li-ion,
IMR, and LiFeP04 batteries, to do that, simply press
[mode] button once. Digital screen will show the
updated charging current. (1000mA charging current is
NOT available for NIMH and NICO).
Note: 2A USB power source is needed to charge 2x Li-ion battery at
1000mA speed setting
Tip: It is safe to use 1A current option for Li-ion, IMR and LiFeP04
batteries as long as its capacity is higher than 1000mAh, for capacity
1000mAh or below, please stay with the default charging current
500ma for better battery life span.
Activate / Deactivate LiFeP04 charging mode: To
properly charge a LiFEpo4 battery (please check label
on battery to identify if it’s LiFeP04), LiFeP04 charging
mode will need to be manually activated.
To do that:
1. Press “slot” and “mode” button together.
2. Battery type screen will show [LiFeP04].
3. LiFeP04 charging mode is enabled
4. To get out of LiFeP04 charging mode, press 2 buttons together again.
Slot / Mode

Operating Manualwww.ushio.com 17
LCD Reference
A - Battery Charging Type Detection
NiMH / NiCd
Li-ion It will be shown by Auto Detection
LiFePo4 It will be shown ONLY when the SLOT & MODE
buttons are pressed, please read SLOT/ MODE
before use.
B - Charging Status
CHARGE Charging starts
FINISH Charging is finished
ERROR Charging is failed ( See more in Reverse/ Bad Cell/
Short Circuit)
C - Battery Gauge
▼Indicates the selected charging slot ( 1 ) or ( 2 )
Charging starts and the
first block will be flashing
Charging is finished and
all blocks are shown
Charging is failed and
the whole icon will be
flashing
D - Time, Voltage, Current & Finish
Time Shows the time spent for charging
Voltage Shows the charging voltage
Current Shows the charging current
Finish Charging finish ( FULL)
Time, voltage and current will be shown alternatively by 5 sec interval.

Midori™UDC Portable Spot Cure www.ushio.com18
The UDC PSC unit is rated for water resistance. The UDC PSC unit is rated for
slight water contact and mild detergent cleaning solutions only. However, it should
NOT BE IMMERSED in water or cleaning solutions for any prolonged periods of
time. After cleaning, remove UDC PSC unit from cleaning solution, dry and store
the device in a clean and dry environment.
WARNING!
Failure to comply with the following may result in damage to the
UDC PSC unit and will void the product warranty.
Use caution when cleaning the UDC PSC unit; some methods may be harmful and
could result in extensive damage. Manual cleaning is the recommended method.
Certain cleaning agents may damage the device’s materials. Only use water with a
mild detergent such as a nonabrasive hand or dishwashing soap. Do not immerse
the UDC PSC unit in an ultrasonic cleaner.
CAUTION!
Ensure that the battery hatch door is fully tightened on the O-ring
seal to prevent liquid intrusion into the battery compartment.
Never use any organic solvents to clean the UDC PSC unit, other than
isopropyl alcohol.
CARE AND MAINTENANCE
SECTION 4
4.1 CLEANING THE UDC PSC UNIT

Operating Manualwww.ushio.com 19
If the UDC PSC unit comes in contact with liquid, rinse with isopropyl alcohol and
then dry with compressed air, commercial compressed gas canisters or dry damp
cloth.
Note: Air dry is highly recommended to reduce contamination of the
optical components and reduce the possibility of oxidation of the
materials used in the construction of the UDC PSC unit.
CAUTION!
Do not allow the UDC PSC unit to remain in liquid cleaning solution
for prolonged period of time.
In addition, thoroughly dry the battery hatch door seal around the O-ring, with
compressed air or by thoroughly wiping any excess liquid from this area, prior to
removing the battery hatch door. This will prevent any trapped fluid from entering
the battery compartment and exposing the electronics to fluids.
CAUTION!
Ensure there is no trapped liquid between the battery hatch door
and body prior to removing the battery hatch door.
4.2 DRYING THE UDC PSC UNIT

Midori™UDC Portable Spot Cure www.ushio.com20
PROBLEM POSSIBLE CAUSE ACTION
Loss of Illumination
Battery charge is low Replace batteries with freshly
charged batteries.
Batteries cannot supply
sufficient current at this
power setting.
Replace batteries with freshly
charged batteries.
Verify batteries have been
installed in the correct
orientation.
Reduce the light intensity
and continue using the
current battery. Recharge the
batteries as soon as possible.
Battery mismatch
Make sure both batteries are
the same type and freshly
charged.
UDC UV Light
Output Flashing
Battery charge is low Replace batteries with freshly
charged batteries.
This is normal behavior
indicator when the
battery charge is low.
Remaining run time is
about 2 minutes.
Recharge the batteries as
soon as possible.
Light Intensity is
Low
Foreign material or film
on LED output taper.
VERY carefully clean the
LED surface from visible
contamination with a cotton
swap and isopropyl alcohol.
Do not use acetone or other
solvents.
UDC UV Becomes
Hot After Prolonged
Use
UDC UV has been left
on for more than 30
minutes.
Turn the UDC UV OFF for
a few minutes to permit
adequate cool down of the
body.
TROUBLESHOOTING
SECTION 5
This manual suits for next models
3
Table of contents
Other Ushio Lighting Equipment manuals