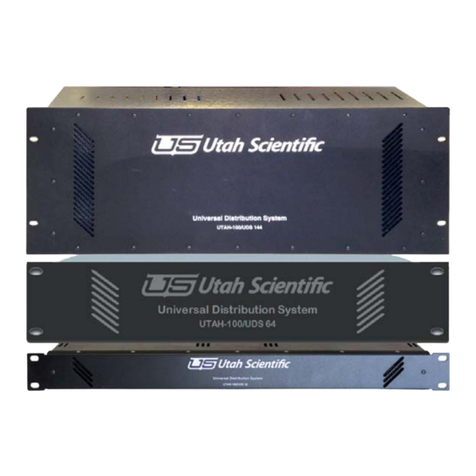
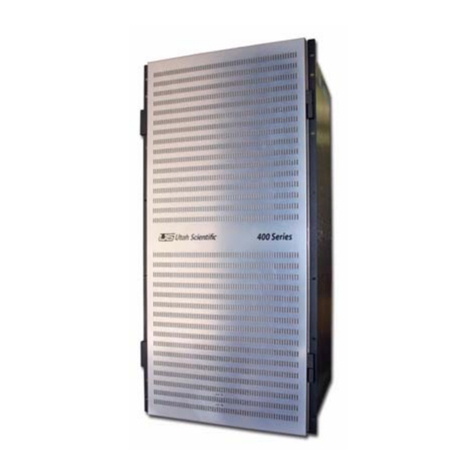
UTAH SCIENTIFIC Utah-400 iP User manual

The Utah-400 Digital Routing Switcher
64x64 Systems
System Setup and Operations

ii Utah-400 64x64
The Utah-400/64x64 Digital Routing Switcher Operators' Manual
• Document Number: 82101-0071
• Document Version: 2.2.1
• Date: June 2, 2015
• Printed in U.S.A.
Copyrights and Trademarks
© 2015 Utah Scientific, Inc., All rights reserved. Any use or reproduction of this guide’s contents with-
out the prior written consent of Utah Scientific, Inc. is strictly prohibited.
•Utah-400 is a trademark of Utah Scientific, Inc.
•Windows, Windows 2000 and Windows NT and XP are registered trademarks of Microsoft Corpo-
ration.
•All other product names and any registered or unregistered trademarks mentioned in this guide are
used for identification purposes only and remain the exclusive property of their respective owners.
Notice
Information contained in this guide is subject to change without notice or obligation. While every effort
has been made to ensure that the information is accurate as of the publication date, Utah Scientific, Inc.
assumes no liability for errors or omissions. In addition, Utah Scientific, Inc. assumes no responsibility
for damages resulting from the use of this guide.
FCC Compliance (USA) and Digital Equipment Compliance (Canada)
This equipment has been tested and found to comply with the limits for a Class A, digital device,
pursuant to Part 15, Subpart B of the FCC Rules and the Canadian EMC Requirement (ICES-003).
These limits are designed to provide reasonable protection against harmful interference when the
equipment is operated in a commercial environment. This equipment generates, uses, and can radiate
radio frequency energy and, if not installed and used in accordance with the instruction manual, may
cause harmful interference to radio communications. Operation of this equipment in a residential area is
likely to cause harmful interference, in which case, the user will be required to correct the interference at
their own expense. Shielded cables must be used to ensure compliance with the FCC Class A limits.

Setup and Operations Guide
Declaration of Conformity
Utah Scientific, Inc.
4750 Wiley Post Way, Suite 150
Salt Lake City, Utah 84116-2878 U.S.A.
We declare our sole responsibility that the Utah-400 Digital Routing Switcher is in conformance with
the following standards:
Emission
•EN55022:1994+A1&A2
Immunity
•EN55024:1998
•EN61000-3-2
•EN61000-3-3
Safety
•IEC 60950-1:2001 /EN 60950-1:2001
Following the provisions of the Directive(s) of the Council of the European Union:
•EMC Directive 89/336/EED
•Low Voltage Electrical Directive 72/23/EEC
Utah Scientific, Inc. hereby declares that the product specified above conforms to the above Directive(s)
and Standard(s).

iv Utah-400 64x64
Important Safeguards and Notices
This section provides important safety guidelines for the Operator and Service Personnel. Specific
warnings and cautions are found throughout the guide where they apply, but may not appear here. Please
read and follow the important safety information, specifically those instructions related to risk of fire,
electric shock, or injury to persons.
Safety Symbols
•Hazardous Voltage symbol
•Caution symbol. The product is marked with this symbol when it is necessary to
refer to the manual to prevent damage to the product.
Warnings
Please observe the following important warnings:
•Any instructions in this guide that require opening the chassis, changing a
power supply, or removing a board, should be performed by qualified personnel
only. To reduce the risk of electric shock, do not perform any service unless you
are qualified to do so.
•Heed all warnings on the unit and in the operating instructions.
•Do not use this product in or near water. Disconnect AC power before installing
any options or servicing the unit unless instructed to do so by this manual.
•This product is grounded through the power cord ground conductor. To avoid
electric shock, plug the power cord into a properly wired receptacle before con-
necting the product inputs or outputs.
•Route power cords and other cables so they won’t be damaged.
•The AC receptacle (socket) should be located near the equipment and be easily
accessible.
•Disconnect power before cleaning. Do not use any liquid or aerosol cleaner -
use only a damp cloth.

Setup and Operations Guide v
•Dangerous voltages exist at several points in this product. To avoid personal
injury, do not touch exposed conductors and components while power is on. Do
not insert anything into either of the systems two-power supply cavities with
power connected.
•Do not wear hand jewelry or watches when troubleshooting high current cir-
cuits, such as power supplies. During installation, do not use the door handles
or front panels to lift the equipment as they may open abruptly and injure you.
•To avoid fire hazard when replacing fuses, use only the specified correct type,
voltage and current rating as referenced in the appropriate parts list for this
product. Always refer fuse replacement to qualified service personnel.
•Have qualified personnel perform safety checks after any service.
Cautions
Please observe the following important cautions:
•When installing this equipment do not install power cords to building surfaces.
To prevent damage when replacing fuses, locate and correct the problem that
caused the fuse to blow, before reconnecting power.
•Use only specified replacement parts
Notices
Please observe the following important notes:
• When the adjacent symbol is indicated on the chassis, please refer to the man-
ual for additional information.
• For the HD-2020 Chassis and Master Control Panel, refer to “Connecting and
Disconnecting Power” - Chapter 2 (Hardware Installation).

vi Utah-400 64x64
Company Information
Utah Scientific, Incorporated
4750 Wiley Post Way, Suite 150
Salt Lake City, Utah 84116-2878 U.S.A.
•Telephone: +1 (801) 575-8801
•FAX: +1 (801) 537-3098
•Technical Services (voice): +1 (800) 447-7204
•Technical Services (FAX): +1 (801) 537-3069
•E-Mail -General Information: [email protected]
•E-Mail -Technical Services: [email protected]
•World Wide Web: http://www.utahscientific.com
•After Hours Emergency: +1 (800) 447-7204. Follow the menu instructions for Emergency Service.

Setup and Operations Guide
Warranty Policies
Hardware Warranty
Utah Scientific, Inc. warrants to the original purchaser that the Utah Scientific hardware is free
from defects in materials and workmanship and will perform substantially in accordance with
the accompanying written materials under normal use and service for a period of ten (10) years
from the date of shipment. Any implied warranties on hardware are limited to ten (10) years.
Some states/jurisdictions do not allow limitations on duration of an implied warranty, so the
above limitation may not apply to certain specific purchasers.
Software Warranty
Utah Scientific warrants that the software will perform substantially in accordance with the
accompanying written materials for a period of one (1) year from the date of shipment.
Customer Remedies
For the first one (1) year after purchase of the software and the first ten (10) years after the date
of purchase of the hardware, Utah Scientific’s and its suppliers’ entire liability and purchaser’s
exclusive remedy shall be, at Utah Scientific’s option, either:
• Return of the price paid, or
• Repair or replacement of the software or hardware that does not meet the above warranties
and is returned to Utah Scientific under the returned materials authorization (RMA)
process with freight and forwarding charges paid.
After the initial warranty periods, purchaser’s exclusive remedy is the repair or replacement of
the hardware upon payment of a fixed fee to cover handling and service costs based on Utah
Scientific’s then-current price schedule. The above warranties are void if failure of the
software or hardware has resulted from an accident, abuse, or misapplication. Any replacement
software or hardware will be warranted for the remainder of the original warranty period or
thirty (30) days, whichever is longer.

viii Utah-400 64x64
No other warranties. To the maximum extent permitted by applicable law, Utah Scientific and
its suppliers disclaim all other warranties, either express or implied, including, but not limited
to implied warranties of merchantability and fitness for a particular purpose, with regard to the
software, the accompanying written materials, and any accompanying hardware. This limited
warranty gives the purchaser specific legal rights. These rights may vary in certain states/
jurisdictions.
No liability for consequential damages. To the maximum extent permitted by applicable law,
in no event shall Utah Scientific or its suppliers be liable for any damages whatsoever
(including without limitation, damages for loss of business profits, business interruption, loss
of business information, or any other pecuniary loss) arising out of the use of or inability to use
Utah Scientific products, even if Utah Scientific has been advised of the possibility of such
damages. Because some states/jurisdictions do not allow the exclusion or limitation of liability
for consequential or incidental damages, the above limitation may not apply in those
circumstances.

64X64 Router TOC-i
Table of Contents
Table of Contents
CHAPTER 1 Introduction
In This Guide .................................................................. 1-1
Conventions .................................................................... 1-2
Abbreviations .................................................................. 1-3
Terms .............................................................................. 1-4
Routing Switcher Basics ................................................. 1-5
Switching Matrix ................................................................... 1-6
Signal Levels ........................................................................ 1-7
The Utah-400 Routing Matrix ............................................... 1-8
Introducing the Utah-400 Digital Routing Switcher ......... 1-10
System Configurations .................................................... 1-12
CHAPTER 2 Hardware Installation
In This Chapter ............................................................... 2-1
Unpacking and Inspection ............................................... 2-2
Installing Physical Equipment ......................................... 2-3
Mounting Equipment in Rack Frames ............................. 2-3
Installing the Utah-400 Digital Routing Switcher ................ 2-3
Installing the MX-Bus Cables .......................................... 2-6
Interconnecting the SC-4 and Utah-400 Frames ................ 2-6
Determining and Setting Router Signal Levels .................. 2-9
Installing the Video Input and Output Signals .................... 2-13
Installing the Analog Audio Input and Output Cables ..... 2-16
Connecting and Disconnecting Power ............................ 2-21
AC Connection .............................................................. 2-21
DC Connectivity ............................................................. 2-22
Crosspoint LEDs ............................................................ 2-23
If no LED's on the Crosspoint board are on: ...................... 2-23
UTAH-64x Read Out / Layout ......................................... 2-24
Hardware Checkout ........................................................ 2-25

TOC-ii The Utah-400
CHAPTER 3 Control System Interconnection
SC-4 Based Connections ............................................... 3-2
Internal SC-400 Based Connections .............................. 3-3
SC-400 Control Board .................................................... 3-5
The SC- 400 LED Indications ...............................................3-5
SC-400 Jumper Settings .......................................................3-6
SC-400 Dipswitch Setting .....................................................3-6
Operation ........................................................................ 3-7
Input and Output Card Removal and Replacement ..............3-7
Crosspoint Card Removal and Replacement ........................3-8
Operation ........................................................................ 3-9
Fan Service ...........................................................................3-9
Rear Panel Overview ............................................................3-9
SC-400 - Specific Connections .............................................3-10
U-Net Connector ...................................................................3-13
U – NET Cabling ...................................................................3-14
CHAPTER 4 Utah-400 Components
In This Chapter ............................................................... 4-1
Video Input Boards ......................................................... 4-2
SD Video Input ......................................................................4-2
Multi-Rate Input .....................................................................4-2
Analog to Digital ....................................................................4-3
Reclocking Input Expansion Card .........................................4-5
UTAH-400 3G Input Card ......................................................4-6
Video Output Boards ...................................................... 4-8
SD-Output .............................................................................4-8
HD-Output (Multi-Rate output card) ......................................4-9
Digital Video to Analog Converter Output card .....................4-9
Multi-Rate Output Board .......................................................4-11
Control Description ...............................................................4-12
UTAH-400 3G Output Board .................................................4-13
Fiber Interface ................................................................. 4-15
Specification Detail ................................................................4-16
Fiber Output LED Indications ................................................4-17
Crosspoint Board ............................................................ 4-19

64X64 Router TOC-iii
Table of Contents
User Controls ....................................................................... 4-20
Indicators .............................................................................. 4-20
Fuses .................................................................................... 4-23
Test points (front of Crosspoint card) .................................... 4-24
Audio Chassis - Basic Layout ......................................... 4-25
Chassis Assembly ................................................................ 4-25
Deluxe Output Module .......................................................... 4-26
DAC Output Module ............................................................. 4-28
ADC Input Module ................................................................ 4-31
Crosspoint Board .................................................................. 4-33
Power Supply .................................................................. 4-37
LED Indications .................................................................... 4-37
CHAPTER 5 Troubleshooting
In This Chapter ............................................................... 5-1
Subsystem Level Troubleshooting .................................. 5-2
Main Troubleshooting Chart ............................................ 5-2
Video Subsystem Troubleshooting Table ........................ 5-4
Power Subsystem Troubleshooting Table ....................... 5-5
Power Supply Alarms ..................................................... 5-5
Control Subsystem Troubleshooting Table ..................... 5-6
System Controller Alarms ............................................... 5-7
Control Panel Troubleshooting ....................................... 5-8
APPENDIX A Specifications
In this Appendix .............................................................. A-1
Power .............................................................................. A-2
Input Power and DC Power Specifications ..................... A-2
Digital Video .................................................................... A-3
High Definition SDI Video ............................................... A-4
Reference ....................................................................... A-4
Control ............................................................................ A-5

TOC-iv The Utah-400
...........................................................................................
Alarms ............................................................................. A-5
Physical .......................................................................... A-6
Regulatory ...................................................................... A-6
Connector Suppliers and USI Part Numbers .................. A-7
APPENDIX B The Debug Port
UT-400/64 Firmware ....................................................... B-2
Menu Items ...........................................................................B-2
Status ....................................................................................B-2
The Debug Cable ............................................................ B-3
Using the Debug Port ............................................................B-4
Startup Display ......................................................................B-5
Main Menu Display ...............................................................B-5
FPGA Memory Status ...........................................................B-6
Verifying the Software Version ..............................................B-6
Checking the Router Crosspoint Status ................................B-7
Checking Input / Output Card Information ............................B-10
IO Information – full display ..................................................B-11
IO Card Information – Locator Diagram ................................B-12
Hardware Status Display .......................................................B-13
APPENDIX C The Utah-400 Digital Audio Breakout Panel
Scope .............................................................................. C-1
The AES Breakout Panel Kit ........................................... C-1
Description of the AES Breakout Panel .......................... C-1
Installation of the AES Breakout Panel ........................... C-2
Label Instructions for the Utah-400 Breakout Panel ....... C-4
Scope ....................................................................................C-4
Application ............................................................................C-4

Utah-400 1-1
CHAPTER 1 Introduction
In This Guide
This guide provides instructions on installing, configuring and operating the
Utah Scientific, Utah-400 Digital Signal Routing Switcher (64x64
configuration). The following chapters and appendices are included:
•Chapter 1
"Introduction" summarizes the guide, describes basic router operation and
describes the hardware and software components of the Utah-400 Digital
Routing Switcher.
•Chapter 2
"Hardware Installation" provides instructions for installing the Utah-400 Dig-
ital Routing Switcher in your facility.
•Chapter 3
"Configuration and Operation" provides specific information regarding the
configurations of this unit, and necessary equipment handling (operation).
•Chapter 4
"Utah-400 Router Components" provides basic information about the Input,
Output, Crosspoint, Interface board and Power Supplies. Included is gen-
eral information about LED indicators and alarms present on each board
type.
•Chapter 5
"Troubleshooting" looks at some of the common hardware and software
problems, diagnostics and solutions available to the user on site. Included
in this section is information on the various avenues to contact Utah Scien-
tific Technical Services and tips on discussing equipment problems.

Introduction
1-2 The Utah-400
•Appendix A
"Hardware Specifics" provides technical details of connectors, cabling, and suggestions
regarding usage. A Glossary of Terms is also included in this section.
•Appendix B
"Specifications" lists all system specifications, including Audio, Video, physical, power, and
regulatory.
Conventions
The following conventions are used throughout this guide:
•Connectors and terminators will be indicated by bold, upper case text in Arial Black font.
For example:
• Connect the MX-Bus to J-1
•Operator Actions will be indicated in Helvetica Bold where a board is inserted, removed
and/or an action is required in the Troubleshooting or configuration sections of this manual.
There will usually be a graphic to accompany the instruction(s). For example:
• Insert the expansion Input board in slot 6.
• Switch the suspected bad input to a known good input to verify output "X".
•The use of bullets indicates a random order of operation or to draw the readers attention to
specific items.
1. The use of numbers in specific operations or lists indicates a "recommended order of
operation" to perform specific tasks. Bulleted items may be below numbered items to
highlight tasks or indicate the operation(s) may be performed at random.

64x64 Router 1-3
Abbreviations
Abbreviations
The following abbreviations may be used in this guide: See Appendix A for an additional Glos-
sary of Terms and further definitions.
TABLE 1. Common Abbreviations and Mnemonics
Abbreviation Description
ATR Audio Tape Recorder
AES Audio Engineering Society
CPU Central Processing Unit
DTR Digital Tape Recorder
EBU European Broadcast Union
ENET Ethernet
HDTV High Definition Television
I/O Input / Output
IP Internet Protocol
JPEG Joint Photographic Experts
Group
M-JPEG Motion – JPEG
MPEG Motion Picture Experts Group
MX-Bus Utah Router Control Comm.
Bus
RMS Router Management System
RU Rack Unit
SDI Serial Digital Interface
U-Net Utah Control Panel Comm.
Network
UTP Unshielded Twisted Pair
VTR Video Tape Recorder

Introduction
1-4 The Utah-400
Terms
The following terms are used throughout the documentation in this guide:
•"Operator" and "User" refer to the person using or operating the Utah-400 Digital Router
System.
•"System" refers to the entire interconnected Utah-400 System including control panels,
routers, software, and chassis.
•"Mainframe” refers to the Utah-400 chassis plus redundancy.
•"Input" refers to and audio or video signal source that is connected to the Utah-400 main
frame.
• One video input represents one High Definition or Serial Digital Interface video output
signal.
• One audio input represents a single monophonic track from an analog audio source.
• One digital audio input represents two tracks (left and right channel) from a digital
audio source.
•"Source" refers to an audio or video device whose output signals are connected to the
Utah-400 mainframe inputs. Examples of audio / video sources are ATR's, VTR's, DTR's,
cameras, video / audio routers, audio mixers, graphics systems, and satellite feeds.
•"Output" refers to the Utah-400 audio or video signals from the Utah-400 "Outputs", which
are connected to the 'destination device'. This term also includes the physical output con-
nectors on the frame.
•"Destination" refers to the device, which is receiving the Utah-400 output signal. This could
include VTRs, monitors, satellite feeds, or video / audio routers.
•"Signal Level" refers to the logical level of the audio / video routers in relation to the entire
connected system(s). Typically, the Utah-400 occupies levels above 1, with master control
occupying the lowest logical level.
•"Hot Swappable" " refers to a printed circuit board, which can be removed or replaced with
system power "on".
•"Control Panel" refers to the physical human interface used to control the various systems
in use.
•"Display" is the 'LCD Display' on the panels in use.

64x64 Router 1-5
Routing Switcher Basics
•"Monitor" refers to the monitor attached to the monitor matrix port of a video or audio
router system.
•"High Definition" " refers to all 780p and 1080i formats – as per CEMA definition. The typ-
ical high definition data rate is 1.485 Giga Byte and a 16:9 Aspect Ratio Picture character-
izes this technology.
•"Serial Digital" Interface (SDI)" refers to the serial digital video signal operating at 125 to
270 MB. Utah Scientific data rates for the serial digital router are 143, 177, 270,360 and
540 MB.
Routing Switcher Basics
A routing switcher is a specialized form of broadcast equipment that allows the user to connect
large numbers of source and destination devices together electronically – without patching or
running cables across floors and without significant signal loss.
The routing switcher solves connectivity problems and increases signal qualities in a wide
variety of applications. The technologies of routing switchers now include the standard ana-
logue, digital video, digital audio, and increasingly the high definition formats.
The routing switcher provides the user with the following advantages:
•Many signal levels (determined by the matrix size) may be switched simultaneously.
• A simple route connects (switches) one signal level from one source (for example a
VTR) to one destination (a monitor).
• A complex route would connect multiple signal levels from one source to multiple
destinations, including tie lines. For example, a satellite feed to a group of VTRs and
monitors.
•Audio and video signal levels can be switched in groups (all follow takes) or individually
(breakaway takes). Any input can be switched to any output, limited only by the matrix
size.
•The Routing Switcher may be controlled manually via control panels, or with computer con-
trolled automation.

Introduction
1-6 The Utah-400
Switching Matrix
A switching matrix is the internal array of inputs, crosspoints and outputs that allow a routing
switcher to perform the task of routing signals from sources to destinations. The figure below
illustrates a simple 10 X 10 switching matrix – with 10 Inputs and 10 Outputs.
Note the following points regarding the illustration:
•Each VTR is fully connected to the matrix – all audio/video inputs and outputs.
•A cross-point (represented by an X) is the internal electronic connection of the input to the
output – either audio or video.
•When the cross-point is turned "ON" the connection is made between the source and desti-
nation. The action of turning the cross-point on is known as making a "Take".
•When an entire audio/video array is connected in this manner, from all of the devices in
your facility, you have full routing flexibility.
•Without re-cabling or re-patching, a device can play back one moment (as a source) and
record the next moment (as a destination).
0123456789
0
1
2
3
4
5
6
7
8
9
Inputs
Outputs
VTR 2
VTR 6 Routing Switcher
Matrix
VTR 2
Out
VTR 6
Out
VTR 2
In
VTR 6
In
Crosspoint

64x64 Router 1-7
Routing Switcher Basics
Signal Levels
A "signal level" represents one of many specific types of audio or video elements that a routing
switcher is capable of handling. The typical signals capable of being switched are:
•Analog Video
•Analog Audio (stereo with left and right channels).
•Digital Video
•Digital Audio (dual channel – stereo pair)
•High Definition Video.
Some systems may be configured with one signal level, while others may be configured with
multiple signal levels.
While the diagram in the previous section shows only one signal level, a multi-signal level sys-
tem is capable of routing any combination up to 32 levels – each with its own matrix and cross-
points.
The figure below illustrates eight signal levels in a 10 X 10 matrix system.
Signal routers are typically much larger than a 10 X 10 matrix, depending on user needs.
Each signal level may also have different sizes of matrices and do not all need to be the same
size.
Analog Audio R
Digital Video
Digital Audio 1/2
Digital Audio 3/4
Digital Audio 5/6
Digital Audio 7/8
Analog Video
Analog Audio L
One
Signal
Level

Introduction
1-8 The Utah-400
The Utah-400 Routing Matrix
The Utah-400's unique matrix technology allows for a greater flexibility of input and output
combinations available to the user. Each input or output board contains eight signal paths so
the user can expand in groups of eight up to the maximum capacity of the router.
The crosspoint board and its flexible design characterize the Utah-400 system. All crosspoint
switching is input coincident, consistent with previous Utah Scientific technologies.
Chassis demographics require all input board to be installed to the left of the midplane (cross-
point) in the chassis; all output boards are installed to the right of the midplane in the chassis.
Features of this technology include signal presence indicators on both the input and output
boards. The status of the router input and output states can be continuously monitored via the
crosspoint status port – J1.
Refer to the Utah-400 Matrix Block Diagram for the following signal routing description.
The input signal is received on the input board at the Receiver/Re-clocker circuit. A valid input
will illuminate the Signal Presence Detector LED and also status the crosspoint board.
From this point the signal is routed to the crosspoint, where the operator has made a "Take",
selecting the routing path of this input to its output.
Other manuals for Utah-400 iP
3
Table of contents
Other UTAH SCIENTIFIC Switch manuals

UTAH SCIENTIFIC
UTAH SCIENTIFIC Utah-400 iP User manual

UTAH SCIENTIFIC
UTAH SCIENTIFIC BPS-2020 Instruction Manual

UTAH SCIENTIFIC
UTAH SCIENTIFIC Utah-400 2 Series Manual instruction

UTAH SCIENTIFIC
UTAH SCIENTIFIC Utah-400 iP Manual instruction

UTAH SCIENTIFIC
UTAH SCIENTIFIC UHD 12G Setup guide

UTAH SCIENTIFIC
UTAH SCIENTIFIC MX-Hub User manual

UTAH SCIENTIFIC
UTAH SCIENTIFIC UTAH-200 User manual

UTAH SCIENTIFIC
UTAH SCIENTIFIC MC-2020 Manual instruction

UTAH SCIENTIFIC
UTAH SCIENTIFIC Utah-400 iP Setup guide

UTAH SCIENTIFIC
UTAH SCIENTIFIC UTAH-100/UDS XY Manual instruction