Utilitech TM-097 User manual

ITEM #0141224
MODEL #TM-097
PACKAGE CONTENTS
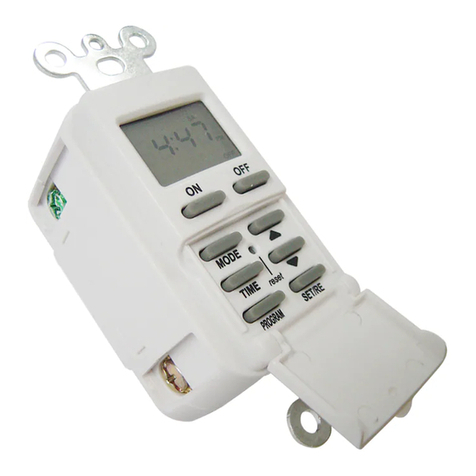
IN-WALL TIMER
Call customer service at 1-866-994-4148,
8 a.m. - 6 p.m., EST, Monday - Thursday,
8 a.m. - 5 p.m., EST, Friday.
TROUBLESHOOTING
• This product is guaranteed to be free of defects for
a limited period of one year from the date of
purchase.
• If the product suddenly malfunctions and is not
damaged by external factors or personal reasons
within the one year warranty limit from the day of
purchase, the product maybe considered for repair.
If the product is damaged due to natural disaster like
fire, lightning, flood, hurricane, etc., the product will
not be considered for repair.
SAFETY INFORMATION
HELPFUL TIPS
• In case of an operational failure of the timer, use a
paper clip and insert into the RESET hole to clear all
the settings and restart.
Please read and understand this entire manual before
attempting to assemble, operate or install the product.
WARRANTY
• For information on product warranty please call
customer service at 1-866-994-4148, 8 a.m. - 6 p.m.,
EST, Monday - Thursday, 8 a.m. - 5 p.m., EST,
Friday.
CAUTION
• Do not attach a device that exceeds the unit ratings
as described in the Safety Information section of this
manual.
• Wattage of lamps or appliances controlled must NOT
exceed rated capacity.
• FOR INDOOR USE ONLY.
• Installation by a licensed electrician to local, state
and national codes is recommended.
• Remove wall plate and make sure both hot and
neutral wires are present in the junction box. If both
wires are not present, additional wiring will be
necessary before installation can be completed.
• Check that all wire connections are secure.
• Place all wires inside junction box. Fit timer into
junction box.
• Reconnect electrical power.
PROBLEM POSSIBLE
CAUSE CORRECTIVE
ACTION
Timer turns
ON/OFF at
incorrect
times or
skips some
of the
programmed
times.
1. Programmed
event(s) are
incorrect.
2. Timer is in
RANDOM mode,
which varies
switching times
up to 15 minutes
(to give your home
a “lived-in” look).
1. Press
PROGRAM
button to review the
settings and revise
them as necessary.
See OPERATING
INSTRUCTIONS.
2. If you don’t want to
keep the timer in
RANDOM mode,
press MODE to
change to AUTO
mode.
The attached
device turns
off
immediately
after being
turned on.
The timer is wired
incorrectly.
Disconnect wires,
remove timer,
re-install per the
instruction manual. If
problem persists,
contact certified
electrician.
LCD screen
is blank. The included
rechargeable
battery has lost its
charge.
Battery will
automatically
recharge after
installation.
LCD screen
is on but
attached
device is off.
The light or
attached device
itself may be
switched OFF.
Make sure the light
or attached device is
switched ON.
Warning: To avoid fire and/or shock, turn off power.
Make sure the power is off before wiring. If you are
unsure or uncomfortable with installation, contact a
licensed electrician.
INSTALLATION INSTRUCTIONS
A B
2. Operating the Time Switch
Press the MODE button repeatedly to set the timer
to Automatic, Random or Manual (ON or OFF) mode.
NOTE: For the time switch to run programmed
events, it must be set to “AUTO” mode.
• AUTO — runs all events automatically, according
to the schedule you have set. The word “AUTO”
appears in the display.
• RDM (Random) - Timer will randomly turn devices
ON/OFF within15 minutes 5 times per day. This is
a security feature in which ON and OFF times
randomly, creating a more “lived-in” look.
• MANUAL (ON or OFF) — turns always ON or OFF
only when user presses the ON or OFF button.
The display is blank, showing neither RDM nor
AUTO.
4. Setting Programs
Timer has up to 7 customizable ON/OFF Event
Settings to turn devices on and off at different times
and on different days as programmed.
1. Press MODE repeatedly until the display
shows AUTO.
6. Clearing (Deleting) an Event
1. Press the PROGRAM button as many times as
necessary to locate the setting you want to clear.
2. Press and hold the SET/RE for 3 seconds button.
3. When finished, press the TIME button to return
the display to the time of day.
5. Reviewing Events Programmed
1. In the current time display, press the PROGRAM
button repeatedly to check your settings.
2. When finished, press the TIME button to return
the display to the time of day.
3/4”
(1.9cm)
Strip Length:
1. Insert the ground or bare wire(s) into the hole(s)
labeled “G” (near green screw) (see figure 3).
2. The timer requires a
neutral wire connection
or the timer will not work.
(1) If the neutral (white)
wire has an appropriate
length, strip and twist
together the ends of the
neutral (white) wires and
insert into the holes
labeled N (near silver
screw). (see figure
3-2-1).
(2) If the neutral wire from
the wall box is short
and does not reach the
timer, use the enclosed
jumper kit to extend the
wire connection. Begin
by connecting one end
ON
4-2
6. Press the " " or " " button until the display shows
the current DAY then press SET/RE button.
7. Press the " " or " " button until the display shows
the current HOUR then press SET/RE button.
8. Press the " " or " " button until the display shows
the current MINUTE then press SET/RE button to
complete time setting.
OPERATING INSTRUCTIONS
1. Setting the Clock
1. Open the door.
2. Press TIME button.
3. Display will flash for a 15 seconds. If no other
action taken, clock may engage with the incorrect
time.
4. Press the " " or " " button until the display shows
the current YEAR then press SET/RE button.
5. Press the " " or " " button until the display shows
the current MONTH then press SET/RE button.
2. Press the PROGRAM
button once. The display
will look as shown at the
right. The "" in the
lower right hand corner
indicates that you are now
programming EVENT 1
which you want your
device turned ON.
3. Press the SET/RE button to set up the time.
4. Press the " " or " " button repeatedly until the
display shows the DAY(s) when you want then
press SET/RE button.
The options are:
• All days of the week (MO TU WE TH FR SA SU)
• Individual days of the week (MO, etc.)
• Weekdays only (MO TU WE TH FR)
• Weekends only (SA SU)
5. Press the " " or " " button repeatedly until the
display shows the HOUR when you want then
press SET/RE button.
6. Press the " " or " " button repeatedly until the
display shows the MINUTE when you want then
press SET/RE button.
7. Repeat Steps 3, 4, 5, 6 to set the OFF time for
Event 1
Two kinds of settings can cause the timer to work in
an unexpected way:
- Set up events in progressive order of time (for
example, 8:00 pm ON, 9:00 pm ON, 10:00 pm
ON — NOT 8:00 pm ON, 10:00 pm ON, 9:00 pm
ON).
- Do not overlap event times (for example, 8:00 pm
ON /12:00 pm OFF, and 9:00 pm ON / 11:00 pm
OFF).
ON
3. Installing In-Wall Timer:
Begin by loosening all screws.
3
Hot wire
Load
wire
Neutral
Neutral
Ground
Ground wire (Green)
Neutral wire (White)
Load wire (Black)
Hot wire (Black)
Wall
3. Overriding Timer Settings
The ON or OFF buttons
override the current
programmed events. To
override the current
program (either ON or OFF),
press the ON or OFF button.
NOTE: If the timer is not in
“Manual (ON or OFF)” mode,
it will obey the next programmed event. This allows
the user to manually turn a light on and allow the
program to shut the light back off at a preset time.
AM
ON
AUTO
SU
PROGRAM
SET/RE
TIME
MODE
ON OFF
reset
3
C D
QUANTITYDESCRIPTIONPART
1
1
A
B
Timer
Wall plate
0.748 in. - 2C
Mounting screws (Wall box)
0.33 in. - 2
D
Mounting screws (Wall plate)
* Tools Required for Assembly (not included):
flathead screwdriver.
Before initial use, if LCD screen is blank, connect with
power for at least 30 minutes to charge the internal
battery. After the screen displays, the unit is ready for
programming.
1. This device is to be installed in a wall box measuring
at least 3 in. x 2 in. x 2-1/2 in. (standard single gang
electrical wall box) and wired in
accordance with National Electrical
Code.
2. Straighten each conductor and strip 3/4 in.
of insulation from each wires.
3-6
encouraged to try to correct the interference by one or
more of the following measures:
• Reorient or relocate the receiving antenna.
• Increase the separation between the equipment and
the receiver.
• Connect the equipment into an outlet on a circuit
different from that to which the receiver is connected.
• Consult the dealer or an experienced radio/TV
technician for help.
This device complies with Part 15 of the FCC Rules.
Operation is subject to the following two conditions: (1)
This device may not cause harmful interference, and
(2) this device must accept any interference received,
including interference that may cause undesired
operation of the device.
FCC Caution: Any changes or modifications not
expressly approved by the party responsible for
compliance could void the user's authority to operate
this equipment.
THIS TIMER IS FOR USE WITH A 125 V AC POWER
SOURCE. 125 V AC / 60 Hz
DO NOT ATTACH A DEVICE THAT EXCEEDS THE
UNIT RATINGS:
15 A / 1,875 Resistive (General Purpose)
8 A / 1,000 W Tungsten (Incandescent)
8.3 A / 996 W Standard Ballast (Fluorescent)
500 VA Ballast (Electronic)
1/2 HP (Horsepower Motor)
TO AVOID FIRE, SHOCK, OR DEATH, TURN OFF
POWER AT CIRCUIT BREAKER AND TEST THAT
POWER IS OFF BEFORE WIRING.
WARNING
This equipment has been tested and found to comply
with the limits for Class B digital device, pursuant to
part 15 of the FCC Rules. These limits are designed to
provide reasonable protection against harmful
interference in a residential installation. This equipment
generates, uses and can radiate radio frequency
energy and, if not installed and used in accordance
with the instructions, may cause harmful interference to
radio or television reception, which can be determined
by turning the equipment off and on, the user is
The spare
(white) wire.
3-2-2
7. Restore power by flipping the breaker to the “on”
position or re-installing the fuse to the circuit.
3-2-1
of the supplied wire (white) to the neutral wires
from the wall and secure it with a wire nut.
Then, insert the two neutral (white) wires into
the holes labeled N (near silver screw) (see
figure 3-2-2).
3. Insert the hot wire into the hole labeled “L-I” (near
brass screw) (see figure 3).
4. Insert the load wire into the hole labeled “L-O”
(near brass screw). The screw terminal accepts
14AWG-12AWG copper wire (12AWG maximum).
(see figure 3).
5. Tighten all screws firmly
(see figure 3-5).
6. Carefully fold wire into
wall box and mount timer
(A) into wall box using
mounting screws (CC),
then attach the wall plate
using the mounting
screws (DD). (see figure 3-6).
AB16775 Printed in China

1. Configuración del reloj
1. Abra la puerta.
2. Presione el botón TIME.
3. La pantalla destellará durante unos 15 segundos.
Si no realiza otra acción, el reloj se establecerá
en la hora incorrecta.
4. Presione el botón " " o " " hasta que la pantalla
muestre el AÑO actual, después, presione el
botón SET/RE.
5. Presione el botón " " o " " hasta que la pantalla
muestre el MES actual, después, presione el
botón SET/RE.
6. Presione el botón " " o " " hasta que la pantalla
muestre el DÍA actual, después, presione el botón
SET/RE.
7. Presione el botón " " o " " hasta que la pantalla
muestre la HORA actual, después, presione el
botón SET/RE.
8. Presione el botón " " o " " hasta que la pantalla
muestre el MINUTO actual, después, presione el
botón SET/RE para terminar de ajustar la hora.
1. El dispositivo debe instalarse en una caja de pared
que mida al menos 7,62 cm x 5,08 cm x 3,81 cm
(caja de pared simple estándar) y
cablearse según lo establece el
Código Nacional de Electricidad.
2. Enderece cada conductor y pele
19,05 mm de aislamiento para cada
cable.
ARTÍCULO #0141224
MODELO #TM-097
TEMPORIZADOR DE
PARED
Llame al Departamento de Servicio al Cliente al
1-866-994-4148, de lunes a jueves de 8 a.m. a 6 p.m.,
y los viernes de 8 a.m. a 5 p.m., hora estándar del Este.
CONTENIDO DEL PAQUETE
Advertencia: desconecte el suministro de
electricidad para evitar incendios o descargas eléctricas.
Asegúrese de que la unidad esté apagada antes de
realizar el cableado. Consulte a un electricista
matriculado si tiene dudas o no se siente capacitado
para hacer la instalación.
INSTRUCCIONES DE INSTALACIÓN
A
GARANTÍA
SOLUCIÓN DE PROBLEMAS
• Si desea más información sobre la garantía del
producto, llame a nuestro Departamento de Servicio
al Cliente al 1-866-994-4148 de lunes a jueves de
8 a.m. a 6 p.m., y los viernes de 8 a.m. a 5 p.m., hora
estándar del Este.
• Este producto está garantizado contra defectos por
un período de un año a partir de la fecha de compra.
• Si el producto intempestivamente empieza a fallar y
no presenta daños debido a factores externos ni por
razones personales dentro del año de la garantía
desde la fecha de compra, es posible que el producto
califique para la reparación. Si el producto sufre
daños debido a desastres naturales como incendios,
rayos, inundaciones, huracanes, etc., este no
calificará para la reparación.
PROBLEMA CAUSA
POSIBLE ACCIÓN
CORRECTIVA
El
temporizador
se enciende
o apaga a
horas
incorrectas u
omite algunas
de las horas
programadas.
1. Los eventos
programados son
incorrectos.
2. El temporizador
está en modo
RANDOM, que
varía los tiempos
de encendido o
apagado en hasta
15 minutos (para
darle a su hogar la
apariencia de que
se encuentra
habitada).
1. Presione el botón
PROGRAM para
revisar las
configuraciones y
ajustarlas según sea
necesario. Consulte
las INSTRUCCIONES
DE FUNCIONAMIENTO.
2. Si no desea que el
temporizador continúe
en Modo RANDOM,
presione MODE para
cambiar a modo
AUTO.
El dispositivo
conectado se
apaga
inmediatamente
después de
encenderse.
El temporizador
está cableado
incorrectamente.
Desconecte los cables,
retire el temporizador
y vuelva a instalarlo
según el manual de
instrucciones. Si el
problema persiste,
póngase en contacto
con un electricista
calificado.
La pantalla
LCD está en
blanco.
La batería
recargable incluida
no tiene carga.
La batería se
recargará
automáticamente
después de la
instalación.
La pantalla
LCD está
encendida,
pero el
dispositivo
conectado
está apagado.
Puede que la luz o
el dispositivo
conectado esté
apagado.
Asegúrese de que la
luz o el dispositivo
conectado esté
encendido.
NO CONECTE UN DISPOSITIVO QUE SUPERE LA
CLASIFICACIÓN DE LA UNIDAD:
Resistivo de 15 amperios/1875 (para uso general)
Tungsteno de 8 amperios/1000 vatios
(incandescente)
Balastro estándar de 8,3 amperios/996 vatios
(fluorescente)
Balastro de 500 vatios (electrónico)
1/2 HP (motor de caballos de fuerza)
ESTE TEMPORIZADOR ES PARA USO CON UNA
FUENTE DE ALIMENTACIÓN DE 125 V CA.
125 V CA / 60 Hz
INFORMACIÓN DE SEGURIDAD
Lea y comprenda completamente este manual antes
de intentar ensamblar, usar o instalar el producto.
PRECAUCIÓN
• No incorporar un dispositivo que supere los valores
nominales que describido en la sección " información
de seguridad" de este manual.
• El vataje de las lámparas o los electrodomésticos
controlados NO debe exceder la capacidad nominal.
• SOLO PARA USO EN INTERIORES.
• Se recomienda que un electricista matriculado realice
la instalación según los códigos locales, estatales y
nacionales.
• Retire la placa para pared y asegúrese de que los
conductores de corriente y neutro estén en la caja de
unión. Si faltan ambos conductores, se necesitará un
cableado adicional antes de completar la instalación.
• Verifique que todas las conexiones del cableado
sean seguras.
• Coloque todos los conductores dentro de la caja de
unión. Coloque el temporizador en la caja de unión.
• Vuelva a conectar la alimentación eléctrica.
PARA EVITAR INCENDIOS, DESCARGAS O LA
MUERTE, APAGUE EL SUMINISTRO ELÉCTRICO
EN EL INTER RUPTOR DE CIRCUITO Y
COMPRUEBE QUE ESTÉ APAGADO ANTES DE
REALIZAR EL CABLEADO.
ADVERTENCIA
2. Funcionamiento Del Interruptor de Tiempo
Presione varias veces el botón MODE para
configurar el temporizador en modo Automatic
(automático), Random (aleatorio) o Manual (ON or
OFF) (encendido o apagado manual).
NOTA: para que el interruptor de tiempo funcione
con los eventos programados, debe configurarse el
modo “AUTO”.
• AUTO — hace funcionar todos los eventos de
manera automática, de acuerdo con el programa
que configuró. La palabra “AUTO” aparece en la
pantalla.
• RDM (Modo aleatorio) - El temporizador encenderá
o apagará los dispositivos al azar cada 15 minutos
5 veces al día. Esta es una característica de
seguridad en la que los dispositivos se encienden
y apagan de manera aleatoria, creando una
apariencia más “realista”.
• Modo manual — se enciende y apaga únicamente
cuando el usuario presiona el botón ON o el OFF.
La pantalla está en blanco, sin mostrar ni RDM ni
AUTO.
4. Programas de Configuración
El temporizador tiene hasta 7 configuraciones de
eventos de encendido y apagado para encender y
apagar dispositivos a distintas horas y en distintos
días según lo programado.
5. Revisión de eventos programados
1. En la pantalla de hora actual, presione varias
veces el botón PROGRAM para verificar sus
configuraciones.
2. Una vez que termine, presione el botón TIME para
que la pantalla vuelva a mostrar la hora del día.
1. Inserte el cable a tierra o los conductores
desnudos en los orificios marcados con “G” (cerca
del tornillo verde) (ver figura 3).
2. El temporizador requiere
una conexión del conductor
neutro o el temporizador
no funcionará.
(1) Si el conductor neutro
(blanco) tiene un largo
adecuado, corte y una
los extremos de los
conductores neutros
(blanco) e insértelos
en los orificios marcados
con “N” (cerca del
tornillo plateado).
(consulte la figura
3-2-1).
(2) Si el conductor neutro
de la caja de la pared
ON
4-2
1. Presione MODE varias veces hasta que la
pantalla muestre AUTO.
2. Presione una vez el
botón PROGRAM
(Programa). La pantalla
se verá como se muestra
a la derecha. El " "
en la esquina inferior
derecha indica que ahora
está programando el
EVENTO 1 en el que
usted quiere que se encienda su dispositivo.
3. Presione el botón SET/RE para fijar la hora.
4. Presione varias veces el botón " " o " " hasta
que la pantalla muestre los DÍAS que desee,
después, presione el botón SET/RE.
Las opciones son:
• Todos los días de la semana (MO, TU, WE, TH,
FR, SA, SU)
• Días de la semana por separado (MO, etc.)
• Solo días de semana (MO, TU, WE, TH, FR)
• Solo fines de semana (SA, SU)
5. Presione varias veces el botón " " o " " hasta
que la pantalla muestre la HORA que desee,
después, presione el botón SET/RE.
ON
3. Instalación del temporizador de pared
Comience por soltar todos los tornillos.
3
Conductor
de
corriente
Conductor de
carga
Neutro
Neutro
Puesta a
tierra
Conductor de tierra
(verde)
Conductor neutro
(blanco)
Conductor de carga
(negro)
Conductor de corriente
(negro)
Pared
INSTRUCCIONES DE FUNCIONAMIENTO
3/4”
(1.9cm)
Largo de hilera:
AM
ON
AUTO
SU
PROGRAM
SET/RE
TIME
MODE
ON OFF
reset
3
3. Anulación de Las Configuraciones Del Temporizador
Los botones ON u OFF
anulan los eventos
programados. Para anular
el programa actual (ya sea
de encendido o apagado),
presione el botón ON o el
OFF.
NOTA: si el temporizador
no está en el modo “Manual (ON or OFF)”, cumplirá
el siguiente evento programado. Esto le permite al
usuario encender una luz de manera manual y al
programa volver a apagar la luz a una hora
preestablecida.
CONSEJOS PRÁCTICOS
• En caso de que el temporizador tenga una falla de
funcionamiento, use una horquilla de metal e insértela
en el orificio RESET para eliminar todas las
configuraciones y volver a comenzar.
6. Eliminación de un evento
1. Presione el botón PROGRAM todas las veces que
sean necesarias para ubicar la configuración que
desea eliminar.
2. Presione el botón SET/RE y manténgalo
presionado por 3 segundos.
3. Una vez que termine, presione el botón TIME
para que la pantalla vuelva a mostrar la hora del
día.
C D
B
CANTIDADDESCRIPCIÓNPIEZA
1
1
A
B
Temporizador
Placa para pared
0.748 in. - 2C
Tornillos de montaje
(Caja de pared)
0.33 in. - 2D
Tornillos de montaje
(Placa para pared)
* Herramientas necesarias para el ensamblaje (no se
incluyen): destornillador de cabeza plana.
Antes del primer uso, si la pantalla LCD está en blanco,
conecte al suministro de electricidad durante al menos
30 minutos para cargar la batería interna. Después de
que se encienda la pantalla, la unidad estará lista para
programarse.
3-6
Este dispositivo cumple con la sección 15 de las reglas
de la FCC. El funcionamiento está sujeto a las
siguientes dos condiciones: (1) este dispositivo no
debería causar interferencia perjudicial y (2) debe
aceptar cualquier interferencia recibida, incluida la
interferencia que pudiese causar un funcionamiento no
deseado.
NOTA: este equipo ha sido probado y se ha verificado
que cumple los límites para un dispositivo digital clase
B, conforme a la sección 15 de las reglas de la FCC.
Estos límites han sido diseñados para proporcionar
una protección razonable contra la interferencia
perjudicial en una instalación residencial. Este equipo
genera, utiliza y puede irradiar energía de
radiofrecuencia y, si no se instala y usa de acuerdo
con las instrucciones, puede causar interferencia
perjudicial a las comunicaciones de radio. Sin
embargo, no se garantiza que no se producirán
interferencias en una instalación en especial. Si este
equipo genera interferencia perjudicial a la recepción
de radio o televisión, lo que se puede determinar
apagando y encendiendo el equipo, se recomienda al
usuario que intente corregir la interferencia con una o
más de las siguientes medidas:
--Reoriente o reubique la antena de recepción.
--Aumente la separación entre el equipo y el receptor.
--Conecte el equipo a un tomacorriente de un circuito
distinto al que usa el receptor.
--Solicite ayuda al distribuidor o a un técnico con
experiencia en radio/TV.
Los cambios o modificaciones a esta unidad que no
estén expresamente aprobados por la parte
responsable del cumplimiento podrían anular la
autorización del usuario para utilizar el equipo.
El conductor
(blanco) de repuesto.
3-2-2
3-2-1
3. Inserte el conductor de corriente en el orificio
marcados con “L-I” (cerca del tornillo de latón)
(ver figura 3).
4. Inserte el conductor de carga en el orificio marcado
con “L-O” (cerca del tornillo de latón) (ver figura 3).
El terminal del tornillo acepta un conductor de
cobre 14 AWG - 12 AWG (12 AWG máximo).
5. Apriete todos los tornillos
con firmeza (13,82 kgf-cm)
(consulte la figura 3-5).
6. Con mucho cuidado,
pliegue el conductor dentro
de la caja para pared y fije
el temporizador (A) en la
caja de pared con tornillos
de montaje, después,
coloque la placa para pared usando tornillos de
montaje (DD).
es corto y no alcanza el temporizador, use el
kit de puente que se incluye para extender la
conexión de los conductores. Comience
conectando un extremo del conductor
suministrado (blanco) a los conductores
neutros de la pared y fije con un empalme
plástico. Luego, inserte los dos conductores
neutros (banco) en los orificios marcados con
“N” (cerca del tornillo plateado). (consulte
la figura 3-2-2).
7. Vuelva a conectar la electricidad cambiando el
interruptor a la posición “on” o reinstalando el
fusible en el circuito.
6. Presione varias veces el botón " " o " " hasta
que la pantalla muestre el MINUTO que desee,
después, presione el botón SET/RE.
7. Repita los pasos 3, 4, 5 y 6 para configurar la hora
de apagado para el Evento 1.
Dos tipos de configuraciones pueden hacer que el
temporizador funcione de manera inesperada:
- Configure eventos en orden sucesivo (por ejemplo,
8:00 p.m. ON, 9:00 p.m. ON, 10:00 p.m. ON y NO
8:00 p.m. ON, 10:00 p.m. ON, 9:00 p.m. ON).
- No superponga las horas de los eventos (por
ejemplo, 8:00 p.m. ON /12:00 p.m. OFF y 9:00 p.m.
ON / 11:00 p.m. OFF).
Impreso en China
Table of contents
Languages:
Other Utilitech Timer manuals
Utilitech
Utilitech UTTNI2423 User manual
Utilitech
Utilitech UTTNOCD2 User manual
Utilitech
Utilitech UTDT9IW7 Operating manual
Utilitech
Utilitech TM-089 User manual

Utilitech
Utilitech TM-097 S User manual
Utilitech
Utilitech TM-097 S User manual
Utilitech
Utilitech TM-087 User manual
Utilitech
Utilitech TH06WHBL Guide
Utilitech
Utilitech UTTNDIW7D User manual
Utilitech
Utilitech SP-045 User manual

