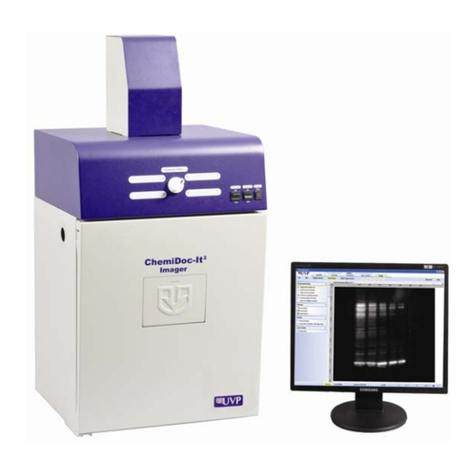
UVP GelDoc-It2 Guide

1
81-0220-01 Rev R
GelDoc-It®2& ChemiDoc-It®2Imagers
Installation and User Instructions
UVP, LLC Ultra-Violet Products Ltd.
2066 W. 11th Street Unit 1, Trinity Hall Farm Estate
Upland, CA 91786 Nuffield Road, Cambridge CB4 1TG UK
Phone: (800) 452-6788 Phone: +44(0)1223-420022
Fax: (909) 946-3597 Fax: +44(0)1223-420561
Web Site: www.uvp.com

2
81-0220-01 Rev R
Table of Contents
1
Basic information...............................................................................................4
1.1
User manual notes ....................................................................................4
1.2
Intended use..............................................................................................4
2
Technical data....................................................................................................5
2.1
Specifications ............................................................................................5
2.2
Minimum computer requirements..............................................................5
2.3
Cameras and lenses..................................................................................5
3
Safety instructions.............................................................................................7
3.1
General notes............................................................................................7
3.2
Safety Instructions –Operation and Maintenance ....................................8
4
System design....................................................................................................9
4.1
Components ..............................................................................................9
4.2
Camera Models .......................................................................................10
4.3
Ethidium Bromide (EtBr) emissionfilter...................................................10
4.4
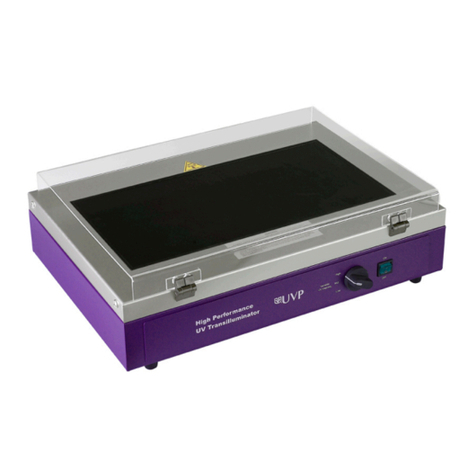
Transilluminator.......................................................................................10
4.5
Fluorescent Focus Target........................................................................10
4.6
Optional Equipment.................................................................................11
4.7
Thermal Printer........................................................................................11
4.8
UV Handheld Lamps for Epi (Overhead) Lighting...................................11
4.9
LED White Light Plate .............................................................................11
4.10
Converter Plates......................................................................................11
4.11
VisionWorks®Acquisition and Analysis Software...................................12
5
Set-Up ...............................................................................................................13
5.1
Scope of supply.......................................................................................13
5.2
Connecting the power cables..................................................................13
5.3
Installing emissionfilters..........................................................................14
5.4
Camera Setup..........................................................................................14
6
Software Installation........................................................................................20
6.1
Installing VisionWorksSoftware...............................................................20
6.2
Registering the Software.........................................................................20
6.3
Installing CameraDrivers ........................................................................21
7
Using the imaging system ..............................................................................22
7.1
Powering up the system ..........................................................................22
7.2
Using the Filters.......................................................................................23
7.3
Using the Transilluminator.......................................................................23
7.4
Using the Overhead (Epi) Lighting ..........................................................23

3
81-0220-01 Rev R
7.5
Using the UV Gel Viewer Window...........................................................24
8
Capturing Images and Using Templates.......................................................25
8.1
Image Focusing.......................................................................................25
8.2
Capturing Images ....................................................................................26
8.3
Using Templates......................................................................................27
9
Maintenance, replacement parts/accessories ..............................................29
9.1
Care and cleaning ...................................................................................29
9.2
Replacement parts and accessories .......................................................29
9.3
Troubleshooting.......................................................................................32
10
Disposal............................................................................................................32

4
81-0220-01 Rev R
1
Basic information
1.1
User manual notes
The Imagers are intended for operation by qualified specialist personnel observing thisuser
manual.
The user manual informs about the design and function of the Imagers and provides the
necessary know-how for the safe handling of the device and its components to personnel
familiar with analysis. The user manual further includes notes on the maintenance and
service of the equipment.
User manual conventions
Instructions for action which occur in chronological order are numbered and combinedinto
action units and furnished with the corresponding results.
Lists which are not in chronological order are shown as itemized lists, sub-listings as bullet
points.
Safety notes are indicated by pictographs and signal words. The type and source of the
danger are stated together with notes on preventing the danger. The meaning of the
pictographs and signal words used is explained in the chapter "Safetyinstructions".
1.2
Intended use
The GelDoc-It2Imager is a high resolution imager, capable of capturing, documenting and
analyzing fluorescent gel images.
The ChemiDoc-It2Imager is designed as a high resolution imager capable of capturing,
documenting and analyzing fluorescent gel images, as well chemiluminescent blot images,
including Western blots. The system is equipped with a cooled, scientific-grade CCD
camera.
Both imagers incorporate a light-tight darkroom with VisionWorks®software for image
acquisition and analysis functions. The darkroom has a UV-blocking gel viewer window,
built-in overhead epi white lighting, a UV transilluminator and a four-position emission filter
wheel with an ethidium bromide (EtBr) emission filter included as standard.

5
81-0220-01 Rev R
2
Technical data
2.1
Specifications
Power Requirements
100/115V, 50/60Hz; 2.1 Amps at 120 Volts
230V, 50/60Hz; 1.1 Amps at 230 Volts
Mains supply voltage fluctuations are not to exceed 10 percent of
the nominal supply voltage
Pollution Degree
2
Installation Category
II
Altitude
Up to 2000 m
Ambient Temperature
5 °C to 40 °C
Humidity
Maximum relative humidity of 80 % for temperatures up to 31 °C,
decreasing linearly to 50 % maximum relative humidity at 40 °C
2.2
Minimum computer requirements
Microsoft Windows 10, 8, 7 or XP (SP2), 32-bit or64-bit
Microsoft Internet Explorer 6.0 or later
Pentium class processor or equivalent, 1.6 GHz or higher
2 GB of RAM (4 GB preferred)
200 MB of available hard disk space for the program, more for data
CD-ROM drive
USB ports: The computer must come equipped with a minimum of three USB2.0
ports. Additional peripherals (mouse, keyboard, printer, etc.) may require additional
USB ports.
Color monitor, supporting at least 1024 x 768 resolution and 16-bit or better; 24-bitor
32-bit color is stronglyrecommended
IMPORTANT
For 21 CFR Part 11 support functionality, the computer partition must be formatted
with NTFS. Refer to the VisionWorks software manual forinstructions.
2.3
Cameras and lenses
The GelDoc-It2Imager is equipped with the GelCam 315 camera, a monochrome
CMOS camera with a resolution of 5.0MP (2592 x 1944) with USB 3.0 PC interface.
The ChemiDoc-It2Imager can be equipped with two different cameras.
Camera with Peltier cooling (for gel documentation and chemiluminescence
documentation):

6
81-0220-01 Rev R
Available are: CCD™ 515 or 815 CCD scientific-grade monochrome CCD camera. All
cameras are Peltier cooled and offer full 16-bit file bit depth:
The 515 CCD camera has 2.1 MP resolution with Peltier cooling to - 57 °C from ambient.
The 515 CCD has a peak quantum efficiency of 50 % and is capable of binning from 1 x 1
to 8 x 8.
The 815 CCD camera has 8.1 MP (3296 x 2472) resolution with Peltier cooling to -57
°C from ambient. The 815 CCD has a peak quantum efficiency of 50 % and is also
capableof binning from 1 x 1 to 8 x 8.
All camera settings are factory pre-set for optimum performance when viewing gels, films or
membranes under low light level conditions. Contact Technical Support priorto making any
adjustments to the camera settings.
Lens Kit (Motorized or Manual)
The lens used comes in two configurations:
The motorized lens is controlled via VisionWorksSoftware.
The manual lens requires manual user adjustment.
Some lenses may be fitted with a close-up diopter. The diopter is used for focusing on
objects at the focal length of the darkroom.

7
81-0220-01 Rev R
3
Safety instructions
3.1
General notes
For your own safety, please read this chapter carefully before operating. Observe all safety
notes listed in this user manual.
Symbols and signal words used
The user manual uses the following symbols and signal words to indicate safety hazards,
warnings and instructions.
General warning
Caution: ultraviolet radiation
Important: hints or useful information

8
81-0220-01 Rev R
3.2
Safety Instructions –Operation and Maintenance
The system is designed for function, reliability, and safety. The unit may include shortwave
UV, which is a powerful source of UV radiation that will cause damage to unprotected eyes
and skin.
For your own safety observe the following notes:
The device must only be operated if all protective equipment is present, and the system
is properly installed and fully functional.
Free access to the power plug and main power switch on the back of the unit must be
ensured.
Disconnect the power supply before servicing the system
For UV protection and to extend the life of the UV transilluminator, the system
incorporates a customizable transilluminator shutoff timer built into the software. For
additional information, refer to Section 4.4.
Caution: Do not override the UV safety switch located on the darkroom without the use of
protective equipment and face shields.
Caution: Shortwave UV (254 nm) is a powerful source of UV radiation that will cause
damage to unprotected eyes and skin. Before operating any unit, ensure all personnel in
the area are properly protected and that instructions for use of this equipment are followed.

System design
9
81-0220-01 Rev R
4
System design
4.1
Components
Refer to the packing slip and pictured components for specific parts and components
included with the system.
Note: The delivered system may look slightly different (without cover, only withdifferent
camera bracket).
GelDoc-It®2 & ChemiDoc-It®2 Imagers
Camera and Lens Kit
(actual configuration may
be different than shown in
the photo)
Lighting and UV
Timer Switches
Epi Overhead
White Light
Four Position
Emission Filter
Selector
UV Safety
Interlock Switch
UV-Safe Gel
Viewer
Window
Roll-Out
Transilluminator
LED White Light
Plate (Optional)
Access port
for optional
BioLite™
MultiSpectral
Light Source

System design
10
81-0220-01 Rev R
4.2
Camera Models
815 CCD and 515 CCD Cameras
Specifications
815 CCD
515 CCD
Type
CCD, Monochrome
CCD, Monochrome
Resolution
3296 x 2472, 8.1 MP
2.1 MP
Bit Depth
16 bit
16 bit
Quantum Efficiency
50 % peak
50 % peak
Cooling
- 57 °C from ambient
Binning
Yes, 1 x 1 through 8 x 8
PC Interface
USB2.0
USB2.0
4.3
Ethidium Bromide (EtBr) emissionfilter
The ethidium bromide (50 mm2) UV-blocking bandpass interference filter blocks UV and IR
radiation emitted from the transilluminator. The filter is placed in the slide-out filter wheel
assembly on the side of the Imager. The filter allows visualization of fluorophores from 580 -
630 nm, targeting the ethidium bromide emission peak of 605 nm.
Additional filters are available for other specific fluorophores. Filters can also be removed when
imaging non-fluorescent media (including chemiluminescent blots, protein gels, colony plates,
etc.) in order to produce brighter images.
4.4
Transilluminator
The GelDoc-It2and ChemiDoc-It2Imagers can accommodate UVP’s Benchtop and FirstLight
transilluminator models. UVP offers a variety of transilluminator configurations, including
Benchtop models with multiple wavelengths and variable intensities as well as the highly
uniform, patented FirstLight®transilluminator. Refer to the packing slip for the transilluminator
included with your system.
Note: For UV protection and to extend the life of the UV transilluminator, the system
incorporates a ten-minute transilluminator shutoff timer. The timer shuts off the
transilluminator after ten minutes of operation. A push button on the front of the
darkroom allows the user to reset the timer. Alternately, the timer can also be reset by
opening and closing the darkroom door.
4.5
Fluorescent Focus Target
The Fluorescent Focus Target fluoresces when placed
on a UV transilluminator or when exposed to overhead
UV. The Target provides sharp fluorescent images to
aid in adjusting the lens and camera settings for ideal
imaging results.

System design
11
81-0220-01 Rev R
4.6
Optional Equipment
UVP offers a variety of optional equipment to support the needs of varying laboratory
environments. Refer to “Replacement Parts and Accessories” at the end of this manual for
optional equipment part numbers.
4.7
Thermal Printer
The thermal printer provides archive quality, 256 gray-
scale prints and five optional cost-effective printsizes.
Thermal Printer
4.8
UV Handheld Lamps for Epi (Overhead) Lighting
A set of two 4-watt ultraviolet lamps can be connected
inside the darkroom to provide epi UV illumination.
These lamps can be switched on or off using the switch
in front of the darkroom and can also be removed from
the darkroom and used as standalone handheld lamps
(as seen in the image to the right).
UV Lamp
4.9
LED White Light Plate
The LED White Light Plate emits high uniformity with
less than 5 % coefficient of variance (CV). Plug the LED
White Light Plate directly into the power supply within
the system darkroom, or store it in the exterior dark-
room side pocket when not in use.
LED White Light Plate
4.10
Converter Plates
An alternate to the LED White Light Plate, the
UV/White Converter Plate allows imaging of non-
fluorescent stained media with an ultraviolet transillumi-
nator. The converter plate is specially coated to convert
302 nm UV output to white light rather than using a
separate white light box or plate.
The Converter Plate Visi-Blue™ (not shown) converts
UV to a safe 460 –470 nm wavelength designed for
use with blue excitation samples and SYBR Green,
SYPRO Orange and GFP stains.
UV/White Converter Plate

System design
12
81-0220-01 Rev R
4.11
VisionWorks®Acquisition and Analysis Software
The Imager is configured with VisionWorks Software for acquisition and analysis of gels,
plates and membranes. The software features image enhancement, complete analysistools
and reporting capabilities, and is ideal for users who require image analysis functions in
addition to the standard image acquisition capabilities.
IMPORTANT
VisionWorks is included as standard. Software must be installed on an externalcomputer.
For installation instructions please see next chapter as well the separate software
instructions.

Set-Up
13
81-0220-01 Rev R
5
Set-Up
5.1
Scope of supply
When unpacking the system, the following items will beincluded:
GelDoc-It2 or ChemiDoc-It2darkroom
Transilluminator
Camera with lens and bracket
Ethidium bromide (EtBr) emission filter
Power cables
VisionWorks® Software
Supporting documentation
Black chemi tray for blots (ChemiDoc-It2only)
Gel tray and gel ruler (GelDoc-It2only)
Note: When unpacking and setting up the darkroom, two people are required to move
the dark- room. Place the darkroom on a flat surface which can provide adequate
support for up to100 pounds.
CAUTION! Risk of short circuits!
Do not attempt to perform any setup procedures while the system is plugged in orpowered
on unless otherwise instructed.
IMPORTANT
Do not install the system in areas with high moisture, dust or high temperatures. Keep the
equipment away from motors or any other large magnetic equipment apparatus. This system
is designed for indoor use only.
5.2
Connecting the power cables
1.
Inside the darkroom, place the transilluminator on the roll-out tray. Connect the
transilluminator to one end of the jumper cable. Connect the other end of the jumper
cableto the interior of the darkroom. Turn the UV transilluminator’s main power switch
(green switch) ON.
2.
If installing the LED White Light Plate, place the plate on top of the UVtransilluminator
and connect the power cord coming from inside the darkroom to the back of thePlate.
3.
If installing epi UV handheld lamps, place the lamps in the brackets located at the topof
the darkroom. Plug the handheld lamps into the outlets provided inside the darkroom.
Place the power switches located on the outside of the handheld lamps in the ON
position.
4.
Connect the main power cord from the back of the darkroom to a surge-protectedpower
outlet.

Set-Up
14
81-0220-01 Rev R
5.3
Installing emission filters
To install the 50 mm2 ethidium bromide (EtBr) filter and any other emission filters:
1.
Carefully remove the filter from the protective plastic case, holding the filter at the edges
to prevent placing fingerprints on the glass surface.
IMPORTANT
It may be necessary to remove the base and cameraas-
sembly to insert new filters (photograph shows camera
and base removed).
2.
The filter wheel is located inside the top of the dark-
room. Before placing the filter in the filter wheel, en-
sure that the text on the edge of the filter is posi-
tioned so it is right side up when facing the installer.
3.
Place the filter in the filter wheel.
4.
Write the name of the filter on the appropriate labelat
the front of the darkroom.
Additional and replacement emission filters are available through UVP. Refer tothe
“Replacement Parts and Accessories” section of this manual for ordering information.
5.4
Camera Setup
High sensitivity, scientific-grade cameras are designed for use with UVP’s imagers. This
section covers the components and steps required to install cameras. The following
cameras are covered in this manual (refer to the packing list for the camera included with
your specific system):
515 CCD
815 CCD
5.4.1
Camera with Manual Lens
The 515 camera, zoom lens and diopter are assembled at the UVPfactory.
Note: The camera, lens and brackets may appear different thanpictured.
1.
Before installing the camera, install the emission filter. Refer to section: 5.3
Installing emission filters.
2.
Remove the cap from the lens by pulling off, instead of unscrewing.
3.
When using a zoom lens, a step-up ring and diopter should be attached to the lens. The
step-up ring and diopter will only fit one way.

Set-Up
15
81-0220-01 Rev R
4.
Using the brass thumb nuts provided, secure the camera assembly bracket to the dark-
room base located the top of the system. Ensure that a light-tight seal is madebetween
the end of the lens and the rubber gasket beneath the darkroom bracket.
5.
Plug the additional power cables to an external power source.
Do not plug the camera USB into the computer, until VisionWorks LS has been in-
stalled!
.
Darkroom bracket
Brass thumb nut
Camera bracket
Camera USB cable
Camera and lens
assembly
Rubber gasket

Set-Up
16
81-0220-01 Rev R
5.4.2
Camera with Motorized Lens
The 515 camera, zoom lens and diopter are assembled at the UVPfactory.
Note: The camera, lens and brackets may appear different thanpictured.
The 815 CCD and and 515 CCD cameras use many of the same components and are in-
stalled in a similar manner. Therefore, the installation instructions herein will refer to allthree
cameras interchangeably.
Camera Installation
The photograph shows the parts required for assembly of the 815 CCD and 515 CCD cam-
era kits with the motorized lens on the Imager.
Note: The image above shows the motorized 42.5mm f/0.95 lens. Another lens and/orlens
controller may be shipped with the system, but will be installed in the samemanner.
Camera
power
supply
Camera
and lens
Lens controller
power cable
Lens controller
Camera
power
cable
USB cable
(computer
to camera)
Base mount
(ships attached
to darkroom)
Black screws
and brass
thumb nuts
Bracket and
black thumb
screws

Set-Up
17
81-0220-01 Rev R
1.
Check to see if base mount has been mounted to the top of the darkroom. If not, usethe
black screws or brass thumb nuts to install the mount.
2.
Attach the camera bracket to the base mount with the brass thumb nuts.
3.
Place the camera/lens assembly in the hole in the base mount, making sure that the label,
found on the camera, which states Front, is placed towards the front of the darkroom, fac-
ing the user.
4.
Use the black thumb screw(s) to tightly secure the camera in place, attaching it through
the hole at the top of the bracket.
5.
Plug the serial cable from the motorized lens into the lens controller.
6.
Plug the camera cable into the top of the camera. Do not plug the other end of the USB
cable for the lens controller and camera, into the computer, until VisionWorkssoftware
has been installed
Note: When looking at the darkroom from the front, the 815 CCD and 515 CCD cameras
attach to the bracket with the Black Thumb Screw to the right and/or left of the system. The
USB and power cables will extend from the top of the camera, facing the user.

Set-Up
18
81-0220-01 Rev R
5.4.3
515 CCD Camera with Motorized Zoom Lens
Note: The picture below shows the 12.5-75mm f/1.2 motorized zoom lens. The camera,
zoom lens and diopter are assembled at the UVPfactory.
Note: The camera, lens and brackets, may appear different thanpictured.
Camera Installation
1.
Note: If not already removed, take the lens cap off the lens by pulling straight off. Do not
unscrew the lens cap as it will simply pull off.
2.
Follow steps 1-4 from the Camera Installation section under 5.4.2 Cameras with Mo-
torized Lens.
3.
Plug the camera cable into the top of the camera but do not plug in the other end of the
USB cable until VisionWorks software has beeninstalled.
Camera
and lens
Camera
power
supply
Camera
power
cable
USB
(camera to
PC)
Diopter
Black
screws and
brass
thumb nuts
USB cable
(lens control
box to PC)
Black
thumb
screw and
bracket
Lens con-
trol box
power
Base
mount
Lens
control box

Set-Up
19
81-0220-01 Rev R
4.
Mount the lens control box on the hook
located at the back of the darkroom.
5.
Plug the serial cable from the motorized lens
into the lens control box.
6.
Connect the USB cable to the PC connection port on the lens control box. Leave the
other end of the USB cable unplugged until installation of VisionWorks iscomplete.
7.
Connect the power supply to the lens control box and into the poweroutlet.
Hook for the
Lens Control Box
Power switch for the Lens
Control Box
Power supply
on the Lens Control Box
PC Connection on the Lens
Control Box

Software Installation
20
81-0220-01 Rev R
6
Software Installation
6.1
Installing VisionWorksSoftware
1.
Insert the VisionWorks flash drive into thecomputer.
2.
Click on the Install button for VisionWorks.
3.
Click OK, Next, agree to “I accept terms of licensing agreement”, then Next. Leave all
options in their default settings. Then click Next, Next, Install and finallyFinish.
6.2
Registering the Software
1.
Double click the
VisionWorks soft-
ware icon on the desk-
top.
2.
To activate the software,
registration is required.
To immediately activate
the software online,
choose On-the-Fly
activation. Activation
can aso be done using
a smartphone.
Activation can also be done at REG.UVP.com using any other web connected device. A
Config ID will be needed for this option and can be found by clicking Next after selecting On
the fly activiation. It will be displayed under ConfigurationID.
3.
Click Next to continue.
4.
The Already have an activation ID option is useful when reloading the softwareafter
receiving an initial activationcode.
5.
Complete all required infor-
mation on the form.
6.
Fill out the Serial Number
located on the box delivered
with the flash drive. The num-
ber should be four sets of six
numbers.
7.
Once the form is completed,
click on Get Activation No. and
then click Activate once the
Activation Number appears in
the box.
Other manuals for GelDoc-It2
1
This manual suits for next models
1
Table of contents
Other UVP Laboratory Equipment manuals