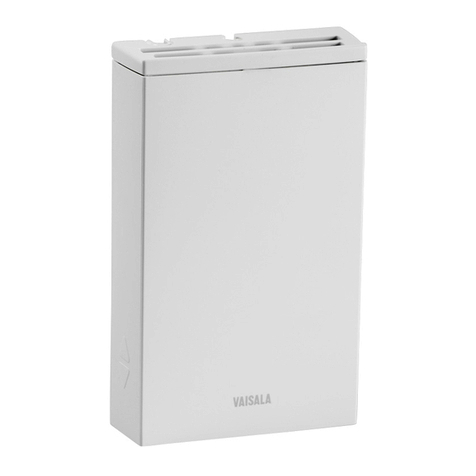
Vaisala CARBOCAP GMW86P User manual

M211748EN-C
USER'S GUIDE
Vaisala CARBOCAP® Carbon Dioxide,
Humidity and Temperature Transmitters
GMW80 Series

PUBLISHED BY
Vaisala Oyj
Street address: Vanha Nurmijärventie 21, FI-01670 Vantaa, Finland
Mailing address: P.O. Box 26, FI-00421 Helsinki, Finland
Phone: +358 9 8949 1
Fax: +358 9 8949 2227
Visit our Internet pages at www.vaisala.com.
© Vaisala 2015
No part of this manual may be reproduced, published or publicly displayed in
any form or by any means, electronic or mechanical (including photocopying),
normay its contents be modified, translated, adapted, sold or disclosed to a third
party without prior written permission of the copyright holder. Translated
manuals and translated portions of multilingual documents are based on the
original English versions. In ambiguous cases, the English versions are
applicable, not the translations.
The contents of this manual are subject to change without prior notice.
This manual does not create any legally binding obligations for Vaisala towards
customers or end users. All legally binding obligations and agreements are
included exclusively in the applicable supply contract orthe General Conditions
of Sale and General Conditions of Service of Vaisala.
This product contains software developed by Vaisala. Use of the software is
governed by license terms and conditions included in the applicable supply
contract or, in the absence of separate license terms and conditions, by the
General License Conditions of Vaisala Group.
2

Table of Contents
1 About This Document 3
Documentation Conventions 3
Trademarks 4
2 Product Overview 5
Introduction to GMW80 Series 5
Transmitter Models 6
Transmitter Parts 7
Display 9
Startup Screens 9
Measurement Screen 10
Error Messages 10
CO2 Level Indicator LEDs 11
Temperature Setpoint Potentiometer 12
Analog Output Overrange Behavior 13
Safety 15
Regulatory Compliances 16
Patent Notice 16
3 Installation 17
Selecting Location 17
Opening and Closing the Transmitter 19
Installing the Mounting Base 20
Wiring 21
Wiring GMW83, GMW83D and GMW83A 22
Wiring GMW83T 23
Wiring GMW83RP and GMW83DRP 23
Wiring GMW86P 24
Wiring GMW86PT 25
4 Maintenance 26
Cleaning 26
Replacing the CO2 Measurement Module (GM10) 27
Replacing the INTERCAP® Humidity Sensor 28
5 Troubleshooting 29
Problem Situations 29
Error State 33
6 Technical Data 34
Specifications 34
Dimensions 37
1

1ABOUT THIS DOCUMENT
This document provides information for installing, operating, and maintaining
GMW80 series transmitters.
DocumentCode Date Description of Changes
M211748EN-C June 2015 Updated wiring instructions for GMW83
product models.
M211748EN-B May 2015 nAdded new product models:GMW83,
GMW83D, GMW83A, GMW83T,
GMW83RP, GMW83DRP.
nUpdated Analog Output Overrange
Behavior on page13.
nUpdated Problem Situations on page29.
M211748EN-A November2014 First version.
Table 1 Document Versions
DocumentCode Name
M211660EN GM10 Quick Guide
Table 2 Related Manuals
Documentation Conventions
Warning alerts you to a serious hazard. If you do not read and
follow instructions very carefully at this point, there is a risk of
injury or even death.
Caution warns you of a potential hazard. If you do not read and
follow instructions carefully at this point, the product could be
damaged or important data could be lost.
Note highlights important information on using the product.
3
1 About This Document

Trademarks
CARBOCAP®and INTERCAP®are registered trademarks of Vaisala Oyj.
Third-party products and names may be trademarks of their respective owners.
4
1 About This Document

2PRODUCT OVERVIEW
Introduction to GMW80 Series
Vaisala GMW80 series CARBOCAP® carbon dioxide, humidity, and
temperature transmitters are wall-mount transmitters designed to fulfill the needs
for CO2measurements in standard demand controlled ventilation applications.
The CO2measurement is based on a new generation CARBOCAP® sensor,
which uses a novel, silicon-based microchip emitter instead of an incandescent
light bulb. The internal reference in the CO2sensor guarantees the best stability
and operation also in constantly occupied buildings without frequent
readjustments.
CARBOCAP® sensors give correct CO2measurements immediately when
powered on. As they have a built-in reference measurement they do not need a
lengthy learning phase before the measured values are correct. Proper
operation can be verified immediately after snapping on the device cover.
All GMW80 series transmitters measure carbon dioxide (CO2) and temperature
(T), some models also include relative humidity (RH)measurement as well.
Humidity measurement utilizes the Vaisala INTERCAP® sensor.
Transmitter models and their features are listed in Transmitter Models on the
next page.
5
2 Product Overview

Transmitter Models
Model
Name
CO2
Output
T
Output
RH
Output Display CO2
LEDs
T Setpoint
Potentiometer
GMW86P 4...20mA
0...10V
Pt1000
(passive)
No No No No
GMW86PT 4 ... 20 mA
0 ... 10 V
Pt1000
(passive)
No No No Yes
GMW83 0 ... 10 V 0 ... 10 V No No No No
GMW83D 0 ... 10 V 0 ... 10 V No Yes No No
GMW83A 0 ... 10 V 0 ... 10 V No No Yes No
GMW83T 0 ... 10 V 0 ... 10 V No No No Yes
GMW83RP 0 ... 10 V 0 ... 10 V
Pt1000
(passive)
0...10V No No No
GMW83DRP 0 ... 10 V 0 ... 10 V
Pt1000
(passive)
0...10V Yes No No
Table 3 GMW80 Series Transmitters
Letters at the end of the model name stand for the following features:
P =Passive temperature measurement
T =Temperature setpoint potentiometer
D = Display
A = CO2indicator LEDs
R =Humidity measurement
6
2 Product Overview

Transmitter Parts
12
10
11
8
9
4
5
7
6
1
2
3
Figure 1 GMW80 Series Transmitter Parts
1 = Opening tab.
2 = Screw terminals. The wiring information is marked on the mounting base
next to the terminals.
3 = Barrier to prevent the cable from being routed below the GM10
measurement module. The area to avoid is marked No cable on the
mounting base.
4 = Orientation arrow. Should point up after mounting base has been installed.
5 = Opening for cable when wiring from behind(recommended).
6 = Place for zip tie (optional, for cable strain relief).
7 = Breakaway tab for routing the cable from below.
8 = Locking screw. Supplied with the transmitter.
9 = Breakaway tab for routing the cable from above.
10 = CO2level indicator LEDs (on models with letter A). See CO2 Level Indicator
LEDs on page11.
11 = Display (on models with letter D). See Display on page9.
12 = Setpoint wheel (on models with letter T). See Temperature Setpoint
Potentiometer on page12.
7
2 Product Overview

1
4
2
3
5
6
Figure 2 GMW80 Series Component Board Parts
1 = Pins that connect the transmitter cover to the screw terminals when the
transmitter cover is in place.
2 = Vaisala INTERCAP® humidity sensor (on models with letter R).
3 = Pt1000 temperature sensor for passive temperature measurement
(onmodels with letter P)
4 = Active temperature sensor.
5 = GM10 carbon dioxide measurement module.
6 = Potentiometer component (on models with letter T).
8
2 Product Overview

Display
Startup Screens
When a GMW80 series transmitter with a display is powered on, it shows a
sequence of information screens. The screens are shown for a few seconds
each.
Figure 3 Example Startup Screens
The first screen shows the following information:
nTransmitter model, software version, and serial number.
nSerial number of the connected GM10 CO2measurement module. If the
module is disconnected, no serial number is shown.
nTransmitter status:OKor ERROR. If the status is ERROR, the cause of the
error will be shown on the measurement screen after the startup is
completed.
The following screen(s) show the configuration of the active analog outputs:
nOutput type (for example, 0 ... 10 V).
nOutput parameter and unit (for example, CO2(ppm)).
nOutput scaling (for example, 0 ... 2000 ppm).
9
2 Product Overview

Measurement Screen
After the startup screens the transmitter shows the measurement screen. It
shows the measured parameters and an air quality indicator based on the
current CO2level.
nGood air quality:0 ... 800 ppm CO2
nFair air quality: 800 ... 1200 ppm CO2
nPoor air quality: >1200 ppm CO2
Figure 4 Example Measurement Screens
Error Messages
If there is a problem with measurement, affected readings are replaced with
stars. The alarm indicator and an error message will also appear on the screen.
If more than one error is active, the display will cycle through the errors, showing
each error for a few seconds.
For a list of possible errors and their causes, see Problem Situations on
page29.
Figure 5 Example Error Message on Display
10
2 Product Overview

CO2Level Indicator LEDs
Transmitter model GMW83Ahas indicator LEDs for the measured CO2level on
the front cover. The LEDs provide a visual indication of the measured CO2level
to the occupant of the monitored space.
The LEDs are lit as follows:
nRed LED (top): lit between 1200 ... 2000 ppm CO2, blinking>2000ppmCO2.
nYellow LED (center):lit between 800 ... 1200 ppm CO2.
nGreen LED (bottom):lit between 0 ... 800 ppm CO2.
Figure 6 CO2Level Indicator LEDs on Model GMW83A
11
2 Product Overview

Temperature Setpoint Potentiometer
GMW80 series transmitter models with the letter Tin their model name have
atemperature setpoint function that gives the occupant of the monitored space a
way to adjust the temperature. The setpoint function is implemented using a
passive 10 kΩ linear potentiometer (variable resistor) that is mechanically
actuated by a setpoint wheel on the lower part of the transmitter.
The transmitter is simply marked with plus "+" and minus "-" signs to indicate the
direction of adjustment. The rotation of the wheel is mechanically limited to
approximately 180degrees, so in actual use the resistance range of the
potentiometer varies between approximately 2.1 kΩ and 7.2 kΩ. The
corresponding temperature change is decided on the building controller level.
Minimum: ~2.1kΩresistance.
Midpoint: ~4.65kΩresistance.
Maximum: ~7.2kΩresistance.
12
2 Product Overview

Analog Output Overrange Behavior
Analog outputs of the GMW80 series transmitters have a defined behavior when
the values measured by the transmitter are outside the scaled analog output
range.
nAt the top end of the output range, the output is clipped to the maximum value
of the output. This means that even if the measured parameter rises, the
value does not change anymore.
nAt the low end of the output range, the output stays at the minimum value
when the measured parameter falls below the scaled range.
nThe output is eventually set to the error state if the measured parameter is far
enough from the scaled output range. The exact limits for this behavior are
parameter dependent;see the figures below.
For more information on the error state, see Error State on page33.
20.0
0
0 2000 6000
Output clipping limit
Error level
CO2 (ppm)
-100
Output
(mA)
Scaled output range:
4 ... 20 mA
0 ... 2000 ppm
3.6
4.0
Figure 7 Overrange Behavior of CO2Measurement with 4...20mA Output
Negative ppm values cannot physically exist but the behavior of the output is
defined to account for cases where a low CO2reading, combined with sensor
drift, could cause a negative result.
13
2 Product Overview

11.0
10.0
0
0 2000 6000
Output clipping limit
Error level
CO2 (ppm)
-100
Output
(V)
Scaled output range:
0 ... 10 V
0 ... 2000 ppm
Figure 8 Overrange Behavior of CO2Measurement with 0...10 V Output.
11.0
10.0
0
0 50 52.5
Output clipping limit
Error level
T (º
C)
-2.5
Output
(V)
Scaled output
range:
0 ... 10 V
0 ... 50 ºC
Figure 9 Overrange Behavior of Active Temperature Measurement
Passive temperature measurement (reading the Pt1000 resistor) is not affected
by the overrange behavior or the error state.
14
2 Product Overview

11.0
10.0
0
0 100 110
Output clipping limit
Error level
%RH
-5
Output
(V)
Scaled output
range:
0 ... 10 V
0 ... 100 %RH
Figure 10 Overrange Behavior of Relative Humidity Measurement
The transmitter may measure humidities in excess of 100%RH if the sensor
element becomes wet due to condensation.
Safety
The GMW80 series transmitter delivered to you has been tested for safety and
approved as shipped from the factory. Note the following precautions:
Connect only de-energized wires.
Do not modify the unit. Improper modification can damage the
product or lead to malfunction.
Electrostatic Discharge (ESD) can cause immediate or latent
damage to electronic circuits. Avoid touching exposed
component contacts during installation and maintenance.
15
2 Product Overview

Regulatory Compliances
GMW80 series is in conformity with the following directives:
nRoHS-Directive
nEMC-Directive
The conformity is declared with using the following standards:
nEN50581: Technical documentation for the assessment of
electrical and electronic products with respect to the restriction
of hazardous substances.
nEN 61326-1: Electrical equipment for measurement, control,
and laboratory use – EMC requirements – Immunity test
requirements for equipment intended to be used in an
industrial electromagnetic environment.
nEN 550022: Information technology equipment – Radio
disturbance characteristics – Limits and methods of
measurement.
Patent Notice
The GMW80 series is protected by the following patents and their corresponding
national rights:
Patent Issued By Patent Number
United States Patent and Trademark Office US 5,827,438
US 6,177,673
European Patent Office EP0776023
EP0922972
German Patent and Trade Mark Office 69615635
Japan Patent Office 4263285
Finnish Patent Office 112005
105598
Table 4 Applicable Patents
16
2 Product Overview

3INSTALLATION
Selecting Location
Select a location that represents well the area of interest. Interior walls and
columns are typically suitable locations. The installation height should be
1.2...1.8 m (4 ... 6 ft).
Figure 11 Examples of Good Installation Locations
Seal the cable opening when bringing a cable through the wall.
The hole will supply air from outside the room into the transmitter
and affect the measurement readings. For example, fresh
concrete binds CO2and may cause low readings, especially in
new buildings.
17
3 Installation

Avoid installing in the following locations:
nNear doors or windows.
nNear heat and moisture sources.
nIn direct sunlight.
nIn locations that are blocked by furniture.
nClose to the discharge of the supply air ducts.
nOn the floor or the ceiling.
nOn points that experience excessive vibration.
Figure 12 Examples of Unsuitable Installation Locations
18
3 Installation
This manual suits for next models
8
Table of contents
Other Vaisala Temperature Controllers manuals