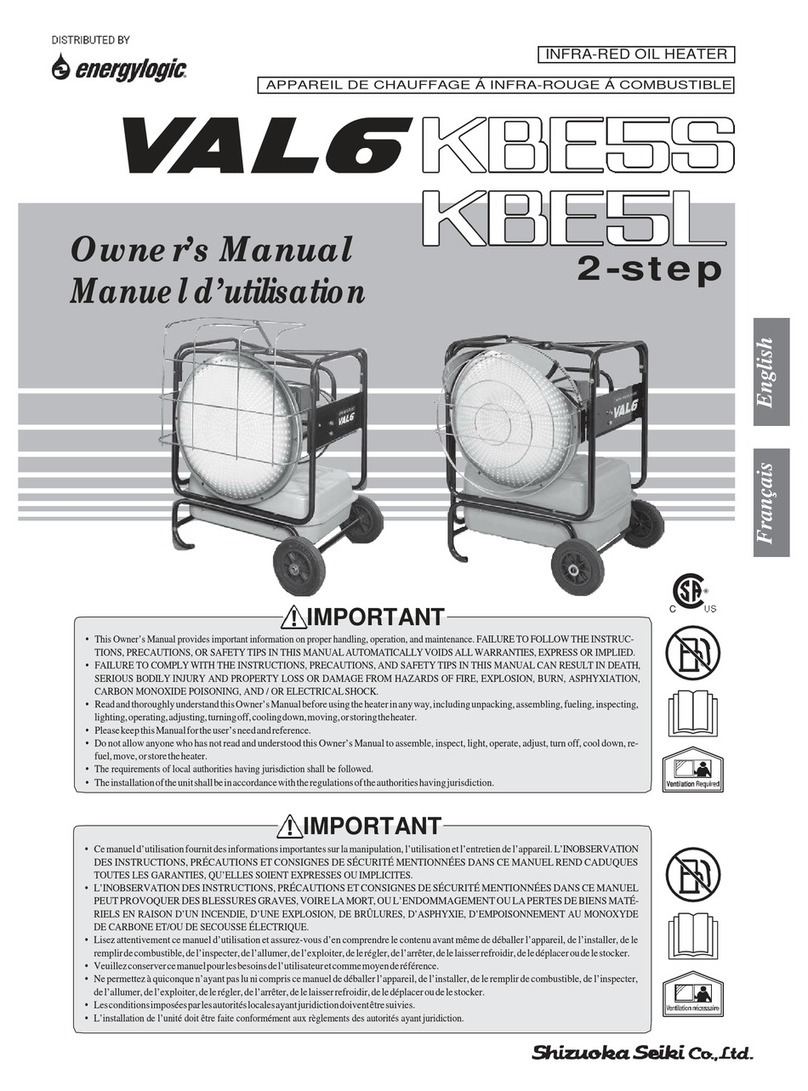
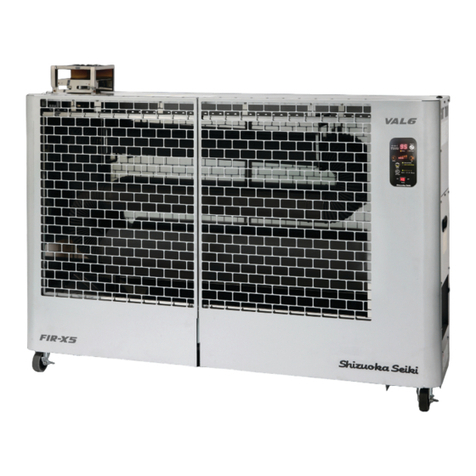
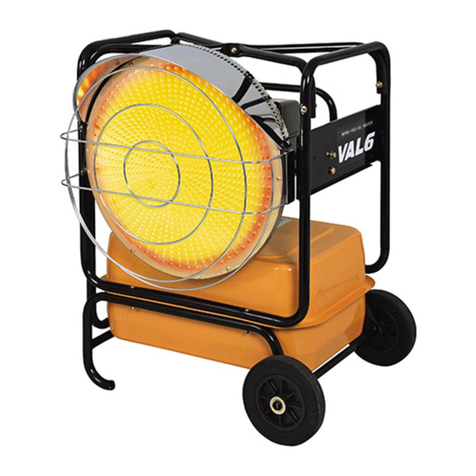
Val6 KBE5L User manual

INFRA-RED
OILHEATER
APPAREIL DE CHAUFFAGE A INFRA-ROUGE A COMBUSTIBLE
KBtr5L
Owner'sfrIqnusl
Irrlonuel
d'utilisotion
. Veuillezlire etparfaitement
comprendre
lecontenuede
cemanueld'instructions
avant
d'utiliserl'appareildechauff'agepouravoirla certitude
deI'utiliseren
toutesdcuritd.
. Veuillezconserver
cemanuel
pour
les
besoinsdeI'utilisateuretcomme
moyen
der6f6rence.
. Lesconditions
impos6es
par
lesautorit6s
localesayant
juridictiondoivent6tre
suivies.
. L'installation
deI'unitd doit 6trefaiteconformdment
auxrbslementsdes
.@:.
. Readandthoroughlyunderstand
thisOwner'sManual
beforeusingtl.reheater
for safety
operation.
. Please
keepthisManualfor theuser'sneedandreference.
. Therequirements
of localauthoritieshaving
jurisdiction
shallbefbllowed.
. Theinstallation
of theunit shallbein accordance
with theresulations
of the
authoritieshaving
jurisdiction.

I Contents
ASSEMBLY
INSTRUCTION ...-....1
1. Safety
Information.............................3
2. NamesofMain
Components
.............6
3. HowTo
Use
........ ................7
3-1.
Preparationfortheoperation.....7
3-2.Operating
Procedures................
8
3-3.
HowtoconnecttheControl
Device...9
3-4.
UseoftheHeatShilding
Mat...10
3-5.OperationwithPortable
generator
..10
4. Inspection ........10
4-1.DailyInspection ........10
4-2.PeriodicInspection..................
12
5. HowTo
Store
theHeater..............
....12
6. Troubleshooting ...............13
7. Exchange
procedure .......13
7-1.Fuse ..........14
7-2.Nozzle............ ...........14
8. Specifications
........ ..........15
9. Safety
Labels ...................16
6.
7.
8.
9.
Inspection ........26
4-1.Inspection
quotidienne
............
26
4-2.Inspection
p6riodique
..............28
Commententreposer
I'appareil
dechauffage
......... ...........28
D6pannage
............. ..........29
M6thodede
remplacement..............
29
7-1.
Fusib|e............. .........30
7-2.Buse .........30
Caract6ristiques
techniques
...........
31
Etiquettes
des6curit6
.............
.........
32
: Toble
des
moti6res
DIRECTIVESRELATIVESAUASSEMBLAGE
.....17
1. lnformationsconcernantlas6curit6..19
2. Nomsdes
principaux
composants.......22
3. Comment
l'utiliser... .........23
3-1.
Pr6paratifsd'utilisation............23
3-2.
Proc6duresd'utilisation...........24
3-3.
Branchement
du dispositifde
commande
................................25
3-4.Utilisationdutapisdeprotection
thermique .................26
3-5.
Alimentationdpartir
d'un
groupe
6lectrogdne
portatif
..............
....26

. KBEsS
The unit ispackagedwithout having the safety
guard and wheel
parts
assembled.
Be sareto assemblethesafety
guardproperly beforethe unit is used.
Follow the instruction below to assemble
the safetyguard and wheels
in the comectorder.
J'_f3
Put
theshaftthrough
the
shaft
plate,
thenmount
thewheels,washers
andcutter-pins.
ACnUTION
Donotusetheunit
without
the
safety
guard
to prevent
from
llra aaail|anl
Putthe main
structureon the
wheel
frame
andfasten
themwith
the
screws
provided. The safety
guard
mustbe fastened
with
thescrews
provided.

'tJ
'-r;*
o
KBESL
The unit is packaged without having the safetyguard and the visor
partsassembled.
Besuretoassemble
thesafety
guardandthevisor
properlybefore
the
unitisused.
Follow the instruction belowto assemble
thesafety
guard and the visor
in the correct order.
I Jl
Thesafety
guard
mustbe
fastenedwiththe
screws
provided
onbothsides.
Safety
guard
J-I9:
Finally,the
visormustbe
fastened
withthe screws
provided
on both
sides.
) J!)',:y
Theretainer
plate
must
be
fastened
withthe screws
provided
uponthe
safety
guard
onbothsides.
Visor
Retainer
plate
ACnUTION
unit
withoutthesafety
guard
to prevent
from

Thank
you forhaving boughf ourlnfrqredOil
Heafer "VAL6",
Safety
Information
I This Manual explainseverycautionthat shouldbe strictly taken,for the improper andsafety
operation.
Caution
is dividedinto 3 categories
of A Danger,A Warning, and
A Caution. Please
readandunderstand
well thedetailsand
meaningsof eachcategory.
A@ Negligence
of this indication "DANGBR" and the improper operation can lead
to death, seriousinjury and/or major fire.
Negligence
of this indication .'WARNING" and theimproper operation may likely
result in death, seriousinjury, fire and/or possibleexplosion.
Negligence
of this indication "CAUTION'' and the improper operation may re-
sult in serious
injury and/or property damage.
A@
* Dependinguponthecircumstances,
even
thecategoryof "CAUTION" canleadto grave
results.Caution
andrecom-
mendationlistedin each
categoryareequallyimportantfor thesafety
operation,sobesureto follow well all 3 catego-
ries.
A@
I Following signs,used
throughout this Manualodefineasfollows:
Prohibited
(This
sign
indicates
"strictly
forbiddenaction".)
Mandatory
(This
indicates
"actions
or
instructions"that
must
be
carriedout.)
Gaution
(This
indicates
"actions"
thatmust
requireattention.)
A lmportant
Notice
AwnRNTNG
aa
o
o
o
*il;0";;;;.,;"'t";;t;';;;
;;il;;i'*"*u"" ."*i"o'";;*t;;''''''''''''
Whenreplacing
parts,
useonly thegenuineparts.
Pleasebenotedthatwe shall
notbeheldresponsible
or liablefor anydamage
or accidentthat
resultsfrom usinganyunapproved
ornon-genuine
parts.
Weshallnot beheld liable or responsiblefor anydamage
or accidentthatresultsfrom disobeying
or notproperly carrying out
anyinstructionsin this Manual, or from theimpropermodification or operation.
; ';,;" i""-*."0'., ";;;;tt"';;;"; ;t;;;;;;'";r";,;, "t,i""", ,;;;."*no"o'";t' ;;"; ;;';
notfully foreseeawholerangeofpossibledangers.So,
whenoperatingor doingdailyinspection
(tothisheater),
pleasepay
full attention
notonly to thecontents
of thisManual andtheLabelsontheheater
itself,but alsoto thoughtful consideration
to
be duly paid to thesafetyoperation.
2. Ifyou haveanyquestion
or moredetailedinformation to know abouttheheater,
please
contact
your dealer.
3. If anyirregularor missingpage(s)is found in this Manual,please
contact
your dealerandwe will exchangeit with anewone.
4. Please
keepasetof StandardPartssupplied
togetherwith theheater.
I Purposeof
this
Owner's
Manual

* Following signsmean the very important points for the safetyoperation, soplease
don't fail to read
them well,beforeusing.
ziT
DANGER
1Useof Gasoline
Prohibited Neveruse
gasoline,
whichsurelycausesafire.
2Also Following
Operation
Prohibited
Neverusetheheater
wherethinner,
gasoline,
liquid propane
gas,
otherhighty
flammable
vapors,etc.,arepresent,
because
theseleadto explosion
orfire.
3Ventilation
Required
Neveruse
theheaterin badlyventilated areas,
alsonever
continueusingit in
suchcircumstances.
Insufficient
supply
of oxygencausesincomplete
combus-
tion, producing
carbon monoxide
which may resultin carbonmonoxide
toxication.Provide
theHeater
with freshair always whenin use.Carbonmon-
oxide
poisoning
mayleadtodeath!
A WARNING
1Keepaerosol
bottles
away from the heater
Never
putthesealdedcontainers
likeaerosolbottles
wheretheyareexposed
and
heated
by theheater,
becausetheinner
pressure
of aerosol
bottles,heated,
goes
toburst
andhurtthehuman
body. s
2Neverusethe heater
where flammable
dusts are present.
Neveroperatethe
heaterwherehighlyflammable
dusts
(ofwood,
paper,
textile,
etc.)
are
present.
Dusts,
aftersucked
andheated
by theheater,
will beblown out
"sparked"
and
causeafire. S
3Be careful of hot sur-
faces Nevertouchthehotsurfacesaround
theburner,
whileburning
orfor 30minutes
after
switchedoff,to avoidaburn. A
4Do not service
the
heater while burning Donotservice
orhandle
theheater
whileburning,
in operation,hotorplugged-
into avoidanyinjury and/or
trouble. s
5Modification of the
Heater Prohibited Never modify theheater
bv anvmeans.
to avoidtroubleor fire. @
6Be Careful of Electri-
cal Shock
Toavoid
electricalshock,
neveruse
theheater
whereexposedto rain,snowor
high humidity.Make sure
thepowerplug is disconnected
from theelectrical
outlet,beforestartingdaily inspection
andmaintenance. A
zir
GAUTION
1Keep the flammables
away from the heater
Toavoidafire,please
keepall flammables
more
than2.5m
(8.2ft) awayfrom
thefront of theradiation
disk,andmorethan2m (6.56ft.)
awayfrom all sides
(leftiright andtop/rear)ofthe heater. o
2Do not block the
heater Toavoidafire, neverplace
anyobjectwithin one
(1)meter
(3.28
feet)from (the
front of) theradiationdisk. s
3Do not repeat
"switch-on and ofPt
Ifthe heaterdoesnotignite in threeconsecutive
tries,
please
stopswitching and
neverrepeat
morethan
three
(3)times,
to avoid
a
possible
fire:andplease
con-
sultyour dealer. S
4Do not operate the
heater unattended Do not operatetheheater
atunattended
situationin orderto avoid unexpected
troubleor fire. N

zlr
GAUTION
5Be careful of tempera-
ture of the floor
Theheateris for useon Non Combustible
Flooringunlesstheshieldinsmat.
part
#503002-05001
isused.
Materialsof shieldingmat : Glasscloth andAluminum film / Dimensionof
shieldingmat: 1200x 1200x (3.5)
mm (L x W x H) A
6Exposure
oftheHeater
to
rain/snow
andthe
operation
withwethandsare
prohibited
Do notusetheheater
whereexposedtorain/snow/etc,
anddonot operateit with
wet handsto avoidelectricshock. s
7Do not usethe Heater
in high altitudes
Whentheheater
isusedin analtitudehigherthan1000m
(3000f0 above
thesea
level,someadjustmentswill berequired.
Pleasecontact
your dealerabout
the
adjustments.Theheater,if not duly adjusted,mayleadto wrong burningor fire. S
IStopusing the Heater
when anything irregu-
lar is found
When wrongburning,smellor smoke,etcis found during theoperation,
please
stopimmediately
theoperationand
contact
yourdealer.If youcontinue
using
theheaterin sucha situation,afire likely takes
place. s
9Do not move the
heater while burning Do not movetheheater,while burningor in operation,to preventafire whenit
is overturned. S
10 Caution for switching
off the Heater. Beforetakingtheelectric
plug off theoutlet,
please
makesuretheoperating
lampis OFF. S
11 Tirrn off while refuel-
ing Always makesure
thattheheater
is turnedoff while refueling,to avoid afire . o
12 Useonly the correct
voltage Only electricalvoltage
and
frequency
specifiedonthemodelplatemustbeused,
to avoid afire, electricalshockand/ordamage. A
13 Earth./Ground
the
heater
beforeopera-
tion
Please
confirm if or not a grounded
powercordis connected.To operatethe
heaterwithout propergroundingmay resultin electricalshock s
14 Donotpull outthe
power
cord
Whendisconnectingthepowercord,always
pull outtheplug, never
thecord,to
unplugthecord.Topull outthecordmaydamagethecorditself andresultin
fire throughelectricalshockor shortcircuit. A
15 Do not damage the
power cord
Do notplace
excessiveforceonthecordby bending,
pulling, twisting, pinching
orremodeling.
Also, donotplace
anyheavyobjectson theheater,
etc.thatmay
damageit, to avoid afire andelectricshock. A
16 Usegloves When cleaningup theheater,
please
usethegloves,
to avoid anyinjury to hand
orfinsers. o
17 Make surethe flame is
extinguished After shuttingdown theoperation,
please
confirm that theflame is completely
extinguished,beforeyou leave
theplace. o
18 Do not disposeof the
Heater illegally Whenyou disposeof theHeater,
please
donotdisposeof it illegally andconsult
your local authoritiesor specialistson how to properly disposeof it. o
19 Do not usethe heater
in the following places
To prevent disaster,injury, etc.,pleasedo not usethe heaterin the following places:
. Onvibratingandtremblingfloor.
. Onslantfloor
(not
horizontal).
. Instairs,emergencyexit,doorways,
etc.
. Neartheunstablestacks/pilings-up.
. Inwindv,humid,dustvormetal
particles
floatinq
areas. S

I
;
t
zlr
GAUTION
20 Temperature
surrounding ln
area.
Make surethattheheateroperates
attemperaturesbetween
-20" and 40"C(4"
and 104"F).
If theheateroperatesatmorethan40"C(104"F),
theheaterwill
overheatandresultin fire. A
21 Provide the Owner's
Manual to the new
owner
If theheateris soldor given to anew owner,makesure
thattheHeateralways
soeswith it's Owner's
Manual
(this
booklet). o
22 Do not usethe fuel of
low quality Do notusethefuel of low qualitv suchasdiscardedoil or fuel mixed with water. A
23 Be careful when
moving or storing the
heater.
Whentheheateris movedor stored,it mustbein a level positionto avoid a
leakageof fuel. A
Names
ofComponents
. KBE5S '',tt
e BurnerCover
;;.,;,,
@ BurnerHandle
,-;,,:;;'.
@ switch section
,:; @ Transport
Handte
," @ Wheel
" @ FuelTank
@ DrainBolt
. @ TankLegs
.,,
@ Radiation
Disk
",. @ KnobBolt
't;:,
@ FuelCaP
,a::
@ Tank
InletFilter
@ FuelGauge
@ Fuel
Filter
@ FuelSuctionand
ReturnHoses
@ Protector
(7 FlameMonitor
(Flame
Eye)
@ Fuse
@ fan Motor
i Burner
Section
l
708
o
KBESL

i SwitchSection
OperatingSwitch
Thisignitesor extinguishestheflame.
(Refer
topages
8and9.)
Operating
Lamp
Thisislit while (the
heateris)operatingandflasheswhile
(the
heateris)coolingdown.
MisfireLamp
Thisflashes
whenthe
flameisextinsuished.
Description
of Devices
@ FlameMonitor
This
automaticallyextinguishes
theflamewhenignitionfailsorflame
goes
outduring
the
operation.
Thismonitor,when
detectsany
irregularitybe-
foreignition,automaticallyextinguishesthe
flame.
OperatingCondition:Misfirelampflashesand
Post-Purge
continues
forthree
(3)
minutes.
@ Electric
Overload
System
(Fuse)
Thisshuts
off
the
power
supply
whenexcessiveelectriccurrent
passes
through,
due
toirregulartrouble
of
the
devices.
OperatingCondition:
Thewhole
operationstops.
,^!.
ffiEl Howro
use
3-1.
Preparationfor
thgOperation
.......o...................o
. Neveruse
highlyflammablefuellike gasoline,
toavoidfire.
Pleaserefuel
only whiletheheateristurnedoff andcompletelyextinguished.
Pleaseuseonly theelectric
power(voltage
and
frequency
specifiedon themodelplate).
Suchelectric
powerasdifferentfrom thespecificartions
may resultin fire, electrical
shockand/ordamage.
Please
confirm theground/earth
cableis surelyconnected,to preventelectricalshock.
Fordisconnectingtheelectric
power,pull alwaystheplug out.Also, donotpull andbend
with excessiveforce thecord.not to damaseit andto have afire or electricalshock.
I Refueling Observations
Make sure
thatthetankinlet filter (in thefuel tank)is freeof dirt/dusts,
etc.If thefilter is filled up with dirt/dusts,takeout
thefilter andwashit with kerosene.
Do notpour backinto thefuel tankthekerosene
usedfor washing,
to avoidtroubles.
I
HowTo
Use

ll
2
Removethefuel
cap
andinsertahandysuc-
tion
pump
intothe
fuel
tank.
Watchthefuel
gauge
while
refueling.
Whenthe
gauge
reachesthemaximum
level,
stop
refueling.
I Connecting
the
Power
Supply
Makesurethat
the
operating
switchis"OFF",
then
plug
theheater's
powerplug
into
approved,
grounded,
three-wireextension
cord.
Plug
extension
cordintostandard
120volt/
60Hz,3-prong
grounded
outlet.
Tightenwellthefuelcap,and
wipe
off
any
spilt.
ExtensionCordSize
Requirement
. 6
to10feet
(1
.8to
3
meters)long,use
18
AWG
(0.75
mm2)rated
cord
. 11to100feet
(3.3
to30.5
meters)long,
use
16AWG
(1
.0mm2)ratedcord
Extension
l
2
Cord
3'2.Operating Procedures .ooo...... o........ o..... oo........
Whensmell,smoke,wrong
burning,etc.takes
place,
stop
immediatelyoperationtoavoid
afire,and
contact
yourdealer.
If theheater
does
notignite
with threeconsecutivetries.stoptryingmorethanthree
(3)
times,toavoidafire,and
contact
yourdealer.
When usingtheheater,
becareful
sothatthefloor surface
(in front of it ) may not get
overheated.
Do notoperatetheheater,while fuel tankis dirty andfbul, to preventpoor ignition or
wrongburning.
I lgnitionProcedures Observations
Not to misstheignition, please
do not leave
theheateruntil you confirm thatit is properly burning.
2
Use
thefuel
gauge
tocheck
ifthefuelis
suf-
ficientlyfilled
upinthe
tank.
Set
"ON"
theoperatingswitch,and
the
oper-
atinglampwilllightandtheheaterwillignite
in
about5 seconds.
Stopcompletelythe
inglamphasturned
operation.Theoperat-
off,
thentry
again
the

Do notadjust
theangle
of themainunit while theheater
ispluggedin operating
orhot to
avoid sever
bumsandelectricshock.
oKBESS
ffi
Loosen
theknob
boltto move
and
setthe
main
heater
unit
atthe
desired
angle,
and
tighten
theknob
boltfirmly.
The
vertical
angle
of
theradiation
diskis
ad-
justable
upto20degrees.
I Shut-Down
Operation
' After theoperation
is shut
down,please
make
surethattheflameis completelv
guished
before
leaving
theplace.
Observations
' To disconnect
thepower plug from theAC outlet,please
makesure
thatthefan motor is stopped.
Turn
"OFF"
the
operating
switch,
andthe
heater
flame
will
be
extinguished,
then
the
fan
motor
will
also
automatically
stop
after
aboutthree(3)
minutes,
andfinally
the
oper-
ating
lamp
willturn
off.
3-3,
How
to
conngct
thg
Control
dgvic@......................
Uncouple
the
terminals(A)
attached
tothe
tip
ofwhite
wires
that
come
outofthe
burner
base.
Connect
both
male
andfemale
terminals,
which
are
uncoupled,
to
the
connectors
(B)
of
control
device.
Observations
. When theheater
is controlled by another
device(such
asathermostat
or atimer), theheater
could turn itself
on at anytime.
ffi
ffi rerminals
(A)--_._ @ll
\ ltlt1
____T-
-e=-\Varue_
-rf-%a connectors
(B)
lf Rt
\'_ )
ToControl
Device
,@

3'4,USeOf
the Heat
Shiglding
mat
.......... o.o.o.... oo......
usetheheateroncombustibleflooring
un-
lesstheheat
shielding
mat,whichisavail-
able
asanoption,
is
used.
,r Theheater
operateswithinthevoltagerange
. of 108Voltsto 132Volts.Before
plugging
the
i, healerintothe
generator,
theoutputvoltage
'' ofgenerator
should
be
verified.
Heatshieldingmat
3-5.Operation
WithPortable
generator.
o.....................
Beforeoperating
theheaterfrom aportablegenerator,
please
confirm thatthegenerator
hasbeen
properlyconnectedto theground
earth.Tooperatethegenerator
without proper
groundingmayresultin electricalshock.
Pleasereferto the owner's manualsuppliedby
thegenerator's
manufacturer.
lfthevoltage
does
notmeasureinthisrange,
theheatershouldnotbe
plugged
intothe
gen-
erator.
lnspection
. Never
inspect
or servicetheheaterwhileit isburning,in operation,hot orplugged-in
to
avoid anyinjury and/ortrouble.
Beforestartinganyinspectionor service,to avoidelectric
shock,
please
make
sure
the
heateris shutdown andthatthepower cordis disconnected.
When cleaningtheheater,
please
wearglovesto preventpossible
injury.
Observations
. Pleasedonot pour in thefuel tankthefuel used
for cleaning
thetankinlet filter ; afteryou finish to inspectinsidethefuel
tank,please
do not returnbackinto thefuel tank foul fuel takenout ofthe tank.
4-1.DailyInSpeCtiOn
..............o.........
.... .......o......
I Inspection
of
the
tank
inlet
filter
Pleaseremove
thefuelcapandcheckif
dirt/
dustssticktothetankinletfilter.
lfthereare
anydirt/dusts,
remove
the
filter
and
washitwith
fuel.
,
,ffi ffifirmly
the
fuel
cap.
Pleaserestorethetankinletfilter,
and
tighten
TankInletFilter

I Inspection
of thefilter
and
drainage
ofwater
from
thefuel
tank.
Check
whether
or
not
the
filter
element
is
dirt
andfgul.
In
casethe
filter
element
is
dirty
orclogged,
please
replace
itwith
anew
one,and
bind
firmly
the
cup
withthe
tightening
ring.
lf
thewater
has
collected
inthe
cup,
discard
water.
Also,
water
in
the
cupmeans
there
is
water
in
thetank
aswell.Follow
theinstruc-
tions
on
page
11
and
drain
thewater
from
thefueltank.
Fuel
Strainer Tightening
Ring
O'-- oRins
Gasket
/A
ffi-=--"'o
O
f6)=- rishrening
Ring
W
ff
ffi I:.*,the fuel
cap,take
out
thetank
inlet ru Restore
the
drain
bott
packing
andtighten
the
H fitter
andinsert
ahandv
suction
pump
into X mlil:ilt;il'r that
fuer
cannofreak
out
m
ru the
tank.
ffi Wipe
offkerosene
orwaterspilt
overthe
tank.
. KBESS oKBESL
w
ffi
w
ffi
Remove
as
muchfuel
as
possible
(with
the
handy
suction
pump).
Restore
the
tank
inlet
filter
and
tighten
firmly
the
fuel
cap.
Prepare
anempty
container
of
about
3liters
(0.7
gallons)
capacity:to
hold
kerosene
and
waterremained
in
the
fuel
tank,
place
the
container
underthe
drain
bolt
(of
the
fuel
tank).
Later
on,
please
remove
with
wrench
the
drain
bolt
andtilt
thefuel
tank
until
thefuel
is
completely
drained
out
ofthe
tank.
(At
the
same
time,
becareful
not
tolose
the
drain
bolt
packing.)
Remove
Wrench I
(24mm) a
\&9\o,.",noo*
'a\

I Inspectionandcleaning
ofthe
flamemonitor
- Observations
When removing the flame monitor, hold it by its main assembly;do not pull out thecord. l
1'
2
3
Unscrew
twoscrewsofburnercoverand
re-
move
the
burner
cover.Pullout
theflame
monitorandcheck
whetherornotitslens
is
dirty/foul.
lfthelens
is
dirty/foul,
please
wipethesur-
faceofthelenswithasoftcloth,
etc.untilit
becomesclear.
Restoretheflamemonitor,
then
please
surely
fixwithscrewstheburnercover.
CottonSwab
I lnspectionof
"dirVdusts"
on
themainunit
| , Check
whetherornot
dirt/dusts
are
onand
' aroundtheheater.
4'2.PgriodicInspection
............
..................
........
Theheatermustbechecked,ifused
for
a longtime. Pleaseask
your
dealertoinspecttheheater
everytwo(2)
seasons.
. Whenyou storetheheater
orhold it unusedfor along time,please
makesurethatthefuel
tankis empty,for preventingaleakageof fuel andfire.
outletandstore
itindoorswhereit
islesshumid.
2;, lfdustsare
found,
please
removethem
with
,
,,;,avacuumcleanerorwipewithasoftcloth,
:-
:' etO.
Burnercover
FlameMonitor
FlameMonitor
Howtostore
theHeater
Observations

Troubleshooting
l@
L
l@
,w
w
@
w
I When
youface
problems
onyourheater,
please
referto this check-
tablebeforeconsulting
your
service
shop.
In casesatisfactory
resultsdo not comeoutthroughreferringto thetable,or you have
problems
not de-
scribedin this table,
please
contact
your dealer.While consulting
him, please
describe
theproblemyou
have,togetherwith type andserialnumberof your heater.
(For finding the heater's serial number, pleaserefer to page 16.)
lfthefollowing
phenomenon
takes
place,
itisnot
an
irregulartrouble.
Pleasecheckagain
beforeconsulting
your
serviceshop.
Phenomenon Possible
Cause Remedy
Theheaterdoesnotstart.
(The
lamp
does
notlight
on.)
Powercord
isnotconnected
withan
AC
outlet. Powersupplyiscutoff. Please
connect
thepower
cord
withanACoutlet,and
checkthe
power
supply.
Blown
fuse Replacefusewithanew
one.
(Please
referto page
14.)
Theheaterdoes
notstart.
(The
lampislit.) Safetydevicesare
working. Pleaseconfirmif
"Flame
Monitoi'
isexposedtoanytypeof
light
(sunlight
orelectriclamp,etc.),and
removetheheater
to
pre-
venttheradiationdiskfromdetecting
anytypeoflightdirectly.
Theheaterdoes not ignite.
Nofuelinthe
fueltank. Please
oour
fuelintothe
tank.
Thereiswater
in
the
fueltank. Please
clean
upthetankand
fillitwithfresh/cleanfuel.
Fuelfilterelementisclogged. Checkwellthe
filter
element
andreolace
itwith
anewone.
Nozzleisclogged Replacenozzlewithanew
one.
(Please
refertopage
14.)
Theflame
goes
outduring
the
operation.
Wronoorfoulfuelisused. Pleasecleanuothefueltankandfillitwithfresh/new
fuel.
Flame
monitoris
dirty. PleasecleanuptheFlame
Monitor
(Please
refertopage
12).
Fuelfilterelementisclogged. Pleasecheck
thefilterelementand
replaceitwitha
newone.
Phenomenon Explanation
Whenusedforthefirsttime,smokeor smell
comes out of the heater. Becausefuelisburning
togetherwithdusts,etc.
This
phenomenon
willdisap-
oearafter
ashortwhile.
At thetimeof ignitionor shut-down of the
heater.noisecomesfromthe burnersection. Noise
iscaused
byexpansionorshrinkage
oftheburnersectiondue
to
temperature'supanddown.
Thisisnotirregular.
Exchange
procedure
w
w
w
w
. Never servicetheheaterwhile it is burning, in operation,
hot or plugged-in to avoid any
injury and/ortrouble.
Before startingany service,
to avoid electric shock,please
makesure
theheateris shut
down andthatthepower cordis disconnected.
When servicingtheheater,
please
wearglovesto preventpossibleinjury.

7-1 . FUSe ... o...... o........ o......... o.... o.... o.............
w
w
Unscrew
twoscrews
ofburner
coverand
re-
move
theburner
cover.
Unscrew
thescrew
capof
fuse
holderand
takeoutthe
fuse.
Unscrew
twoscrews
andtake
burnercover
off
ffi Replace
withanewone.
ffi Putthescrew
capback
into
fuse
holder.
Putthe
burnercover
back
withtwoscrews
removed.
Open
ascrewcap
andtake
outafuse
Remove
thenozzle
usingthe
nozzle
wrench
provided
asstandard
parts.
Replace
withanewnozzle.
Tightenthe
nozzleusing
the
nozzle
wrench
until
thenozzle
isfixed.
Put
theburner
assembly
back
withthree
nuts
removed.
@
w*"
Check
whether
the
fuse
is
blown
out
7-2. NOZZI@ ........... o.......... oo. oo..... o...................
Observations
. Placetheburner
assemblv
taken
outwithin
thereach
oftwofuelhoses.
Remove
three
nutsfromburner
attachment
bolts
and
taketheburner
assembly
off.
Nozzle
Nut
Unscrew
three
nutsandtake
theburneroff w
w

Specifications
Model
Number VAL6KBE5S VAL6KBE5L Model
Number VAL6KBE5S ] VAL6KBE5L
Type Radiated
direct
flame Power
Consumption .When
igniting:
100
W
.When
burning:
80
W
lgnition System High
intensity
discharge
Fuel No.
1Diesel
orKerosene Electric
Overload
Fuse 3A
Fuel
ConSumption 0.85
gallons/h,
2.67kglh Noise
Level
(in
operation) 6edB
(A)
Heat
Output 11
1,0008TU.
32.5kW Safety
System . Flame
Monitor(Flame
Eye)
. Electric
Overload
System
Tank
Capacity 9gallons 15
gallons
Continuous
Operating
Time 10
hours 17
hours Standard
Parts .Fusex2
. Filter
Element
x2
. Nozzle
x 'l
. Nozzle
Wrench
x 1
. Oil
Sealx
2
Dimensions(mm)
(H
xWx D) 918x708x695 951
x71Ox740
Disk
Diameter
0562
weight(Dry) 83.8
lbs,
38kgs. 88.1
lbs,40kgs.
Power
Supply AC120V(60H2)
Wiring
Diagram
SW1
TH
ES
FE
RL
AL
PS
SW1
TH
FE
FG
HT
FM
CM
IG
SP
SV
RL
AL
KA*
F
z
ES
Power
Source
Operation
Switch
Thermostat
(Short)
Photo
Cell
Frame
Ground
PreHeater
Fan
Motor
(Open)
lgniter
Solenoid
Pump
(Open)
Running
Lamp
Misfire
Lamp
Control
Relay
Line
Fuse
Surge
Absorber
Emergency
(Short)

Safety
Labels
@ DangerLabel
w
w
I
t
I
I
t
I
t
O Safety
labels
provide
important
informationforsafeuseofthe
heater.
So,
please
do
notremoveorsoil
them.
O lf
anyof
thelabelsisunreadableor
removed,
please
ask
your
dealer
foranewoneand
replacewiththe
newone.
@ ttot
Surface
Caution
Label
A,
DO|\lOTTOUCHHOTSURFACE
l{EPASTOUCHEB,SURFACECI|A|JDE
@ ttot Label
HOTDONOTTOUCH/CHAUD,
NEPASTOUCHER
@ Caution Label @ FloorTemperatureCaution
Label
@ SpecificationsLabel @ Specifications Label
@ CautiononRefuelingLabel
$erialngmler (( @:
Numem0eSene gdardla S.ihi ae
fto E@rMqtsd r@raffi6hdm iudrdon shai b.6lM
b6trNn@oubatr6Meii4ffi etudtuft
Never
use
gasoline
Ne
jamais
seservird'essence
Do not operate withoul reading this warning
AWarning
-NEvERus6gasolinotorfuol -Do nol operaie healer on conbu3dble
- U3e only cl.an dl.6el f u€l o. flooringfrthoutouroptionalshi.lding mat
k.roson. - NEVERoporaro heatdne.rcombusrible
-Venill.ilon i3 r6ouk.d lf u6.d at mat.dals
indoo. - Stop u3lng lhe he.ler when .nything
-Donotop.ral.h.at.run.tund.d tEgularislound
- Hsd6r may be hot after I ls turned off - Make 3urc the operallng |rmp is off belor.
Ne pas utiliser avant d'avoir lu cette calte d'averlissemeni
A Avertissement
0wneis
manual
before
usinq,/Veuillezlhelemoded'emploiavantde
faire
usaqede
1. N6vercpoal swllohlng on aid off soqu6nc6 no€ than 3 tm€3
Insucha@s€,consutwilhyourdbributoi
N€ssayez pa8 d6 @mmutil Iappardil de chauf.o6 sur
march6 6l aii6r plus d€ lrcls lo s d6 suto.
Si l, nac6*16 s. pDdu I, onsu162 voto dlstlbutour
2. Ndor use hoal€rin the pr€sonc€ of fadmabLo or vo al 16
gas
N6jama s ulll ser I'appaFll de chauftaqo 6n pr666nc6 d6 pD-
duls nfammab 6s ou d6 Oaz intlammabl€s t€ls qu6 csur prcv-
3. Use only n p ac6s iioe ol namfrablo vapor o.highdust @n-
lent such as chips and wsstpap6(
Utl s6z lniqu6m€nt lppaBll d6 ch.ulfag€ d.ns l$ 6ndots
ao..es d€ vape-a inllanmaole>o- ds_s es onooild6rJ6s
!As por>s,6 e,rouenp €s6_c€ de copoa-r dobo's.d6paoF
4. Ndillouch h6aldunli! heatdrh.. cool€d ofr
' Tu_nopoEfon swn!'on and cofrbuslon sl I slad ts aboi !
Men6z appafeIenmaichepourquela@mbustond6-
darc 6nvFn 56€cond66 puslad.
. Incas6of nonlgnlion,turnswitchotr6ndonagain.
Si Llnflammalion n€ s6 poduit pas, coup6z Ial montallon
.Tu.n oooElion swilch otr and combuslon w/ | sloD
Aif6t6z Iapparci polfquo a @mblsllon sadt6.
. OooEtionlamoandb@err6maiiONbr3nnutesaier
turnlng swlch otf and th6n sbp aulomail€ny
L. amo6ramoind6bncilonn€monrrcst€allum666tla
soffioil€ 6s1€ en marche pond€nt3 minutes aprdsavot
@mmut6 suran6l ouls Iard est aubmatloue.
High allltude use (dsr 3000 bot)
Atvol!fr e musl b6 adilst€d.oodingly
(mo6 op€ning of ih6 at- nl€l doorforthe higher altltude)
Aradlusihontls locabdatinsldeof lhocovei
usag€ ahaute allud€ (au-d66sGd€ 3000pi€ds)
L€ vorumo d'atdoit et6 ajusla €n onseuonce
(Plus q€nd€ ouv€dur€ du rclsid appel dat6n prosence duie allltude supO.
eure). Le roslage dahse buve a finGielr du capol,
The requkgmenls of ocal aulhofli€s havine jufsdl.lion shall bo to lmed.
L€s conditions mposaos par l6s aubnbs locs ss syantluridlotion dolvent 0t@
RUN/ENFONCION
(GREENA/ERT)
1. Ke€p h€ater away fDm tlamma ble maloilab by 6 f€6t or morc.
M.int6n6z l.ppaFi d€ chaufiage d€s mat6faux ini€mmabl€s
2 Donolus€h€atorlnplaoessubjsctto€h,sn@orhlghtem
Nutrisezjamas appar€idechauffa96dansl€r€ndohon I
rsqu6 dAt.6rp66 a l. plu 6, la n6ig. ou d d6s lomp6mturos
3. Foruse on non cohbustlble tlooilig only
Le chautrage doilet6 utilis6 sur un @ebm6ntd6
bGlibb e moins q!6 le lapis ieniluge.
4.N€Lorre.-erwFi6il 5tsol,ope?rngo'pLggod.n!ondiion
No Evibillezjama s lppar6ll quaid I est encore chaud,
quand | €st€n marche ou quil 661Ec@da d la prs€
5. Ndermds h6ar6rwhi e in opsEtion.
e,
s
e
a
=
'tt
a.
o
s
c
(t
=
WARNING
^K'
ffi
X
>=/
ff$.ili:lilxi"fi,x:
Usethe heaterwith a heatshield-
ing mat on the combustible or
heat sensitive floor.
Hest shleldlng mat lPail# 50300-205001
(1
,200
x 1
,200 x 3.5mm)lto be placed under lhe
rsdlallon dlsk lo provent fom dlscolorhg or
burnlng thelloon
Utilisezle radiateuravec une pro-
tection thermique plac6esur le
sol, s'il est en matiire inflam-
mableou sensiblee lachaleur.
Prolecllon thermlque IPad# 50300-205001
(1,200x 1,200x 3.smm)l a placer sous la zone
de rayonnement pour 6vlt€r que le 60l ne soll
d6color6ou bdl6.
@ WarningLabel

O
KBEsS
Cetappareil est
emball6sanslaprotection ni lesrouesen
place.
Avantd'utiliser l'appareil, montez
laprotection comme
il convient.
Pour monter la protection et lesrouesdans l'ordre prdvu, suivezles
instructions
figurant ci-dessous.
APREcnurloN
N'utilisez
pas
I'appareil
sanslaprotection
de
s6curit6
afind'6viter
dlr'lrn aeeidenl ca nraclrrica
Posez
la
structure
principale
sur
le
support
de
laroue
et
immobilisez
avec
lesvis
et
les
dispositifs.
La
protection
des6curit6
doit6tre
immobilis6e
fermement
avec
lesvis
fournies.
Engagez
I'axe
dansle
plateau
d'axe
puis
montez
lesroues,
les
rondelles
et
les
goupilles
fendues.
Other manuals for KBE5L
1
This manual suits for next models
1
Table of contents
Other Val6 Heater manuals
Popular Heater manuals by other brands

Henstock Technologies
Henstock Technologies Demon Instructions for assembly

Webasto
Webasto Air Top Evo 3900 Series Workshop manual

Totai
Totai F6T40G2 quick start guide

Comfort Glow
Comfort Glow QTH350 owner's manual

Master
Master MH-40-GFA User's manual & operating instructions

EDM Product
EDM Product 07205 instruction manual

DeWalt
DeWalt DXH2000TS instruction manual

Harvia
Harvia sentiotec Concept R combi black Instructions for installation and use

Linea 2000
Linea 2000 Domo DO7329H Instruction booklet

Arlec
Arlec Osville CEH553 user manual

Atlantic
Atlantic Maradja Digital manual

HK Instruments
HK Instruments DPT-Flow-4 Series installation instructions