manuals.online logo
Brands
  1. Home
  2. •
  3. Brands
  4. •
  5. Valcom
  6. •
  7. Horn
  8. •
  9. Valcom V-1039A User manual

Valcom V-1039A User manual

Issue 3
1 947037
V-1039A
7 WATT EXPLOSION PROOF
PAGING HORN/AMPLIFIER ASSEMBLY
INTRODUCTION
These instructions provide identification,
installation and technical assistance information
for the V-1039A, Explosion Proof One-Way
Amplified Horn Assembly.
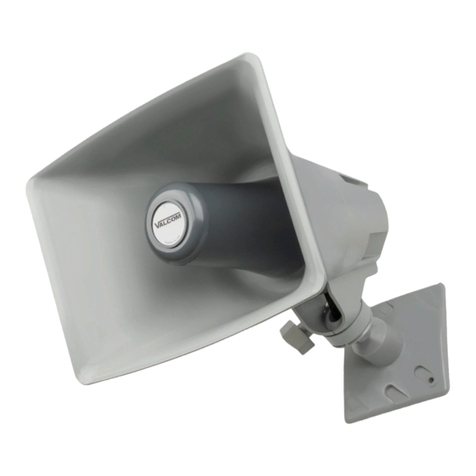
The V-1039A is a one-way explosion proof
paging horn for use with Valcom single or
multi-zone paging equipment.
The V-1039A is UL listed for use in the following
atmospheres:
Class I, Division I, Groups C & D: Gas
Atmospheres
This paging unit has received an FCC type KX
registration and is designed to be used with FCC
registered key telephone systems. In
accordance with FCC rules with applicable
tariffs, this Paging Unit may only be installed with
the authorization of the host system.
Installations may be made by Valcom, Inc., an
authorized agent of the same, equipment
manufacturers, telephone companies, registered
telephone refurbishers, and those qualified for
installation of FCC registered systems under
FCC Rules Section 68.215. The FCC
Registration Number, BAF9I7-69358-KX-N, will
be listed in the affidavits filed with the telephone
company; it will also be recorded in the system
log kept by installation and maintenance
personnel.
SPECIFICATIONS
The V-1039A consists of an explosion proof horn
speaker with a built-in one-way 7 watt amplifier.
Features
•7 watts
•Self-contained amplifier
•Includes V-1092 wall mount volume
control
•Weatherproof
•Wide dispersion angle
•Metal and polycarbonate construction
•Omni-directional mounting bracket
•1/2" conduit access
Dimensions/Weights
•V-1039A: 6.0"H x 14"W x 17.5"D
(15.2cmH x 35.56cmW x 44.45cmD)
19 lbs. (8.62kg)
•V-1092: 4.5"H x 2.75"W x 2.8"D
11.43cm H x 6.99cm W x 7.11cm D)
0.8 lbs. (.36kg)
Power Requirements
•1.0 amp max unfiltered –24 Vdc
("B" Battery)
Environment
•Temperature: -4 to 130°F (-20 to 55°C)
•Humidity: 0-95% non-precipitating
2 947037
DESIGN
The V-1039A may be used to provide one-way
paging from any Valcom one-way or talkback
page control unit. A standard Valcom paging
system (see Figure 1) is made of three basic
components:
1. A page control unit
2. Speakers (such as the V-1039A)
3. A power supply
Consult the Valcom VSP, One-Way Paging, for
detailed information on selecting the control unit
and power supply for one-way paging.
Figure 1
Special Applications
The V-1039A may be connected directly to the
speaker in most electronic key telephones to
amplify the level of the speaker and broadcast it
to a large area. A power supply will also be
required.
The V-1039A may be used to expand a 70 volt
type paging system without placing an additional
load on the amplifier by connecting the speaker
directly to the 1/4 watt output of one of the
existing 70 volt transformers. A power supply is
also required.
Coverage
Refer to the table below for coverage of this horn
assembly. The first figure given is the side to
side distance to use when mounting the horns. It
is also the distance in front of the horn that you
can expect to hear a good quality page. The
second figure is the total square footage the horn
assembly will cover.
Horn Spacing
Location Side/Side Square
Feet
Quiet 80' 6,400
Moderate 50' 2,500
Noisy 30' 900
INSTALLATION
Cautions
The V-1092 volume control is NOT designed for
areas requiring explosion proof equipment.
When installing this system, do not mount the
V-1092 volume control in the hazardous
environment.
To prevent ignition in a hazardous atmosphere,
disconnect product from supply circuit before
opening. Keep assembly tightly closed when in
operation. Unit must be installed in accordance
with the national Electrical Code requirements
for hazardous atmospheres.
Should it be necessary to remove the back cover
of the explosion proof driver enclosure, be
certain to exercise special care to avoid
damaging machined surfaces. Prior to
reassembly, make certain that adjoining surfaces
of enclosure are free from dirt. Tighten all bolts
completely. To provide the specified protection
in hazardous locations, please note that no
compound of any type is to be applied to the
machined flange. Care must be taken to ensure
no wires are captured between these machined
surfaces.
Connections
Four conductor wire is required for the V-1039A.
Standard 22 or 24 gauge station wire is
acceptable. Shielded wire is not required or
recommended. Connections are as follows:
Brown Tip/A
Red Ring/B
Black Ground
White -24 VDC
Tip and Ring are connected to Tip Out and Ring
Out of the V-1092 volume control. Tip In and
Ring In of the volume control must be connected
to the output of the page control unit. The –24
VDC and ground leads connect directly to the
power supply. See Figure 2.
The Specifications in Tables 1 and 2 must be
met when wiring this speaker assembly.
Table 1
Maximum number of Horns
per Audio Run
Wire Run in Feet
(22 AWG)
# Horns
400 100
800 50
1600 25
Valcom
Control
Unit
Power
Supply
Telephone
System
One-Way
Speaker
A
ssembly
3 947037
Table 2
Maximum Number of Horns
per Power Run
Wire Run in Feet
(22 AWG)
# Horns
100 2
200 1
400 0
TECHNICAL ASSISTANCE
When trouble is reported, verify that power is
being supplied to the unit and there are no
broken connections. Check voltages for proper
polarity on the cross connect block.
Assistance in troubleshooting is available from
the factory. When calling, you should have a
VOM, a telephone test set, and several clip leads
available and be calling from the job site. Call
(540) 563-2000 and ask for Technical Support or
visit our website at http://www.valcom.com.
Valcom equipment is not field repairable.
Valcom, Inc. maintains service facilities in
Roanoke, VA. Should repairs be necessary,
attach a tag to the unit clearly stating company

name, address, phone number, contact person,
and the nature of the problem. Send the unit to:
Valcom, Inc.
Repair and Return Dept.
5614 Hollins Road
Roanoke, VA 24019-5056
TROUBLESHOOTING CHART
SYMPTOM
SOLUTION
No output
1. Verify –24 VDC on the white lead with ground (+) on the black.
2. Verify audio is present on the input and output of the V-1092 and at the
speaker.
3. Verify volume control is turned up (clockwise).
Brown
Red
Black
White
V-1039A
T Out
R Out
T In
R In
Tip
Ring
Ground
-24VDC
Page Control
A
udio Output
Power Suppl
y
V-1092
Volume Control
V-1039A CONNECTION DIAGRAM
FIGURE 2
4 947037
VALCOM LIMITED WARRANTY
Valcom, Inc. warrants its products to be free from defects in materials and workmanship under conditions of normal use and service for a period of one year from
the date of shipment. The obligation under this warranty shall be limited to the replacement, repair or refund of any such defective device within the warranty
period, provided that:
1. inspection by Valcom, Inc. indicates the validity of the claim;
2. the defect is not the result of damage, misuse or negligence after the original shipment;
3. the product has not been altered in any way or repaired by others and that factory sealed units are unopened (a service charge plus
parts and labor will be applied to units defaced or physically damaged);
4. freight charges for the return of products to Valcom are prepaid;
5. all units 'out of warranty' are subject to a service charge. The service charge will cover minor repairs (major repairs will be subject to
additional charges for parts and labor).
This warranty is in lieu of and excludes all other warranties, expressed or implied and in no event shall Valcom, Inc. be liable for any anticipated
profits, consequential damages, loss of time or other losses incurred by the buyer in connection with the purchase, operation or use of the product.
This warranty specifically excludes damage incurred in shipment. In the event a product is received in damaged condition, the carrier should be notified
immediately. Claims for such damage should be filed with the carrier involved in accordance with the F.O.B. point.
Headquarters:
Valcom, Inc.
5614 Hollins Road
Roanoke, VA 24019-5056
Phone: (540) 563-2000
FAX: (540) 362-9800

Other Valcom Horn manuals

Valcom VIP-9831AL User manual

Valcom

Valcom VIP-9831AL User manual

Valcom V-1090- BG User manual

Valcom

Valcom V-1090- BG User manual

Valcom Flexhorn VIP-490AL-IC User manual

Valcom

Valcom Flexhorn VIP-490AL-IC User manual

Valcom FLEXHORN V-1090 User manual

Valcom

Valcom FLEXHORN V-1090 User manual

Valcom V-1090 Flexhorn User manual

Valcom

Valcom V-1090 Flexhorn User manual

Valcom VIP-480AL-IC User manual

Valcom

Valcom VIP-480AL-IC User manual

Valcom FlexHorn V-1030M User manual

Valcom

Valcom FlexHorn V-1030M User manual

Valcom V-1030C Manual

Valcom

Valcom V-1030C Manual

Valcom InformaCast VIP-148L-IC User manual

Valcom

Valcom InformaCast VIP-148L-IC User manual

Valcom V-1080 Flexhorn User manual

Valcom

Valcom V-1080 Flexhorn User manual

Valcom V-9925A User manual

Valcom

Valcom V-9925A User manual

Valcom VIP-130L-IC User manual

Valcom

Valcom VIP-130L-IC User manual

Valcom VIP-130AL-IC User manual

Valcom

Valcom VIP-130AL-IC User manual

Valcom V-1048B User manual

Valcom

Valcom V-1048B User manual

Valcom V-9925A User manual

Valcom

Valcom V-9925A User manual

Valcom VIP-9831A User manual

Valcom

Valcom VIP-9831A User manual

Valcom V-1030C User manual

Valcom

Valcom V-1030C User manual

Valcom VIP-148AL-SA Syn-Apps User manual

Valcom

Valcom VIP-148AL-SA Syn-Apps User manual

Valcom V-1069 User manual

Valcom

Valcom V-1069 User manual

Valcom VIP-480L User manual

Valcom

Valcom VIP-480L User manual

Valcom PagePac V-5331210 User manual

Valcom

Valcom PagePac V-5331210 User manual

Valcom PagePac V-5331215A User manual

Valcom

Valcom PagePac V-5331215A User manual

Valcom IP Solutions VIP-9880 User manual

Valcom

Valcom IP Solutions VIP-9880 User manual

Valcom VIP-130L User manual

Valcom

Valcom VIP-130L User manual

Popular Horn manuals by other brands

Wolo 225-2T installation instructions

Wolo

Wolo 225-2T installation instructions

Vixen Horns VXH3114LB installation guide

Vixen Horns

Vixen Horns VXH3114LB installation guide

Federal Signal Corporation 350 installation instructions

Federal Signal Corporation

Federal Signal Corporation 350 installation instructions

Vixen Horns VXO8325B/4114B installation guide

Vixen Horns

Vixen Horns VXO8325B/4114B installation guide

EAW MR-102B Specifications

EAW

EAW MR-102B Specifications

Vixen Horns VXO3118B installation guide

Vixen Horns

Vixen Horns VXO3118B installation guide

Kleinn Air Horns SDKIT17-230STD installation manual

Kleinn Air Horns

Kleinn Air Horns SDKIT17-230STD installation manual

Eaton DB3B UL Technical manual

Eaton

Eaton DB3B UL Technical manual

Pyle PMP37LED user manual

Pyle

Pyle PMP37LED user manual

Behringer Eurosound Megaphone XT quick start guide

Behringer

Behringer Eurosound Megaphone XT quick start guide

Juuko TA3 instruction manual

Juuko

Juuko TA3 instruction manual

Vixen Horns VXH4318B installation guide

Vixen Horns

Vixen Horns VXH4318B installation guide

Vixen Horns OCTOPOD installation guide

Vixen Horns

Vixen Horns OCTOPOD installation guide

Optimus AC-650T instruction manual

Optimus

Optimus AC-650T instruction manual

Vixen Horns VXO8115/3311 installation guide

Vixen Horns

Vixen Horns VXO8115/3311 installation guide

FONESTAR MF-114SU instruction manual

FONESTAR

FONESTAR MF-114SU instruction manual

Wheelock MIZ-24S installation instructions

Wheelock

Wheelock MIZ-24S installation instructions

COMPRO CO BL HP 582 G 24/230 Series quick start guide

COMPRO

COMPRO CO BL HP 582 G 24/230 Series quick start guide

manuals.online logo
manuals.online logoBrands
  • About & Mission
  • Contact us
  • Privacy Policy
  • Terms and Conditions

Copyright 2025 Manuals.Online. All Rights Reserved.