2
INSTALLATION
Precautions
Failure to observe the following precautions could
result in damage to the V-9924B and other
equipment.
a. Unplug the power supply when connecting the
power leads and signal leads to the unit. These
leads are brought in on adjacent terminals.
Accidental bridging of these two terminals could
damage the equipment.
b. Use pared crossconnect wire for all voice
connections and voltages.
c. Set all volume controls to their minimum
(Counter clockwise) level.
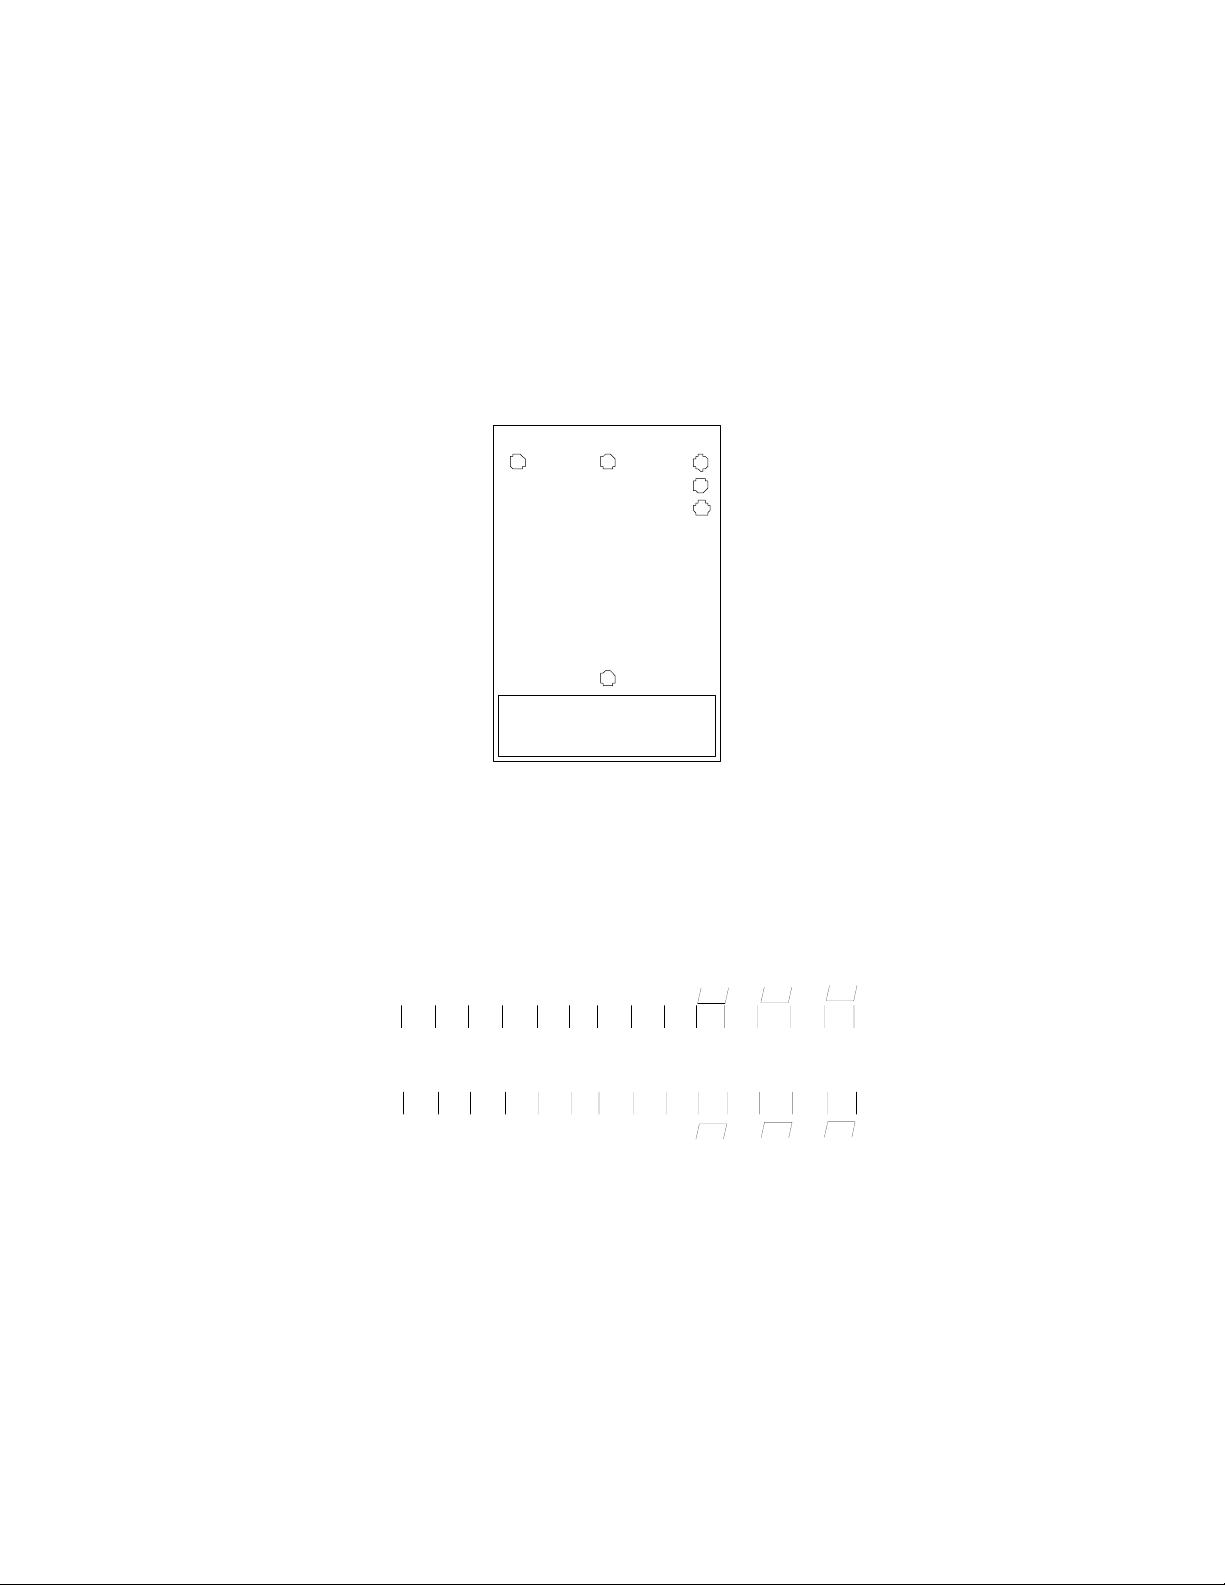
Mounting
Remove the metal mounting plate from the rear of
the V-9924B enclosure. Using two #6 ¾" wood
screws, mount the plate in a vacant space on the
backboard with the telephone system common
equipment. Both mounting holes must be utilized to
insure secure mounting of the unit. See Figure 1A.
Open the V-9924B enclosure to access connections
and option switches. Slide the rear of the unit
(Contains the board) onto the mounting plate and
lock in place with screw provided. Make
connections.
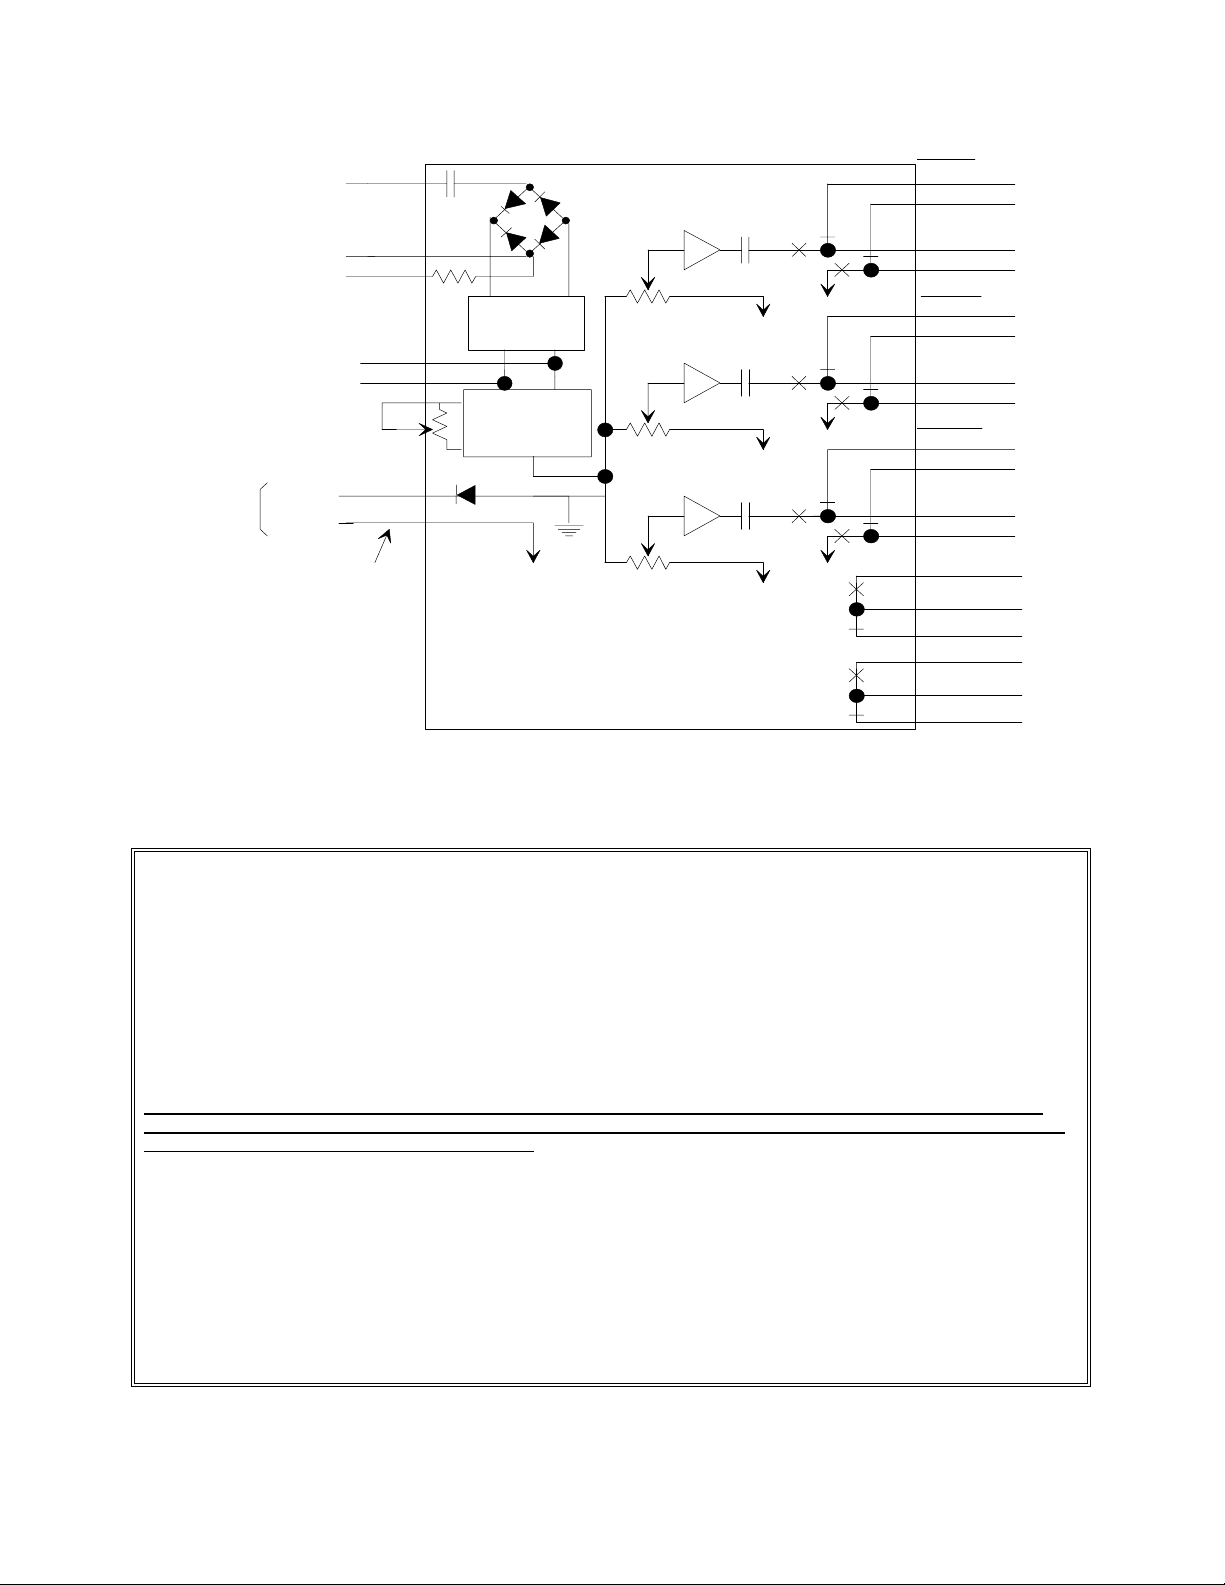
Signaling Connections
The V-9924B can be activated via ringing voltage,
buzzer voltage or a dry contact closure. When used
with buzzer voltage, apply one side of the pair to SIG
COMMON (Pin 11 or 26) and the other side of the
pair to 18VAC SIG (Pin 12 or 27). For ringing
voltage connections, put one side of the pair on SIG
COMMON (Pin 11 or 26) and the other side of the
pair to 105VAC SIG (Pin 13 or 28). The V-9924B
can also be activated by connecting one side of a dry
contact closure to pin 7 and the other side of the dry
closure to pin 22.
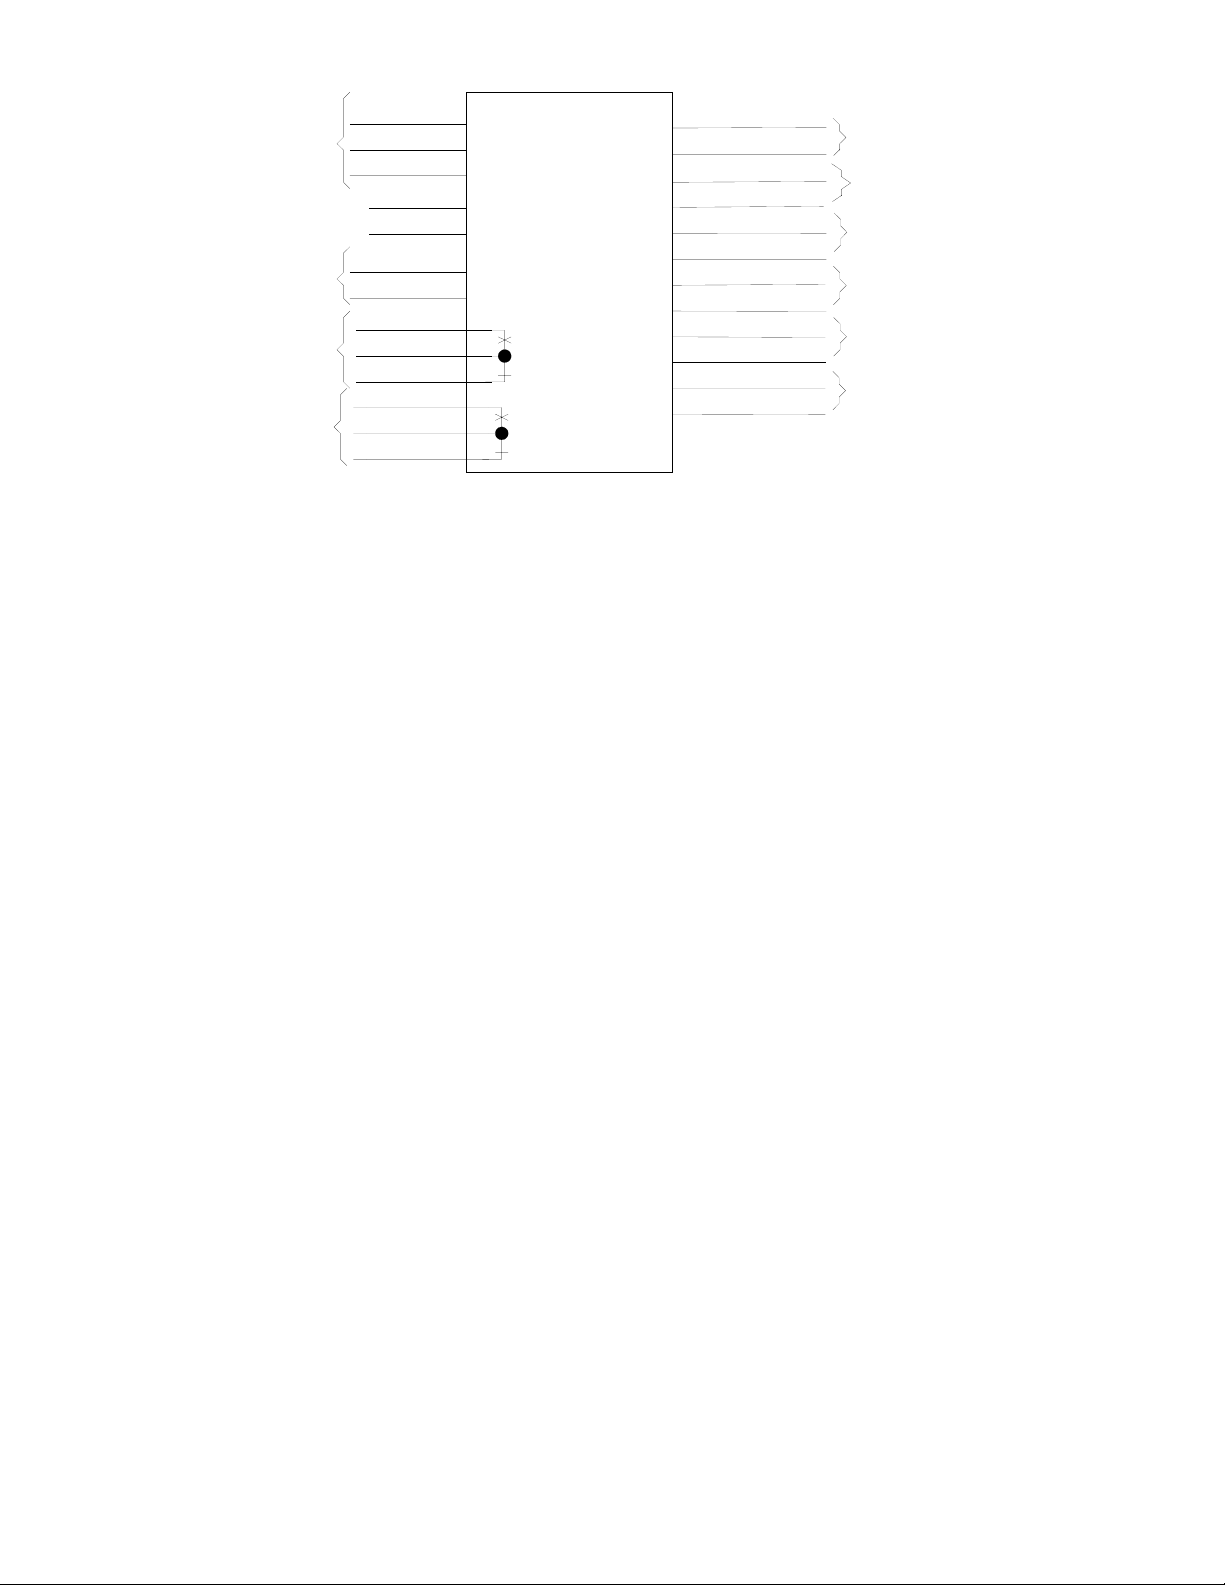
Speaker Connections
The V-9924B Common Audible Ringing Unit is
capable of switching up to three zones of speakers to
the audible signal generated by the unit. The device
is intended to be placed in series with the speakers.
Zone 1 IN (Pins 16 and 17) are connected to the
speaker/zone output leads of the page control. Zone
1 OUT (Pins 1 and 2) are connected to the speakers.
Zones 2 and 3 hook up in a similar fashion. Refer to
Figure 3 for pin numbers.
Power Connections
Connect -24VDC from the power supply to pin 15 or
30 on the crossconnect block and ground to pin 14 or
29.
Contact Closure
Two form C auxiliary contact closures are provided
on the V-9924B. These contacts follow the input
cadence and may be used for special applications.
The contact ratings are 1 Amp at 24VDC.
Set Up
After all connections are complete and double
checked, apply voltage to the unit. Place a call to the
telephone system and while ringing or buzzer is
being applied to the unit or when the dry contact
closure closes, adjust the volume of each zone by
turning the volume control clockwise for each zone.
Replace cover when all connections and adjustments
are complete and lock in place using the #6 ½"
screws provided.
SIG COMMON
18VAC SIG
105VAC SIG
To Key
System
Common
Audible
GROUND
-24VDC BATT
Power
Supply
11
12
13
14
15
ZONE 1 IN - TIP
ZONE 1 IN - RING
ZONE 1 OUT - TIP
ZONE 1 OUT - RING
ZONE 2 IN - TIP
ZONE 2 IN - RING
ZONE 2 OUT - TIP
ZONE 2 OUT - RING
ZONE 3 IN -TIP
ZONE 3 IN - RING
ZONE 3 OUT - TIP
ZONE 3 OUT - RING
16
17
1
2
18
19
3
4
20
21
5
6
From Page Unit
Speakers for Zone
From Page Unit
Speakers for Zone
From Page Unit
Speakers for Zone
FIGURE 1 - SIMPLIFIED BLOCK DIAGRAM
To UNA or Ring
Dry Closure CC
7
22
25
23
24
AUX 1 NO
AUX 1 COM
AUX 1 NC
Aux Relay
Contacts
CC
10
8
9
AUX 2 NO
AUX 2 COM
AUX 2 NC
Aux Relay
Contacts