Valentine EVO2200 series User manual

Ed. 07/2017
Manuel original/Originalbetriebsanleitung /Original manual
©Valentine Fabrique SA,2017
Friteuses EVO
Guide de prise en main rapide p 3-14
EVO Fritteusen
Kurzanleitung p 16-27
EVO Fryer
Quick start guide p 29-47

29
Congratulations on purchasing a Valentine fryer, a high quality product known worldwide for
over 60 years.
By following the basic rules described in this manual, the product will provide high-level perfor-
mance for many years.
Warning:
Make sure that the device is connected by a qualified person according to applicable stand-
ards.
This device is designed for professional use such as in restaurant or hotel kitchens or commu-
nity canteens. It is not designed for mass frying in industrial food production.
Do not leave the fryer unattended!
Make sure that children do not have access to the device and that users
are properly trained. See HSE information sheet CIS # 21
Hot oil causes severe burns. Avoid all direct contact with the casing. Ensure that your
face is not near the hot oil tank when food is immersed in it. Thoroughly drain the food
before frying. Never allow water or ice to come into contact with the hot oil.
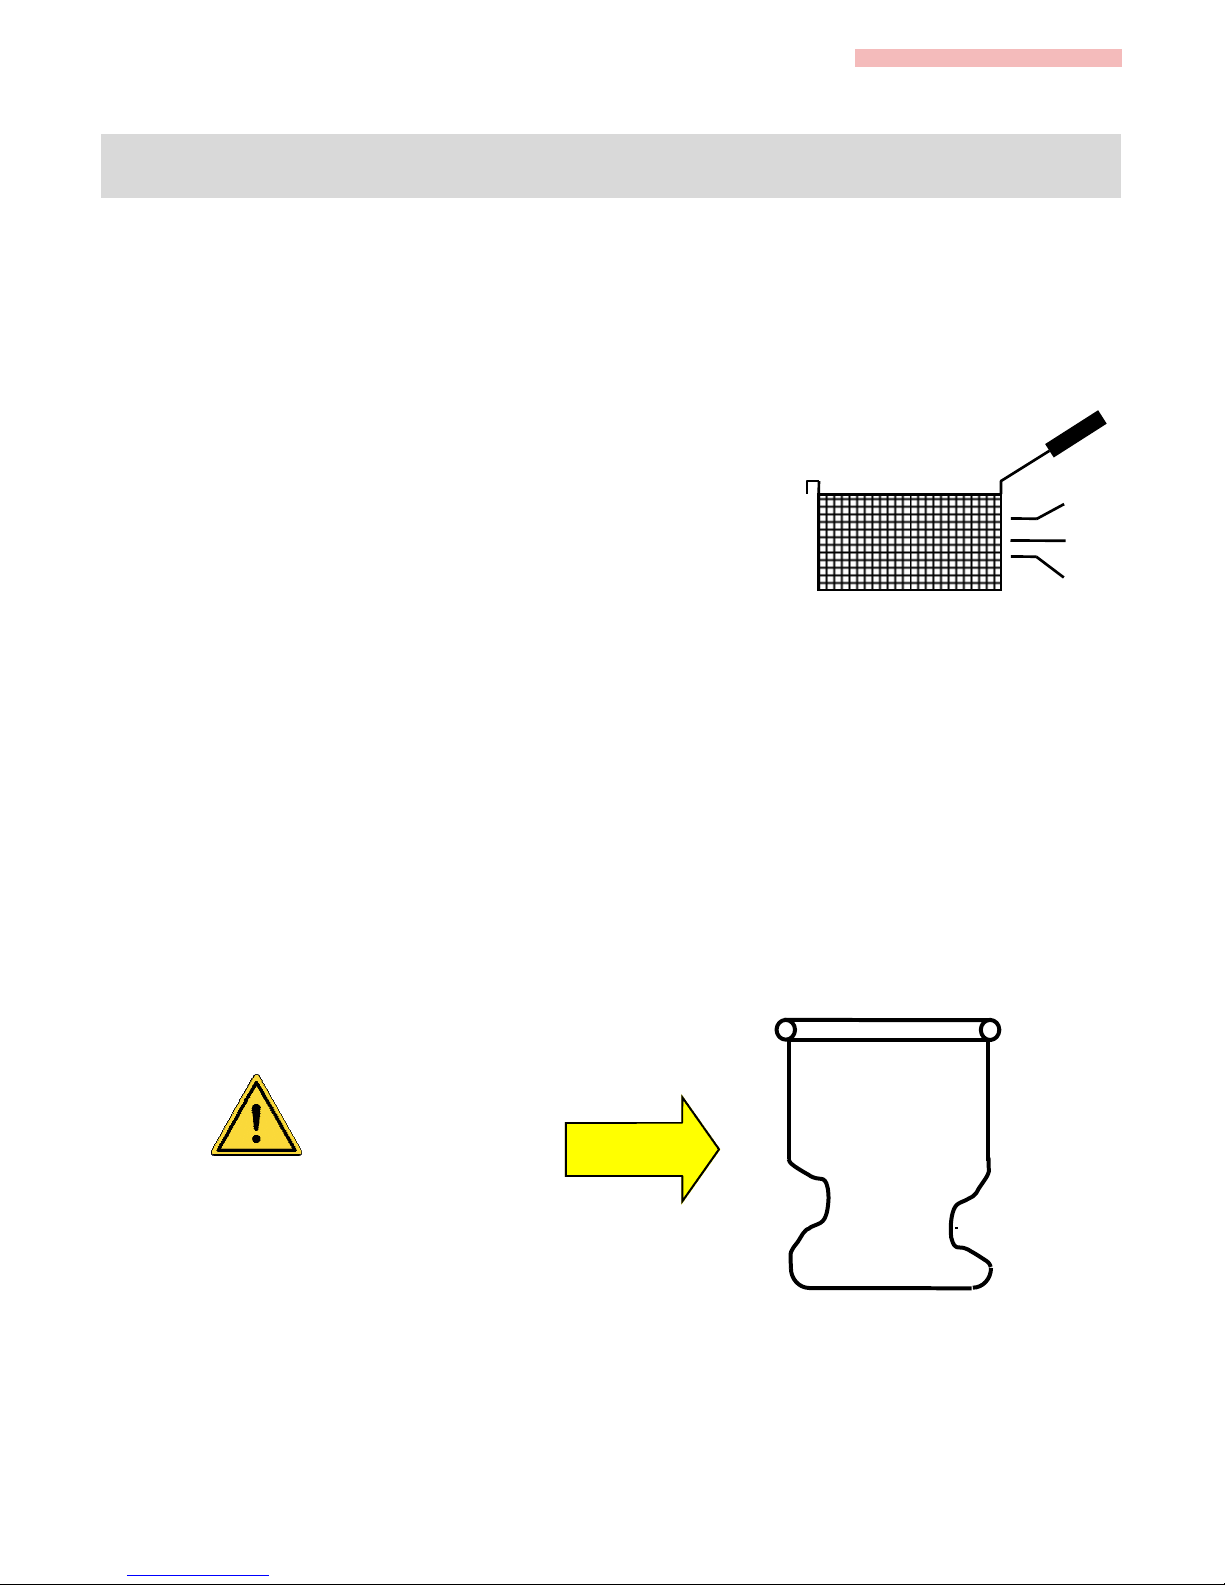
Oil splashes and tank overflow
Beware of clouds of steam and hot oil splashes during cooking.
Never allow anything but food to enter the oil tank, e.g. sealed containers etc., as
there is a risk of explosion that will cause considerable hot oil splashes.
The oil level should never be above the "MAX" oil level mark or below the "MIN" oil
level mark. If the oil level is too low there is a fire risk.
Old oil or frequently used grease is more easily ignited.
In case of fire, never extinguish with water. It is recommended to install
the correct type of fire extinguisher near the fryer and to have a fire
blanket available.
The fryer must be disconnected from mains in case of maintenance for example with
tools or replacement of parts. Do not use the device if the power cable is defective.
The cable must be replaced immediately by a qualified service engineer i.e. by Valen-
tine Equipment Ltd or your official dealer.
Valentine Fabrique SA and Valentine Equipment Ltd accept no liability for
damage caused through improper operation of the fryer and failure to adhere
these operating instructions.
Welcome- Security
Carefully read this manual before setting up and starting the fryer. Please keep for
future reference.

30
Installation
Remove the protective plastic sheets Adjust the feet so that the fryer is level,
stable and in an upright position
Fryer must be installed in such a way that it is
not exposed to water and that no water splash
can get into the pan while in use.
Clean the tank with hot soapy water (it is possible to heat water with the ther-
mostat set at 95°), then dry the pan thoroughly. Make sure that the drain valve
is closed before filling the tank.
Valentine fryers are equipped with an earthing terminal placed in the back of
the device, near the cable outlets. These terminals are accessible from the
bottom of the device, without opening it .
Slimline fryers (200, 250 mm) must be installed
between other devices or units of furniture, or
they must be attached to a wall in order to
avoid risk of tipping over.

31
Filling the fryer
Respect the MAX-MIN level marks while filling
the tank.
Reduce energy consumption and premature aging of the oil.
Preheat with reduced power using the “ECO” function.
Preheating
Solid fat (e.g. beef tallow) must be melted using the “ECO” function in
order to avoid burning of the fat and/or overheating the heating ele-
ment.
In case of a fryer with computer, please refer to the specific additional manual
concerning the process of melting.
Set the thermostat (located behind the door of the device) by choosing
preferably a moderate preheating temperature, e.g. 130°C.
The yellow lamp indicates that the
device is heating.

32
Frying
A) Turn the main switch to “1”.
The two white lamps illuminate.
B) Set the thermostat (located behind the
door of the device) to the desired tempera-
ture.
The yellow lamp indicates that the device is
heating.
C) The green lamp indicates that the cook-
ing temperature is reached. The fryer is
ready for use
Timer
To set the timer, turn the knob clockwise.
The standard timer is audio only and has no electro mechanical
function

33
Best use of the baskets
Cooking quality depends largely on the filling of the basket. Avoid excessive
loads especially with frozen food. Here are some indicative values
3/4
1/2
1/3
Temp. oC Food Minutes Load
180 Frozen chips 3 (1+1) -1/3-
160 Blanching raw chips 4 - 6 -3/4-
180 2nd cooking of pre-blanched
chips 2 - 3 -1/3-
170 Schnitzel 3 -1/2-
170 Frozen chicken drumsticks 6 - 8 -1/2-
180 Fish 2 - 4 -1/2-
Do not knock the basket against
the side edge of the tank!
Do not knock the basket against the side edge of the tank!

34
Drain and filtration
Before performing the filtering procedure the device
must be stopped with the main switch to “0” position.
A) Check that the filter is placed over the oil bucket
Filter hot oil but let it cool to 60°C, at least 5 minutes, to avoid risk of
burns. See health and safety catering sheet #17
B) Release the drain-valve safety catch to open the red drain valve
(behind the door), and close once all oil has passed through the filter.
Check that the valve is properly locked after draining!
C) Replace the filtered oil back into the tank or first clean
the tank and heating element (see next paragraph)
D) If you have a microfilter, place it on your tank and pour
the oil into it. N.B: the oil temperature must not exceed 40°
(see opposite)
E) Clean the microfilter with hot soapy water.
Follow local regulations regarding the disposal of waste oil!
MAX
40°

35
Cleaning – Tank and heating element
Before performing the cleaning procedure the device
must be switched off with the main switch to “0” posi-
tion.
Cleaning with alkaline degreaser:
Alkaline degreasing agents (e.g. Pastigras) may be used in the EVO
fryers. For hot cleaning without boiling, turn down the thermostat to
95° C.
Heating element in drain
position
Heating element in cleaning
position
Finish cleaning with hot soapy water, rinse and drain properly. Wipe the tank and heating
element dry before adding oil.
The heating elements are locked once raised into the appropriate
position. To lower, lift the release button while holding the heating
element using the hook located inside the door.
Never force the heating element down without using the
release button!
Do not use water or steam pressure jets to clean the device!

36
Safety thermostat
All Valentine fryers are equipped with one safety
thermostat for each element. In case of overheating,
e.g. due to low oil level, the safety thermostat is
activated and stops the fryer from working. Similar-
ly, if room temperature drops below 0°, the safety
thermostat may also be activated.
Resetting the safety thermostat:
The safety thermostat is located behind the door.
The red lamp lights up when the safety thermostat
is activated. Make sure the pan has the correct level
of oil before resetting safety thermostat.
Problems and troubleshooting
Problem Possible cause Action
Fryer is not heating Safety thermostat has activat-
ed
Reset (see above)
The fryer is not heating suffi-
ciently
Main switch has remained on
“ECO”
Turn knob to (1) for frying (see
p. 5)
Excessive foaming Presence of water in oil, Food is too wet
Change oil
Clean the fryer
Food product too Greasy,
excess oil absorption
Overloaded baskets
Correct temperature not se-
lected
Reduce portions
Select correct temperature and
time for the food that is to be
cooked.
Other problems Contact your dealer’s cus-
tomer service department, or
Valentine directly

37
Automatic lift (optional)
Set the timer by turning the knob clock-
wise.
The basket lowers automatically.
The basket rises automatically after the
indicated time. The program can be
stopped at all times by turning the knob
counter-clockwise.
A) Check that the filter and
microfilter are placed on the
oil bucket N.B: the oil tem-
perature must not exceed
100°.
Filter hot oil, but let it cool to 40°C to avoid risk of burns
B) Open the red drain
valve (behind the door),
and close once all oil has
flowed through the prima-
ry filter.
Check that the tap is
properly locked after
draining!
Filtration pump (optional)
Before performing the cleaning procedure the device
must be stopped with the main switch to “0” position.

38
C) Connect the discharge pipe to the outlet pipe provided
for this purpose
F) Clean the filter and micro-filter with warm water
Follow local regulations regarding the disposal of waste oil!
D) Operate the pump with the timer locat-
ed behind the door (in front of the door for
EVO250 fryer). The blue lamp is lit and
the pump stops after the indicated time.
The program can be stopped at all times
by turning the knob counter-clockwise.
Never turn on the pump without first connecting the discharge pipe. Do
not disconnect the discharge pipe when the pump is running it could
damage the pump!
Never remove the discharge pipe before the pump has stopped, as
there is risk of hot splashes!
Cleaninf of fryers with pump
Follow the instructions on page 35.
However, do not circulate cleaning products in the pump circuit. If necessary, drain the system
with some clean oil.
E) After stopping the pump
Remove the discharge pipe by pushing the
knurled ring down.
WARNING
KNURLED RING MAYBE HOT
Click!

39
Technical data
Type EVO200-xxx EVO250-xxx EVO2200-xxx EVO400-xxx EVO2525-xxx EVO600-xxx
Max weight, empty
Kg
38 43 68 63 73 81
Max oil or grease
load, Kg 7.6 9.9 2x7.6 16.7 2x9.9 25.8
weighted sound
pressure level < 70 dB(A)

40
We manufacturer Valentine Fabrique SA
Z.I. Moulin du Choc E
CH - 1122 Romanel-sur-Morges
Tél.: +41 21 637 37 40
Fax: +41 21 637 37 41
Internet : www.valentine.ch
hereby declare that these products comply with the following directives and standards:
Low voltage directive : 2014/35/UE
EMC directive : 2014/30/EU
ROHS directive : 2011/65/UE
Food contact 1935/2004/CE
WEEE directive : 2012/19/UE2
Machines directive: 2006/42/EG
Applicable standards : EN 55014-1:06 + A1:09 + A2:11
EN 55014-2:15
EN 60335-1:12 + A11:14
EN 60335-2-37:02 + A1:08 + A11:12
EN 61000-3-11:00
EN 61000-3-12:11
EN 62233:08
Romanel-sur-Morges, 24 juillet 2017
Valentine Fabrique S.A.
B. Paris
Administrateur
Declaration of conformity

41
Safety during emptying and
cleaning of fryers
Introduction
This information sheet advises on safety during
emptying and cleaning of fryers. It includes guid-
ance on manual emptying and cleaning, and on
fryers with automated or semi-automated filtering
(using enclosed portable filtering units).
Automated and semi-automated filtering process-
es avoid the need for the operator to come into
contact with hot oil, significantly reducing the risks.
This enables filtering to take place safely even
while the oil is at normal cooking temperature. In
any case, most automated or semi-automated
systems require an oil temperature of at least 100
°C for the filtering process to work effectively.
Hazards
Hazards connected with emptying and
cleaning fryers include:
• fire;
• burns from hot oil;
• contact with hot surfaces;
• fumes from boiling cleaning chem-
icals and the danger of the chemi-
cals overflowing;
• eye injuries from splashes;
• slips from oil spillage; and
• strains and sprains from lifting and
moving
• containers of oil.
Manual emptying and filtering of fryers should only
be carried out when the oil has been cooled to 40
°C.
If a 24-hour service is offered and the
appliance is
required continuously, there are two
safe options:
• use more than one fryer and clean
them in rotation;
• use an automated filtering system
or semi-automated portable filter-
ing unit that removes the hot oil
direct from the fryer, filters the oil
and holds it safely
HSE information sheet - UK only

42
Key messages
Burns from hot oil can be very serious. Oil
takes only
6-7 minutes to heat up but can take 6-7
hours to cool
down again (ie 60 times slower).
Whichever type of fryer is used, it is essen-
tial that:
• staff are trained in safe procedures
for emptying and cleaning;
• staff are provided with suitable pro-
tective equipment, where required by
the risk assessment, eg eye protec-
tion, heat-resistant gloves, aprons;
• the fryer must be well maintained
and any attachments used must be
suitable for their purpose, as recom-
mended by the manufacturer;
• any oil spillages must be cleaned up
immediately, ensuring floor areas
around equipment are completely
clean and dry to avoid slip risks.
Automated and semi-automated filtering
Automated filtering systems
An automated system consists of an inbuilt oil
filtration
system. The oil is drained into an enclosed res-
ervoir and an electric pump circulates it through
a filter system and internal pipe work back into
the fryer. Since this process is enclosed within
the equipment, the operator does not come into
contact with hot oil, greatly reducing any risk.
Portable oil filtering units (semi-automated)
These units are not part of the fryer but sit
alongside it. The operator attaches an extension
pipe to the fryer and the hot oil is drained into
an enclosed container within the portable unit.
The oil is then filtered as above and returned to
the fryer.
If you have a fryer with an automated oil drain-
ing system or a portable oil filtering unit, you
should refer to the manufacturer’s guidelines for
draining/filtering temperatures and safe opera-
tional requirements .
When to empty and clean
Most catering establishments are closed
overnight for at least eight hours. For fire
safety and economy, fat fryers must be
switched off when unattended. It is best
practice for manual oil filtering and cleaning
to be carried out as a first task of the day
rather than as part of the closing-down pro-
cedure.
These, together with your own risk assess-
ment, will determine the need for suitable
protective equipment. If there is still a risk
from contact with hot surfaces or oil splash-
ing, you may require eye protection, a pro-
tective apron and/or heat-resistant gloves/
gauntlets.
Other precautions
Make sure the design of the drain-off tap pre-
vents it being turned on accidentally:
• mark the tap clearly that it should not be
touched;
• place warning signs near the tap;
• if possible, remove the tap handle when the
fryer is switched on.

43
Manual oil filtering
This involves the operator draining the oil from the
fryer, through a filter, into a suitable drain bucket or
container and manually lifting it back into the fryer.
Rules for draining oil safely and in the correct se-
quence can be based on the following guidelines:
• Turn off the appliance, and turn off the power
supply at the wall socket for electric, and the
on/off control for gas.
• Allow the oil to cool, ideally for at least six
hours, and check the temperature using a suit-
able probe thermometer before draining. Do
not drain if the temperature is above 40 °C.
• Follow any manufacturers instructions and use
the correct equipment (eg a detachable spout
for the type of fryer being emptied), making
sure any equipment required is brought to the
fryer before the process starts.
• Depending on the type of fryer, oil will be
drained by drain valve, removable spout, lifting
container or by tilting.
• If the oil is too cold to drain easily, reheat it
briefly and agitate with the fryer basket (for no
more than one minute). Switch the appliance
off and check the temperature (using a suitable
probe thermometer) before emptying.
• Using a filter, run the oil into a suitable metal
holding or heat-resistant hard plastic container.
These containers will generally need carrying
handles and a cover or lid. Before moving,
make sure that the lid or cover is secure.
• Make sure that the container is empty and big
enough to take the volume of oil being drained
at any time.
• When large volumes of oil are being drained, it
is safer to drain off in smaller amounts. This
avoids overfilling the container and will reduce
the chance of spillages when it is moved.
Smaller amounts will also be easier to carry.
Cleaning procedure
This section may apply to all types of
fryers:
• Turn off the appliance, and turn off
the power supply at the wall socket
for electric and the on/off control for
gas.
• Make sure suitable protective equip-
ment is worn, including eye protec-
tion (if appropriate).
• Check that other activities will not be
put at risk by the cleaning activity.
• Check that the oil has been thor-
oughly drained and that there are no
spillages that may cause slipping.
• Remove loose debris from the inter-
nal surfaces.
• Thoroughly wash all internal and
external surfaces with suitable
cleaning chemicals and check for
any leaks.
• For stubborn residues, fill the fryer
with your recommended cleaning
agents and leave or simmer accord-
ing to instructions.
• Do not leave the fryer unattended or
allow it to boil as this may cause the
fryer to cascade liquid onto the floor,
causing additional scalding and slip-
ping hazards.
• Drain the appliance and rinse thor-
oughly with plenty of water.
• Dry all internal surfaces and make
sure there is no water left in the
fryer.
• Check the drain valve is closed and
working properly then refill and
switch on as required.

44
• Place the container in a safe place where it
cannot be contaminated with chemicals, water
or foreign bodies. Place the container on top
of a drip tray to avoid any floor contamination.
• Do not dispose of waste oil down the drain.
Disposal must comply with environmental
legislation.
• Clean up any spillages immediately.
• Make sure floor areas around equipment are
completely clean and dry to avoid slip risks
(see also Preventing slips and trips in kitchens
and food service Catering Information Sheet
CAIS6(rev1) HSE Books 2005).
• When refilling the fryer with oil, some
help may be required if the oil con-
tainer is too large or heavy for one
member of staff. Where possible use
smaller containers.
• Do not overfill the fryer. Follow the
manufacturer’s guidelines.
• Clean up any spillages immediately.
• Make sure floor areas around the
equipment are completely clean and
dry to avoid slip risks.
Training
This section may apply to all types of fryers:
• Only staff who have been trained in safe use of the cleaning chemicals and cleaning pro-
cedures for the fryer should be allowed to do this task.
• Staff should be trained in the reporting procedures if they find the equipment to be faulty.
• Staff should be made aware of the reasons for use of suitable protective equipment, ie
gloves, eye protection.
• Risk assessments should be completed for hazardous chemicals and staff should be
made aware of the correct procedures for the use of cleaning chemicals. Safety data
sheets should be available to staff.
• A short, written procedure can act as a reminder to staff for both draining and cleaning
operations.

45
Further information
HSE priced and free publications are available by mail order from HSE Books, PO Box 1999,
Sudbury, Suffolk CO10 2WA Tel: 01787 881165 Fax: 01787 313995 Website:
www.hsebooks.co.uk (HSE priced publications are also available from bookshops and free
leaflets can be downloaded from HSE’s website: www.hse.gov.uk.)
HSE’s catering and hospitality industry website: www.hse.gov.uk/catering
For information about health and safety ring HSE’s Infoline Tel: 0845 345 0055 Fax: 0845 408
Services, Caerphilly Business Park, Caerphilly CF83 3GG.
This leaflet contains notes on good practice which are not compulsory but which you may find
helpful in considering what you need to do.
© Crown copyright This publication may be freely reproduced, except for advertising, endorse-
ment or commercial purposes. First published 09/05. Please acknowledge the source as HSE.
Further reading
Preventing slips and trips in kitchens and food service Catering Information Sheet CAIS6(rev1)
HSE Books 2005
Planning for health and safety when selecting and using catering equipment and workplaces
Catering Information Sheet CAIS9 HSE Books 1997
Maintenance priorities in catering Catering Information Sheet CAIS12 HSE Books 2000
Manual handling in the catering industry Catering Information Sheet CAIS13 HSE Books 2000
Safe use of cleaning chemicals in the hospitality industry Catering Information Sheet CAIS22
HSE Books 2003
While every effort has been made to ensure the accuracy of the references listed in this publi-
cation, their future availability cannot be guaranteed.

46
WEEE DISPOSAL PROCEDURE
WEE/FA00 7TX
!!"#
!"$%&!
! '"
()'!#
*+ ,--. -**/0.1*+22 '$
"&
(!3*+,--.-**/0.1*+22
'&
4",/5'&
3!!&
!&
6""''&
)' 5 7 8 " "
&"9:'$
!&
**&*'$$#
"3*+,--."
$!5!
;<5=>$5;!
'">!!
! ! 5 ' ,
!5
' ,--? ;< ' <>$ " ' @ "
!&

47
**&,"!
5'&
**&+ 5 !
!'5"
&" 5$
!5"&
**&2$''$"5#
'&
**&.6"@'**&2
!,/"
"""
$!"'5$!"#
&"&
**&? ;( " " '
5"**&."
'#
! ' A '
55&
**&1!!#
5"!
'&
**&/"5
! 5#
!&
**&0!$'$"
5 '
'"B!
9!"@'5**&.9&
**&*-!3
''5"#
'" #
'
**&**!#
$ $ 5
@#!
'&
This manual suits for next models
5
Table of contents
Other Valentine Fryer manuals