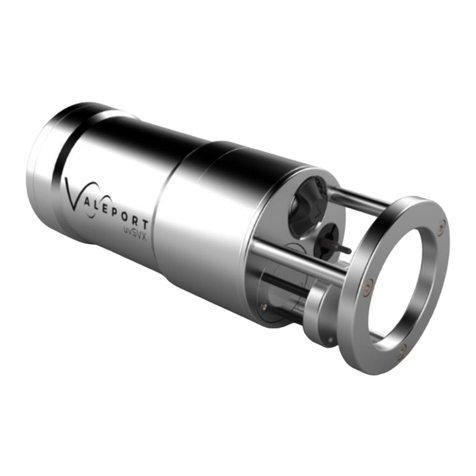
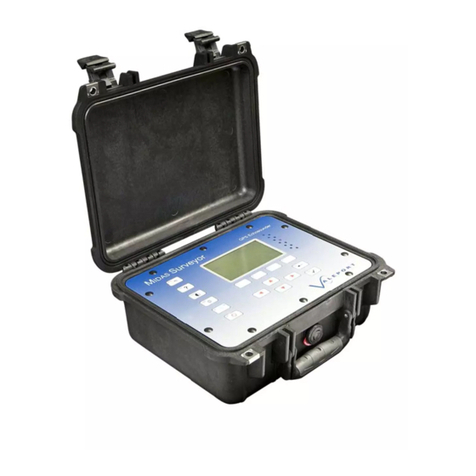
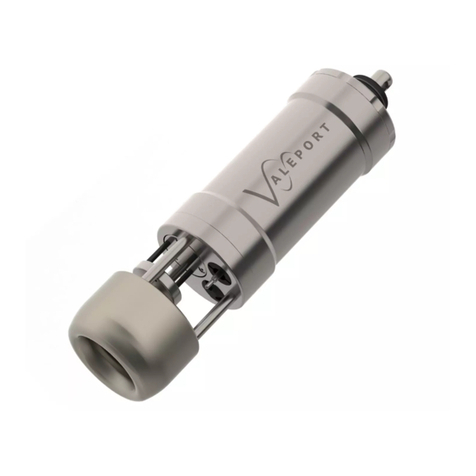
Valeport MIDAS CTD+ User manual

MIDAS CTD+
Operating Manual
Document Ref:
Date:
This document was prepared by the staff of Valeport Limited, the Company, and is the property of the
Company, which also owns the copyright therein. All rights conferred by the law of the copyright and by virtue
of international copyright conventions are reserved to the Company. This document must not be copied,
reprinted or reproduced in any material form, either wholly or in part, and the contents of this document, and
any method or technique available therefrom, must not be disclosed to any other person whatsoever without
the prior written consent of the Company.
Valeport Limited
St Peters Quay
Totnes
Devon, TQ9 5EW
United Kingdom
As part of our policy of continuous development, we reserve the right to alter, without prior notice, all
specifications, designs, prices and conditions of supply for all our equipment.
0606829a
Wednesday, November 21, 2018
+44 1803 869292
sales@valeport.co.uk | support@valport.co.uk
www.valeport.co.uk
Tel:
e mail:
Web:

Table of Contents
© 2018 Valeport Ltd Page 2
Table of Contents
..................................................................................................................................... 31. Introduction
..................................................................................................................................... 42. Specifications
.................................................................................................................................... 42.1. Sensor Specifications
.................................................................................................................................... 52.2. Optionally Fitted Sensors
.................................................................................................................................... 62.3. Mechanical Specifications
.................................................................................................................................... 72.4. Performance Specifications
.................................................................................................................................... 82.5. Sample Lifetime Calculations
..................................................................................................................................... 113. Installation
.................................................................................................................................... 113.1. Communications With PC
.................................................................................................................................... 113.2. Deploying the MIDAS CTD+ on its Own
.................................................................................................................................... 133.3. Deployment Of The Water Sampler System
..................................................................................................................................... 184. Maintenance
.................................................................................................................................... 194.1. Changing Batteries
.................................................................................................................................... 204.2. O-Ring Sizes .................................................................................................................................... 214.3. Replenishing Pressure Balance Fluid in Motor Housing
..................................................................................................................................... 225. Sensor Information
.................................................................................................................................... 235.1. Optionally Fitted Sensors
..................................................................................................................................... 246. Wiring Information
.................................................................................................................................... 246.1. 3m Y Lead (RS232)
.................................................................................................................................... 246.2. Remote Fluorometer Flylead
.................................................................................................................................... 256.3. Water Sampler Motor Flylead
..................................................................................................................................... 267. Warranty

© 2018 Valeport Ltd
Introduction
Page 3
1. Introduction
This section of the manual describes the specification, construction, wiring diagrams and basic
maintenance procedures of the Valeport MIDAS CTD+ Multi-Parameter CTD, including the optional
additional sensors and water sampling system.
The MIDAS CTD+ system consists of the following components:
·Titanium housed instrument with bulkhead mounted sensors
·Stainless steel deployment cage
·3m Y lead (interface to PC)
·Switching Plug
·Basic maintenance tools and spare o-rings
·DataLog Pro Software
·Operating Manual
·Transit case
In addition, the following components may be supplied as optional extras:
·Additional remote sensors with interface cables
·RS485 communications adaptor
·RS422 communications adaptor
·FSK modem communications adaptor (includes PCB in instrument)
·Various lengths & types of signal cable are also available
Please refer to Section 2 of this manual for details of software operation.

© 2018 Valeport Ltd
0606829a - MIDAS CTD+
Page 4
2. Specifications
2.1. Sensor Specifications
The unit is fitted with the following standard sensors:
Conductivity
Type:
Pressure balanced inductive coils
Range:
0.1 to 80 mS/cm
Accuracy:
± 0.01mS/cm
Resolution:
0.004mS/cm
Pressure
Type:
Strain Gauge
Range:
20Bar absolute (approx 200m water depth)
as standard, others available on request
Accuracy:
± 0.1% Full scale
Resolution:
0.005% Full scale
Temperature
Type:
Fast response PRT
Range:
-5 to +35°C
Accuracy:
± 0.01°C
Resolution:
0.002°C

© 2018 Valeport Ltd
Specifications
Page 5
2.2. Optionally Fitted Sensors
The following sensors may be optionally fitted:
Turbidity
DO
pH
Redox (ORP)
PAR
Type:
Seapoint
Oxyguard
Pressure
Balanced
Electrode
Pressure
Balanced
Electrode
BioSpherical
See manufacturer's
datasheet
Range:
0 to 2000FTU (max)
0 to 200%
2 to 12
0 to 1000mV
Accuracy:
± <2% to 750 FTU
±1% of
measured
value
± 0.1
± 0.1mV
Resolution:
0.005% FS
0.005% sat
0.001
0.01
Note that all these sensors give an analogue output signal (either volts or amps) as standard – the
accurate measurement of this signal is the function of the primary sensor calibration, which is given in
the calibration section of this manual. This primary calibration has a high level of long-term stability,
and should not need to be rechecked any more often than the conductivity, temperature or pressure
sensors – typically every one or two years depending on the customer’s own requirements.
However, this primary data output may be subjected to a secondary, or “User” calibration within the
instrument, so that the output is converted into engineering units, for example mg/l. Details of how
to perform these User calibrations are given in a separate manual.

© 2018 Valeport Ltd
0606829a - MIDAS CTD+
Page 6
2.3. Mechanical Specifications
2.3.1. Instrument
2.3.1.1. Materials
Housing:
Titanium or Acetal
Exceptions:
Conductivity Cell, DO Sensor, Turbidity Sensor and pH Sensor use Acetal.
Temperature Sensor uses Stainless Steel (316 grade). Redox and pH use glass
electrodes.
Cage:
Stainless steel (316 grade) with polypropylene clamping brackets
Dimensions:
Instrument - 88mm Ø, 665mm long (including connector)
Cage – 750mm long x 140mm x 120mm
Weight
(in cage):
20kg Titanium (air), 8.5kg (water)
12kg Acetal (air)
Depth Rating:
6000m Titanium (unless shallower rated pressure sensor fitted)
500m Acetal
2.3.1.2. Connectors
Instrument:
10 pin female SubConn bulkhead type with lock ring, data and power
Comms Cable:
Valeport 3m Y lead. 10 pin male SubConn line type to instrument, 2 x 4mm
banana plugs to external power, 9 pin female D type to PC.
Switching Plug:
10 pin male SubConn line type, with lock ring. Note that the switch cap
contains wiring links to activate the instrument – it is not a dummy plug.

© 2018 Valeport Ltd
Specifications
Page 7
2.3.2. Water Sampling System
2.3.2.1. Motor System
Housing:
Pressure balanced perspex and stainless steel. Device filled with Fluorinert FC-
77 to provide pressure balancing
Motor:
Brushed DC motor
Power:
10vDC input, drawing 25mA when running
Positioning:
Rotor position detected by optical switches
2.3.2.2. Rosette Frame
Materials:
316 grade stainless steel.
Dimensions:
assembled size is 92cm diameter x 1.7m high
Fittings:
Provision for 12 x 2.5litre water bottles, 1 x Valeport MIDAS CTD+ CTD, 1 x WS
Envirotech EcoLab system.
Weight:
48kg (excluding instruments and bottles)
2.3.2.3. Sample Bottles
Materials:
PVC
Volume:
2.5litre
Weight:
2kg
2.4. Performance Specifications
Memory:
8 Mbyte solid state memory
(upgradeable in 8 Mbyte steps to 32 Mbyte)
Internal Power:
8 x 1.5V alkaline D cells.
The unit will accept 8 x 3.6V Lithium D cells with no alterations required. Do not mix
battery types
External Power:
Between 8 and 30V DC
Current Drain:
Depends on sensors fitted. CTD only uses 50mA at 12V when running, and
0.25mA when in sleep mode
Sampling Rate:
1, 2, 4 or 8Hz (synchronised)
Data Output:
RS232, RS485 or RS422, depending on pin selection. Baud rate is user
selectable from 2400 to 115200

© 2018 Valeport Ltd
0606829a - MIDAS CTD+
Page 8
2.5. Sample Lifetime Calculations
2.5.1. Based on Memory
Lifetime based on memory is simple to calculate. Conductivity, Temperature, Pressure, Turbidity, DO
and pH values use 2 bytes of memory per sample. Therefore total memory used per record is (6 x 2)
= 12 bytes. Note that in Trip mode, each record is also assigned a date/time stamp, which uses a
further 7 bytes.
The 8 Mbyte memory actually contains 8,388,608 bytes. Allowing a small amount of memory usage
for header files, the memory will store over 430,000 records in Trip sampling mode, and over 1 million
records in all other modes.
The length of time that this will last for obviously depends on sampling scenario. Here are three
examples:
2.5.1.1. Continuous Data Sampling - 8Hz
Memory used per second is 8 x 12 bytes = 96 bytes.
Total memory fitted is 8,388,608 bytes.
Number of seconds before memory full is 8,388,608 / 96 = (approx) 87,381 seconds.
This is equivalent to 24 hours.
This period can be doubled by sampling at 4Hz.
2.5.1.2. Burst Sampling - 4Hz (sampling for 1 minute every 10 minutes,
recording all data points)
Memory used per burst is 12 bytes x 4Hz x 60 seconds = 2880 bytes.
The memory will therefore be full after 8,388,608 / 2880 bytes = 2912 bursts. At a 10 minute cycle
time, this is 29120 minutes, which is equivalent to 20 days.
2.5.1.3. Trip Sampling - 6000m Cast (measurement every 1 metre)
In this example, the instrument will take 1 reading every metre of both descent and ascent. This
means 6000 data points descending, and a further 6000 ascending. Each record consists of 12 bytes
of data and 7 bytes of time stamp. Each record therefore uses 19 bytes. A single cast will take 12,000
such records and will, therefore, use 228,000 bytes.
The 8Mbyte memory will therefore hold approximately 35 casts of data.

© 2018 Valeport Ltd
Specifications
Page 9
2.5.2. Based on Batteries
The MIDAS CTD+ will function with a voltage supply of between 9 and 30VDC. The voltage output of
the 8 x D cell battery pack will vary according to the type of cell fitted. The most likely cells to be
used will be standard alkaline type (1.5V each) or Lithium cells (3.6V each), giving a 12V nominal
output for alkaline cells, or 28.8V nominal for Lithium cells. The following calculations are based on
the same sampling scenarios as the memory calculations, using figures for a 12V alkaline battery pack.
Each example also gives a figure for a Lithium battery pack, calculated from a basic ratio of alkaline
to Lithium performance.
In all examples, it is taken that an 8 D cell alkaline battery pack will have a nominal capacity of 14Ah,
and will be 75% efficient (total available charge, 10.5Ah), and that an 8 D cell Lithium pack will have a
nominal capacity of 17.5Ah, and will be 95% efficient (total available charge, 16.6Ah).
Note: the following examples are intended as guides only. Valeport accepts no responsibility
for variation in actual performance
Note: the performance of individual battery cells is not always consistent
2.5.2.1. Continuous Data Sampling - 8Hz
At 12V, the instrument will draw approximately 60mA when sampling, with DO, pH and turbidity
sensors fitted.
Total charge available is 10500mAh.
Number of hours available is therefore 10500mAh / 60mA = 175 hours.
This is equivalent to just over 7 days.
For Lithium cells, a similar calculation gives over 27 days.
Note that the instrument is effectively operating continuously when in Trip sampling mode, so similar
calculations will apply.

© 2018 Valeport Ltd
0606829a - MIDAS CTD+
Page 10
2.5.2.2. Burst Sampling - 4Hz (sampling for 1 minute every 10 minutes)
At 12V, instrument draws 60mA when sampling, plus 60mA for 5 seconds at the start of each burst. It
draws 0.25mA when in sleep mode between bursts.
In this scenario then, the instrument will draw 60mA for 65 seconds, and then 0.25ms for 535
seconds. On average, it will draw:
(60 * 65) + (0.25 * 535)
= 6.72mA
(65 + 535)
Total charge available is 10500mAh.
Number of hours available is therefore 10500mAh / 6.72mA = 1562 hours.
This is equivalent to approx 65 days.
For Lithium cells, a similar calculation gives approx 156 days.

© 2018 Valeport Ltd
Installation
Page 11
3. Installation
The MIDAS CTD+ system is supplied in an ABS transit case, together with any communications
adaptors ordered. Any additional lengths of signal cable are packed separately.
3.1. Communications With PC
The MIDAS CTD+ can be set up and interrogated using the DataLog Pro software supplied. Please
refer to separate manual for details of how to use the software.
To connect the instrument directly to a PC for RS232 communications, use the 3m Y lead supplied.
This lead is fitted with a 10 pin SubConn type connector, which should be plugged directly into the
connector on the top of the housing (or to a length of signal cable). The lead also features 2 x 4mm
banana plugs for application of external power if required and a 9 way D type connector which
should plug directly into a spare comm port on the back of the PC.
If non-RS232 communications are to be used, via the optional RS485, RS422 or FSK methods, then
the appropriate adaptor should be used. Each adaptor is supplied with a switched 3m Y lead
(different to the standard RS232 Y lead), which should be connected as follows:
Comms
Method
Adaptor
Part no.
Connections
RS485
0400029
Connect 15 pin D type and 4mm plugs from Y lead into adaptor.
Connect 9 pin D type from adaptor to PC, and 4mm plugs from adaptor
to external power, as indicated on adaptor housing.
RS422
0400030
Connect 15 pin D type and 4mm plugs from Y lead into adaptor.
Connect 9 pin D type from adaptor to PC, and 4mm plugs from adaptor
to external power, as indicated on adaptor housing.
FSK
0400005
Connect 4mm plugs from Y lead into adaptor, leaving D types
unconnected (FSK uses power and signal on just two wires). Connect 9
pin D type from adaptor to PC, and 4mm plugs from adaptor to external
power, as indicated on adaptor
3.2. Deploying the MIDAS CTD+ on its Own
All parts of the standard system (with the exception of the top part of the 3m Y lead) are designed for
immersion. All communications adaptors (RS485, RS422, FSK) are splash proof, but should be sited in
a dry place, as close to the PC as possible.
The MIDAS CTD+ is supplied with a stainless steel protective cage, but care should still be taken not
to damage the instrument. For profiling work, the recommended deployment method is to suspend
the instrument using the stainless steel wire strop. For fixed deployments, the user may wish to
remove the steel cage, and use the grooves in the titanium instrument housing as clamping points.

© 2018 Valeport Ltd
0606829a - MIDAS CTD+
Page 12
3.2.1. Real Time Operation
For real time data output, connect the signal cable to the 10 pin SubConn connector on the
instrument. All Valeport signal cables include a suspension point for strain relief, and a similar
arrangement is recommended for other cable types. Connect the top end of the cable to a PC using
the appropriate method as described above.
3.2.2. Self Recording Operation
For self recording only deployments, the instrument is switched on by insertion of the SubConn style
switch plug. This plug must be inserted for the unit to operate.
3.2.3. Recovery
On recovery, data can be extracted to PC via the 3m Y lead. This is covered in Section 2.
To prolong the lifetime of the instrument the following procedures should be carried out once the
instrument has been recovered:
·Remove any significant growth from the instrument, taking care not to damage any of the sensor
faces. A high pressure water jet or stiff (not metal) brush is recommended.
·Remove any significant growth from the pressure sensor port. Take care not to introduce any
sharp objects onto the sensor face – this may result in sensor damage.
·Check instrument for signs of damage.
·Rinse the instrument in fresh water
·Dry the instrument if possible, paying particular attention to the sensors and connector.
·Repack the instrument in the transit cases provided.

© 2018 Valeport Ltd
Installation
Page 13
3.3. Deployment Of The Water Sampler System
3.3.1. Assembly
The water sampler system is supplied in kit form, and must be assembled prior to use. The procedure
should take no more than 30 minutes. All required tools are provided.
Unpack the frame from the packing case, and remove all the packaging materials. The following
components should be present, as illustrated:
12x
40cm stainless steel rods
12x
20cm stainless steel rods
12x
M5 stainless steel screws
1x
stainless steel bottle mounting ring
1x
combined top & bottom frame
2x
150mm diameter clamping rings for MIDAS CTD+
2x
310mm diameter clamping rings for EcoLab (1 packed separate, 1 fixed to bottom frame)
1x
motor assembly (not illustrated)
Begin by separating the top and bottom frames, by
undoing the wing nuts holding them together:

© 2018 Valeport Ltd
0606829a - MIDAS CTD+
Page 14
Screw the 12x 40cm stainless steel rods onto the bottom
frame, tightening as much as possible.
Lower the instrument clamping brackets onto the rods. The
larger EcoLab bracket should be positioned vertically above
the bracket that is already in place. The smaller MIDAS
CTD+ brackets should be positioned directly opposite the
EcoLab brackets, vertically above each other.
Also note that the MIDAS CTD+ is supplied with a
fluorometer; the clamping brackets for this should be fitted
to one of the rods at this time.
Next, place the bottle mounting ring on the rods, taking care to position it the right way up. The
thread on the top of the rods should fit through the holes in the ring. Then, screw the 20cm rods in
place as shown, tightening as much as possible.

© 2018 Valeport Ltd
Installation
Page 15
Now, position the top frame on the rods, and secure in
place with the M5 screws, using a 4mm Allen key.
The motor system is pressure balanced, and contains a
liquid called Fluorinert. It is important that the motor
housing contains little or no air bubbles, as this will affect
the pressure balancing capabilities of the housing. If there
are air bubbles visible in the housing, the Fluorinert must
be replenished, using the procedure described in Section
4.3 of this manual.
Position the motor underneath the top frame, so that the
mounting holes align. The rotor arm may need to be
removed to allow this. Secure in place with the screws
provided.
If the rotor arm is loose, it must be secured in the correct
position. To do this it is necessary to communicate with the
instrument using the software. This procedure is therefore
described in the software manual.
Assembly of the frame is now complete.
3.3.2. Fitting Instruments to the Frame
It is easiest to fit the MIDAS CTD+ by laying the frame on its
side. Use the locking screws to tighten the lower clamping
bracket onto the frame, and loosen the upper clamping
bracket.
Each clamping bracket is made of two half-clamps. These
should be separated by undoing the screws as shown:
The MIDAS CTD+ is shipped in a separate frame, which may
be used for deploying the instrument on its own if required.
The instrument must be removed from this frame to allow it
to fit into the water sampler frame.
Remove the instrument from its frame as shown in the
picture.

© 2018 Valeport Ltd
0606829a - MIDAS CTD+
Page 16
Gently place the MIDAS CTD+ into the clamping brackets
on the water sampler frame, with the sensors towards the
bottom of the frame. Slide the upper bracket so that the
clamps fit into the grooves in the instrument housing. Fix
the upper bracket tightly to the frame. Now replace the
other half of the clamps, and screw into place.
Repeat this procedure to fit the EcoLab system into the large
clamps.
Using the lead supplied, connect the instrument to the
motor unit. The lead may be held to the frame by means of
cable ties.
3.3.3. Loading The Water Bottles
The motor and frame are designed to work with 12 x 2.5 litre water bottles. The bottles should be
fixed to the frame as follows.
Locate the hole in the mounting block of the bottle onto the screw of the bottle mounting ring, as
shown, and then depress the white plunger. This allows the top of the bottle to slide into place in the
top part of the frame. The white plunger is spring loaded, and should release into the hole in the
frame, locking it in place.
Arm the bottles using the following procedure:
Push forward the release lever, and secure in place with the
rotating plate.

© 2018 Valeport Ltd
Installation
Page 17
Carefully lift the top cap of the water bottle, and hook the
loop of nylon cord over the end of the release lever.
Then, carefully disengage the bottom cap of the water
bottle, and use the spring shackle to secure the nylon cord
to the top nylon cord as shown. Ensure that the shackle
goes over the whole cord, and not through it.
Repeat for each bottle.
Finally, to prepare the bottle for deployment, ensure that the tap on the side of the bottle is pulled
out as far as the stop will allow, and that the release screw on the top of the bottle is tightly secured.
3.3.4. Releasing the Water Sample
To release the water sample after the deployment, place a small hose over the tap, leading to the
desired container. Push the tap into the bottle as far as the stop will allow, causing a small amount of
water to be ejected. Release the remainder of the sample by slowly release the screw on the top of
the bottle. This allows the water to drain out of the tap under atmospheric pressure.

© 2018 Valeport Ltd
0606829a - MIDAS CTD+
Page 18
4. Maintenance
The MIDAS CTD+ Multi-Parameter Logger with CTD is completely solid state, and therefore requires
very little maintenance. Other than performing calibration routines on the sensors (detailed in a
separate document), the user will need to keep the instrument relatively clean, and to change the
batteries. This Chapter also covers details of the o-rings that are fitted to the instrument, and which
should be checked regularly for damage and replaced if necessary.

© 2018 Valeport Ltd
Maintenance
Page 19
4.1. Changing Batteries
The MIDAS CTD+ Multi-Parameter Logger accepts 8 x D cells, of either 1.5V alkaline or 3.6V Lithium
type. These cells are arranged in series, so the output voltage is 12V (alkaline) or 28.8V (Lithium).
Some example scenarios for lifetime of these batteries are given in Chapter 2.4.2.
The batteries are located in a holder in the top of the instrument, and should be accessed by
removing the connector bulkhead.
1. Remove the instrument from the protective cage by loosening the M10 nuts on the polypropylene
clamps. Gently lever
these clamps apart,
using a screwdriver if
necessary.
2. Slide the instrument out of the cage, in either direction.
3. Remove the 3 M5 x 20 socket cap screws in the connector bulkhead, using the Allen key provided.
Note that these screws are titanium, and should be replaced with titanium screws if lost. Other
materials may suffer galvanic corrosion and may be destroyed.
4. Without twisting or putting undue stress on the SubConn
connector slide the bulkhead and attached battery pack
out of the main housing. A slot between the tube and
the bulkhead allows levering with a screwdriver if
necessary. Take care not to scratch the bore of the tube.
5. A lead connects the battery pack to the electronics inside
the tube. This may be disconnected at the battery pack if
required, for ease.
6. Replace the batteries.
7. Check the condition of the bore seal o-rings and apply a light coating of silicon grease. Ensure
that they sit in the groove correctly, and are free from damage. Replace them if necessary.

© 2018 Valeport Ltd
0606829a - MIDAS CTD+
Page 20
8. Reattach the connector to the electronics if necessary, and gently slide the battery pack back into
the tube, ensuring that the fixing holes are correctly aligned. Again, take care not to scratch the
bore.
9. Replace the 3 x M5 titanium screws, using a small amount of copper grease (supplied). Do not
force the screws, just tighten firmly.
10. Finally, slide the instrument back into the protective cage. Note that the clamping brackets are
offset, and that the sensor end of the instrument should lie at the long end of the cage.
4.2. O-Ring Sizes
The MIDAS CTD+ Multi-Parameter Logger with CTD is kept watertight by using o-ring seals. Double
o-ring seals are used at each end of the titanium housing, although the customer should have no
reason to open any seal other than that at the battery end. To help preserve the watertight nature of
the equipment, please observe the following guidelines:
·Ensure that all o-rings are free from cuts, abrasions or perishing.
·Ensure that all-o-rings are free from dirt, grit, sand, hair and other foreign objects.
·Whenever an o-ring seal is opened (e.g. when changing batteries), ensure that a light coating of
silicon grease is applied to the o-ring before the seal is closed.
·Ensure that all o-ring protected seals are tightened.
A set of spare o-rings is included with the equipment. If an o-ring needs replacing, be sure to use
the correct size. If obtaining further spare o-rings from an alternative source, be sure to obtain the
correct material (signified by the last 4 digits of the o-ring code number).
O-ring size: 200-158-4470
Anti-Extrusion ring size: 158
Table of contents
Other Valeport Marine Equipment manuals