Valley Electronics Lady-Comp User manual

INSTRUCTIONS

LADY-COMP®.
YOUR ULTRA-PRECISE DAILY COMPANION.
Thank you for choosing the natural option as your way of planning a family in the
future. Please read these instructions carefully and completely, for your own safety.
For comprehensive details about this device, refer to the Table of Contents or the
Alphabetical Index. Should you have any more questions about a technical term or
two, then go to our LADYpedia at www.lady-comp.de for a comprehensive answer.
Now you are ready to go!
LADY-COMP – 2

LADY-COMP®
AT A GLANCE
• Cycle computer
• Measuring sensor
• 2 AAA rechargeable batteries/
batteries (optional)
• Slipcase
• Instruction manual
• USB cable for reading out data
• Battery charger (optional)
Measuring sensor
Sensor with cable
Control button
Display screen
Sensor holder
3 – LADY-COMP

TABLE OF CONTENTS
1. LADY-COMP® at a glance
Product contents 03
2. Before you begin
Opening the device 06
Inserting the battery 06
Closing the device 06
Home screen 07
Control button 07
Default values 07
Menu levels 08
3. Time/date
Setting the time 09
Setting the date 10
4. Alarm
Alarm on/off 11
Setting the alarm 11
5. Menstruation
Activating «M» / correcting «M» 12
Menstruation data 12
Post-hoc «M» inputs 12
6. Measurement
Measurement in the morning 13
Measurement period 14
Fertility indicator 16
Review/preview 16
Fever indicator 17
Skipping a measurement 17
Cancelling a measurement 17
7. Cycle calendar
Cycle calendar 18
8. Planning pregnancy
LADY- COMP®baby display 19
Sexual intercourse (SI) 19
Gender prognosis 20
Pregnancy indicator 21
Conception date & birth date 21
Restart after pregnancy 21
9. Cycle & planning statistics
Cycle statistics 22
Planning statistics
(LADY-COMP®baby only) 23
Cycle curve 24
Personal inputs 26
12
39
6
LADY-COMP – 4

27
29
30
30
31
32
33
33
34
34
35
35
36
36
36
36
37
37
37
37
10. Settings
Body Mass Index (BMI)
Default settings
Temperature/time unit
Personal comments
Gender prognosis on/off
Erasing data
Test measurement
Information about the device
Luminosity
Volume
Alarm signal
Button click tone on/off
11. Important information
Analysing cycle data/reading out data
Mini USB cable
Micro SD card
AAA battery charger
Loss of data
After the pill
Software program
Prognosis
Travel and time zones 37
Summer and winter time 37
Nightshifts 37
Restarting after a pause 37
12. Error messages & corrective actions
M input: check 38
Charge batteries 38
Batteries empty (112-11) 38
Clock battery running out (112-12) 38
Clock battery empty (112-13) 38
USB: no function (117-1) 39
Storage nearly full (111-11) 39
Storage full (111-12) 39
Error bootloader (120-1) 39
Technics, maintenance, safety 40
Service and support 42
Electromagnetic compatibility 43
Index 48
Addresses 52
5 – LADY-COMP

2. BEFORE YOU BEGIN
1. Remove the measuring
sensor
2. Open the device
Screw the device open in
counter-clockwise fashion.
3. Insert the batteries
Insert the rechargeable batteries/
batteries as required.
4. Close the device
Put the two parts together at
the notches and screw the device
closed clockwise.
AAA
AAA
COMP-N-MB RK.500
Rechargeable batteries/batteries
Before you start using the device, you will have to insert the batteries.
2 (AAA type) rechargeable batteries are included with your LADY-
COMP®computer. You may also use normal AAA batteries that are
available anywhere (1.5V). The two (AAA type) rechargeable batteries
must be charged for 12 hours before inserting them. The serial num-
ber of the device is written in the battery compartment.
LADY-COMP – 6

Home screen
You will receive your cycle computer with
the time, date and year, already pre-set.
Control button / switch on
Keep the control button pressed until you see
the time/date come up on screen. All menus
can be accessed by pushing the control button
up/ down or right/ left. To activate
the menus and conrm inputs click the centre
of the button.
Back to home screen
Keep the centre button pressed for 3 seconds
to return to the time/date home screen.
Automatic switch off
The device will completely switch o within
60 seconds if no button is pressed. The
screen will then go dark until a button is
pressed or the alarm rings.
Default values
Your cycle computer comes with default
values pre-set before you start. These
are automatically erased as soon as you do
your rst measurement or input your own
menstruation data. The default values
will reappear as soon as your own data is
erased.
Select the menus via the control button
left, right, up, down
Forward/backward
Select left, right
Select yes, no
Date/time set ahead/set back
Select up, down
Conrm
Conrm input
Keep button pressed for 3 seconds
= back to home
+
«Return» = on (blue square) and
«OK button« (conrm)
= return to prior menu level
7 – LADY-COMP

THE MAIN MENUS OF THE DIFFERENT LADY-COMP®
MODELS AND THEIR SYMBOLS
12
39
6
Time/ date
Alarm
Menstruation
Measurement
Return
Settings
Cycle calendar
Pregnancy planning
Cycle & planning statistics
The available menu levels may vary depending
on which LADY-COMP®model you use.
12
39
6
12
39
6
LADY-COMP®LADY-COMP® baby
LADY-COMP – 8

3. TIME/DATE
12
39
6
12
39
6
12
39
6
12
39
610 :48
12
39
610 :48
12
39
610 :48
12
39
610 :50
«Return» is on
Click Set the hour Go to minutes Set the minutes Press
«Return»
Setting the time
9 – LADY-COMP

4. ALARM
12
39
6
12
39
6
12
39
6
.09 08
2012
.10
2012
08
10 08
2012
.
«Return» is on
Click Set the day Click Press
«Return»
Setting the date
Please note:
Once your device has stored one
measurement or more, you may set
back the date by only one day. If
you set the date back, no measure-
ment can be recorded the next day.
You can also set the date ahead
by only one day. It is thus impossib-
le to enter a false date. This enables
you to correct the date when
travelling to other time zones. Make
sure, though, to skip the measure-
ment on the travelling day.
Please note:
To enter any previous menstruation
data, make sure you do this the
day before your rst measurement
(before 11 pm, see page 12).
Before you begin with your rst measurement,
you should set and activate the alarm.
TIME/DATE
LADY-COMP – 10

12
39
6
12
39
6
:00
07
07 :29
07 :30
07 :30
«Return» is on
Click Set the hour Go to minutes Set the minutes Press
«Return»
«Return» is on
Click Alarm on
Alarm o Conrm Press
«Return»
Alarm on/off
Setting the alarm
Good to know:
An alarm indicator appears on
the home screen once the alarm
has been activated.
10.08.07:30
07:30
ALARM
11 – LADY-COMP

5. MENSTRUATION
09.08.
12
39
6
09.08.
10.08.
10.08.
10.08.
«Return» is on
Select the date «M» yes
«M» no
Press
«Return»
Activating «M» or correcting «M»
Menstruation data:
If you have previously recorded your «M»= menstruation data, please
enter them before your first measurement. Activate «M» as described
below.
Inputting «M» post hoc:
If you have not taken a measurement for quite some time (e.g. because
you forgot to) and you have meanwhile had your period, you may input
«M» retrospectively. Please do this with care since erroneous inputs
may only be corrected 3 days back. Start with the most remote mens-
truation date.
Please note:
«M» input: check (?M) If your device
has not received any measurement
or «M» input for some time (4 days)
and a new cycle was expected
to begin during this time period, this
warning will remind you to catch
up with your inputs. To do: activate
«M» post hoc.
In the event of such a retrospective
menstruation input, only the rst
«M» day needs to be activated per
cycle. The device will automatically
save three «M» days. Begin with
the most remote menstruation date.
«M» input after discontinuing the
pill: the rst period after discontinu-
ing the pill is a pill-induced with-
drawal bleeding, not a real period.
Do not input «M» in this case.
LADY-COMP – 12

6. MEASURING YOUR TEMPERATURE
10.08.07:30
07 :30
10 .08.14
36 28
.
10.08.07:30
07 :30
10.08.
.
10.08.20
36 28
.
10.08.20
36 28
.
Measurement symbol
is on, alarm rings
Measurement symbol
blinking
Audible signal marks the
end of the measurement
Is switched o automati-
cally or «Return» is on
Click button to
switch o alarm
Click button to
start measurement Place sensor under tongue Measurement value and
fertility are displayed
Click
«Return»
Measuring your temperature in the morning
Our system ultimately relies on the daily
measurement of your basal body temperature.
The basal body temperature is the tempe-
rature you have immediately after waking up,
i.e. before getting up and before being
active in whatever form. The more regularly
you measure your temperature – especially
in the rst months getting started – the quicker
your device will become familiar with your
personal cycle. Place the measuring sensor
left or right under your tongue and close
your mouth. The sensor should not be moved
during the measurement process.
*LADY- COMP®baby
Boy/girl indicator*
Fertility indicator
Measurement icon
Cycle day
Sensitivities
Sexual intercourse*
Measurement
unit
Measurement
value
Menstruation
Date
13 – LADY-COMP

Tips for measuring your temperature
LADY- COMP® will wake you up with a tone. To switch o the tone,
click the control button. To measure your temperature, just press any
button on the home screen. LADY-COMP®will be ready to measure
when the “Measurement” symbol starts to blink.
– Now place the sensor under your tongue and close your mouth.
– Measurement will take approx. 60 seconds. If no measurement
value can be determined after 3 minutes, the measurement will be
cancelled automatically.
– The display shows measurement values from 34.5 to 41.0°C.
– From 37.8°C upwards, the measurement value will alternate
with F for fever.
– Once the measurement is completed, you will hear a tone and
your current temperature will appear on the screen. It will also
show your fertility status for that day.
Measurement period
The measurement period is the time span in which
you may proceed to measure your basal body tempe-
rature every day. This time span is monitored by the
LADY- COMP®device. The measurement period is inde-
pendent of the alarm and is calculated based on the
time you took your measurement on the previous day
(-3/+3 hours). The measurement period extends over
6 hours and begins/ends three hours before and after
the last measurement time, if this point in time does
not coincide with the time you wake up the next day.
Tips for the measurement period:
- The measurement period is displayed in form of
a measurement symbol on the home screen.
- Within the measurement period, pressing any button
on the home screen will start the measuring process.
- We recommend using the LADY-COMP®alarm
to wake you.
- Should you wake up any time within the measurement
period, e.g. because you have to nurse your child, start
to measure your temperature.
- Should you get up after the measurement period is
over, skip that measurement.
- You may redene the measurement period at any time
by resetting the alarm (e.g. on weekends or in case of
working nightshifts).
After three measurement-free days, the measurement period will be cleared again and
measurement will only be possible the day after, in conjunction with an activated alarm.
The measurement period will then again depend on the wake-up time (-3/+3 hours).
MEASURING YOUR TEMPERATURE
LADY-COMP – 14

10.08.
36 20
.
10.08.
36 20
.
10.08.
36 20
.
1
«M» blinks when «M»
is expected «Return» is on «Return» is on
«M» yes
«M» no
Display
«M» no
Display
«M» yes
«M» input after measurement
After measurement, you will possibly see
«M» = menstruation blinking.
– In case of «M» yes, conrm «M» with «up» yes.
– In case of «M» no, reject «M» with «down» no.
As soon as LADY-COMP®knows everything about your cycle, the
device will prompt you for «M» on days that «M» is expected.
– The prompting for «M» («M» blinking) starts two days prior to «M».
– Once «M» is over, LADY-COMP®will stop prompting for «M».
Please note:
Conrm «M» on at least three
successive days. If you have «M»
without being prompted by your
device, activate «M» as described.
Should you have erroneously
input «M», you may correct «M»
on the same day and three days
backwards.
MEASURING YOUR TEMPERATURE
15 – LADY-COMP

11.01.20
36 59
.
20
36 60
.
05.08.
01.01.06
36 25
.
25 10.08.
06.01.11
36 30
.
25 10.08.
10.01.15
36 34
.
25.01.30
36 80
.
29.01.34
36 80
.
«green» is on
= not fertile
«yellow» is on
= computer learning phase
«red» is on
= fertile
«red» blinking
= ovulation day
«red» «yellow» «green»
blinking
=possibly pregnant
«red» «yellow»
«green» on constantly
=most likely pregnant
«Return» is on
Go back
= Prognosis
Go forward
= Prognosis
Press
«Return»
Review / Preview - Fertility indicator / Prognoses
Fertility indicator
The device shows your measurement value and fertility for that day,
these remain valid for 24 hours and are safe from day 1 onwards.
The number of «green» days will increase slowly though systematically.
«Red» days will be increasingly narrowed down.
To display all previous measurement values, press the button
«left» several times. You may also call up a six-day prognosis by
pressing the button «right» several times.
MEASURING YOUR TEMPERATURE
If the device receives no input or receives information that cannot be
evaluated, the number of «yellow» days will increase.
LADY-COMP – 16

Fever indicator
From 37.8°C upward, the measurement value will alternate with «F» for
fever. Fever will then be stored as measurement value and also shown
in the review. The fever values will, however, not be used for analysis.
No measurement taken
The device calculates the expected cycle curve and your fertility
status, based on existing values. Temperature increases due to the u,
a lack of sleep, excessive alcohol consumption and/or the use of
medicinal drugs with a thermal eect are «misleading» and are identi-
ed by the device. It is generally recommended to interrupt your daily
measurements in case of a cold with fever, the use of medicine, or a late
night to avoid the input of «misleading» values.
Cancel the measurement process
You may cancel the measurement process by holding the «OK»
button down for 3 seconds; this will take you back to the main
menu. You may then repeat the measurement at any time within
the measurement period.
07:3010.08.
07 :30
10.08.
.
10.08.
.
36
10.08.
38 45
.
Measurement symbol
is on - Alarm is on
Measurement symbol
blinking
«Fever» alternates with
the temperature value «Return» is on
Press button to
switch o alarm +
start measurement
Place the sensor under
your tongue
To cancel a measu-
ring process, keep
button pressed for
3 sec.
Press
«Return»
Please note:
LADY- COMP®is not intended for
controlling the body temperature
as part of a self-health check,
this should be done with a ther-
mometer.
MEASURING YOUR TEMPERATURE
17 – LADY-COMP

05 2012
1
8765
12 13 14 15 16 17
24232221201918
2725 2826 29 30
4
11
910
23
05 2012
41
111098
15 16 17 18 19 20
27262524232221
3028 3129
7
14
12 13
523 6
04 2012
2
6543
10 11 12 13 14 15
22
29
21
28
20
27
19181716
23
30
24 25 26
2
9
78
35141
«Return» is on
Flip through
months
Press
«Return»
The cycle calendar shows you the fertility
curve of your cycles as measured in the
last months. You may also call up a menstrua-
tion prognosis for the coming 6 months.
7. CYCLE CALENDAR
12
39
6
06 2012
1
8765
12 13 14 15 16 17
24232221201918
25 26 27 28 29 30
4
11
910
23
LADY-COMP – 18

If you are planning for pregnancy, then inform
your LADY-COMP®baby when sexual inter-
course has taken place «SI»:
- Enter «SI» the day after your measurement.
- You may enter «SI» up to three days
backwards.
Since the introduction of LADY-COMP®baby in
1986, we have supported countless couples
in planning a child. LADY-COMP®baby shows
you the ideal time to become pregnant.
10.08.
09.08.
09.08.
8. PLANNING PREGNANCY
12
39
6
Inputting intercourse «SI»
«Return» is on
Click Select date Click Press
«Return»
19 – LADY-COMP

Gender prognosis
To rather plan for a boy, restrict sexual intercourse to the two days in
which the «boy» symbol is displayed alone. To rather plan for a girl,
restrict intercourse to the two days in which the «girl» symbol is
displayed. The rst «boy» symbol will appear two days before the ideal
conception date. The «girl» symbol appears on the day after the
ideal conception date. «Boy» and «girl» come up on the ideal con-
ception date itself. This prognosis is based on calculation.
11
36 30
.
08.08.
11
36 30
.
09.08.
11
36 30
.
10.08.
«Return» is on
Click Flip through
dates
Flip through
dates
Click
«Return»
PLANNING PREGNANCY
Please note:
LADY- COMP®baby displays the
boy/girl gender prognosis in
addition to the fertility indicator.
LADY-COMP – 20
Other manuals for Lady-Comp
8
Table of contents
Other Valley Electronics Personal Care Product manuals
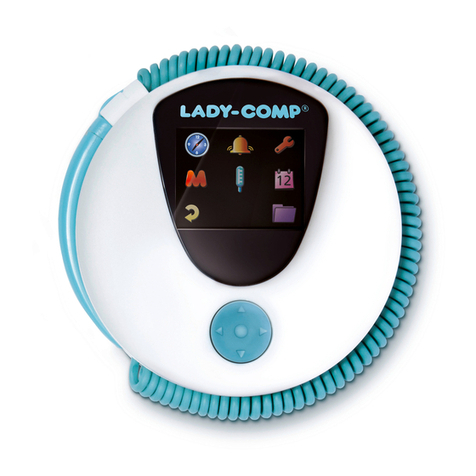
Valley Electronics
Valley Electronics Lady-Comp User manual

Valley Electronics
Valley Electronics Lady-Comp User manual

Valley Electronics
Valley Electronics Lady-Comp User manual

Valley Electronics
Valley Electronics Lady-Comp Pearly User manual
Valley Electronics
Valley Electronics Lady-Comp User manual

Valley Electronics
Valley Electronics Teena User manual

Valley Electronics
Valley Electronics daysy User manual

Valley Electronics
Valley Electronics daysy User manual

Valley Electronics
Valley Electronics Lady-Comp User manual

Valley Electronics
Valley Electronics daysy User manual