manuals.online logo
Brands
  1. Home
  2. •
  3. Brands
  4. •
  5. Vanderbilt
  6. •
  7. Security Sensor
  8. •
  9. Vanderbilt ES 470 User manual

Vanderbilt ES 470 User manual

INSTALLATION MANUAL ES 470
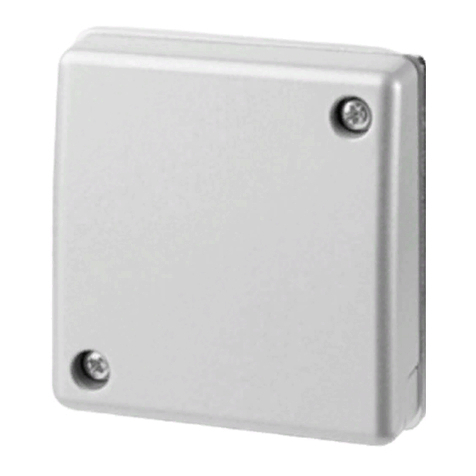
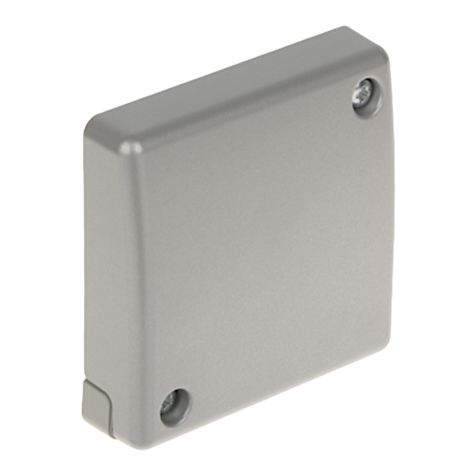
Shock and vibration detector
DESCRIPTION
ES 470 offers reliable monitoring against attacks with
mechanical tools. The ES 470 is a shock and vibration
detector with 3 separate detection channels: an integra-
tion channel / saw channel for weak signals with long
duration, a counting channel that senses strong impact
on the monitored surface and an explosion channel
which senses very strong signals from e.g. an explosion.
ES 470 has built-in relays for the alarm and tamper
outputs. This allows the ES 470 to be connected directly
to the alarm central unit, this means that no analyzer unit
is necessary.
The ES 470 is polarity independent.
FEATURES
•
Relay outputs for alarm and tamper
•
Polarity independent for easy connection
•
3 separate detection channels
•
Cover radius up to 3m
•
Resistant to interference
•
Detailed sensitivity setting
•
Suitable for 24-hour monitoring
•
DAY and NIGHT control of LED
OPERATING PRINCIPLE
The ES 470 uses a piezoelectric sensor to monitor the vibration
signature of the mounting surface that occurs when it is
crushed or cut with tools. The signal has a special signature
with a broad spectrum and high amplitude that the electronics
detects, then opens the alarm relay and illuminates the
LED. The ES 470 has a built-in self-control and voltage
monitoring. Fault is indicated by a flashing LED (alarm relay
remains closed). The indication is controlled by a DAY and
NIGHT function. With 8Vdc on the power input, DAY mode is
active and LED lights up at alarm and with pulsating shine in
case of failure. At 6Vdc, NIGHT mode is active and LED is
switched off in case of alarm or fault.
Resetting the detector after alarm can be done in two different
ways:
•Disconnect power to the detector
•Switch from DAY to NIGHT mode
MOUNTING
1. Loosen the screw for the cover and lift it off.
2. Select the mounting location and mark the mounting holes
with the bottom part as a template.
3. Drill with a 2-2.5 mm drill for the two supplied mounting
screws.
NOTE! A clean and smooth mounting surface under the
detector provides maximum range.
CONNECTIONS
The detector has 6 screw terminals:
ES470 manual I-200422 Page 1 of 2
#
Function
1
DC Input voltage (-) or (+)
2
DC Input voltage (-) or (+)
3
Alarm output, relay (NC)
4
Alarm output, relay (C)
5
Tamper output, relay (NC)
6
Tamper output, relay (C)
DIP-SWITCH
The DIP switch with 6 switches is used to program the functions
of the detector.
DIP Sensitivity (1 = lowest sensitivity, 8 = highest)
1
2
3
4
5
6
7
8
1
OFF
OFF
OFF
OFF
ON
ON
ON
ON
2
OFF
OFF
ON
ON
OFF
OFF
ON
ON
3
OFF
ON
OFF
ON
OFF
ON
OFF
ON
DIP Counting Channel, Number of hits
3
6
4
OFF
ON
DIP Saw/Integration Channel
Integration Channel
OFF
Integration Channel ON
5
OFF
ON
DIP Autoreset of alarm (after 4 s)
Autoreset OFF
Autoreset ON
6
OFF
ON
DETECTION RADIUS
The approximate range of different materials is given in the
table below. Note, however, that the stated numbers only
serve as guide values and are strongly dependent on joints etc.
The actual range must be determined in practical tests.
Material
Wood/Glass/
Plywood
Brick*/
Plastering*
Steel/Concrete *
Radius
r = 2 m
r = 1 m
r =3 m
COMMISSIONING AND ADJUSTMENT
NOTE! For detector to show short blink, following procedure
must be done within 5 minutes after detector is powered on.
Commissioning and adjustment is very simple. Check that the
Autoreset is active (DIP 6 ON), the LED will then indicate when
the detector is alarmed, and after about 4 seconds, the alarm
goes out while the alarm relay closes. The counting channel
causes each received pulse to be displayed with a short flash on
the LED until the number of pulses set is reached (3 or 6), then
alarm is indicated. The alarm is indicated by a steady light as
long as the alarm relay is open.
1. Set the DIP switch to medium sensitivity, 6 hits, active saw
channel and auto reset. This is done by setting DIP 1=OFF
and DIP 2-6=ON.
2. Tap next to the detector and check that each tap is regis-
tered and that the alarm relay opens after 6 pulses.
3. Now tap relatively strongly with eg. the back of a screw-
driver on the most remote point to be protected.
4. If the pulses are not detected (short flash on the LED),
incrementally increase the sensitivity with DIP 1-3 as
shown in the table until the LED shows the received pulse.
5. If the diode instead shows alarm directly (steady light),
reduce the sensitivity incrementally with DIP 1-3 according
to the table until the LED shows the received pulse.
6. Check and adjust all connections. Finally, check that both
the alarm output and the tamper switch are received cor-
rectly at the control panel.
A fairly common mistake is to set higher sensitivity than
required, which results in false alarms. We therefore
recommend to not connect the detector in live operation
until after a few weeks so that the setting has been veri-
fied.
* When mounting on brick / plaster / concrete, the mounting
plate MP550 must be used for correct
operation
TECHNICAL DATA
Detection radius
Up to 3m
Input voltage
8 –15 VDC (DAY mode), 6 VDC (NIGHT mode)
Max. ripple
0.2 Vpp at 12 V
Current consumption (typical) quiescent
8.0 mA (at 12 V)
Current consumption (typical) alarm
7.1 mA (at 12 V)
Alarm output
Relay (Max 50V / 120 mA), R < 30 Ω
Alarm indication
LED, DAY/NIGHT controlled
DAY and NIGHT control
DAY≥8 V, NIGHT=6 V input voltage
Alarm time
4s (when Auto Reset) or latching
Alarm reset
Input voltage below 1 V
Tamper protection
Pry-off and cover removal
Tamper output
Relay (Max 50V / 120 mA), R < 30 Ω
Low voltage alarm or fault in electronics
<5V indicated by flashing LED
Environmental class (EN50130-5:2011)
II
Operating temperature range
-40°C till +55°C
Operating humidity
max. 95% RH
Housing
White ABS plastic, IP 42
Size [H x D x W]
20 x 23 x 80 mm
Approvals
EN 50131-2-8 Grade 3, SSF Klass 3,
ORDERING INFORMATION
ES 470
V54543-F109-A100
Mounting plate MP 550
N54534-Z110-A100
EST400 Test Tool
NBPZ:4726120001
Vanderbilt reserves the right to change without prior notice ES470 manual I-200422 Feb 2021 Page 2 of 2

Other Vanderbilt Security Sensor manuals

Vanderbilt IR261 User manual

Vanderbilt

Vanderbilt IR261 User manual

Vanderbilt GM775LSNi User manual

Vanderbilt

Vanderbilt GM775LSNi User manual

Vanderbilt AGB800-AM Manual

Vanderbilt

Vanderbilt AGB800-AM Manual

Vanderbilt WPIR-EXT Manual

Vanderbilt

Vanderbilt WPIR-EXT Manual

Vanderbilt GM710 User manual

Vanderbilt

Vanderbilt GM710 User manual

Vanderbilt GM730 User manual

Vanderbilt

Vanderbilt GM730 User manual

Vanderbilt IS443 User manual

Vanderbilt

Vanderbilt IS443 User manual

Vanderbilt Intrunet E-Line ADM-I12W1 User manual

Vanderbilt

Vanderbilt Intrunet E-Line ADM-I12W1 User manual

Vanderbilt GM7 Series User guide

Vanderbilt

Vanderbilt GM7 Series User guide

Vanderbilt bright blue User manual

Vanderbilt

Vanderbilt bright blue User manual

Vanderbilt WPIR-CRT User manual

Vanderbilt

Vanderbilt WPIR-CRT User manual

Vanderbilt GM730 User manual

Vanderbilt

Vanderbilt GM730 User manual

Vanderbilt GM775 User manual

Vanderbilt

Vanderbilt GM775 User manual

Vanderbilt AGB800 Manual

Vanderbilt

Vanderbilt AGB800 Manual

Vanderbilt PDM-I12T User manual

Vanderbilt

Vanderbilt PDM-I12T User manual

Popular Security Sensor manuals by other brands

Menvier 800 Series quick start guide

Menvier

Menvier 800 Series quick start guide

GREEN INSTRUMENTS G26 instruction manual

GREEN INSTRUMENTS

GREEN INSTRUMENTS G26 instruction manual

SWARCO IG315/2 user manual

SWARCO

SWARCO IG315/2 user manual

Vivax Metrotech vLoc3 RTK-Pro User handbook

Vivax Metrotech

Vivax Metrotech vLoc3 RTK-Pro User handbook

3xLogic S1 quick start guide

3xLogic

3xLogic S1 quick start guide

ADT Home Assure Getting started

ADT

ADT Home Assure Getting started

Mitsubishi Electric k-con KSGD-01WS-B Installation and operation manual

Mitsubishi Electric

Mitsubishi Electric k-con KSGD-01WS-B Installation and operation manual

mcmurdo E5; G5 Service manual

mcmurdo

mcmurdo E5; G5 Service manual

tibelec ST45A instructions

tibelec

tibelec ST45A instructions

Det-Tronics FlexSight LS2000 instructions

Det-Tronics

Det-Tronics FlexSight LS2000 instructions

Morris 59124 quick start guide

Morris

Morris 59124 quick start guide

LEGRAND SANUS SAL-IWP2 installation instructions

LEGRAND

LEGRAND SANUS SAL-IWP2 installation instructions

Honeywell 5800PIR-RES installation instructions

Honeywell

Honeywell 5800PIR-RES installation instructions

Niko 350-20082 manual

Niko

Niko 350-20082 manual

Autostopcock Plus user manual

Autostopcock

Autostopcock Plus user manual

hilmor LDHD250 Operation and maintenance instructions

hilmor

hilmor LDHD250 Operation and maintenance instructions

NAPCO PIR1680 Installation insructions

NAPCO

NAPCO PIR1680 Installation insructions

Crestron PinPoint PP-100 installation guide

Crestron

Crestron PinPoint PP-100 installation guide

manuals.online logo
manuals.online logoBrands
  • About & Mission
  • Contact us
  • Privacy Policy
  • Terms and Conditions

Copyright 2025 Manuals.Online. All Rights Reserved.