VANPOWERS JL5272 LCD User manual

1
r
Vanpowers Bike
Display
User Manual
For City Vanture & R7

2
USER GUIDE
JL5272 LCD

3
Contents
1. Appearance and Specifications .......................................................................................................4
2. Overview of Functions and Buttons ............................................................................................... 5
2.1 Preset and Default Items ...................................................................................................... 5
2.2 Display Example Image ......................................................................................................... 5
2.3 Buttons ..................................................................................................................................6
3. User Warnings .................................................................................................................................6
4. Installation Instructions .................................................................................................................. 7
5. Standard Operation .........................................................................................................................7
5.1 Power On/Off ........................................................................................................................7
5.2 Display Interface ................................................................................................................... 8
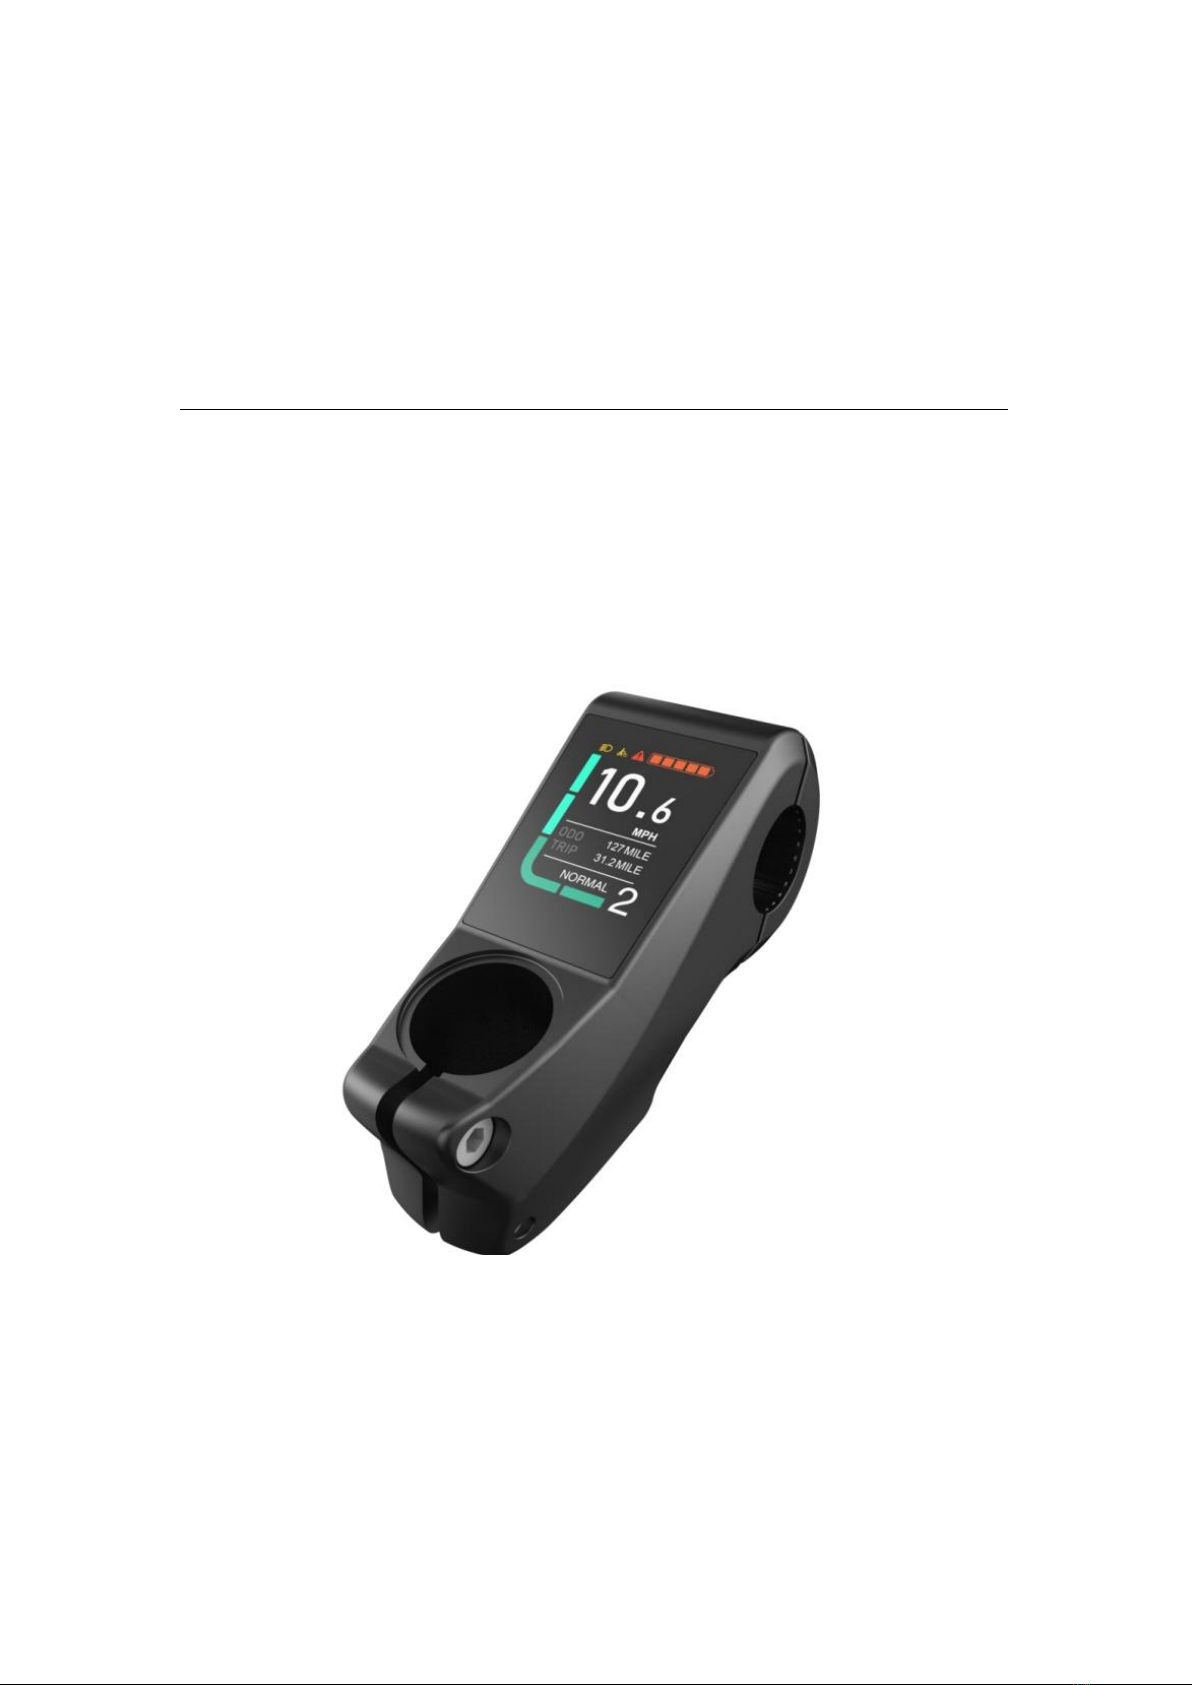
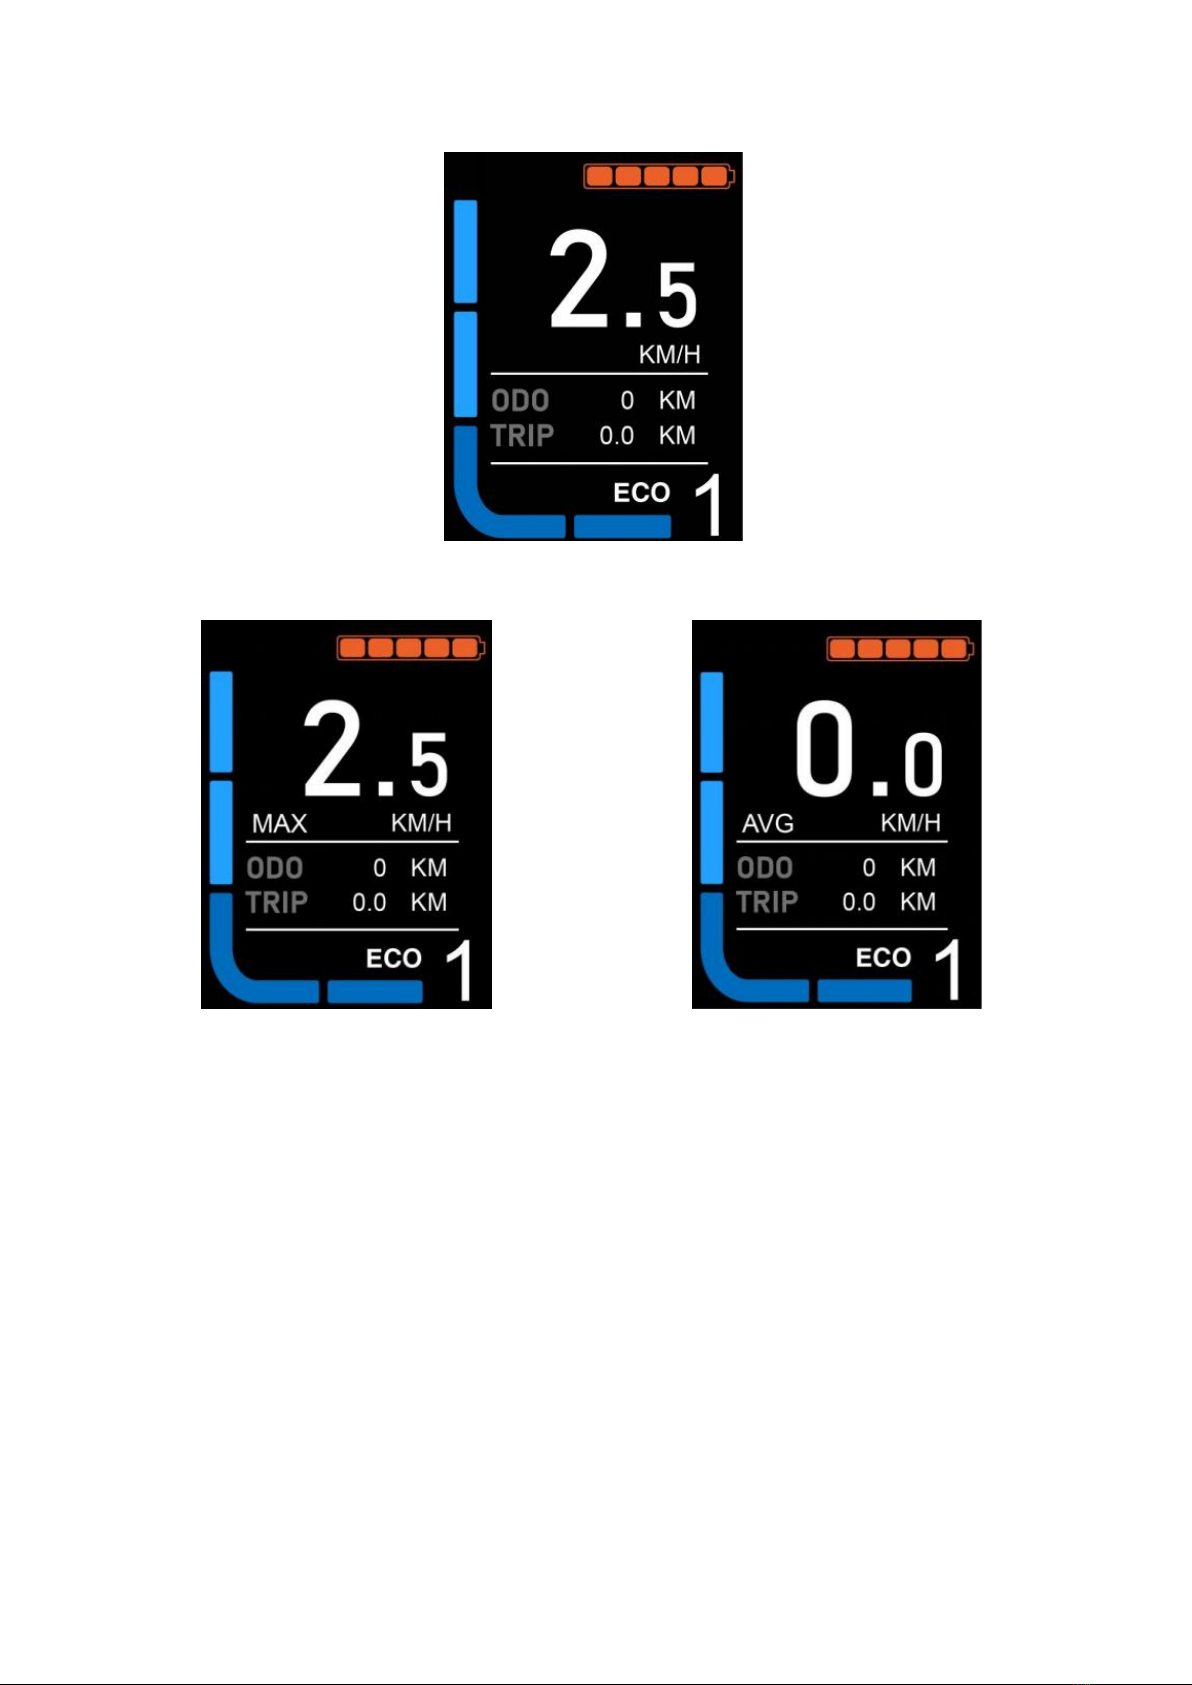
5.3 Speed .................................................................................................................................... 8
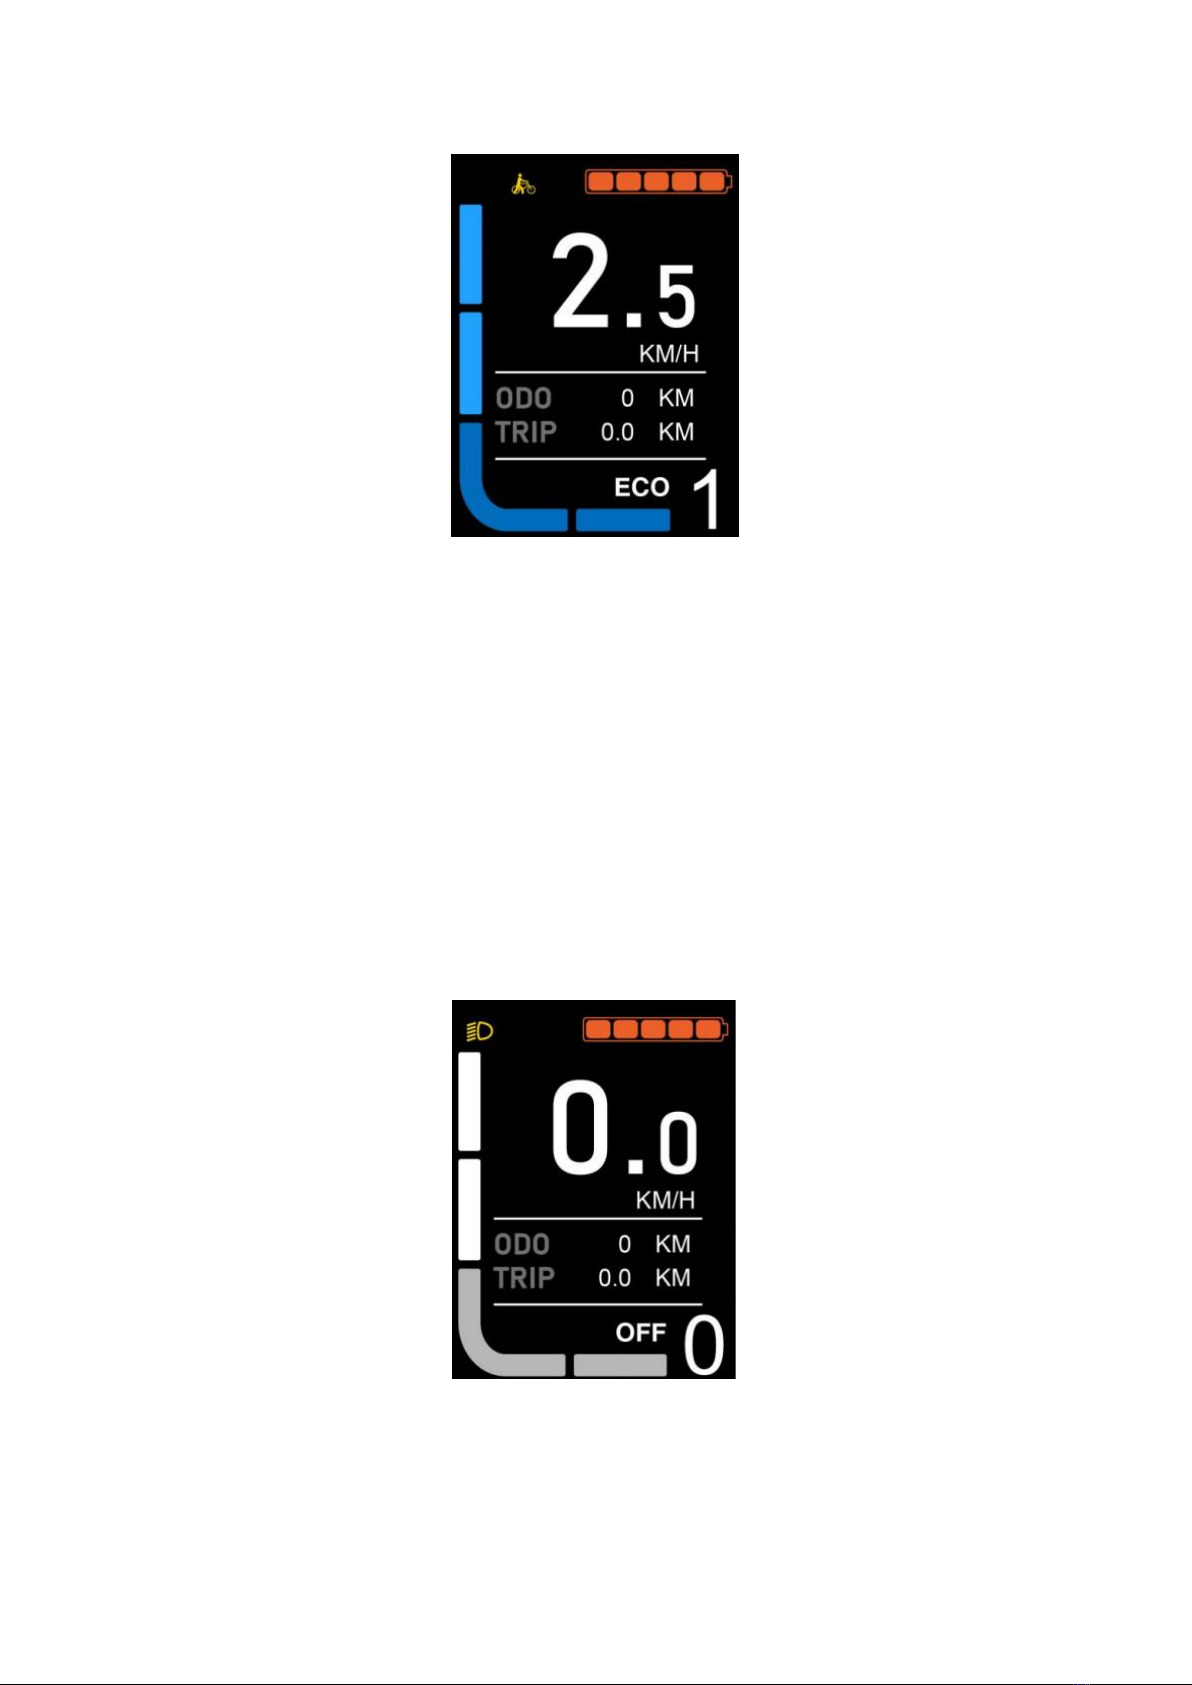
5.4 Cruise Control ....................................................................................................................... 9
5.5 Headlight .............................................................................................................................10
5.6 Power Output ......................................................................................................................10
5.7 Battery Capacity ..................................................................................................................11
6. User Settings ................................................................................................................................. 11
6.1 Trip Clearing ........................................................................................................................ 12
6.2 Backlight ..............................................................................................................................13
6.3 Unit Settings ........................................................................................................................13
6.4 Automatic Shut-Off Time ....................................................................................................14
6.5 Wheel Size ...........................................................................................................................15
6.6 Speed Limit ......................................................................................................................... 16
6.7 Enable/Disable Password ................................................................................................... 16
6.8 Modify Password ................................................................................................................ 17
6.9 PAS Range ............................................................................................................................18
6.10 Enable/Disable PAS Button ...............................................................................................18
6.11 Start-Up Speed ..................................................................................................................19
6.12 System Reset .....................................................................................................................20
6.13 Exit Settings .......................................................................................................................20
7. User Preparation Advisory ............................................................................................................21
8. Q&A ...............................................................................................................................................21
9. Warranty Terms .............................................................................................................................21
10. Software Version .........................................................................................................................22

4
User Instructions
Dear User,
To ensure the best possible performance for your e-bike, please read
through the JL5272 display manual carefully before use.
From hardware installation to settings to basic functions, this manual will
go over every aspect of the display in brief and concise language. It will
also help you troubleshoot potential problems to prevent you from
having to research confusing technological terms.
1. Appearance and Specifications
1.1 Material and Color
The material of the JL5272 display shell allows for normal use at
temperatures ranging from –20℃to 60℃.
Illustrative and schematic drawings (with measurements in mm) are
provided below.

5
The JL5272 is matched with an N3 button that can be installed on either
the left or right side of the handlebar. The N3 button is connected to the
lead wire at the bottom of the JL5272 display.
Illustrations are provided below.
2. Overview of Functions and Buttons
2.1 Preset and Default Items
The JL5272 provides you with various functions to meet your riding
needs, such as displaying your power level, speed, and mileage, as well
as having useful settings like backlight brightness.
2.2 Display Example Image

6
2.3 Buttons
The JL5272 display has three buttons. In this manual, the key is
represented by [MODE], the key is represented by [UP], and
the key is represented by [DOWN].
3. User Warnings
Pay attention and practice the recommended safety precautions during
use. Do not plug in or unplug the display while it is on.
Avoid collision with the display as much as possible.

7
The display comes with a waterproof membrane. Please do not
remove it, otherwise the performance of the display in wet conditions
may be affected.
Please do not change settings/parameters without knowing what
they do, as this may greatly affect your riding experience.
Be sure to schedule maintenance as soon as the display shows
signs of abnormal function.
4. Installation Instructions
Affix the display to the handlebar and adjust the angle for easy viewing
while riding. With the e-bike turned off, connect the display cable with
the controller cable to finish installation.
5. Standard Operation
5.1 Power On/Off
After long pressing the [MODE] key, the display will turn on and begin
supplying power to the controller. Long press the [MODE] key again to

8
turn off the e-bike. In the power-off state, the display will no longer
consume battery power, with a rate of leakage of less than 1uA.
If the bike has not being used for more than 10 minutes, the display will
automatically shut down.
5.2 Display Interface
When it is turned on, the display will show the normal startup interface,
which includes the real-time battery level, real-time speed (SPEED),
single-ride mileage (TRIP), a total-distance odometer (ODO), the current
pedal assist gear (PAS), etc.
Normal display interface
5.3 Speed
After the display is turned on, it will show the real-time speed by default.
Short press the [MODE] key to cycle through all the options for display
information, which are as follows: real-time speed → maximum speed of
the current trip (MAX) → average speed of the current trip (AVG).

9
Real-time speed
Maximum trip speed (MAX) Average trip speed (AVG)
5.4 Cruise Control
Press and hold [DOWN] for 2 seconds to enter assisted walk mode. The
bike will travel at a fixed speed of 3.7 mph (6 km/h).

10
Assisted walk interface
Warning: Assisted walk mode is only recommended while pushing the
bike. Please do not use it while riding.
5.5 Headlight
Press and hold the [UP] key for 2 seconds to turn on the headlight. Press
and hold the [UP] key again for 2 seconds to turn it off.
Headlight interface
5.6 Power Output

11
Use the [UP] and [DOWN] keys to change the assist level and motor
output power. The default output power range goes from level 0 to level
5.
Assist level interface
5.7 Battery Capacity
The battery indicator will be full when the battery level is high. When the
battery level gets too low, the indicator will be empty, indicating that the
battery needs to be charged immediately.
Battery interface
6. User Settings
In the power-on state, press and hold the [UP] and [DOWN] keys
simultaneously for 2 seconds to enter your settings. While in the settings
menu, use the [UP] and [DOWN] keys to switch the selected setting.

12
Setting list interface
6.1 Trip Clearing
Short press the [MODE] key to enter the Trip Clearing settings. This
setting has two options. The default NO means that the total mileage will
not be reset after each ride, whereas YES means that the mileage will be
reset after each ride. You can use the [UP] and [DOWN] keys to switch
between NO and YES. Long press the [MODE] key to save your changes
and exit to the menu.

13
Single-trip mileage reset interface
6.2 Backlight
Short press the [MODE] key to enter the Backlight settings. You can
choose from three backlight brightness levels; 1 is the darkest, 2 is
standard, and 3 is the brightest. The default setting is level 3. Long press
the [MODE] key to save your changes and return to the settings menu.
Backlight setting interface
6.3 Unit Settings
Short press the [MODE] key to enter the Unit settings. This setting has

14
two options: km and miles. The default km represents metric units, while
miles represents imperial units. Use the [UP] and [DOWN] keys to select
km or miles. Long press the [MODE] key to save your changes and return
to the settings menu.
Unit settings interface
6.4 Automatic Shut-Off Time
Short press the [MODE] key to enter the Automatic Shut-Off Time
settings. The automatic shut-off time is 10 minutes by default but can be
adjusted to be anywhere from 5 to 60 minutes. Press [UP] or [DOWN] to
change the automatic shut-off time, then long press the [MODE] key to
save your changes and return to the settings menu.

15
Auto off time interface
6.5 Wheel Size
Short press the [MODE] key to enter the Wheel Size settings. The
available wheel size values are 16, 18, 20, 22, 24, 26, 700C, 28, and 29.5.
Select the correct wheel size using the [UP] and [DOWN] keys to ensure
the accuracy of the speed and mileage data. Long press the [MODE] key
to save your changes and return to the settings menu.
The password for the Wheel Size settings is 0512.
Wheel size setting interface

16
6.6 Speed Limit
Short press the [MODE] key to enter the Speed Limit settings. The
options for maximum speed range between 7.5 and 25 mph (12 and 40
km/h). Press [UP] or [DOWN] to increase or decrease your maximum
speed. Long press the [MODE] key to save your changes and return to
the settings menu.
The password to set the speed limit is 0512.
Warning: Raising the speed limit of your e-bike may violate your local
laws. Vanpowers Bike is not responsible for any issues caused by your
decision to change the speed limit.
Speed limit interface
6.7 Enable/Disable Password
Short press the [MODE] key to enter the password toggling menu. Use
the [UP] and [DOWN] keys to toggle between YES and NO, which enables
and disables the e-bike’s password requirement for activation,

17
respectively. Long press the [MODE] key to save your changes and return
to the settings menu.
Password enable/disable setting interface
6.8 Modify Password
Short press the [MODE] key to enter the password modification menu.
The password has a total of four digits. Each digit can be selected by
using the [UP] and [DOWN] keys to choose a number to confirm and
move on to the next digit. Once you have entered your new password,
press and hold the [MODE] key to save your changes and return to the
settings menu.

18
Password modification interface
6.9 PAS Range
Short press the [MODE] key to enter the PAS Range settings. Eight pedal
assist level ranges are available to choose from: 0–3, 1–3, 0–5, 1–5, 0–7,
1–7, 0–9, and 1–9. Use the [UP] and [DOWN] keys to choose your PAS
range, then long press the [MODE] key to confirm your changes and
return to the settings menu.
PAS range setting interface
6.10 Enable/Disable PAS Button

19
Short press the [MODE] key to enter the pedal assist toggling menu. Use
the [UP] and [DOWN] keys to switch between YES and NO to enable or
disable the pedal assist button, respectively. The default setting is YES.
Short press the [MODE] button to confirm your choice and enter the PAS
speed settings. After finishing, press and hold the [MODE] key to save
your changes and return to the settings menu.
PAS enable/disable setting interface
6.11 Start-Up Speed
The start-up speed ranges between 1 and 4, with 4 being the slowest
and 1 being the fastest. Use the [UP] and [DOWN] keys to switch
between speed levels. Long press the [MODE] key to save your changes
and return to the settings menu.

20
Start-up speed interface
6.12 System Reset
Use the [UP] and [DOWN] keys to switch between YES and NO. NO
means the system does not need to reset, and YES means that the
system should be reset to the default parameters. Long press the [MODE]
key to return to the settings menu after reset.
System reset interface
6.13 Exit Settings
While in the settings menu, long press the [MODE] key to save and exit.
If no action is detected for one minute, the display will automatically exit
Table of contents
Other VANPOWERS Bicycle Accessories manuals