VANPOWERS SW-LCD User manual

Vanpowers Bike
Display
User Manual
For Manidae

USER GUIDE
SW-LCD

Content
1. Appearance and Specifications ..................................................................................4
1.1 Materials ........................................................................................................... 4
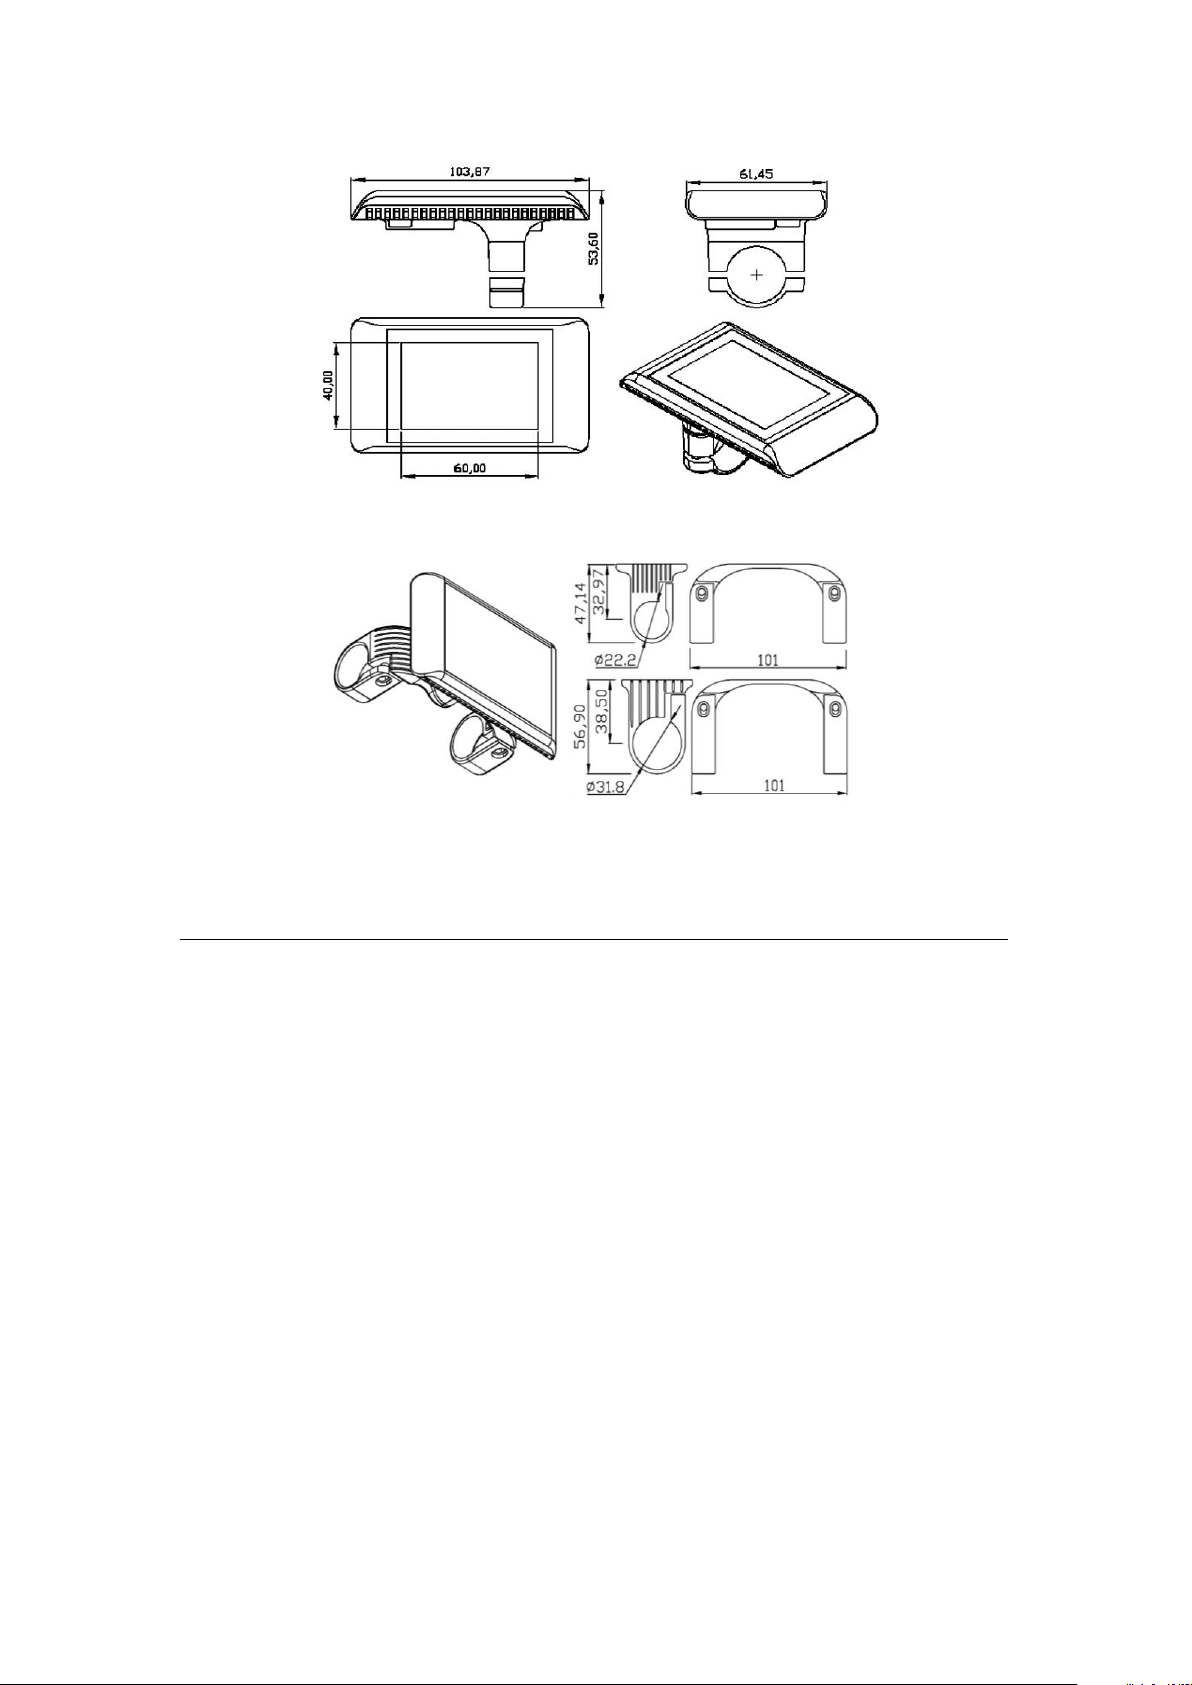
1.2 Display Measurements ..................................................................................... 4
2. Overview of Functions and Buttons ...........................................................................5
2.1 Preset and Default Items .................................................................................. 5
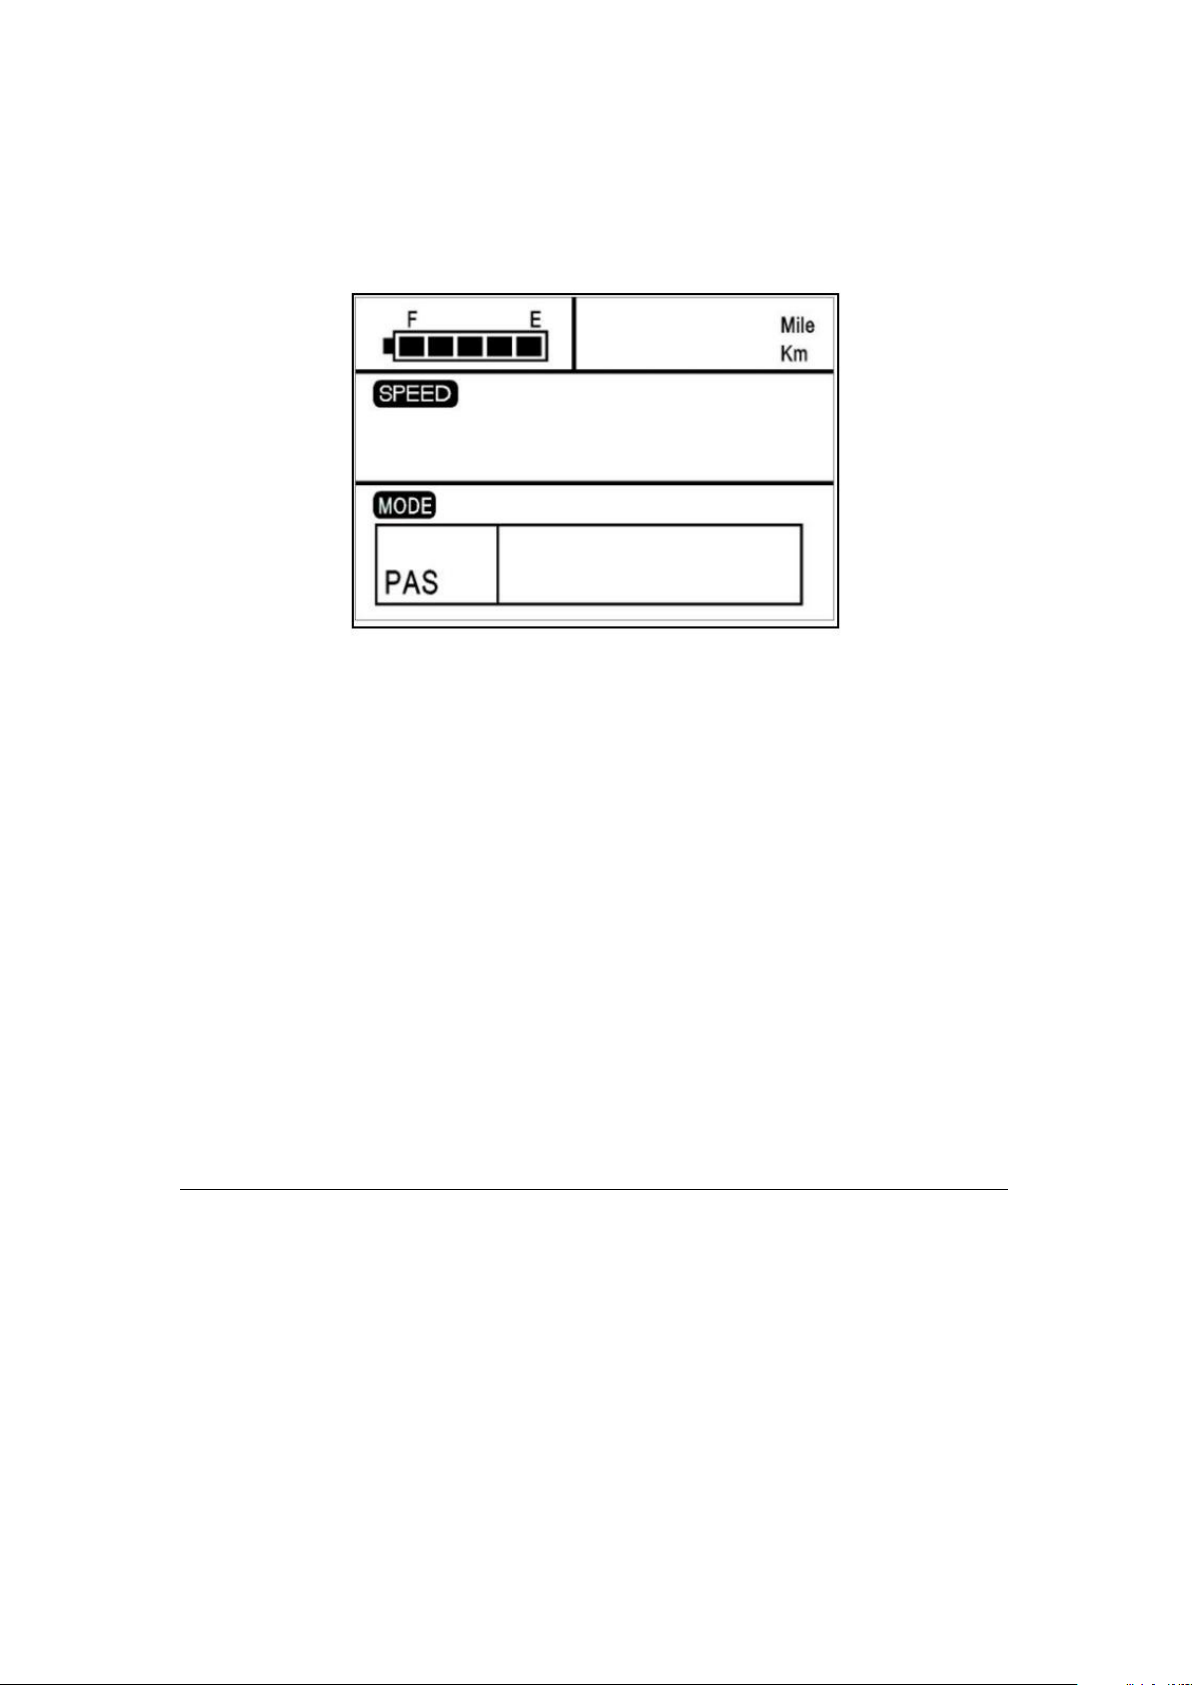
2.2 Display Example Image ..................................................................................... 5
2.3 Buttons ..............................................................................................................6
3. Installation Instructions ............................................................................................. 7
4. Setup .......................................................................................................................... 7
4.1 Pre-Startup ........................................................................................................7
4.2 Startup and Settings ..........................................................................................7
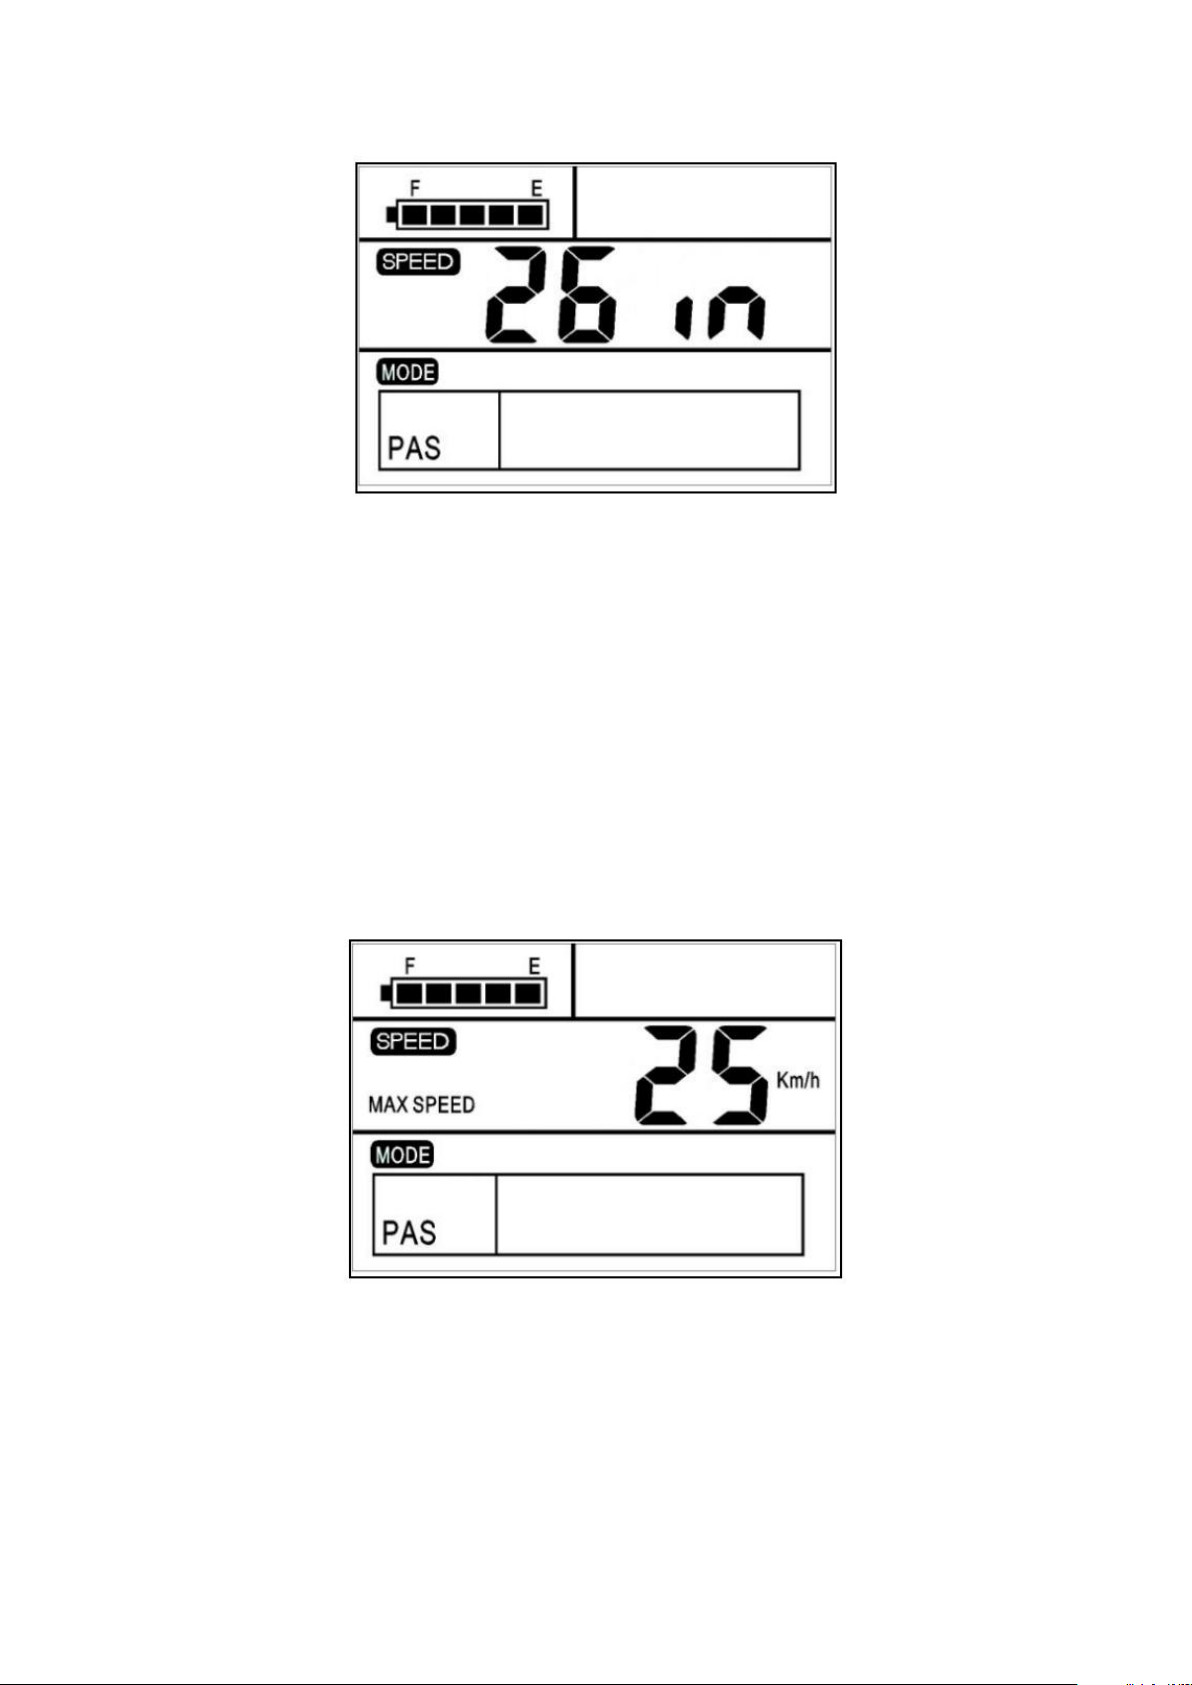
4.3 Wheel Diameter ................................................................................................7
4.4 Maximum Speed ............................................................................................... 8
4.5 Backlight Brightness ..........................................................................................9
4.6 Unit Settings ......................................................................................................9
4.7 Exit Settings .....................................................................................................10
5. Standard Operation ..................................................................................................10
5.1 Power On/Off ..................................................................................................10
5.2 Battery Capacity ..............................................................................................11
5.3 Speed .............................................................................................................. 11
5.4 Assist/Throttle Level ....................................................................................... 12
5.5 Odometer ........................................................................................................12
5.6 Cruise Control ................................................................................................. 13
5.7 Backlight On/Off ............................................................................................. 13
5.8 Power Usage ................................................................................................... 14
6. Warnings .......................................................................................错误!未定义书签。
7. Q&A ..........................................................................................................................15
8. Warranty Terms ........................................................................................................15
9. Circuit Diagram .........................................................................................................15
10. Software Version ....................................................................................................16

User Instructions
Dear User,
To ensure the best possible performance for your e-bike, please read
through the SW-LCD display manual carefully before use.
From hardware installation to settings to basic functions, this manual will
go over every aspect of the display in brief and concise language. It will
also help you troubleshoot potential problems to prevent you from
having to research confusing technological terms.
1. Appearance and Specifications
1.1 Materials
The SW-LCD display shell has a sleek black-and-white design and can be
used normally at temperatures ranging from –20 ℃to 60 ℃.
1.2 Display Measurements
Units are in millimeters (mm).

2. Overview of Functions and Buttons
2.1 Preset and Default Items
The available SW-LCD user settings include wheel diameter (18–28
inches), max speed, backlight level, display units, and more.
2.2 Display Example Image
The screen displays battery capacity, assist level, speed, distance
traveled, power usage, cruise control mode, and an error code if there is
an issue with the electronic control system.

2.3 Buttons
The SW-LCD is equipped with a button set that can be installed on either
side of the handlebar. Its specifications in millimeters are as follows:
The button set is connected to the bottom of the SW-LCD display via the
lead cable.

In the following instructions, is represented by
[MODE], is represented by [UP], and is represented
by [DOWN].
3. Installation Instructions
Affix the display and the button set to the handlebar and adjust the
angle for easy viewing while riding. With the e-bike turned off, connect
the display cable to the controller cable to finish installation.
4. Setup
4.1 Pre-Startup
Make sure the display cable and controller cable are properly connected.
4.2 Startup and Settings
Press the [MODE] button for 1.5 seconds to turn on the display. Hold
both the [UP] and [DOWN] keys for 2.5 seconds to enter the menu to
change your settings. The current setting being adjusted will blink.
4.3 Wheel Diameter
The first setting is wheel diameter. The interface looks like this:

Wheel diameter interface
Press [UP] or [DOWN] to choose the correct diameter (18–28 inches) for
your wheels. The default setting is 26 inches. Press [MODE] to save your
changes and progress to the maximum speed setting.
4.4 Maximum Speed
The second setting is maximum speed. The interface looks like this:
Maximum speed interface
This is where the maximum riding speed can be set. The bike will not
exceed the set maximum speed for the rider’s safety. The options for
maximum speed range from 7.5 to 25 mph (12 to 40 km/h). Press [UP] to

increase the maximum speed and [DOWN] to decrease it. The default
setting is 15.5 mph (25 km/h). Press [MODE] to save your changes and
progress to the backlight brightness setting.
Warning: Raising the speed limit of your e-bike may violate your local
laws. Vanpowers Bike is not responsible for any issues caused by your
decision to change the speed limit.
4.5 Backlight Brightness
The third setting is backlight brightness. The interface looks like this:
Backlight brightness interface
Press [UP] or [DOWN] to modify the backlight brightness. You can
choose from three brightness levels, with 1 being the lowest and 3 being
the highest. The default setting is level 1. Press the [MODE] key to
confirm the backlight brightness and progress to the unit settings.
4.6 Unit Settings

The fourth setting is speed and distance units. The interface looks like
this:
Unit settings interface
Press the [UP] or [DOWN] key to choose between imperial and metric
speed units. The distance units will change accordingly.
4.7 Exit Settings
While in the settings, long press the [MODE] key for 3 seconds to save
your changes and exit.
5. Standard Operation
5.1 Power On/Off
Long press the [MODE] key to start up the display and supply power to
controller. Long press the [MODE] key again to turn off the display and
the controller. In the power-off state, the display and controller will no
longer consume battery power.

5.2 Battery Capacity
When the battery is charged to full or nearly full capacity, all five
segments will be lit. When the battery is running low, the last segment
will flash at 1 Hz, indicating that the battery needs to be recharged
immediately.
5.3 Speed
When the e-bike is turned on, the display will automatically show the
current speed (SPEED).
Hold [UP] to show the maximum speed (MAX SPEED) reached during the
current ride. Hold [UP] again to show the average speed (AVG SPEED)
reached so far on the current ride. Hold [UP] again to return to the
current speed.

Speed display interface
5.4 Assist/Throttle Level
Press [UP] or [DOWN] to change the output power of the motor. The
power ranges from level 1 to level 5, with 1 being the minimum and 5
being the maximum. The default level is 1.
Assist level interface
5.5 Odometer
Press the [MODE] key to switch between current trip distance (TRIP) and
total distance (ODO).

Distance interface
5.6 Cruise Control
Long press the [DOWN] key for 3 seconds to enter a power-assisted walk
mode. The bike will travel at a fixed speed of 3.7 mph (6 km/h).
Power-assisted walk interface
Warning: Cruise control mode is only recommended while pushing the
bike. Please do not use it while riding.
5.7 Backlight On/Off
Hold both [UP] and [MODE] for 3 seconds and turn on the display’s
backlight. Hold both [UP] and [MODE] for 3 seconds again to turn it off.

When the backlight is turned on, the headlight will be also turned on if
the bike has one.
Backlight interface
5.8 Power Usage
This displays the e-bike’s real-time power consumption.
Power usage interface
6. Warnings
Practice safe riding and avoid collision with the display as much as
possible.
Avoid exposing the display to harsh environments such as heavy rain,
snow, and direct sunlight.

Avoid riding with a low battery to prevent damage to it.
The screen will get dark when temperatures fall below –10 ℃and
will brighten again as the temperature rises.
7. Q&A
Q:Why can I not turn on the display?
A:Please check whether the lead cable is properly connected to the
controller cable.
Q:What do I do when an error code appears on the display?
A:Contact a mechanic for repairs.
8. Warranty Terms
We are not responsible for any scratches or damage sustained by the
display shell after the product leaves the factory.
Scratched or broken lead wires are not covered by our warranty.
The warranty period for the display is 24 months from the day the
product leaves the factory.
9. Circuit Diagram

Due to the use of waterproof cable connectors, users will not be able to
see the colors of internal wires.
10. Software Version
This instruction manual was written for a general-purpose version of the
display software (V2.0). The software version used in some displays may
be slightly different from that described in this manual, and in these
cases, the actual version shall take precedent over the manual’s.
Table of contents
Other VANPOWERS Bicycle Accessories manuals