Vecnum NIVO 212 User manual

Betriebsanleitung (S.29)
User manual (p.2)
EN
DE

Thanks for buying the NIVO dropper post.
You have purchased a product, which is designed, manufactured, assembled
and tested in Germany.
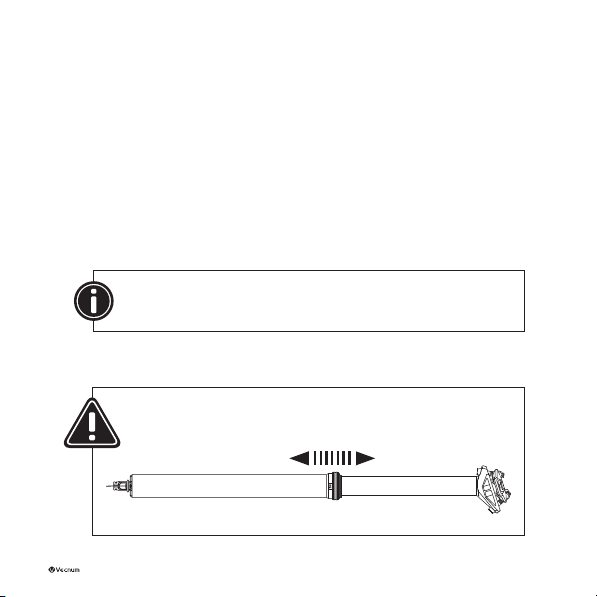
A dropper post is a highly stressed moving part on a mountain bike, which is
directly exposed to dirt. These facts make a periodic maintenance of the post
necessary. During the design process, we put a big priority towards minimum
maintenance, maximum durability and easy servicing. As a result, you can do all
servicing with a standard mini tool.
Please read the manual carefully before installing your NIVO dropper post at
your bike.
Additional information you can nd on our website
http://vecnum.com/en/products/nivo/servicefaq/
There will always be the latest version of the manual online.
For aquick andeasy installationyou willalso nda videotutorial on this website.
Intended use:
The NIVO dropper post is designed for mountain bikes and their purposes.
The installation on a road bike is also permitted
The NIVO dropper post can handle a max. rider weight of 120 kg.
Installation dimensions:
You can easily nd the suitable length for your NIVO dropper post by our online
CONFIGURATOR: http://vecnum.com/en/products/nivo/congurator
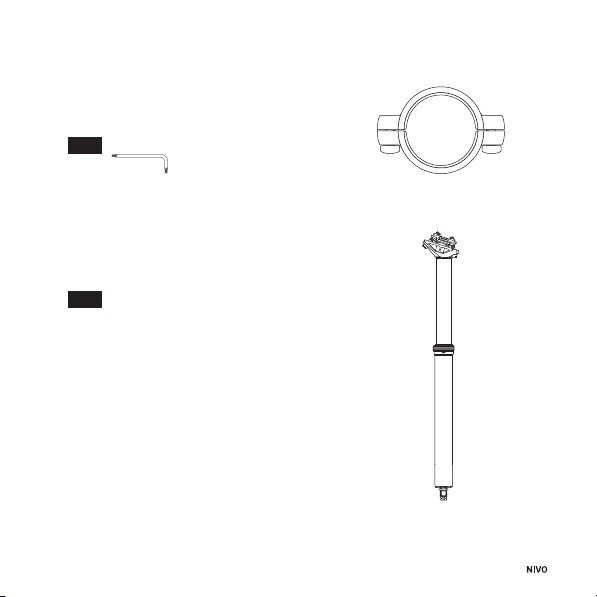
The NIVO dropperpost is only manufactured exclusively withdiameter 30,9 mm.
To adapt the post to several seat tube diameters, we offer different shims in our
online shop. This standard diameter saves weight and ensures a maximum of
flexibility using other seat tube diameters in the future.
EN

CONTENT
1- Installation preparation .........................................................................
2- Change color grip rings.........................................................................
3- Install cable housing .............................................................................
4- Bowden cable installation / replacement and adjustment .................
5- Feature options (a) TRAVEL FIT (b) INDEXED......................................
6- Saddle installation.................................................................................
7- Easy maintenance and care..................................................................
8- Trouble-shooting and maintenance.....................................................
9- Guarantee and Warranty .......................................................................
universal pliers
5mm
Torx T25

4
Extend dropper post completely for all installation and maintenance.
Operation instructions:
Please make sure, that you are fully familiar with the function of the NIVO dropper
post before your rst ride. Due to an operating error you can loose control of your
bike, which could lead to a serious accident.
After a short period of getting familiar, you will shift your NIVO dropper post
intuitively to the individual height positions. Please exercise the handling on
an easy trail.
NIVO INDEXED: 4 different height
positions, enabling a fast and
repeatable height adjustment.
NIVO TRAVEL FIT: innte height
adjustment and the possibility to set an
individual max. position.
Don‘t lower your dropper post completely when using
a cable lift because the T-bar can damage the shaft sealing unit.
(INDEXED: max.position 3, TRAVEL FIT: 40mm )
Installation:

5
We can only guarantee proper function of the NIVO
dropper post if a tooLOC is used for clamping.
Comparison between a conventional seat clamp and tooLOC seat clamp
conventional seat clamp
uneven force distribution into
the seat tube. This can lead to
function restrictions for dropper
posts.
more even force distribution into the seat
tube for a perfect dropper post function
Forces / working load
Clamping Forces

6
1 - Installation preparation
Measure most
recent maximum
Remove old seatpost
1.1
1.2
Make sure to measure the distance
between the end of the seat tube
and the center of the rail clamp

7
Install tooLOC clamp
Extend NIVO
1.3
1.3
Torx T25

8
2 - Change colored grip rings
Remove the recent grip rings
A- Seatpost not installed
Remove and put on the grip
rings via the lower end of
the seatpost.
Continue with point 2.4
B- Seatpost already installed
Remove upper and lower
rocker of the rail clamp.
2.1
2.2

9
Remove and put on the grip rings
via the head of the seatpost.
Fit the new o-rings into
the groove
2.3
2.4

10
Install remote
Push cable housing through the frame.
Make sure the housing extends out of the seattube.
3.1
3.2
3 - Install cable housing

11
Install end cap
3.3
Install cable in seatpost.
Make sure the cable head is
xed by the o-ring.
3.4

12
For inserting the post, always push the
seatpost. Do not pull the cable to
insert the post.
Install the cable into the housing
and plug end cap in the slot.
3.5
Insert seatpost into the frame and
set it to your desired seat height.
3.6
Make sure the seatpost does not collide
with any kink or rocker mounts of the frame.

13
Tighten seat clamp
Torx T25
3.7
Determine housing length. Make sure to
leave enough length for steering clearance.
3.8
Dene and mark the cut
3.9

14
Loosen seat clamp
Torx T25
3.10
Pull seatpost out of the frame
until the housing extends
out of the seattube.
3.11
Unhook cable and cable housing
from the seatpost
3.12

15
Remove cable from the housing
3.13
Cut housing at the mark
3.14
Install end cap
3.15

16
Put thin oil on the cable to make it run smoother.
Insert cable into housing
4.1
Install cable in seatpost and plug
end cap in the slot. Make sure the
cable head is xed by the o-ring.
4.2
4 - Bowden cable installation / replacement and adjustment

17
Insert seatpost into the frame and
set it to your desired seat height.
4.3
Tighten seat clamp
Torx T25
4.4
Install cable and cable housing into
your remote. Make sure the cable
has no play.
4.5
For inserting the post, always push the
seatpost. Do not pull the cable to
insert the post.
Make sure the seatpost does not collide
with any kink or rocker mounts of the frame.
Before cutting the cable, check the function.
1. NIVO does not lock properly = Reduce cable tension
2. Remote has free travel = Increase cable tension

18
Dene and set desired maximum seat height
Mark position with tape at the seal.
5.1
5 - Feature options - (a) - TRAVEL FIT
Maximum position
max. 212mm travel
Desired maximum position
19.5mm
22.5mm
NIVO |212|
212mm - 180mm travel
NIVO |182|
182mm - 150mm travel
NIVO |152 |
152mm - 120mm travel
NIVO |122 |
122mm - 90mm travel

19
Extend seatpost completely
5.2
Remove lower rocker of the rail clamp
and turn upper rocker to front
5.4
5.3 Loosen rear bolt
5mm
Remove red rubber cap
5.5
To set the right position make sure
the seatpost is fully extended.
Make sure to clean the head of the
NIVO thoroughly.
Dust and dirt getting inside of the seat post
can cause damage to the mechanics.
Unlock TRAVEL FIT feature
5.6
5mm
Turn the allen key only for one „klick“.
No strength needed to unlock or
lock TRAVEL FIT

20
Reinstall the rubber cap and the rail clamp
Push the the remote lever and t
the travel by pushing the seatpost
down to the tape marker
5.7
5.10
Lock TRAVEL FIT feature
5.9
5mm
Release remote.
5.8
After releasing the remote, move
seatpost a little bit up an down to
make sure the position is locked.
Make sure to reinstall the rubber cap.
Head of the seatpost must be closed.
This manual suits for next models
3
Table of contents
Languages:
Other Vecnum Bicycle Accessories manuals