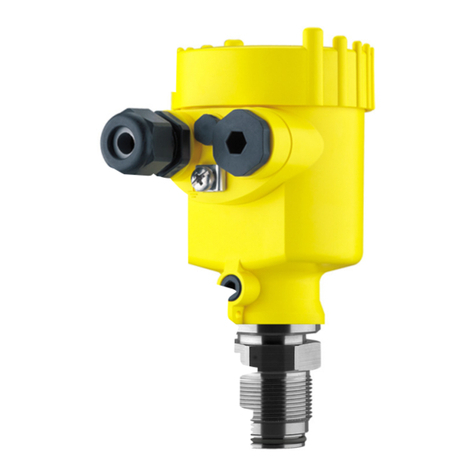
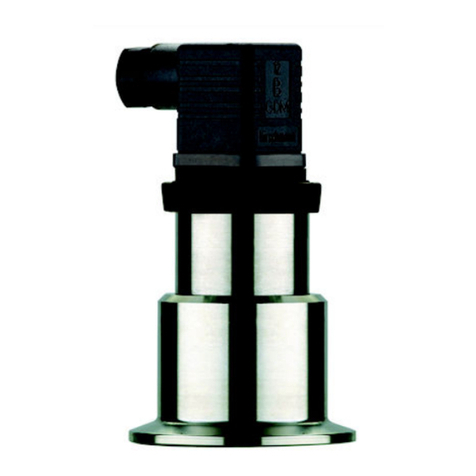
Vega VEGABAR 17 User manual

Operating Instructions
Process pressure transmitter with
metallic measuring cell
VEGABAR 17
Document ID: 27636

2
Contents
VEGABAR 17 •
27636-EN-150224
Contents
1 About this document
1.1 Function ........................................................................................................................... 4
1.2 Target group ..................................................................................................................... 4
1.3 Symbols used................................................................................................................... 4
2 For your safety
2.1 Authorised personnel ....................................................................................................... 5
2.2 Appropriate use................................................................................................................ 5
2.3 Warning about incorrect use............................................................................................. 5
2.4 General safety instructions............................................................................................... 5
2.5 Safety label on the instrument .......................................................................................... 6
2.6 CE conformity................................................................................................................... 6
2.7 Environmental instructions ............................................................................................... 6
3 Product description
3.1 Conguration.................................................................................................................... 7
3.2 Principle of operation........................................................................................................ 7
3.3 Operation ......................................................................................................................... 8
3.4 Packaging, transport and storage..................................................................................... 8
4 Mounting
4.1 General instructions ......................................................................................................... 9
4.2 Mounting instructions ....................................................................................................... 9
4.3 Installation procedure....................................................................................................... 9
5 Connecting to power supply
5.1 Preparing the connection ............................................................................................... 11
5.2 Connection procedure.................................................................................................... 12
5.3 Wiring plan ..................................................................................................................... 15
6 Setup
6.1 Setup steps .................................................................................................................... 17
6.2 Recalibration .................................................................................................................. 17
7 Maintenanceandfaultrectication
7.1 Maintenance .................................................................................................................. 20
7.2 Rectify faults................................................................................................................... 20
7.3 How to proceed if a repair is needed.............................................................................. 20
8 Dismount
8.1 Dismounting steps.......................................................................................................... 22
8.2 Disposal ......................................................................................................................... 22
9 Supplement
9.1 Technical data ................................................................................................................ 23
9.2 Dimensions .................................................................................................................... 29
3
Contents
VEGABAR 17 •
27636-EN-150224
Safety instructions for Ex areas
TakenoteoftheExspecicsafetyinstructionsforExapplications.
These instructions are attached as documents to each instrument
with Ex approval and are part of the operating instructions manual.
Editing status: 2015-02-10

4
1 About this document
VEGABAR 17 •
27636-EN-150224
1 About this document
1.1 Function
This operating instructions manual provides all the information you
need for mounting, connection and setup as well as important instruc-
tionsformaintenanceandfaultrectication.Pleasereadthisinforma-
tion before putting the instrument into operation and keep this manual
accessible in the immediate vicinity of the device.
1.2 Target group
This operating instructions manual is directed to trained specialist
personnel.The contents of this manual should be made available to
these personnel and put into practice by them.
1.3 Symbols used
Information, tip, note
This symbol indicates helpful additional information.
Caution: If this warning is ignored, faults or malfunctions can result.
Warning: If this warning is ignored, injury to persons and/or serious
damage to the instrument can result.
Danger: If this warning is ignored, serious injury to persons and/or
destruction of the instrument can result.
Ex applications
This symbol indicates special instructions for Ex applications.
SIL applications
This symbol indicates instructions for functional safety which must be
taken into account particularly for safety-relevant applications.
• List
The dot set in front indicates a list with no implied sequence.
→ Action
This arrow indicates a single action.
1 Sequence of actions
Numbers set in front indicate successive steps in a procedure.
Battery disposal
This symbol indicates special information about the disposal of bat-
teries and accumulators.

5
2 For your safety
VEGABAR 17 •
27636-EN-150224
2 For your safety
2.1 Authorised personnel
All operations described in this operating instructions manual must
be carried out only by trained specialist personnel authorised by the
plant operator.
During work on and with the device the required personal protective
equipment must always be worn.
2.2 Appropriate use
VEGABAR 17 is a pressure transmitter for measurement of gauge
pressure, absolute pressure and vacuum.
Youcannddetailedinformationabouttheareaofapplicationin
chapter "Product description".
Operational reliability is ensured only if the instrument is properly
usedaccordingtothespecicationsintheoperatinginstructions
manual as well as possible supplementary instructions.
For safety and warranty reasons, any invasive work on the device
beyond that described in the operating instructions manual may be
carried out only by personnel authorised by the manufacturer. Arbi-
traryconversionsormodicationsareexplicitlyforbidden.
2.3 Warning about incorrect use
Inappropriate or incorrect use of the instrument can give rise to
application-specichazards,e.g.vesseloverllordamagetosystem
components through incorrect mounting or adjustment.
2.4 General safety instructions
This is a state-of-the-art instrument complying with all prevailing
regulations and guidelines. The instrument must only be operated in a
technicallyawlessandreliablecondition.Theoperatorisresponsible
for the trouble-free operation of the instrument.
During the entire duration of use, the user is obliged to determine the
compliance of the necessary occupational safety measures with the
current valid rules and regulations and also take note of new regula-
tions.
The safety instructions in this operating instructions manual, the na-
tional installation standards as well as the valid safety regulations and
accident prevention rules must be observed by the user.
For safety and warranty reasons, any invasive work on the device
beyond that described in the operating instructions manual may be
carried out only by personnel authorised by the manufacturer. Arbi-
traryconversionsormodicationsareexplicitlyforbidden.
The safety approval markings and safety tips on the device must also
be observed.

6
2 For your safety
VEGABAR 17 •
27636-EN-150224
2.5 Safety label on the instrument
The safety approval markings and safety tips on the device must be
observed.
2.6 CE conformity
ThedevicefulllsthelegalrequirementsoftheapplicableECguide-
lines.ByaxingtheCEmarking,weconrmsuccessfultestingofthe
product.
YoucanndtheCECerticateofConformityinthedownloadsection
of our homepage.
2.7 Environmental instructions
Protection of the environment is one of our most important duties.
That is why we have introduced an environment management system
with the goal of continuously improving company environmental pro-
tection.Theenvironmentmanagementsystemiscertiedaccording
to DIN EN ISO 14001.
Pleasehelpusfulllthisobligationbyobservingtheenvironmental
instructions in this manual:
• Chapter "Packaging, transport and storage"
• Chapter "Disposal"

7
3 Product description
VEGABAR 17 •
27636-EN-150224
3 Product description
3.1 Conguration
The scope of delivery encompasses:
• VEGABAR 17 process pressure transmitter
• Depending on the version, with plug connector, connection cable
or terminal housing
• Documentation
– this operating instructions manual
– Ex-specic"Safety instructions" (with Ex versions)
– ifnecessary,furthercerticates
4
3
2
1
Fig. 1: VEGABAR 17 with plug connector according to ISO 4400
1 Processtting
2 Housing with electronics
3 Pressure compensation (beneath the knurled nut)
4 Plug connector
Thetypelabelcontainsthemostimportantdataforidenticationand
use of the instrument:
• Article number
• Serial number
• Technical data
• Article numbers, documentation
With the serial number, you can access the delivery data of the instru-
ment via www.vega.com, "VEGA Tools" and "serial number search".
Youcanndtheserialnumberontheinsideoftheinstrumentaswell
as on the type label on the outside.
3.2 Principle of operation
VEGABAR 17 is a pressure transmitter for measurement of gauge
pressure, absolute pressure or vacuum. Measured products are
gases,vapoursandliquids.Thefrontushversionsarealsosuitable
for use in viscous or contaminated products.
Scope of delivery
Conguration
T
ype label
Application area

8
3 Product description
VEGABAR 17 •
27636-EN-150224
The process pressure acts on the sensor element via the stainless
steel diaphragm.The process pressure causes a resistance change
which is converted into a corresponding output signal and outputted
as measured value.1)
4 … 20 mA two-wire electronics for voltage supply and measured
value transmission on the same cable.
3.3 Operation
The VEGABAR 17 has no adjustment options.
However,therearetwobuilt-inpotentiometersforrecalibrationofzero
and span.
3.4 Packaging, transport and storage
Your instrument was protected by packaging during transport. Its
capacity to handle normal loads during transport is assured by a test
based on ISO 4180.
The packaging of standard instruments consists of environment-
friendly, recyclable cardboard. For special versions, PE foam or PE
foil is also used. Dispose of the packaging material via specialised
recycling companies.
Transport must be carried out in due consideration of the notes on the
transport packaging. Nonobservance of these instructions can cause
damage to the device.
The delivery must be checked for completeness and possible transit
damage immediately at receipt. Ascertained transit damage or con-
cealed defects must be appropriately dealt with.
Up to the time of installation, the packages must be left closed and
stored according to the orientation and storage markings on the
outside.
Unless otherwise indicated, the packages must be stored only under
the following conditions:
• Not in the open
• Dry and dust free
• Not exposed to corrosive media
• Protected against solar radiation
• Avoiding mechanical shock and vibration
• Storage and transport temperature see chapter "Supplement -
Technical data - Ambient conditions"
• Relative humidity 20 … 85 %
Functional principle
Voltage supply
Packaging
Transport
Transport inspection
Storage
Storage and transport
temperature
1) Measuringrangesupto16bar:piezoresistivesensorelementwithinternal
transmission liquid. Measuring ranges up to 25 bar: strain gauge (DMS) sen-
sor element on the rear of the stainless steel diaphragm (dry).

9
4 Mounting
VEGABAR 17 •
27636-EN-150224
4 Mounting
4.1 General instructions
Make sure that all parts of the instrument coming in direct contact
with the process, especially the sensor element, process seal and
processtting,aresuitablefortheexistingprocessconditions,such
as process pressure, process temperature as well as the chemical
properties of the medium.
Youcanndthespecicationsinchapter"Technical data" and on the
nameplate.
Toprotectthediaphragm,theprocessttingiscoveredbyaprotec-
tive cap.
Remove the protective cap just before installation so that the dia-
phragm will not get damaged. It is recommended to keep the cap and
use it again later for storage or transport.
4.2 Mounting instructions
Pleasecheckthediaphragmvisuallyfordamageandleakinguid
before mounting and setting up the instrument. Make sure that the
diaphragm doesn't get damaged during installation.
Caution:
Theinstrumentmayonlybeusedifitisinatechnicallyawlesscondi-
tion and has an undamaged diaphragm.
VEGABAR 17 functions in any installation position. It is mounted ac-
cording to the same directives as a manometer (DIN EN 839-2).
Information:
Werecommendusinglockttings,measuringinstrumentholdersand
siphons from our line of accessories.
4.3 Installation procedure
FormountingVEGABAR17,aweldedsocketisrequired.Youcannd
these components in the supplementary instructions manual "Welded
socket and seals".
Usethesealttingtotheinstrument,orincaseofNPTconnections,a
high-resistance sealing material.
Screw VEGABAR 17 into the welded socket with a wrench applied to
thehexagonoftheprocesstting.Forthepropertorqueseechapter
"Technical data",forspannersizeseechapter"Dimensions".
Suitability for the process
conditions
Diaphragm protection
Checking the diaphragm
Installation position
Welding the socket
Sealing/Screwing in

10
4 Mounting
VEGABAR 17 •
27636-EN-150224
Fig. 2: Mounting of VEGABAR 17

11
5 Connecting to power supply
VEGABAR 17 •
27636-EN-150224
5 Connecting to power supply
5.1 Preparing the connection
Always keep in mind the following safety instructions:
• Connect only in the complete absence of line voltage
• If overvoltage surges are expected, overvoltage arresters should
be installed.
Tip:
We recommend VEGA overvoltage arrester ÜSB 62-36G.X.
Inhazardousareasyoumusttakenoteoftherespectiveregulations,
conformityandtypeapprovalcerticatesofthesensorsandpower
supply units.
The supply voltage and the current signal are carried on the same
two-wire connection cable.
Provide a reliable separation between the supply circuit and the
mains circuits according to DIN EN 61140 VDE 0140-1.
VEGA power supply units VEGATRENN 149AEx, VEGASTAB 690,
VEGADIS 371 as well as all VEGAMETs meet this requirement.When
using one of these instruments, protection class III is ensured for
VEGABAR 17.
Keepinmindthefollowingadditionalfactorsthatinuencetheoperat-
ing voltage:
• Output voltage of the power supply unit can be lower under nomi-
nal load (with a sensor current of 20.5 mA or 22 mA in case of fault
message)
• Inuenceofadditionalinstrumentsinthecircuit(seeloadvaluesin
chapter "Technical data")
The instrument is connected with standard two-wire cable without
screen. If electromagnetic interference is expected which is above the
test values of EN 61326 for industrial areas, screened cable should
be used.
Use cable with round cross-section. A suitable cable outer diameter
of (see chapter "Technical data")ensuresthesealeectofthecable
gland.Ifyouareusingcablewithadierentdiameterorcross-sec-
tion, exchange the seal or use a suitable cable gland.
For the version with round plug connector M12 x 1, a suitable, ready-
made connection cable (article no. ASL.1S.) in 5 m, 10 m or 25 m
lengths is available from the line of VEGA accessories.
If screened cable is required, connect the cable screen on both ends
to ground potential.
In Ex systems, the grounding is carried out according to the installa-
tion regulations.
In electroplating and CCP systems (cathodic corrosion protection) it
mustbetakenintoaccountthatsignicantpotentialdierencesexist.
Note safety instructions
Take note of safety
instructions for Ex
applications
Select power supply
Select connection cable
Cable screening and
grounding

12
5 Connecting to power supply
VEGABAR 17 •
27636-EN-150224
This can lead to unacceptably high currents in the cable screen if it is
grounded at both ends.
Information:
Themetallicpartsoftheinstrument(processtting,housing,etc.)are
conductively connected to the ground terminal.
Take note of the corresponding installation regulations for Ex applica-
tions.
5.2 Connection procedure
Proceed as follows:
1. Loosen the screw on the rear of the plug connector
2. Remove the plug connector and seal from VEGABAR 17
3. Remove the plug insert from the plug housing
1
2
3
Fig. 3: Loosen the plug insert
1 Cable gland
2 Plug insert
3 Plug housing
4. Remove approx. 5 cm of the cable mantle, strip approx. 1 cm
insulation from the individual wires
5. Lead the cable through the cable gland into the plug housing
6. Connect the wire ends to the screw terminals according to the
wiring plan
Select connection
cable for Ex applica-
tions
Connection via angle
plug connector

13
5 Connecting to power supply
VEGABAR 17 •
27636-EN-150224
2
3
1
4
Fig. 4: Connection to the screw terminals
1 Cable gland
2 Plug housing
3 Plug insert
4 Plug seal
7. Snap the plug insert into the plug housing and insert the sensor
seal
8. Plug the plug insert with seal to VEGABAR 17 and tighten the
screw
Theelectricalconnectionisnished.
Proceed as follows:
1. Loosen the screw in the cover of the plug connector
2. Open the cover and remove it
3. Press the plug insert downwards
4. Loosen the screws of the strain relief and cable entry
4
32
1
3
2
1
Fig. 5: Loosen the plug insert
1 Plug insert
2 Strain relief
3 Cable gland
4 Plug housing
5. Remove approx. 5 cm of the cable mantle, strip approx. 1 cm
insulation from the individual wires
6. Lead the cable through the cable gland into the plug housing
7. Connect the wire ends to the screw terminals according to the
wiring plan
Connection via angle
plug connector with
hinged cover

14
5 Connecting to power supply
VEGABAR 17 •
27636-EN-150224
1
5
2
3
4
Fig. 6: Connection to the screw terminals
1 Cable gland
2 Cover
3 Plug housing
4 Plug insert
5 Plug seal
8. Snap the plug insert into the plug housing and insert the sensor
seal
Information:
Note the correct arrangement, see illustration
9. Tighten the screws on the strain relief and cable entry
10. Hook in the cover and push onto the plug connection, tighten
cover screw
11. Plug the plug insert with seal to VEGABAR 17 and tighten the
screw
Theelectricalconnectionisnished.
Proceed as follows:
1. Screw on the housing cover
2. Loosen the cable gland with an open-end wrench SW 24
3. Remove approx. 5 cm of the cable mantle, strip approx. 1 cm
insulation from the individual wires
4. Lead the cable through the cable gland into the plug housing
5. Press down the plastic lever on the respective spring terminal
block with a screwdriver, so that the terminal contact opens
6. Insert the confectioned cable end into the opening
7. Release the plastic lever so that the cable end is clamped in the
terminal block
8. After connecting the individual cores, tighten the cable gland and
screw on the housing cover
Theelectricalconnectionisnished.
Connecting through
terminal housing

15
5 Connecting to power supply
VEGABAR 17 •
27636-EN-150224
5.3 Wiring plan
1
2
3
+
-
1
Fig. 7: Wiring plan, angle plug connector according to ISO 4400, top view to
VEGABAR 17
1 Voltage supply and signal output
3
+
-
1
3
2
4
1
Fig. 8: Wiring plan, round plug connector M12 x 1, top view to VEGABAR 17
1 Voltage supply and signal output
Connection via connection cable with 4-pole socket M12 x 1
(accessory)
Wire colour Socket
Brown 1
White 2
Blue 3
Black 4
1
2
3
Fig. 9: Wiring plan cable outlet
1 brown (+) power supply and signal output
2 green (-) power supply and signal output
3 blue = cable screen
Angled plug connector
according to ISO 4400
Round plug connector
M12 x 1
Cable outlet

16
5 Connecting to power supply
VEGABAR 17 •
27636-EN-150224
321
–
+
–
+
4 5
1
2
Fig. 10: Wiring plan, terminal housing
1 To power supply or processing system
2 Control instrument (4 … 20 mA measurement)
Terminal housing

17
6 Setup
VEGABAR 17 •
27636-EN-150224
6 Setup
6.1 Setup steps
After mounting and electrical connection, VEGABAR 17 is ready for
operation.
VEGABAR 17 delivers a current of 4 … 20 mA corresponding to the
actual process pressure.
Further settings are not necessary.
6.2 Recalibration
Withbothinstrumentswiththreadringorterminalhousing,zeroand
span can be adjusted via integrated potentiometers. Adjustment
range:
• Zero ± 5 %
• Span ± 5 %
This allows, for example, the consideration of an installation position
dierentfromthereferenceinstallationposition.
Ashiftingofzeroshiftsspanalsorespectively.
Note:
The potentiometer for span should only be used if you have adequate
calibration equipment (at least 3 times more precise than the devia-
tion of VEGABAR 17).
Recommended recalibration cycle: 1 year.
Proceed as follows:
1. Loosen the plug connector and screw the screwed ring in con-
nected status
2. Place the plug connector onto the instrument place and pull both
carefully out of the instrument
Instruments with plug
connector or cable outlet

18
6 Setup
VEGABAR 17 •
27636-EN-150224
1
2
3
4
5
6
Fig. 11: Open the instrument
1 Plug connector
2 Plug seal
3 Screwed ring
4 Instrument plug
5 Plug seal
6 Housing
3. Setzeroinunpressurizedstatus,check4mAsignalinthecircuit
4. Set span with exact reference pressure
5. Checkzero
21
Fig. 12: Adjustment of zero and span
1 Zero (Z)
2 Span (S)
6. Assemble the instrument and connect it.
Proceed as follows:
1. Screw on the housing cover in connected status
Instruments with terminal
housing

19
6 Setup
VEGABAR 17 •
27636-EN-150224
1
2
Fig. 13: Adjustment of zero and span
1 Zero (Z)
2 Span (S)
2. Setzeroinunpressurizedstatus,check4mAsignalinthecircuit
3. Setaspanwithasucientlyprecisereferencepressure
4. Checkzero
5. Screw the housing lid back on

20
7Maintenanceandfaultrectication
VEGABAR 17 •
27636-EN-150224
7 Maintenanceandfaultrectication
7.1 Maintenance
If the instrument is used properly, no special maintenance is required
in normal operation.
7.2 Rectify faults
The operator of the system is responsible for taking suitable meas-
ures to rectify faults.
VEGABAR17oersmaximumreliability.Nevertheless,faultscanoc-
cur during operation.These may be caused by the following, e.g.:
• Sensor
• Process
• Voltage supply
• Signal processing
Therstmeasuretotakeistochecktheoutputsignal.Inmanycases,
thecausescanbedeterminedthiswayandthefaultsquicklyrectied.
Should these measures not be successful, please call in urgent cases
the VEGA service hotline under the phone no. +49 1805 858550.
Thehotlineismanned7daysaweekround-the-clock.Sinceweoer
this service worldwide, the support is only available in the English
language.The service is free, only standard call charges are incurred.
Error code Cause Rectication
No 4 … 20 mA
signal
Connection to voltage
supply wrong
Check connection according to
chapter "Connection steps" and
if necessary, correct according to
chapter "Wiring plan"
No operating voltage Check cables for breaks; repair if
necessary
Operating voltage too
low or load resistance
too high
Check, adapt if necessary
Steady output
signal with pres-
sure change
Electronics module or
measuring cell defective
Exchange the instrument or send
it in for repair
In Ex applications, the regulations for the wiring of intrinsically safe
circuits must be observed.
Depending on the reason for the fault and the measures taken, the
steps described in chapter "Set up" may have to be carried out again.
7.3 How to proceed if a repair is needed
Youcanndarepairformaswellasdetailedinformationonhowto
proceed at www.vega.com/downloads and "Formsandcerticates".
Reaction when malfunc-
tions occur
Causes of malfunction
Faultrectication
24 hour service hotline
Check the 4 … 20 mA
signal
Reaction after fault recti-
cation
Other manuals for VEGABAR 17
3
Table of contents
Other Vega Transmitter manuals

Vega
Vega VEGABAR 86 User manual

Vega
Vega VEGABAR 64 User manual

Vega
Vega VEGABAR 81 User manual

Vega
Vega VEGADIF 85 User manual

Vega
Vega VEGABAR 87 User manual

Vega
Vega VEGADIF 85 User manual

Vega
Vega VEGABAR 54 User manual

Vega
Vega VEGAWELL 52 User manual

Vega
Vega VEGABAR 83 User manual

Vega
Vega VEGABAR 87 User manual

Vega
Vega VEGABAR 81 User manual

Vega
Vega VEGABAR 82 User manual

Vega
Vega VEGABAR 81 User manual

Vega
Vega VEGABAR 29 User manual

Vega
Vega VEGADIF 65 User manual

Vega
Vega VEGABAR 81 User manual

Vega
Vega VEGADIF 85 User manual

Vega
Vega VEGABAR 86 User manual

Vega
Vega VEGABAR 83 User manual

Vega
Vega VEGABAR 86 User manual