Using the Disposable Plastic Cover
The single-use disposable plastic covers (Product #VLED+DPC) for the Veinlite LED+
MUST be used when the device is placed in contact with a patient’s skin.
CAUTION: These plastic covers are not sterile. They should be wiped with a germicidal
wipe prior to use.
• Before using Veinlite LED+, place it inside the disposable cover with the ap
on the same side as the LEDs.
• Pull the ap over the device to the other side.
• Wipe the LED side of the Veinlite LED+ and any part of it coming in contact
with the patient, with a medically approved germicidal wipe.
Precautions
• Avoid using alcohol on the clear plastic window as this may cause fogging.
• Do not immerse the device in liquid.
• Do not autoclave the device.
Scan Direction
a
b
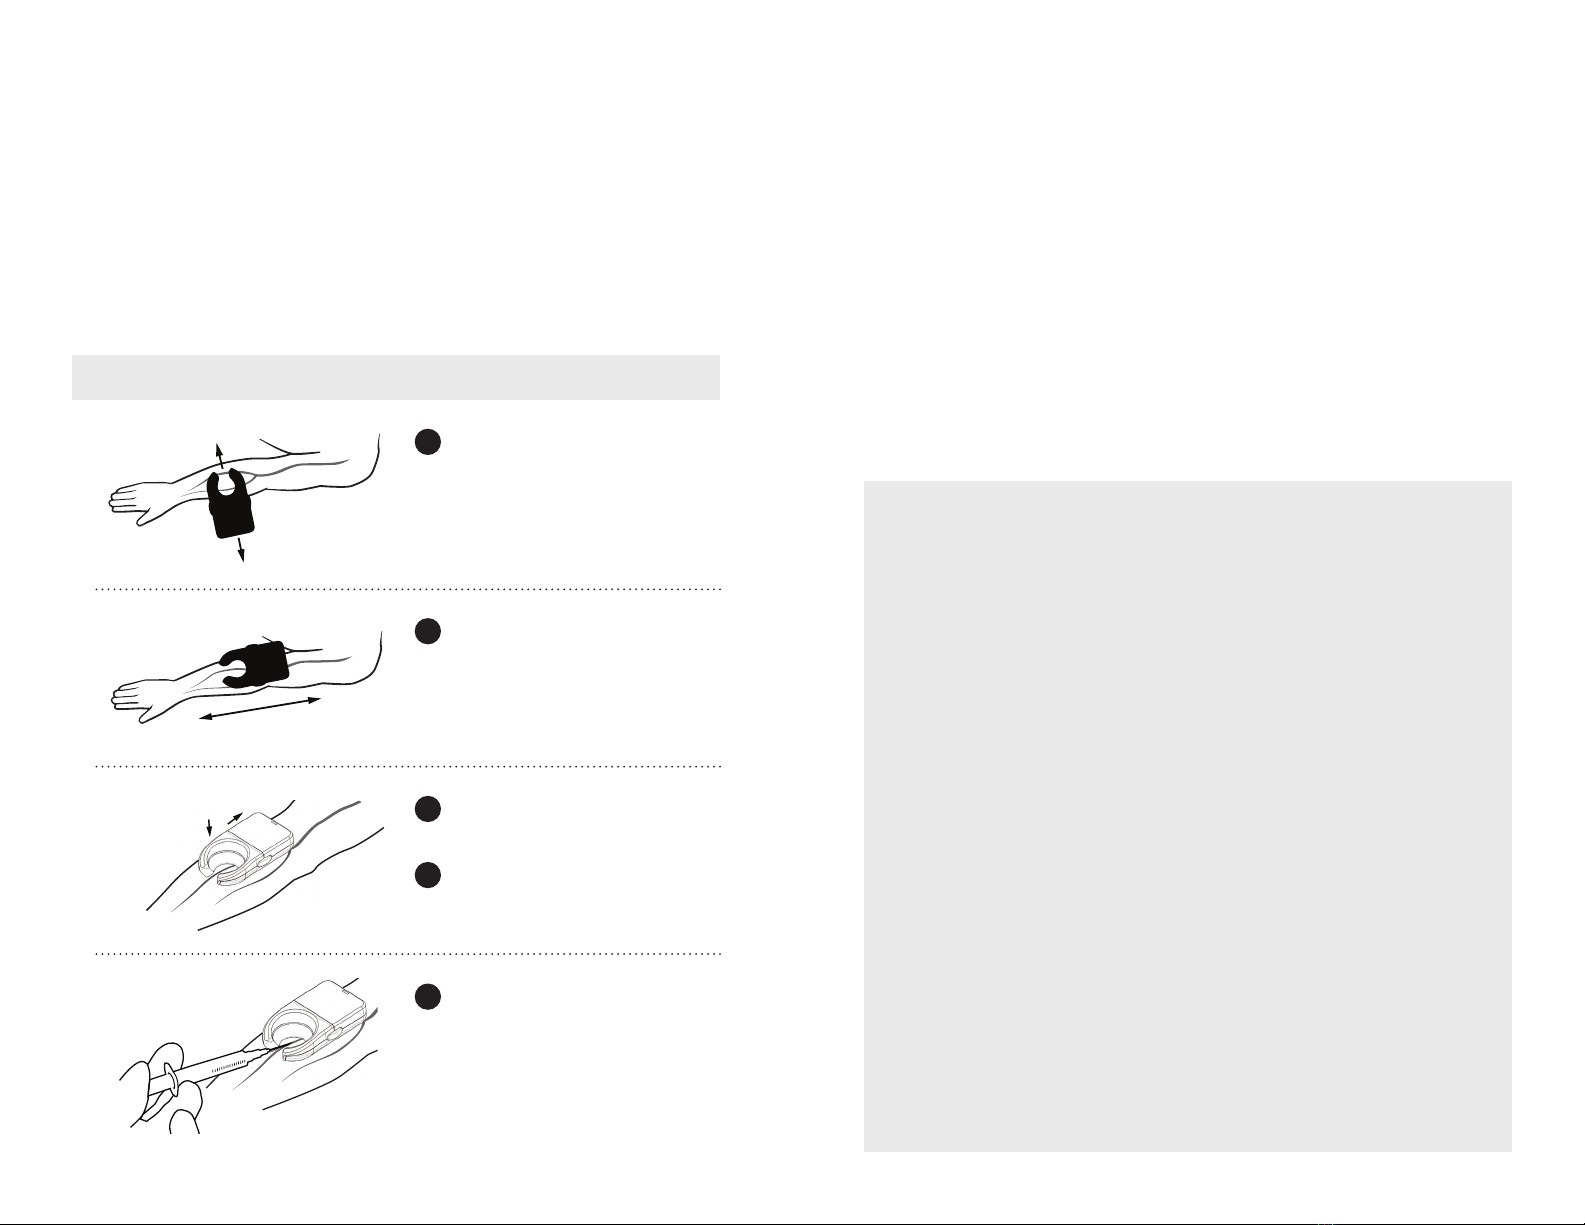
Access Vein
To scan for veins, place device
against skin perpendicular to vein
direction. Scan it forward and
backward. Veins will be visible as
dark lines due to transillumination.
Once a suitable vein has been
identied, rotate device 90˚,
parallel to vein.
Apply gentle pressure on the
Veinlite LED+ to secure the vein.
Push back slightly on the Veinlite
LED+ to stretch the skin and
provide traction.
Insert the needle into the vein,
through the opening of the device.
NOTE: Discard the single-use disposable
plastic cover after each patient.
1
2
4
3a
3b
Operation
• Place the Veinlite LED+ against the patient’s skin with the LED side in direct
contact with the skin perpendicular to vein direction. Apply gentle pressure to
maintain optimal skin contact.
• To turn on the LEDs, press the orange and/or the red button located on the left
and right side of the device. Press the selected button(s) a second time to turn
the LEDs o.
• Press the orange button if you are examining small supercial veins on fair skin.
• Press the red button to add the red color for examining deeper veins or if the
patient’s skin is darkly pigmented.
Battery Level Indicator Light
Veinlite LED+ incorporates a low battery level indicator light. The orange button
illuminates when the battery charge level has fallen to approximately 5% of the
full battery charge.
Recharging the Battery
The Veinlite LED+ is powered by a rechargeable lithium Ion battery, which is
designed to provide approximately 300 minutes of continuous usage.
• Connect the charger to the Veinlite LED+ by inserting it into the charging
socket located on the bottom of the device (see Figure 1.4).
• The orange button will blink indicating that the device is charging.
• Once the blinking stops your device is fully charged.
Replacing the Battery
The rechargeable lithium ion battery in the Veinlite LED+ is capable of
approximately 500 charging cycles or three years of use before
it requires replacement.
1. Slide o the battery cover.
2. Remove the battery by
unplugging the connector at
the top.
NOTE: Before using your Veinlite LED+, please read the detailed battery safety
information on our website FAQ page: https://www.veinlite.com/faq.
WARNING: DO NOT SHINE THE LED LIGHTS IN THE PATIENT’S EYES.
32
3. Replace the battery with a new
battery by plugging it into the
connector
4. Slide the battery cover back on.


