manuals.online logo
Brands
  1. Home
  2. •
  3. Brands
  4. •
  5. Venjakob
  6. •
  7. Indoor Furnishing
  8. •
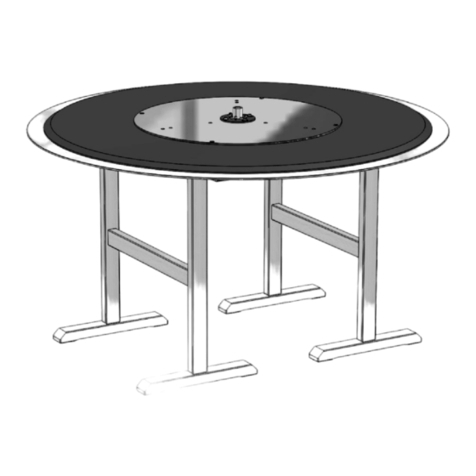
  9. Venjakob 2364 User manual

Venjakob 2364 User manual

Aufbauanleitung / assembly instructions mod.
2364 Holzplatte mit Frontauszug / wooden top with front extension
für 2365-2366 siehe weiter unten / for 2365-2366 see farther below!
1.Montagematerial.
1. Fitting material.
2. Den Oberbau umgedreht auf gepolsterten
Montageböcken ablegen.
2. Put the table-top upside down onto padded
assembling trestles.
3. Den Auszug et a 20 cm ausziehen.
Die Zierblende abschrauben.
3. Drag the pullout approximately 20 cm.
Unscrew the decorati e co er.
4. Die Traverse abschrauben.
4. Unscrew the tra erse.
2364 Holzplatte mit Frontauszug 1 / 7 Änderungsdatum: 01.09.17
4x
30 x 10,5
4x
M10
4x
4x
M10 x 575
1x
SW17
1x
SW6
8x
M8 x 25
5. Die Traverse so mit dem Fuß-Befestigungs-
element verbinden, das sich der große
Lochabstand auf der Seite des Fuß-
Anschlusses (s.a. Bild!) befindet.
Die 4 Fuß-Befestigungselemente mit je z ei
Schrauben und dem mitgelieferten Inbus-
schüssel befestigen.
5. The holes, which ha e the higher distance to
the side of the ta erse, must be on top!
Fix each table-foot connection with each two
screws and use the pro ided hex-wrench.
6. Beim Anschrauben ieder die je eils inneren
Ge inde des Rahmens nutzen.
6. Screw on the tra erse again and reuse the
inner threadholes of the frame.
7. Die Zierblende ieder anschrauben.
7. Screw on the decorati e co er again.
8. In jedes Fuß-Befestigungselement eine
Ge indestange schrauben.
8. Turn a threaded bolt into each table-foot
connection.
2364 Holzplatte mit Frontauszug 2 / 7 Änderungsdatum: 01.09.17
M8 x 25
SW6 M8 x 25
M10 x 575
SW6
Großer Abstand
higher distance
!
9. Die Tischbeine aufstecken und mit den
Scheiben und den Muttern fixieren. Zum
Schrauben der Mutter die mitgelieferte
Stecknuss nutzen.
9. Stick on the table-feet. First stick a asher onto
each threaded bolt and then scre on a nut
onto each threaded bolt. Use the socket to
tighten the nuts.
10. Je einen sch arzen Fuß-Stopfen in das Rohr
stecken.
10. Stick a black plug connection into each table-
foot.
11. Den Tisch enden ohne die Füße zu belasten
und dann gleichzeitig alle 4 Tischbeine auf
dem Boden absetzen.
11. While turning the table the feet must not touch
the ground and then put all the 4 table-legs
onto the floor synchronistically.
12. Vor dem Ausziehen auf beiden Seiten die
sch arzen Bremsschrauben lösen.
12. Before the extension can be pulled out, the
t o black scre s must be released.
2364 Holzplatte mit Frontauszug 3 / 7 Änderungsdatum: 01.09.17
M10 SW17
30 x 10,5
!
13. Prüfen ob die Oberkanten des Auszugs und
der Hauptplatte innen auf einer Höhe sind.
Nur wenn nicht …
13. Check in the middle if the upper surfaces of
the board and the extension are on one le el.
Only if not ...
14. … die Inbusschraube lösen, die Drehstange
entsprechend justieren und die Inbus-
schraube ieder festziehen.
14. … loosen the socket screw and adjust the
extenson-rod accordingly. Then tighten the
socket screw again.
15. Wenn nötig, auch die gegenüberliegende
Lagerung der Drehstange justieren. Dazu ggf.
die Hülse nach hinten ziehen und dann mit
einem Maulschlüssel die Mutter et as lösen.
15. If needed, also adjust the opposite mount of
the extenson-rod. For this purpose the nut
can be loosened and after adjusting be
tightened.
16. Prüfen ob die Oberkanten des Auszugs und
der Hauptplatte außen auf einer Höhe sind.
Wenn nicht …
16. Check at the outer sides, if the upper
surfaces of the board and the extension are
on one le el.
If not ...
2364 Holzplatte mit Frontauszug 4 / 7 Änderungsdatum: 01.09.17
SW5
SW13
Rechte Seite einstellen/
Adjust right side
:
17a: Auszug einklappen.
17b: An beiden eißen Stellschrauben mit einem
Schlitz-Schraubendreher die Höhe
einstellen.
17c: Die Klappeinlage mit dem Ledergriff aus-
klappen, die Höhe rechts erneut kontrollie-
ren und enn nötig erneut einstellen.
17a. Fold the table-extension.
17b. Adjust the hight by turning the two white
screws. Use a slotted screwdri er.
17c. Swing out the table-extension by using the
leather belt. Check the hight again; if
necessary adjust again.
2364 Holzplatte mit Frontauszug 5 / 7 Änderungsdatum: 01.09.17
eiße Stellschrauben
white adjusting-screws
Linke Seite einstellen /
Adjust left side
:
18a. Die Klappeinlage fassen und beide Teile
gleichzeitig vorsichtig hochklappen...
18a. Grab both pieces of the table-extension
and swing out both pieces of the table-
extension at the same time ...
18b. … und beide Halbteile ganz umklappen.
Die Höhe mit einem Kreuz-Schraubendreher
an den sch arzen Laschen einstellen.
18b. … and keel o er both pieces.
Turn the scews of the black plastic-straps to
adjust the hight.
18c. eide Halbteile gleichzeitig zurückklappen.
Mit dem Ledergriff ganz ausklappen und die
Höhe kontrollieren. Ggf. erneut justieren.
18c. Swing in both pieces of the table-extension
at the same time.
Use the leather-blet to swing out the table-
extension and check the hight again.
If necessary, adjust again.
2364 Holzplatte mit Frontauszug 6 / 7 Änderungsdatum: 01.09.17
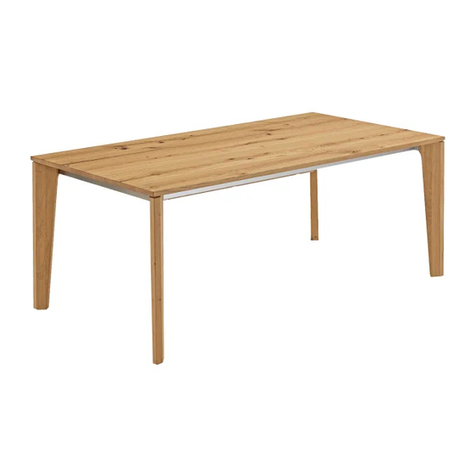
19. Fertiger Tisch; nicht ausgezogen.
19. Finished table; not extended.
20. Fertiger Tisch; ausgezogen.
20. Finished table; extended.
2364 Holzplatte mit Frontauszug 7 / 7 Änderungsdatum: 01.09.17
Aufbauanleitung / assembly instructions mod.
2365, 2366 Holzplatte mit Frontauszug / wooden top with extension
für 2364- siehe weiter oben / for 2364- see farther above!
1.Montagematerial.
1. Fitting material.
2. Den Oberbau umgedreht auf gepolsterten
Montageböcken ablegen.
2. Put the table-top upside down onto padded
assembling trestles.
3. Die 4 uß-Befestigungselemente mit je zwei
Schrauben und dem mitgelieferten Inbus-
schüssel befestigen.
3. Fix each table-foot connection with each two
screws and use the provided hex-wrench.
4. In jedes uß-Befestigungselement eine
Gewindestange schrauben.
4. urn a threaded bolt into each table-foot
connection.
2365, 2366 Holzplatte mit rontauszug 1 / 6 Änderungsdatum: 01.09.17
4x
30 x 10,5
4x
M10
8x
M8 x 25
4x
4x
M10 x 575
1x
SW17
1x
SW6
SW6
M8 x 25
M10 x 575
5. Die Tischbeine aufstecken und mit den
Scheiben und den Muttern fixieren. Zum
Schrauben der Mutter die mitgelieferte
Stecknuss nutzen.
5. Stick on the table-feet. First stick a washer
onto each threaded bolt and then screw on a
nut onto each threaded bolt. Use the socket to
tighten the nuts.
6. Je einen schwarzen uß-Stopfen in das Rohr
stecken.
6. Stick a black plug connection into each table-
foot.
7. Den Tisch wenden ohne die üße zu belasten
und dann gleichzeitig alle 4 Tischbeine auf
dem Boden absetzen.
7. While turning the table the feet must not touch
the ground and then put all the 4 table-legs
onto the floor synchronistically.
8. Vor dem Ausziehen auf beiden Seiten die
schwarzen Bremsschrauben lösen.
8. Before the extension can be pulled out, the two
black screws must be released.
2365, 2366 Holzplatte mit rontauszug 2 / 6 Änderungsdatum: 01.09.17
M10
30 x 10,5
SW17
!
9. Prüfen ob die Oberkanten des Auszugs und
der Hauptplatte innen auf einer Höhe sind.
Nur wenn nicht …
9. Check in the middle if the upper surfaces of the
board and the extension are on one level.
Only if not ...
10. … die Inbusschraube lösen, die Drehstange
entsprechend justieren und die Inbus-
schraube wieder festziehen.
10. … loosen the socket screw and adjust the
extenson-rod accordingly. hen tighten the
socket screw again.
11. Wenn nötig, auch die gegenüberliegende
Lagerung der Drehstange justieren. Dazu ggf.
die Hülse nach hinten ziehen und dann mit
einem Maulschlüssel die Mutter etwas lösen.
11. If needed, also adjust the opposite mount of
the extenson-rod. For this purpose the nut
can be loosened and after adjusting be
tightened.
12. Prüfen ob die Oberkanten des Auszugs und
der Hauptplatte außen auf einer Höhe sind.
Wenn nicht …
12. Check at the outer sides, if the upper
surfaces of the board and the extension are
on one level.
If not ...
2365, 2366 Holzplatte mit rontauszug 3 / 6 Änderungsdatum: 01.09.17
SW5
SW13
Rechte Seite einstellen:
13a: Auszug einklappen.
13b: An beiden weißen Stellschrauben mit einem
Schlitz-Schraubendreher die Höhe
einstellen.
13c: Die Klappeinlage mit dem Ledergriff aus-
klappen, die Höhe rechts erneut kontrollie-
ren und wenn nötig erneut einstellen.
13a. Fold the table-extension.
13b. Adjust the hight by turning the two white
screws. Use a slotted screwdriver.
13c. Swing out the table-extension by using the
leather belt. Check the hight again; if
necessary adjust again.
2365, 2366 Holzplatte mit rontauszug 4 / 6 Änderungsdatum: 01.09.17
weiße Stellschrauben
white adjusting-screws
Linke Seite einstellen:
20a. Die Klappeinlage fassen und bei e Teile
gleichzeitig vorsichtig hochklappen...
20a. Grab both pieces of the table-extension
and swing out both pieces of the table-
extension at the same time ...
20b. … und bei e Halbteile ganz umklappen.
Die Höhe mit einem Kreuz-Schraubendreher
an den schwarzen Laschen einstellen.
20b. … and keel over both pieces.
urn the scews of the black plastic-straps to
adjust the hight.
20c. Bei e Halbteile gleichzeitig zurückklappen.
Mit dem Ledergriff ganz ausklappen und die
Höhe kontrollieren. Ggf. erneut justieren.
20c. Swing in both pieces of the table-extension
at the same time.
Use the leather-blet to swing out the table-
extension and check the hight again.
If necessary, adjust again.
2365, 2366 Holzplatte mit rontauszug 5 / 6 Änderungsdatum: 01.09.17
21. ertiger Tisch; nicht ausgezogen.
22. Finished table; not extended.
22. ertiger Tisch; ausgezogen.
22. Finished table; extended.
2365, 2366 Holzplatte mit rontauszug 6 / 6 Änderungsdatum: 01.09.17

Other manuals for 2364

3

This manual suits for next models

2

Other Venjakob Indoor Furnishing manuals

Venjakob CHIC 6725 User manual

Venjakob

Venjakob CHIC 6725 User manual

Venjakob 6442 User manual

Venjakob

Venjakob 6442 User manual

Venjakob S362 User manual

Venjakob

Venjakob S362 User manual

Venjakob 2057 User manual

Venjakob

Venjakob 2057 User manual

Venjakob 3885 User manual

Venjakob

Venjakob 3885 User manual

Venjakob P7 User manual

Venjakob

Venjakob P7 User manual

Venjakob 6665 User manual

Venjakob

Venjakob 6665 User manual

Venjakob 3244 User manual

Venjakob

Venjakob 3244 User manual

Venjakob 5354 User manual

Venjakob

Venjakob 5354 User manual

Venjakob 3753 User manual

Venjakob

Venjakob 3753 User manual

Venjakob 6665-6668 User manual

Venjakob

Venjakob 6665-6668 User manual

Venjakob 2364 User manual

Venjakob

Venjakob 2364 User manual
Venjakob 3247 User manual

Venjakob

Venjakob 3247 User manual

Venjakob 6040 User manual

Venjakob

Venjakob 6040 User manual

Venjakob P8 User manual

Venjakob

Venjakob P8 User manual

Venjakob Trema User manual

Venjakob

Venjakob Trema User manual

Venjakob 4618 User manual

Venjakob

Venjakob 4618 User manual

Venjakob 3753 User manual

Venjakob

Venjakob 3753 User manual
Venjakob 2822 User manual

Venjakob

Venjakob 2822 User manual

Venjakob 1133 User manual

Venjakob

Venjakob 1133 User manual

Venjakob 6555 User manual

Venjakob

Venjakob 6555 User manual

Venjakob 3932 User manual

Venjakob

Venjakob 3932 User manual

Venjakob 3453 User manual

Venjakob

Venjakob 3453 User manual
Venjakob 4400 User manual

Venjakob

Venjakob 4400 User manual
Popular Indoor Furnishing manuals by other brands

aspenhome I222-366 Assembly instructions

aspenhome

aspenhome I222-366 Assembly instructions

KEUCO Royal Modular 2.0 800010DDEG0 00 Series Instructions for use

KEUCO

KEUCO Royal Modular 2.0 800010DDEG0 00 Series Instructions for use

TAD TV 001 Assembly instructions

TAD

TAD TV 001 Assembly instructions

East West Furniture LANCY PARSON LAP Assembly instructions

East West Furniture

East West Furniture LANCY PARSON LAP Assembly instructions

Pollard 126 Assembly instructions

Pollard

Pollard 126 Assembly instructions

Julian Bowen Limited PLU001 Assembly instructions

Julian Bowen Limited

Julian Bowen Limited PLU001 Assembly instructions

Snow Peak Single Action Round Table M instruction manual

Snow Peak

Snow Peak Single Action Round Table M instruction manual

hygena Amparo 633/3252 Assembly instructions

hygena

hygena Amparo 633/3252 Assembly instructions

Inspire BENITO 201-546WAL Assembly instructions

Inspire

Inspire BENITO 201-546WAL Assembly instructions

SelectBlinds Classic Roman Shades installation guide

SelectBlinds

SelectBlinds Classic Roman Shades installation guide

Varier Wing Assembly instructions

Varier

Varier Wing Assembly instructions

BLACK RED WHITE Azteca Assembly instructions

BLACK RED WHITE

BLACK RED WHITE Azteca Assembly instructions

Hay CPH25 instruction manual

Hay

Hay CPH25 instruction manual

Kvik OU849 quick start guide

Kvik

Kvik OU849 quick start guide

Glacier bay 30608 Assembly instructions

Glacier bay

Glacier bay 30608 Assembly instructions

Granberg 6302H installation instructions

Granberg

Granberg 6302H installation instructions

FMD Möbel ANGERS 4012-002 Assembly instruction

FMD Möbel

FMD Möbel ANGERS 4012-002 Assembly instruction

Goldstar GLDS923E1 Assembling Instruction

Goldstar

Goldstar GLDS923E1 Assembling Instruction

manuals.online logo
manuals.online logoBrands
  • About & Mission
  • Contact us
  • Privacy Policy
  • Terms and Conditions

Copyright 2025 Manuals.Online. All Rights Reserved.