manuals.online logo
Brands
  1. Home
  2. •
  3. Brands
  4. •
  5. Venjakob
  6. •
  7. Indoor Furnishing
  8. •
  9. Venjakob 2364 User manual

Venjakob 2364 User manual

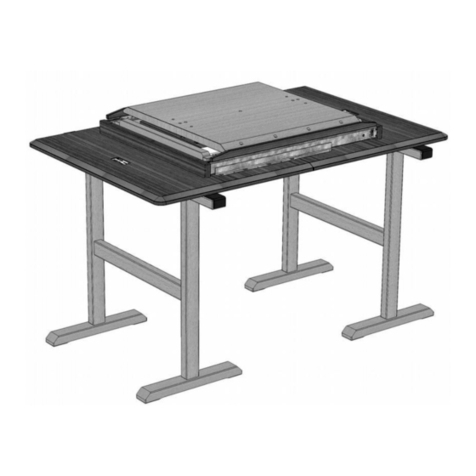
Aufbauanleitung / assembly instructions mod.
2364 Keramik-, Glas-Platte mit Frontauszug
2364 ceramic / glass top with front extension
für 2365-2366 siehe weiter unten / for 2365-2366 see farther below!
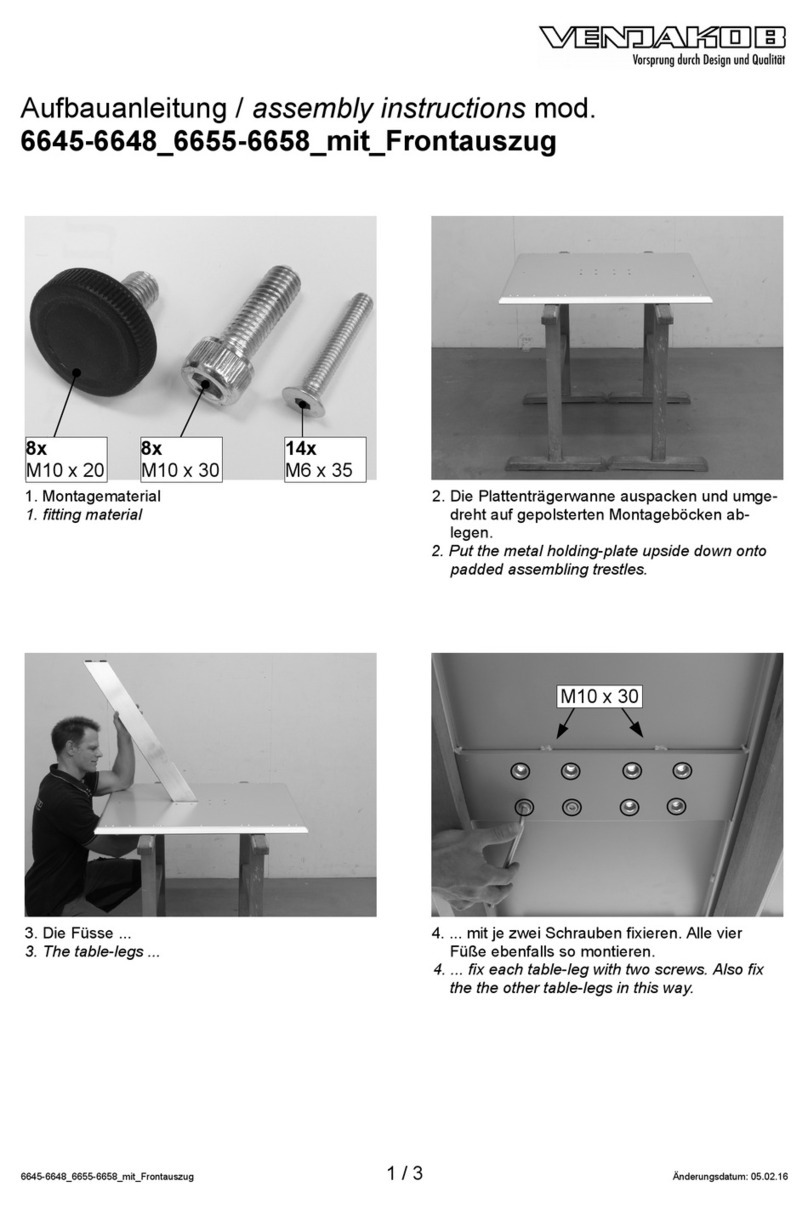
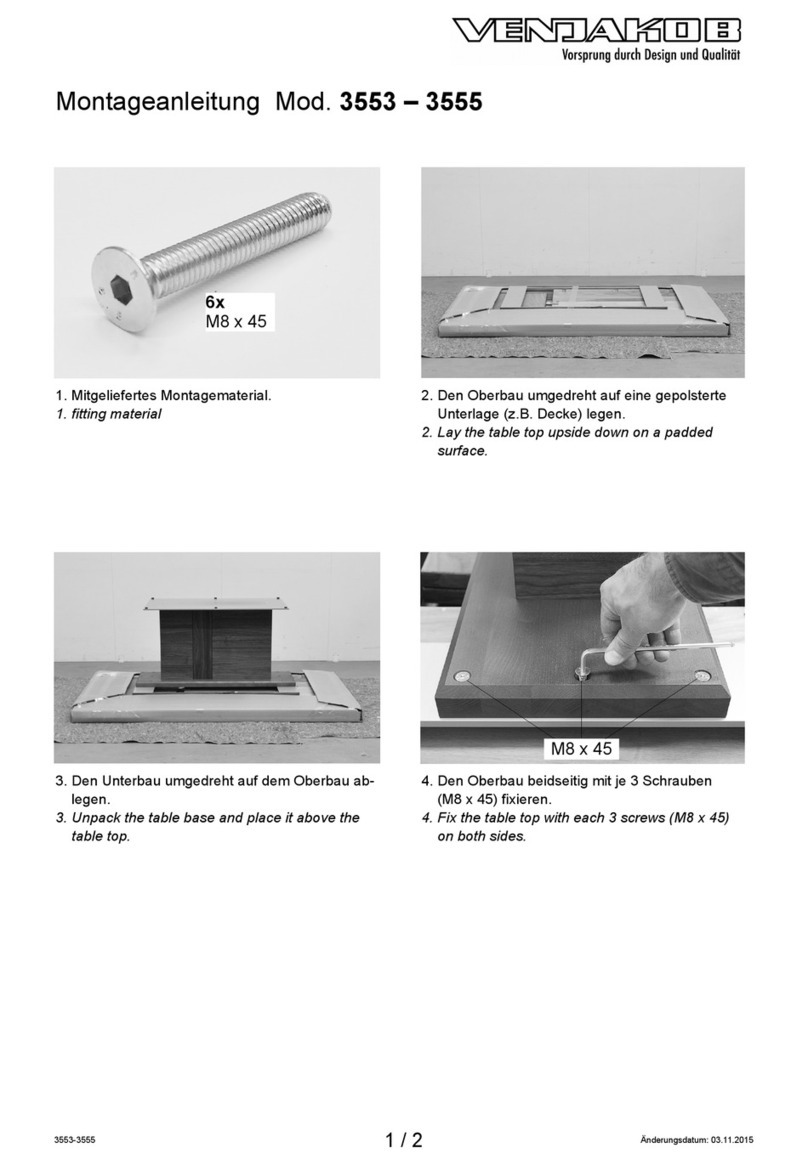
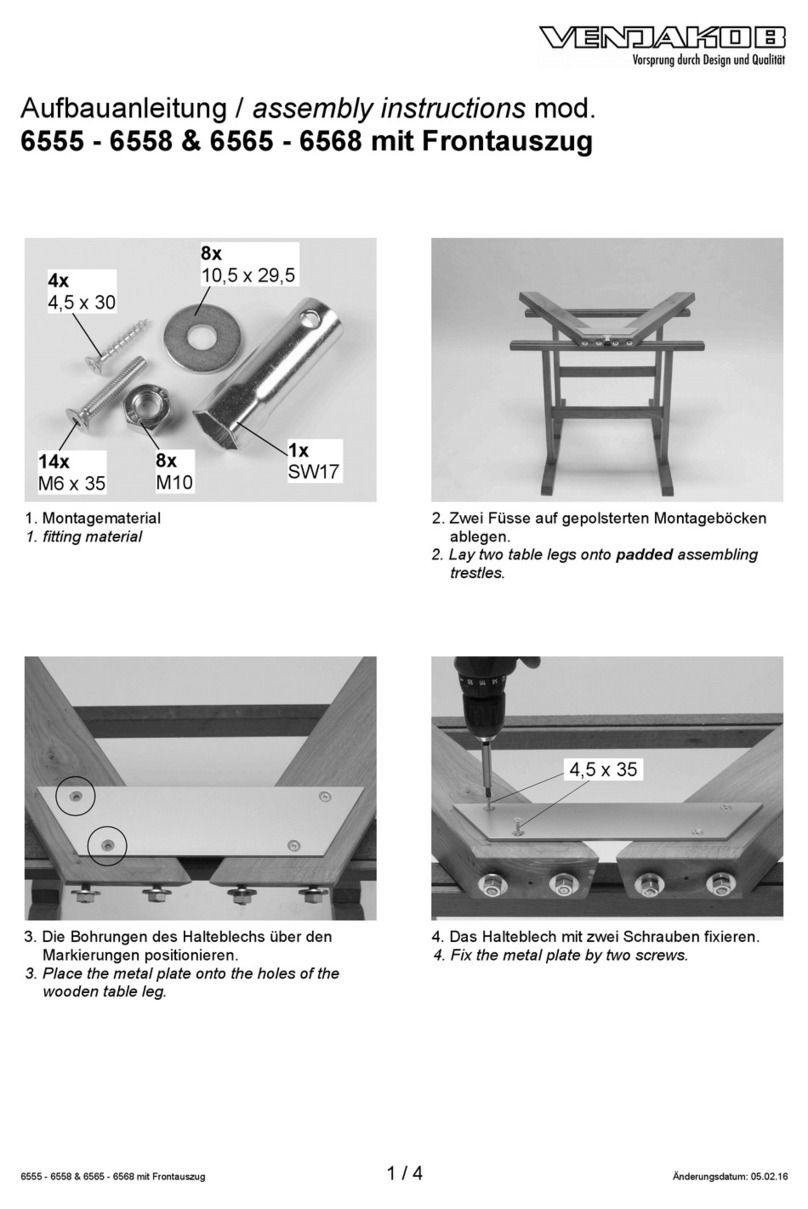
1.Montagematerial.
1. Fitting material.
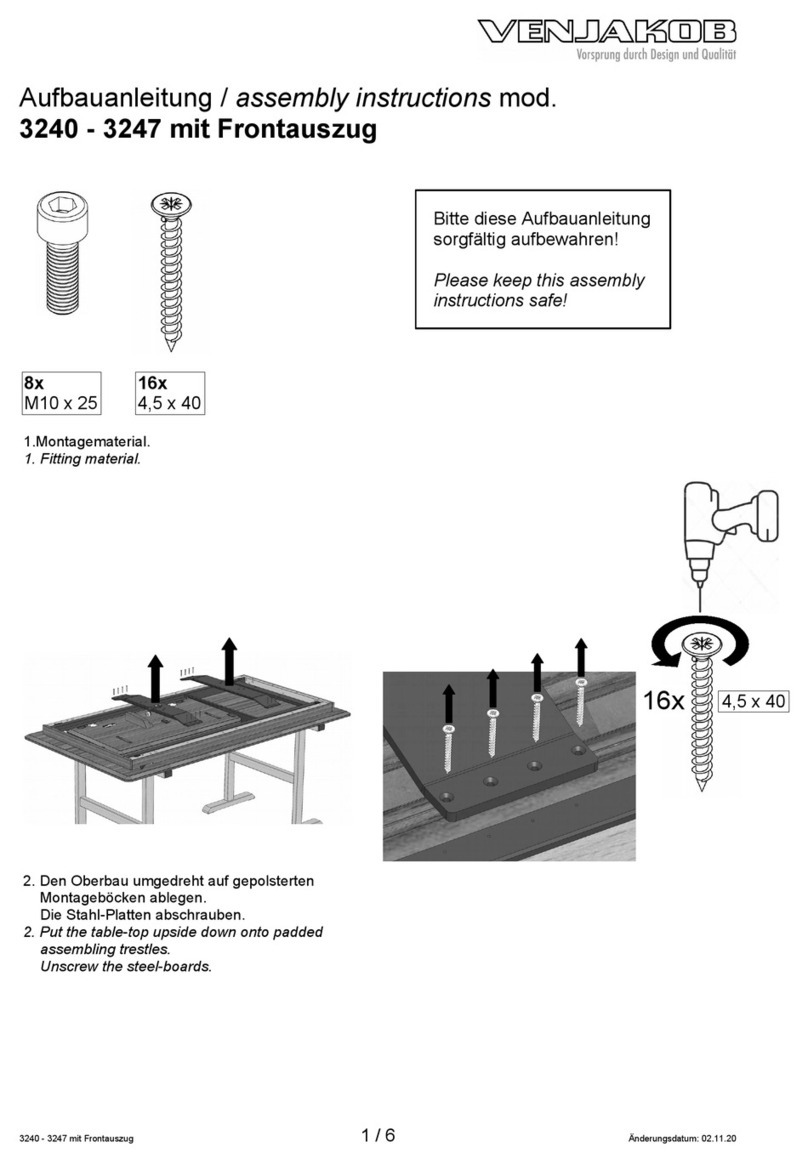
2. Den Oberbau umgedreht auf gepolsterten
Montageböcken ablegen.
2. Put the table top upside down onto padded
assembling trestles.
Montage Befestiungselemente / assembling of table-leg connection
Festseite / fixed side:
3. Den Aus ug etwa 20 cm aus iehen.
Die Zierblende abschrauben.
3. Drag the pullout approximately 20 cm.
nscrew the decorative cover.
4. Die Traverse abschrauben.
4. nscrew the traverse.
2364 Keramik-, Glas-Platte mit Frontaus ug 1 / 9 Änderungsdatum: 21.11.17
4x
30 x 10,5
4x
M10
4x
6x
M8 x 55
6x
14 x 43
4x
M10 x 575
1x
SW17
1x
SW6
8x
M8 x 25
5. Die Traverse so mit dem Fuß-Befestigungs-
element verbinden, dass sich der große
Lochabstand auf der Seite des Fuß-
Anschlusses (s.a. Bild!) befindet.
Die beiden Befestigungselemente beim An-
schrauben nac oben drücken.
5. The holes, which have the higher distance to
the side of the taverse, must be on top!
Fix both table-leg connections with two screws
each and use the provided hex-wrench. Push
up both table-leg connections while fixing
them.
6. Beim Anschrauben wieder die jeweils inneren
Gewinde des Rahmens nut en.
6. Screw on the traverse again and reuse the
inner threadholes of the frame.
Auszugsseite / extension side:
7. Die Zierblende wieder anschrauben.
7. Screw on the decorative cover again.
8. Die beiden Fuß-Befestigungselemente mit je
wei Schrauben und dem mitgelieferten Inbus-
schüssel befestigen. Die beiden Befestigungs-
elemente beim Anschrauben nac unten
drücken.
8. Fix both table-leg connections with two screws
each and use the provided hex-wrench. Push
down both table-leg connections while fixing
them.
2364 Keramik-, Glas-Platte mit Frontaus ug 2 / 9 Änderungsdatum: 21.11.17
M8 x 25
SW6 M8 x 25
SW6
Großer Abstand
higher distance
!
SW6
M8 x 25
9. In jedes Fuß-Befestigungselement eine
Gewindestange schrauben.
9. Screw a threaded bolt into each table-leg
connection.
10. Die Tischbeine aufstecken und mit den
Scheiben und den Muttern fixieren. Zum
Schrauben der Mutter die mitgelieferte
Stecknuss nut en.
10. Attach the table-legs. First put a washer onto
each threaded bolt and then screw on a nut
onto each threaded bolt. se the socket to
tighten the nuts.
11. Je einen schwar en Fuß-Stopfen in das Rohr
stecken.
11. Put a black plug connection into each table-
leg.
12. Den Tisch wenden, ohne die Füße u
belasten und dann gleich eitig alle 4
Tischbeine auf dem Boden abset en.
12. Turn the table right-side-up without using the
feet. Then put the table down on all 4 legs at
once.
2364 Keramik-, Glas-Platte mit Frontaus ug 3 / 9 Änderungsdatum: 21.11.17
M10 x 575 SW17
M10
30 x 10,5
13. Die Platte auspacken und mittig auf dem
Gestell auflegen.
13. npack the board and put it onto the middle
of the frame.
14. Die Platte mit den 6 Hülsen und 6 Schrauben
zunäc st lose anschrauben ...
14. Fix the board with 6 sleeves and 6 screws in
a loose way ...
15. … die Platte gleichmäßig u den Fuß-
Befestigungselementen ausrichten und erst
dann ...
15. … adjust the board to the middle and
finally ...
2364 Keramik-, Glas-Platte mit Frontaus ug 4 / 9 Änderungsdatum: 21.11.17
14 x 43
M8 x 55 SW6
16. … mit dem mitgelieferten Inbusschlüssel alle
6 Schrauben fest iehen.
16. … tighten the 6 screws by using the provided
hex-wrench.
17. Prüfen, ob die Hauptplatte gegenüber den Be-
festigungselementen etwa 3 mm höher ist.
Die Befestigungselemente können nach dem
Lösen der Schrauben (s.a. P. 5 + 8) vertikal
etwas verschoben werden. Anschließend die
Schrauben wieder fest iehen.
17. Check, if the board is aprox 3 mm higher than
the table-leg connections. If needed, loose
the screws (q.v. p. 5 + 8), adjust the table-leg
connections and finally tighten the screws
again.
18. Vor dem Aus iehen auf beiden Seiten die
schwar en Bremsschrauben lösen.
18. Before the extension can be pulled out, the
two black screws must be released.
2364 Keramik-, Glas-Platte mit Frontaus ug 5 / 9 Änderungsdatum: 21.11.17
!
SW6
~ 3 mm

Other manuals for 2364

3

Other Venjakob Indoor Furnishing manuals

Venjakob 3885 User manual

Venjakob

Venjakob 3885 User manual

Venjakob Quanto User manual

Venjakob

Venjakob Quanto User manual

Venjakob barola Owner's manual

Venjakob

Venjakob barola Owner's manual

Venjakob 3642 User manual

Venjakob

Venjakob 3642 User manual

Venjakob 2543 User manual

Venjakob

Venjakob 2543 User manual

Venjakob 4316 User manual

Venjakob

Venjakob 4316 User manual

Venjakob 1421 User manual

Venjakob

Venjakob 1421 User manual

Venjakob 4108 User manual

Venjakob

Venjakob 4108 User manual

Venjakob Impuls corner bench P3 User manual

Venjakob

Venjakob Impuls corner bench P3 User manual

Venjakob 3753 User manual

Venjakob

Venjakob 3753 User manual

Venjakob 3772 User manual

Venjakob

Venjakob 3772 User manual

Venjakob 1630 User manual

Venjakob

Venjakob 1630 User manual

Venjakob 2086 User manual

Venjakob

Venjakob 2086 User manual

Venjakob 1590 User manual

Venjakob

Venjakob 1590 User manual

Venjakob Sentino 1888 User manual

Venjakob

Venjakob Sentino 1888 User manual

Venjakob 655 Series User manual

Venjakob

Venjakob 655 Series User manual

Venjakob 4770 User manual

Venjakob

Venjakob 4770 User manual

Venjakob 6555 User manual

Venjakob

Venjakob 6555 User manual

Venjakob V-Plus 6.0 User manual

Venjakob

Venjakob V-Plus 6.0 User manual

Venjakob 5454 User manual

Venjakob

Venjakob 5454 User manual

Venjakob 4121 User manual

Venjakob

Venjakob 4121 User manual

Venjakob 2253 User manual

Venjakob

Venjakob 2253 User manual

Venjakob 6555 User manual

Venjakob

Venjakob 6555 User manual

Venjakob Plan X5 User manual

Venjakob

Venjakob Plan X5 User manual

Popular Indoor Furnishing manuals by other brands

Regency LWMS3015 Assembly instructions

Regency

Regency LWMS3015 Assembly instructions

Furniture of America CM7751C Assembly instructions

Furniture of America

Furniture of America CM7751C Assembly instructions

Safavieh Furniture Estella CNS5731 manual

Safavieh Furniture

Safavieh Furniture Estella CNS5731 manual

PLACES OF STYLE Ovalfuss Assembly instruction

PLACES OF STYLE

PLACES OF STYLE Ovalfuss Assembly instruction

Trasman 1138 Bo1 Assembly manual

Trasman

Trasman 1138 Bo1 Assembly manual

Costway JV10856 manual

Costway

Costway JV10856 manual
moss DESIGN Caisson Credenza Assembly instructions

moss DESIGN

moss DESIGN Caisson Credenza Assembly instructions

Aquaglide FULL DECK 15.0 owner's manual

Aquaglide

Aquaglide FULL DECK 15.0 owner's manual

AREBOS AR-HE-SW30 user manual

AREBOS

AREBOS AR-HE-SW30 user manual

Till-Hilft Fulda 87005.330 Assembly instructions

Till-Hilft

Till-Hilft Fulda 87005.330 Assembly instructions

Twoey Outside 2010 quick start guide

Twoey Outside

Twoey Outside 2010 quick start guide

Hettich Easys 200 operating instructions

Hettich

Hettich Easys 200 operating instructions

The bedboss RELAX 404 Series owner's manual

The bedboss

The bedboss RELAX 404 Series owner's manual

Oeseder Möbelindustrie Bern 991 720 Assembly instructions

Oeseder Möbelindustrie

Oeseder Möbelindustrie Bern 991 720 Assembly instructions

Costway HW68469 user manual

Costway

Costway HW68469 user manual

Next ALIX A27743 Assembly instructions

Next

Next ALIX A27743 Assembly instructions

BROSA Hans Assembly guide

BROSA

BROSA Hans Assembly guide

Prodigg MINIKA PBA015T-FUR installation manual

Prodigg

Prodigg MINIKA PBA015T-FUR installation manual

manuals.online logo
manuals.online logoBrands
  • About & Mission
  • Contact us
  • Privacy Policy
  • Terms and Conditions

Copyright 2025 Manuals.Online. All Rights Reserved.