manuals.online logo
Brands
  1. Home
  2. •
  3. Brands
  4. •
  5. Verity Audio
  6. •
  7. Speakers
  8. •
  9. Verity Audio Home Cinema Series User manual

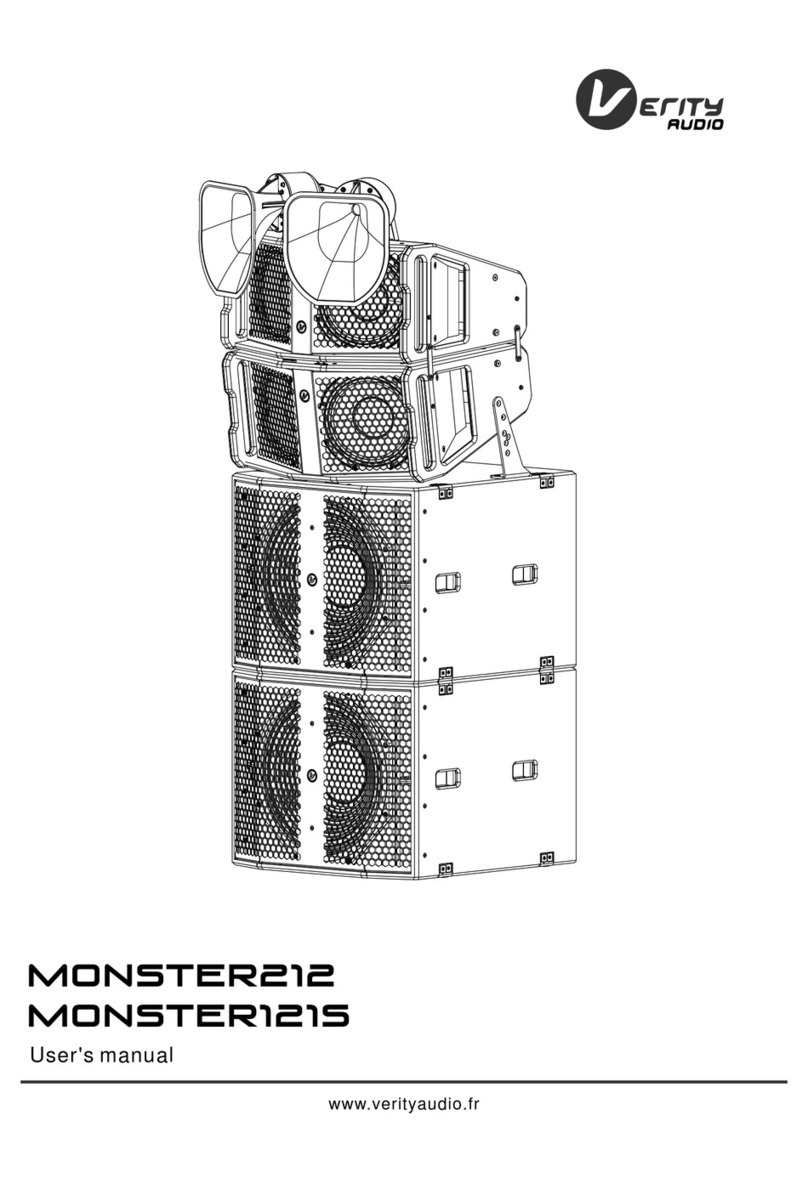
Verity Audio Home Cinema Series User manual

HOME CINEMA
C6/C6B
SUB208S/SUB208SB
SUB408S/SUB408SB
User's manual
www.verityaudio.fr
CLOSER TO MUSIC
1. INTRODUCTION
The C6/C6B, SUB208S/SUB208SB and SUB408S/ SUB408SB
Home Cinema loudspeakers f eature a unique design with a
high-quality finishing and a superior sound perf ormance. The
high SPL capability, sound quality and flexible installation
make them ideal for any home cinem a configuration and size.
The C6/C6B loudspeaker has been specifically designed for
home theater use. The stylized design, the high quality non -
glossy lacquer f inishing, the high SPL and a superb sound
quality allow it to be used on all the functions: Left, Center,
Right, Surround and Ceilin g.
The baffle is tilt 10º and perm it a flat mounting on the wall or
ceiling while focusing the sound to the listening area. It can
be placed horizontal, vertical or on the ceiling with the same
bracket. For a better integration in the room decoration, the
loudspeaker distance to the wall is only 1 cm and the bracket
is almost invisible. It can be used as well with a pole.
The C6/C6B cabinet is made of 9mm MDF with double
thickness baffle and use a coaxial 6.5” woofer - 1” HF driver
in an accurate designed bass reflex system for an extended
bass response and clear and powerful sound reproduction
free of phase problems.
The SUB208S/SUB208SB and SUB408S/ SUB408SB are
composed of two and f our 8” drivers respectively and use an
innovative symmetrical configuration of the drivers and ports
that allow a flat and a practically vibration free cabinet. The
main benefit of th is design is to avoid the comb filtering
produced by the rear wall sound ref lections , and the absence
of vibration of the cabinet panels due to the action-reaction
driver effect. The result is a clear, balanced and undistorted
sound. The flat design (only 240mm deep) allow the
SUB208S/SUB208SB and SUB408S/SUB408SB to be mounted
on a wall. The vibration free cabinet avoid the problems of
sound transmission to other rooms by the building structure.
The heavy braced cabinets are made of 15 and 18mm MDF
respectively, with double thickness baffle to improve the
sound performance by making its structure very rigid and
avoiding undesired cabinet vibrations.
2. SPECIFICATIONS
2. 1. C6/ C6B
Acoustics
Power: 60W AES, 120W Program, 240W Peak
Impedance: 8Ω
Sensitivity: 92dB SPL 1W/1m half space (1)
Max. SPL @1m: 110dB Continuous, 113dB Program, 116dB Peak
Frequency response: 65Hz-15kHz (-6dB), 60Hz-18kHz (-10dB) (2)
Beam aperture -3dB: 100º ±30º 600Hz-3.5kHz, 60º ±30º 3.5kHz-14kHz
Beam aperture -6dB: 120º ±30º 600Hz-3.5kHz, 90º ±30º 3.5kHz-20kHz
Maximum listener distance: 7m (3)
Recommended amplifier: 120W / 8 Ω
Recommended Xover freq.: 70Hz
Speaker components
1 x Coaxial 6.5” woofer 1” comp. driver
Mounting
Wall / Ceiling: 4 x M6 Screws
on left and right faces for vertical or
horizontal mounting by hidden bracket
Pole: 4 M6 insertion points on
left and right faces for pole adaptor
Size / Package Size:
W654xH214xD168 /
W750xH311xD277
Cabinet
CNC made 9mm MDF,
smooth non-glossy white or
black painting
Connectors
2 x Push terminals for input
and stack output
Net Weight / Gross Weight
9.3kg / 14.3kg
1- Measured half space at 2m scaled to 1m full space
2- Measured half space at 4m, curve smoothed 1/3 oct
3- In accordance with dolby® SPL requirements
2. 2. SU B20 8 S/ SUB208SB
Acoustics
Power: 700W AES, 1400W Program, 2800W Peak
Impedance: 8Ω
Sensitivity: 92dB 1W/1m half space (1)
Max. SPL @1m: 120.5dB Cont., 123.5dB Program, 126.5dB Peak
Frequency response: 48Hz-1.1kHz (-6dB), 40Hz-1.5kHz (-10dB) (2)
Directivity: Omnidirectional in the usable range
Recommended amplifier: 1400W / 8 Ω
Recommended HP filter: 35Hz - 12dB/oct - Butterworth
Speaker components
2 x 8" European Ferrite driver
Mounting
On floor
On Wall: 8 M8 insertion points on rear
face for wall bracket
Size / Package Size:
W580xH420xD240 /
W673xH517xD337
Cabinet
CNC made 15mm MDF,
smooth non-glossy white or
black painting
Connectors
1x Euroblock 42A rated with
locking screws
Net Weight / Gross Weight
21kg / 27.4kg
1- Measured half space at 4m scaled to 1m
2- Measured half space at 4m, curve smoothed 1/3 oct
2. 3. SUB408S/ SU B 40 8 SB
Acoustics
Power: 1400W AES, 2800W Program, 5600W Peak
Impedance: 4Ω
Sensitivity: 94.5dB 1W/1m half space (1)
Max. SPL @1m: 126dB Continuous, 129dB Program, 132dB Peak
Frequency response: 33Hz-250Hz (-6dB), 30Hz-350Hz (-10dB) (2)
Directivity: Omnidirectional in the usable range
Recommended amplifier: 2800W / 4 Ω
Recommended HP filter: 30Hz - 12dB/oct - Butterworth
Speaker components
4 x 8" European Ferrite driver
Mounting
On floor
On Wall: 4 hanging slots on rear face
for wall bracket
Size / Package Size:
W940xH560xD240 /
W1036xH657xD337
Cabinet
CNC made 18mm MDF,
smooth non-glossy white or
black painting
Connectors
2x Euroblock 42A rated with
locking screws
Net Weight / Gross Weight
44kg/54.5kg
1- Measured half space at 4m
scaled to 1m
2- Measured half space at 4m
curve smoothed 1/3 oct
2. 4. CURVES
C6/C6B C6/C6B
SPL @4m scaled to 1W/1m half space Impedance
SUB208S/SUB208SB SUB208S/SUB208SB
SPL @4m scaled to 1W/1m half space Impedance @1V
SUB408S/SUB408SB SUB408S/SUB408SB
SPL @4m scaled to 1W/1m half space Impedance @1V
10k5k2k1k50020010050.020.020.0 20kHz
110
dBSPL
100
90.0
80.0
70.0
60.0
Verity AudioLogChirp - Frequency Response26-09-2018 12.09.02
10k5k2k1k50020010050.020.020.0 20kHz
100
Ohm
80.0
60.0
40.0
20.0
0
Verity Audio Sinusoidal 26-09-2018 11.55.12
2k1k50020010050.020.020.0 2kHz
110
dBSPL
100
90.0
80.0
70.0
60.0
Verity AudioLogChirp - Frequency Response21-12-2017 14.25.26
2k1k50020010050.020.020.0 2kHz
100
Ohm
80.0
60.0
40.0
20.0
0
Verity Audio Sinusoidal 21-12-2017 16.42.06
2k1k50020010050.020.020.0 2kHz
110
dBSPL
100
90.0
80.0
70.0
60.0
Verity AudioLogChirp - Frequency Response12-06-2017 16.06.21
2k1k50020010050.020.020.0 2kHz
50.0
Ohm
40.0
30.0
20.0
10.0
0
Verity Audio Sinusoidal 26-09-2018 15.25.30
3. CONFIGURATIONS
3.1. A bit of history
The so und cinem a start ed on lat e 30s with only one
loud speak er on t he cent er of t he screen . Dif f erent recording
syst em s were used and the optical track on a 35mm f ilm was
finally standar di zed .
During the 50s and 60s special e xpensive 70mm films wit h 6
magnetic tr ack s were recorded. The sc reen was filled wit h 5
channels (lef t, cent er left , cent er, center r ig ht and rig ht) and
the 6th channel was f or sur roundin g ef fects .
Lat er , in the 70s, dolby introduced a s ec ond optical t rack on
the 35m m f ilm s: the dolby stereo . A matrix technolog y
per mitt ed to g et 4 channels from the 2 opt ical track s. Left,
center, rig ht and surr ound .
W ith the intr oduct ion of dig ital t echnolo gy early 90s ,
diff er ent s yst em s reach to recor d 6 sound c hannels . A sub
bass LFE (lo w freq uency ef f ec ts ) was added : t he . 1 of the
5.1 loudspeaker s c onfiguration .
At pr es ent, the digital t echnology f or video and audio
recor ding has no limitation of the number of sound channels .
The lat est one , dolby atm os, allow until 128 sound tracks
that are m ixed, processed and direct ed to the loudspeakers
depending on the number and position of them.
3.2. Conf igurat ions numbering
The first number of the different conf ig urations m ean the
num ber of fr ont and surrounding louds pe akers .
The second is t he number of LFE loudspeakers ( also called
sub woofer despite it s m ain f unction in home c inema is not
the sam e as the subwoof er in hi-fi syst em s) .
And t he third is t he number of overhead loudspeak ers .
So, a 7.2.4 conf iguration mean : scr een Lef t, Center and
Right , sur round Left, surround Rig ht, rear Lef t and rear
Rig ht, 2 LFE and 4 overhea d loudspeak er s .
3.3. Loudspeakers acronym
There is a standard acronym t o ident if y easil y the dif fere nt
loud speak ers . T his is a list of the main ones:
C Screen cent er
L Scr een lef t
R Screen rig ht
Ls Lef t surround
Rs Right sur round
Lrs Lef t rear sur round
Rrs Right rear surround
Ltf Lef t to p ( overhead) f ront
Rtf Rig ht top (overhead) f ront
Ltr Lef t top (overhead) rear
Rtr Right top (overhead) r ear
3.4. Loudspeakers placement
The place ment det ails in t his section are accor ding ly with
the dolby at mos recom mendations based in the standar ds
IT U- R BS.775-3 and IT U -R BS.1116 -1
f i g 1 - V e r t i c a l l a y o u t
The best position f or the front and surr ounding loudspeak er s
is at the ear s level of the audience. T his m ean the C6 /C6B
cabinet center must be at around 1.2m from the floor. T he
rear surround loudspeak ers c ould be placed 1.25 tim es
hig her than t he front ones, so is at 1.5m.
The over head loudspeakers m ust be at a heig ht of 2 to 3
tim es the height of the fr ont ones, so is between 2.4 and
3.6m, t hat is usuall y the heig ht of the c eiling in homes .
fig 2 – H o r i zo n t a l l a y o u t
The SUB208S/SUB208SB or SUB408S /SUB408SB placement
could be at any p lace , pr ef er ably on the fr ont of t he
audience an d against a wal l f or a smooth an d linear bass
reproduction. Generally, it is bet ter not to plac e it on
symmetr y axes of the room , like t he center of the f r ont wall.
Near a corner is u suall y the best place.
Loudspeakers but C and LFE shoul d be added to t he syst em
by p airs and placed as sym metric ally as possible t o the axe
from t he listening posit ion to the sc reen . Try to k eep similar
ang les t o this axe f or the lef t and rig ht loudspeak ers of the
same function (see fig 5 to f ig 10)
The sound coming from all louds pe ak ers must arrive at the
sam e time to the cent ral or main listenin g position despit e
the dis tance dif f erences , so, it is very important t he t im e
alig n ment of all the louds peak er s includi ng the LFE. Check
the user man ual of your processor on how to do it.
3.5. Typical conf igur at ions
Belo w ar e the placem ent drawin g s f or som e standard s et ups .
For non-o ver head lo udspeak er config ur ations simply not
consider t hem.
F i g 3 - x . x . 2 Ov e r h e a d p o s i t i o n F i g 4 - x . x . 4 O v e r h e a d p o s i t i o n
F i g 5 - 5 . 1 .2 L a y o u t F i g 6 - 5 . 1 . 4 L a y o u t
F i g 7 - 7 . 1 .2 L a y o u t F i g 8 - 7 . 1 . 4 L a y o u t
F i g 9 - 9 . 1 .2 L a y o u t F i g 10 - 9 . 1 . 4 L a y o u t
3.6. Speaker l evel cal ibration
Each full r ange speaker should be calibrated t o g et t he sam e
SPL at the c entr al listening position . The t arge t SPL can
range f rom 79 to 82dB when dr iving wit h pink noise with an
RMS level of -20dB r elative t o f ull scale .
Set t he cr ossover f requency to 70H z and c alibrate the
sub woofer level at the central listening position f or
redirected bas s content from the full rang e loudspeak er s to
the sam e level of those calibrated bef or e.
If you use the aut ocalibrati on set up incl uded in your AVR or
processor, please double chec k manually t he leve ls on t he
sub woofer a nd overhead loudspeak ers .
4. C6 INS TALL ATION
4.1. Placemen t
The C6/C6B hom e cinem a speaker can be plac ed on pol e, on
shelf , on wall or on t he ceil ing. On wall t he pos ition c ou ld be
hor izont al or ver tica l , depending on t he room and installati on
condit ions.
The C6/C6B aper ture angle of the sound beam is great and
the cabinet not need to be precisely f ocused t o the lis te ning
poin t . It can be inst alled with t he t ilt baff le facing the
list en ing point and keep f lat against the wall.
4.2. Wall /ceili ng inst allat ion
Use the appr opriate screws or
anchor s to f ix the supplied wall
brack et to the wa ll o r ceiling .
Plac e it horizont ally or vert ical ly
as you need.
Plac e the C6 / C6B on the bracket
and f ix it wit h only 2 M6 screws
to allo w to rotate t he cabinet for
an easy cab le c onne ct ion.
Use 2 more M6 screws to f inish
the installat i on. Double check
the scr ews are enoug h tig ht en .
W hen using the wall
brack et it is r ec om mended
to use saf et y cables
attaching them i n the
hole s of the cabinet and
brack et f o r this purpose.
4.3. Pol e install ati on
A pole adapt or can be f ixed on the left or right side of t he
C6/C6B. Only vertical loudsp eaker position is poss ible with a
pole . Remove and u se the 2 M6 scre ws that are in the f aces
to do it .
F i g 11 – W a l l b r a c k e t i n s ta l l
F i g 12 – S a f e t y c a b l e s p l a c e
5. SUB20 8S / SUB408S INSTALL ATION
5.1. Placemen t
The SUB208S/SUB208SB
and SUB40 8S/SUB408SB
can be placed on the
floor or hung on a wall .
In any case th er e mus t
be at least 25 cm of f ree
space in f ront of both
radiating f aces. W hen
used on t he f loor, place
the subwoof er as close
as possible to a wall .
5.2. SUB208S/ SU B208SB Wall mount
The SUB208S/SUB208S B wa ll brack et is
com posed of t wo ide ntic al pieces . Use
the appropriate screws or anchors to f ix
them to the wal l. T ake care to place the
two brack et s with t he f lange f acing up,
per f ect ly leveled an d at the distance of
380mm bet ween t he center point s. You
can use the include d template t o
facilitate the installa tion .
The SUB208S/SUB208S B can
be hung f ace up or fac e do wn t o
facilitate the wiring depending if
the cables come f r om the floor
or from the ceiling . For a f a ce
up install at ion use the 4 insert
poin ts with M6 scre ws on top of
the rear f ace to att ach th e 2
small om ega shaped plat es of
the brack et . For a f ac e down
installation use the 4 on the
bot tom.
F i g 13 – S u b w o o f e r m i n i mu m w a l l d i s t a n c e
F i g 14 – S U B 2 08 S b r a c k e t s
F i g 1 5 – F a c e u p o m e g a p l a t e s
5.3. SUB408S/ SU B408S B Wall mount
The SUB 408S/ SU B4 08 SB wall
brack et is composed of two
iden tica l piece s. Use the
appropriat e sc rews or anchors
to fix them t o the wall. Tak e
car e to place the two brack ets
with the flanges f acing up,
per f ect ly le veled and at t he
distance of 700mm bet ween
the center point s. You can use
the included template to
facilitate the installa t ion .
The SUB 408S/ SU B4 08SB can
be hung f ace up or face do wn
to facilit at e the wiring
depending if the cables come
from the floor or from the ceiling.
6. WIRING
The C6/C6B has two sets of pus h terminals t o connect the
cables , one on ea ch side of the rear f ace . Can use any of
them or t he s ig nal input . T he other can be used t o parallel
connec t a second C6/C6B to the same channel . Use t he red
one f or + connect ion and t he black one for – connection .
The SUB208S/SUB208SB and SU B408S / SUB408 SB use a
hig h curr en t Euroblock connect or for the sig nal input . Two
lo cking scr e ws avo id it b e a ccident a ll y u nplug g ed.
Use a cable of appropriat e gaug e
to connect the subs to t he
amplif ier. As a rule, use 2x2.5mm 2
cable f or lengths up to 10m and
2x4m m2 cable f or longer lengths.
You can us e the st ac k output
connec tors f or a parallel
connec tion of anot her su bwoof er .
OUT –
A M P L I F I E R
OUT +
F i g 16 – S U B 4 08 S b r a c k e t s
F i g 17 – E u r o b l o c k c o n n e c t o r
+
-
Verity audio reserves the right to make any changes to the product specifications without prior notice.
Final specifications to be found in the user manual
© VERITY AUDIO - France * all rights reserved

This manual suits for next models

6

Other Verity Audio Speakers manuals

Verity Audio Florestan User manual

Verity Audio

Verity Audio Florestan User manual

Verity Audio Lohengrin II User manual

Verity Audio

Verity Audio Lohengrin II User manual

Verity Audio VOICE12v User manual

Verity Audio

Verity Audio VOICE12v User manual

Verity Audio FINN User manual

Verity Audio

Verity Audio FINN User manual

Verity Audio MUSE 1185 User manual

Verity Audio

Verity Audio MUSE 1185 User manual

Verity Audio Tamino User manual

Verity Audio

Verity Audio Tamino User manual

Verity Audio IWAC220P User manual

Verity Audio

Verity Audio IWAC220P User manual

Verity Audio MUSE 8PC User manual

Verity Audio

Verity Audio MUSE 8PC User manual

Verity Audio Otello User manual

Verity Audio

Verity Audio Otello User manual

Verity Audio MONSTER212 User manual

Verity Audio

Verity Audio MONSTER212 User manual

Verity Audio Parsifal Ovation R 2.0 User manual

Verity Audio

Verity Audio Parsifal Ovation R 2.0 User manual

Verity Audio COL4.3 User manual

Verity Audio

Verity Audio COL4.3 User manual

Verity Audio Amadis User manual

Verity Audio

Verity Audio Amadis User manual

Verity Audio Fidelio Encore User manual

Verity Audio

Verity Audio Fidelio Encore User manual

Verity Audio Arindal User manual

Verity Audio

Verity Audio Arindal User manual

Verity Audio Sarasto User manual

Verity Audio

Verity Audio Sarasto User manual

Verity Audio Sarastro II User manual

Verity Audio

Verity Audio Sarastro II User manual

Verity Audio MUSE P User manual

Verity Audio

Verity Audio MUSE P User manual

Verity Audio MUSE P Series User manual

Verity Audio

Verity Audio MUSE P Series User manual

Verity Audio VOICE X Series User manual

Verity Audio

Verity Audio VOICE X Series User manual

Verity Audio Rienzi User manual

Verity Audio

Verity Audio Rienzi User manual

Popular Speakers manuals by other brands

PHL Audio M25 Specification sheet

PHL Audio

PHL Audio M25 Specification sheet

Estelon XB Mk II manual

Estelon

Estelon XB Mk II manual

Boston HSi H460T2 quick guide

Boston

Boston HSi H460T2 quick guide

Behringer EUROLIVE S1020 user manual

Behringer

Behringer EUROLIVE S1020 user manual

Martin Audio SCREEN3 - SCHEMATICS manual

Martin Audio

Martin Audio SCREEN3 - SCHEMATICS manual

Sven MS-2250 Operation manual

Sven

Sven MS-2250 Operation manual

AUSTRALIAN MONITOR RF4 Installation

AUSTRALIAN MONITOR

AUSTRALIAN MONITOR RF4 Installation

Nuba BLADE user guide

Nuba

Nuba BLADE user guide

Axiom Quadpolar QS4 v2 Quick setup guide

Axiom

Axiom Quadpolar QS4 v2 Quick setup guide

Overmax Suondbeat 2.0 user manual

Overmax

Overmax Suondbeat 2.0 user manual

QRS Q36 installation manual

QRS

QRS Q36 installation manual

QSC AcousticCoverage AC-C8T user manual

QSC

QSC AcousticCoverage AC-C8T user manual

Samsung HW-J355 user manual

Samsung

Samsung HW-J355 user manual

Sanus MF110 manual

Sanus

Sanus MF110 manual

ENERGY SISTEM Party 3 Go user manual

ENERGY SISTEM

ENERGY SISTEM Party 3 Go user manual

Nyne Adventure Quick user guide

Nyne

Nyne Adventure Quick user guide

Adam A Series Operation manual

Adam

Adam A Series Operation manual

Dynaudio Audience owner's manual

Dynaudio

Dynaudio Audience owner's manual

manuals.online logo
manuals.online logoBrands
  • About & Mission
  • Contact us
  • Privacy Policy
  • Terms and Conditions

Copyright 2025 Manuals.Online. All Rights Reserved.