2QuickReferenceGuideHotMeltDispensing VTK‐VS‐BA‐024e‐A
1QUICKREFERENCEGUIDEHOTMELTDISPENSING
Thismanualshowsyouhowtosetupanapplicationforhotmeltdispensing.Thesetup
makesuseofaVERMESMicroDispensingSystemwithnozzleheaterandcartridgeheater.
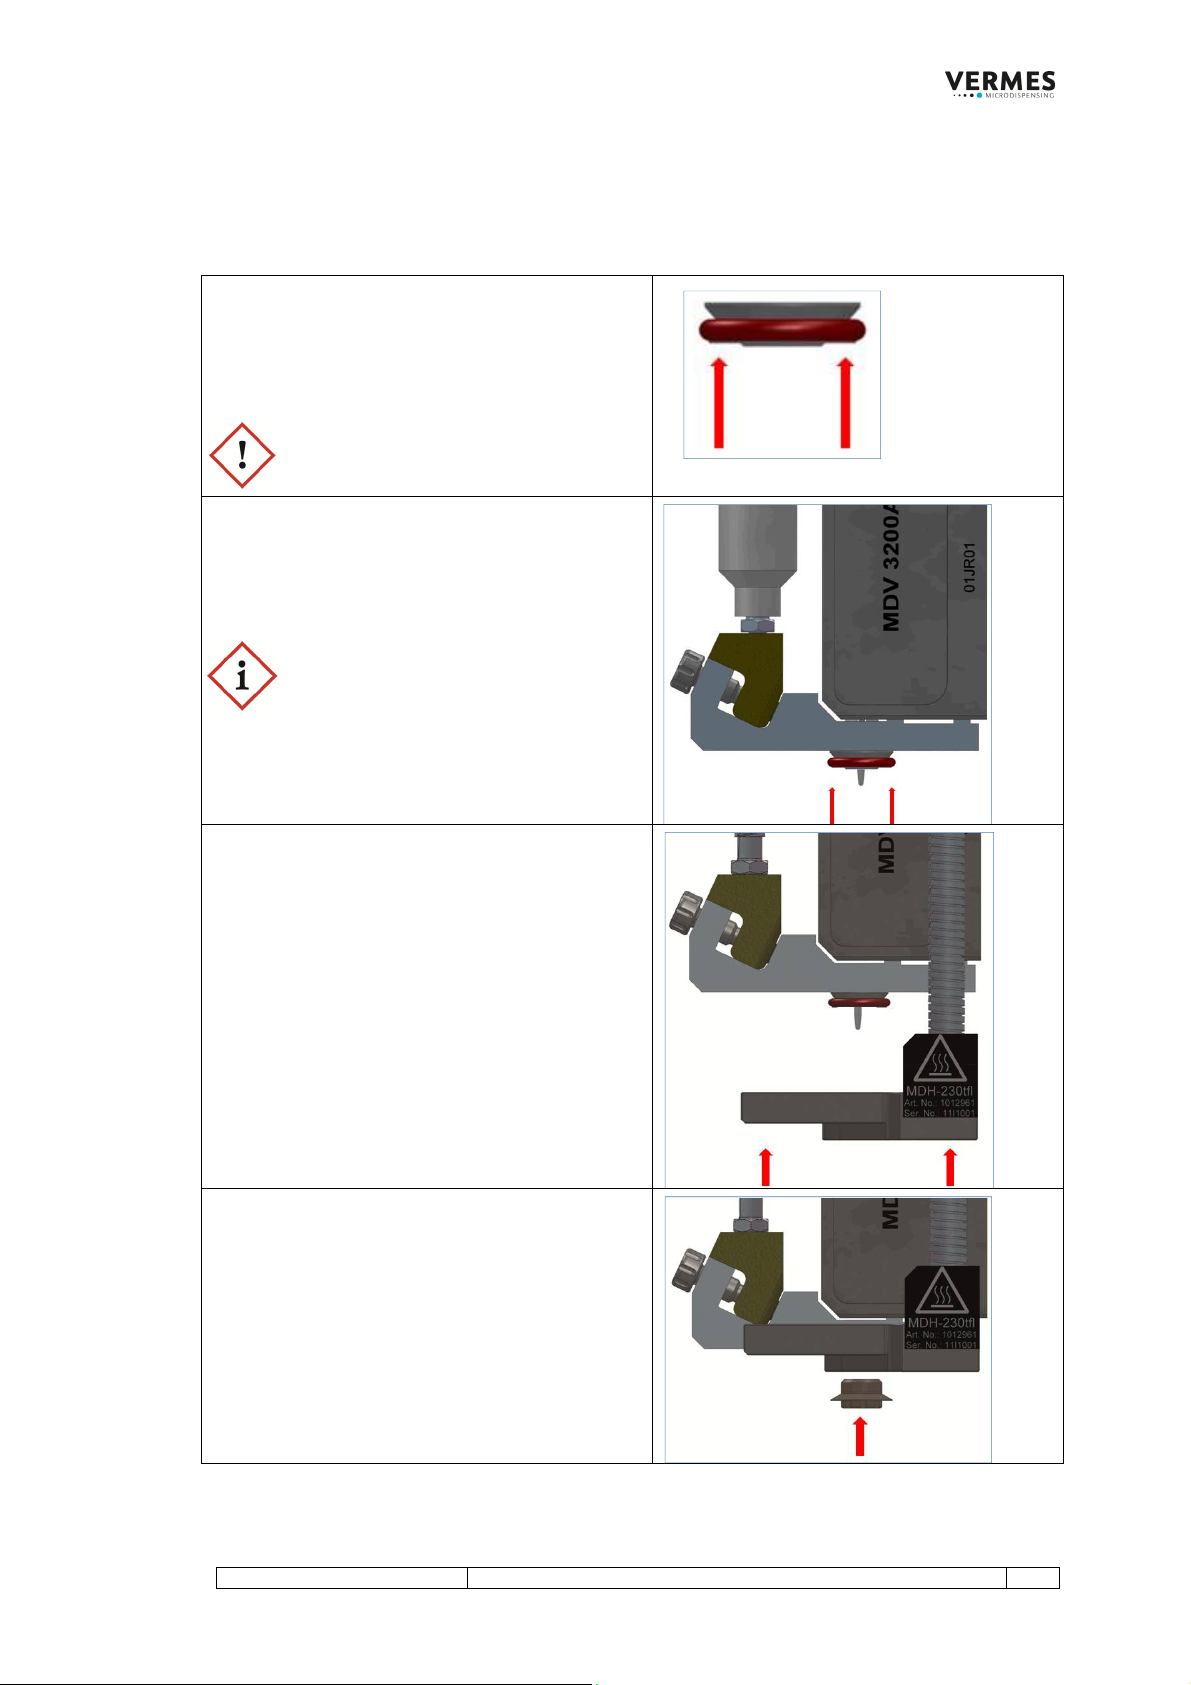
CAUTION!(Hightemperatures)
Theheatersyouwillusecanreachtemperaturesofupto180°C.Forsuchhigh
temperaturesthereisadangerofsevereburnsandinjuries.Useheatresistantgloves.
1.1 GeneralIntroduction
Thismanualexplainsstep‐by‐stephowtomountandworkwithanapplicationforthe
dispensingofareactivehotmeltadhesive.Itstartswiththenecessarypartsandtools;
followedbyanexplanationofhowtomountthenozzleandcartridgeheaters.Themanual
describeshowtodispenseandaddssometipsandtricksaboutcleaningthesystem
afterwards.Finallyaselectionofrecommendedfurtherreadingmaterialislisted.
Bewarethatsomepicturesmightdifferslightlyfromtheactualproduct.
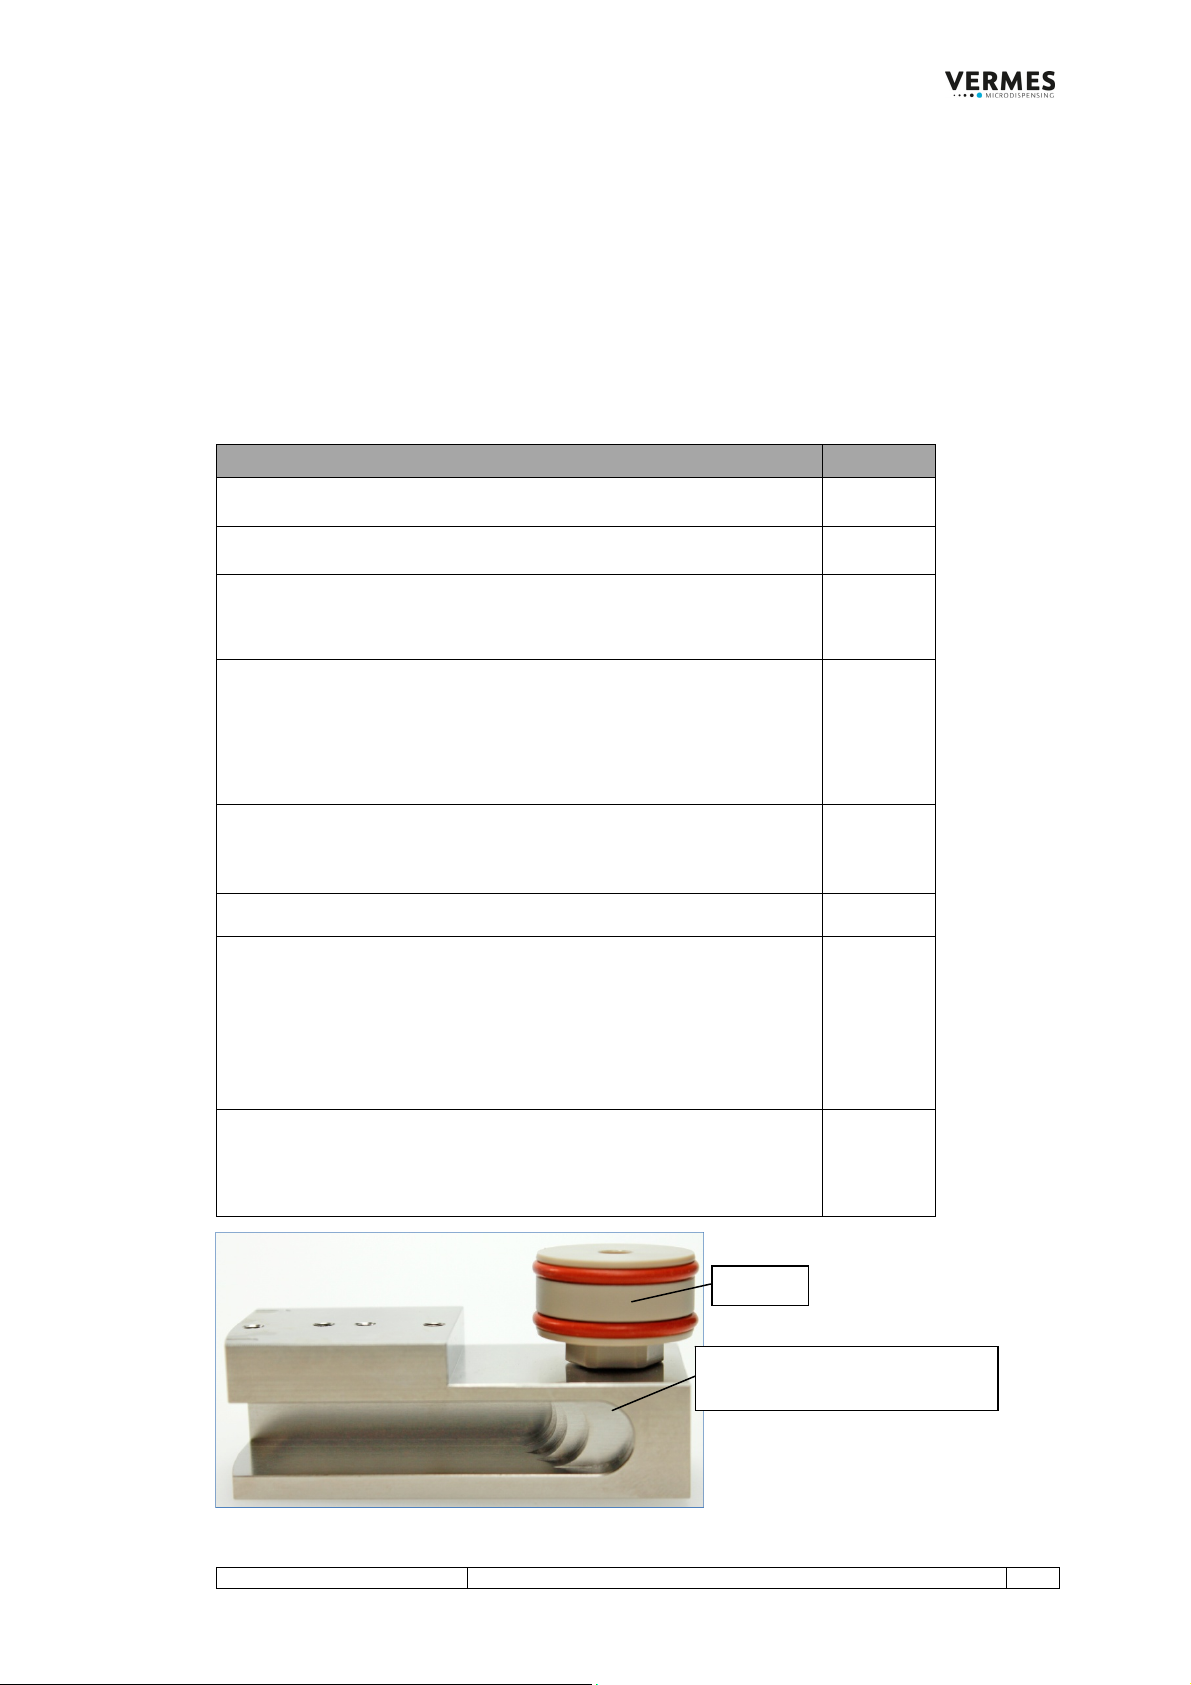
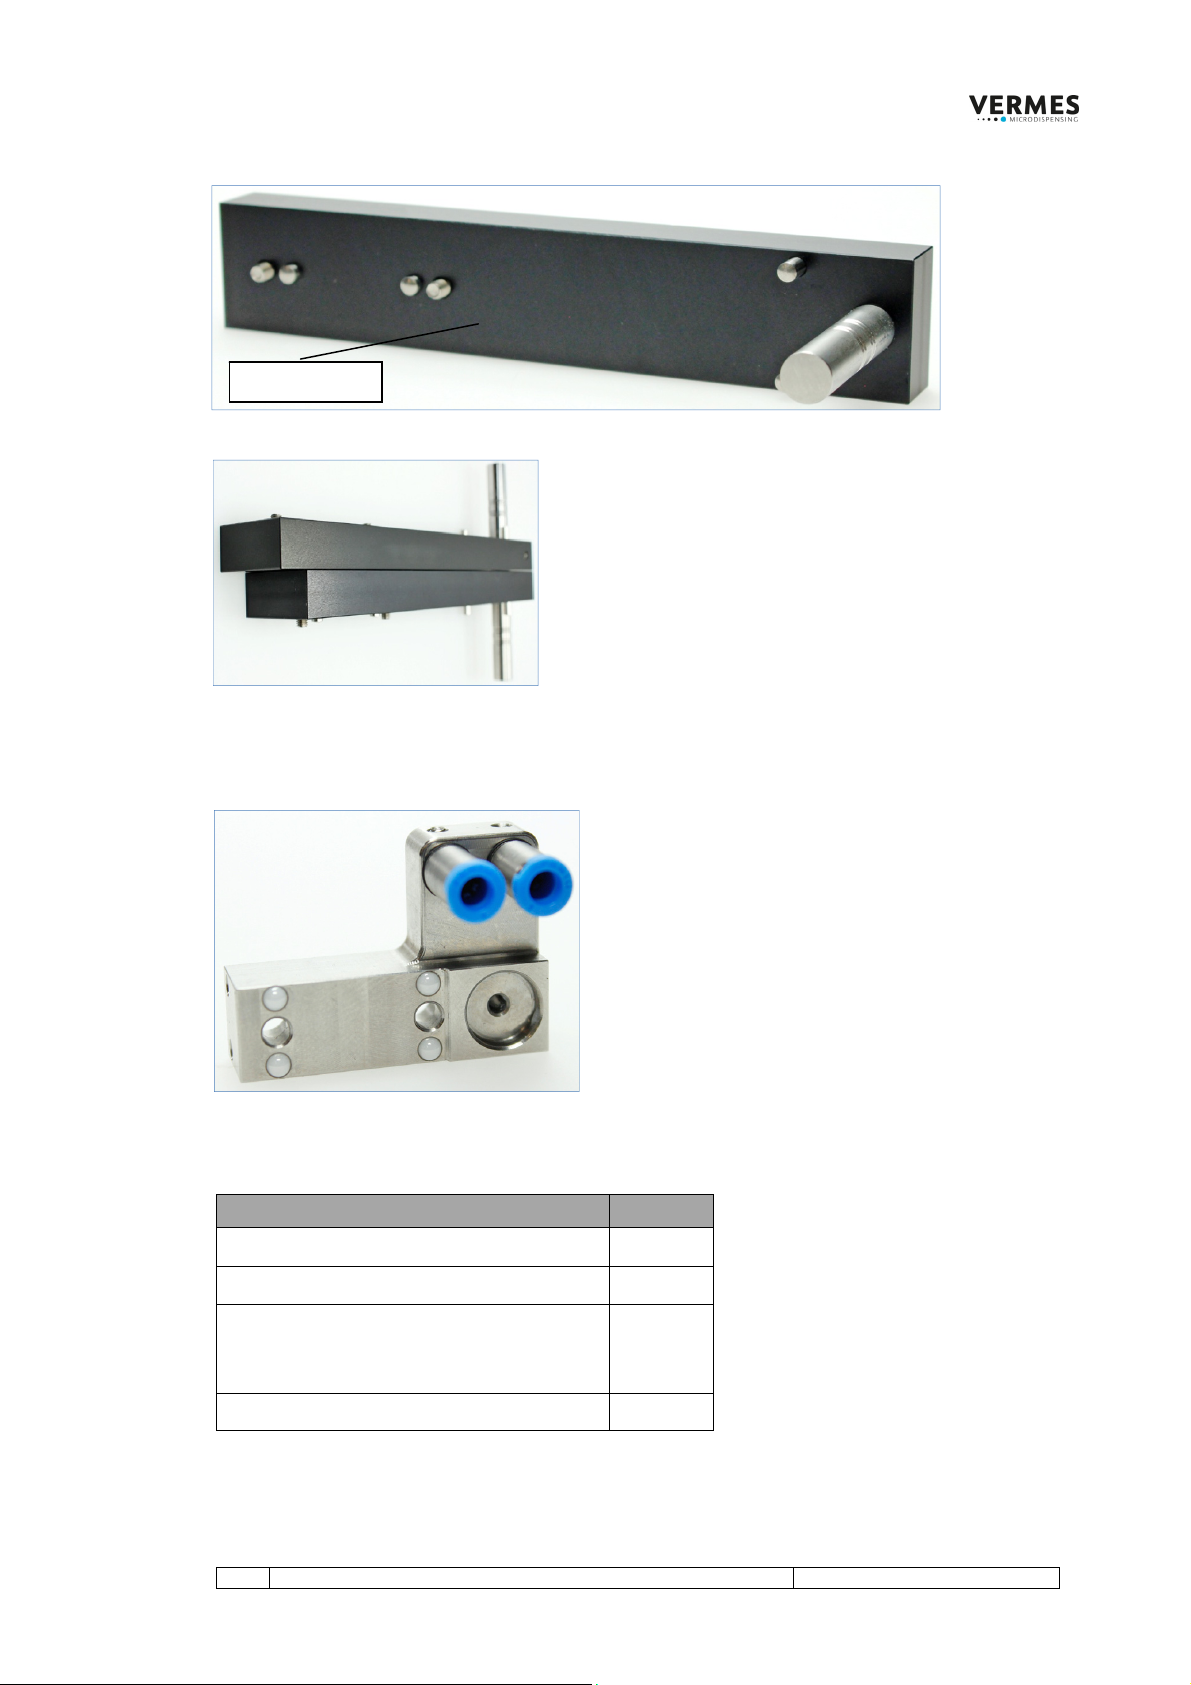
Forbestresultsthedeadvolumeofthemediacarryingchannelsshouldbeassmallas
possibleandbemadeofthermallysimilarmaterialstoavoidtemperaturefluctuations.All
partsarechosensothattheyhaveagoodheatconductance,butarealsosufficientlyheat
resistant.Forthesamereasonitisimportanttouseavalvewithaircooling.
SincetheinternalcontroloftheheaterviaMDCcanonlyworkwithoneheater,youwill
needanexternalheatercontrol.YoucanusetheheatercontrolMHC3001(orderno.
1012948)foroneheaterortheheatercontrolMHC3002(orderno.1012949,seepicture
below)fortwoheatersanduseittocontrolbothheaters.Theadvantageofusingthe
MHC3002forbothheatersisthatthepossibleminimumdelaycanbesetshorter.