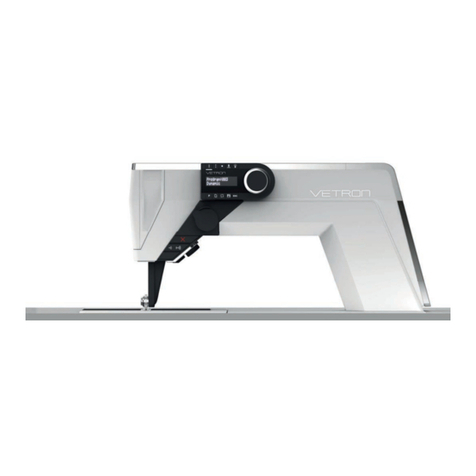
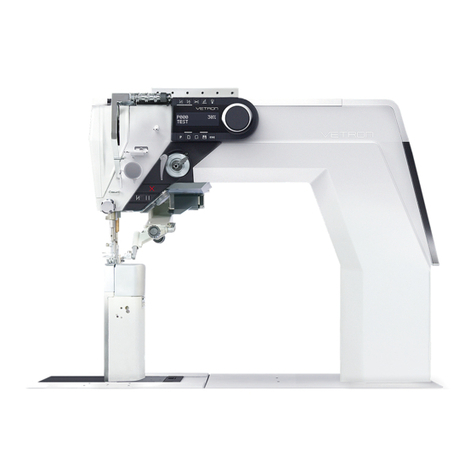
VETRON 5000 User manual

5000 » INSTRUCTION BOOK
03/2015


INSTRUCTION BOOK VETRON 5000 03
INSTRUCTION BOOK
05 01. OVERVIEW
06 02. OPERATING PANEL
07 03. HOTKEYS
08 04. ELECTRONIC HANDWHEEL & REVERSE SEWING
09 05. CONTROL & MAIN SWITCH
10 06. PEDAL
11 07. LIGHT
12 08. GENERAL INFORMATION IMPORTANT FOR SAFETY
13 09. MACHINE START
14 10. PROGRAM CHANGE
15 11. DIRECT ACCESS
16 12. INSERTING THE NEEDLE (ONE AND TWO NEEDLE MACHINE)
18 13. SEWING FEET EXCHANGE
19 14. THREADING THE MACHINE (ONE AND TWO NEEDLE MACHINE)
21 15. EXCHANGING THE BOBBBIN AND ADJUSTING
THE BOBBIN THREAD TENSION
22 16. WINDING THE BOBBIN THREAD
23 17. ENGAGING THE SAFETY CLUTCH
24 18. OIL LEVEL CHECK
25 19. CLEANING THE MACHINE

4 INSTRUCTION BOOK VETRON 5000

ESC
P000 30%
TEST
INSTRUCTION BOOK VETRON 5000 05
INSTRUCTION BOOK
01. OVERVIEW
1 OPERATING PANEL
2 HOTKEYS
4 CONTROL 5 DONGLE 6 PEDAL
3 ELECTRONICS AND SEWING REVERSE

ESC
000
SE T
30%P
T
1 2 3 4
5 6 7 8 9
10
A B
06 INSTRUCTION BOOK VETRON 5000
INSTRUCTION BOOK
02. OPERATING PANEL
The operating fi eld indicates the current operating states.
Operation takes place via continuous dialog between control and operator.
Depending on the operating state, di erent texts are displayed.
The following functions are assigned to the BUTTONS ABOVE AND BELOW THE DISPLAY:
1 BACKTACK (from left to right):
1. Start backtack
2. End backtack
2 THREAD TRIMMING
3 NEEDLE UP/DOWN AFTER STOP
4 LIGHT ON/OFF
5 PARAMETERS (not active)
6 NEW PROGRAM (not active)
7 PROGRAMMED SEAM (not active)
8 SAVE (not active)
9 CANCEL (not active)
If a function is activated, this is indicated by illuminating the corresponding LED.
In order to CHANGE OR SET VALUES, use the JOG KEY ( 10 ):
Turning changes the values; pressing the JOG KEY enters the value.
In the following, the operating type is indicated by the following icons:
Input = Press the JOG KEY:
Change = Turn the JOG KEY:

1
2
4
3
INSTRUCTION BOOK VETRON 5000 07
INSTRUCTION BOOK
03. HOTKEYS
1 SAFETY SWITCH
If the safety switch is triggered, all functions are locked. The LED lights up red.
The “blocked mode” is active.
CAUTION:
Before activating the machine by the X-button make sure to remove sewing material
or other items below the sewing feet if necessary and follow the instructions displayed
in the control panel.
2 SINGLE BACKTACK SUPRESSION
If the backtack function is activated, the following backtack is switched o one time
by pushing the key.
3 2ND STITCH LENGTH
If the second stitch length is activated, the adjacent LED is lit up.
4 CUSTOMIZABLE BUTTON
Default: Toggle foot stroke level

1
2
3
08 INSTRUCTION BOOK VETRON 5000
NOTE!
The electronic handwheel is not active unless the machine has performed at least one stitch.
For safety reasons it is necessary during “blocked mode” to push and hold
the programmable button (the lowest button) 3 to activate the handwheel.
1 ELECTRONIC HAND WHEEL – FUNCTION
» By turning the hand wheel, you can move the needle bar forwards or backwards.
In the following, the operating type is indicated by the following icons:
Pressing the hand wheel: stitch-for-stitch function / needle positioning
Turning the hand wheel:
2 REVERSE SEWING
Pulling the button changes the sewing direction.
stitch-for-stitch function / needle positioning
INSTRUCTION BOOK
04. ELECTRONIC HAND WHEEL & REVERSE SEWING

1
2
INSTRUCTION BOOK VETRON 5000 09
1 MACHINE MAIN SWITCH ON/OFF
2 USB-PORT
Identify yourself using the provided USB dongle.
INSTRUCTION BOOK
05. CONTROL & MAIN SWITCH

0
+1
-2
+2
-1
10 INSTRUCTION BOOK VETRON 5000
INSTRUCTION BOOK
06. PEDAL
0 IDLE POSITION
+1 CONSTANT SEWING SPEED (ADJUSTABLE VIA PARAMETER M502)
+2 VARIABLE SEWING SPEED FROM 0-100%
OF THE CHOOSEN MAXIMUM SPEED (DEPENDING ON SEWING PROGRAM)
-1 SEWING FEET LIFT
-2 SEAM END PROCEDURE ACTIVATION (DEPENDING ON SEWING PROGRAM)

INSTRUCTION BOOK VETRON 5000 11
INSTRUCTION BOOK
07. LIGHT
The VETRON head module for sewing is equipped with LED sewing area lighting,
whose intensity can be controlled via the operating field.
For SWITCHING the light ON and OFF, press button »
To ADJUST THE LIGHT INTENSITY, proceed as follows:
DISPLAY STEP DESCRIPTION
» ADJUST LIGHT INTENSITY
1
P 00 0
EMP OR AGN
1 Press the LIGHT button
►
The corresponding LED on
the display lights up
2r sig %h ne 00st 1B ► Change LIGHT INTENSITY Percentage on the display and
light intensity of the light are changed.
3r sig %h ne 60stB After 2 seconds without further input,
the value is set and the current program
number is shown
4P 00 0
EMP OR AGN
Machine is ready for operation.

12 INSTRUCTION BOOK VETRON 5000
INSTRUCTION BOOK
08. GENERAL INFORMATION IMPORTANT FOR SAFETY
This manual and the warning symbols on the machine should
ensure the safe use of the machine, so that no accidents and
injuries may occur. Please read this instruction and also the
safety instructions of the motor manufacturer carefully.
The machine may only be set into operation after this
instruction manual has been read and the operator has
been trained by authorized personal.
The machine may only be used as specified and with the
appropriate safety devices. General safety instructions
must be applied.
Take note of the danger and safety instructions on the
machine.
The machine must be switched o, or plug pulled when
maintenance and other work e.g. changing of needle,
sewing foot, needle plate, feed dog, bobbin or threading
is done, also when leaving the working place.
Daily maintenance work may only be taken out by properly
trained personnel.
Repairs and special maintenance may only be done by
technical personnel or specially trained sta.
Only qualified mechanic may take out work on the electrical
equipment.
Works on live parts are not allowed. Conversions or modifi-
cations to the machine may only be done with the common
safety measures.
Only original VETRON spare parts or parts which are cleared
by VETRON are allowed to use when repairing the machine.
Failure to comply will void the warranty.
The machine can only be used when the whole unit complies
with the EC-Directive.
The connecting cable must be equipped with a country-
specific connecting plug. This must be done by an electrician.
General Safety Instructions Notice to the owner
This manual must be at all times be available for the
operator as it is part of the machine. Make sure that the
persons whom are working on the machine read it before
starting the machine for the first time.
The owner must make sure that the machine is in good
working order.
The owner must check that all safety devices are in place
and in working order.
The owner must make sure that only authorize, trained
persons are working on the machine
Operators and Technical Sta
It is the operator´s responsibility to take care of small
adjustments, operating and cleaning of the machine.
The operator has to refrain from any actions that can
interfere with the safety of the machine. There is no
jewelry, changings or rings to be worn while working
on the machine. The clothing should be tight fitting.
Only authorized personnel is allowed on the workplace.
The incidence of an error on the machine that can
interfere with the safety must be reportedto the supervisor.
The skilled technical sta is responsible for lubricating,
maintenance, repairing and adjusting of the machine. The
machine must be switched of before starting any work on
the machine and be secured that it can´t be switched on
by evident.
Exceptions are listed in the regulation EN 50110. The safety
guards must be replaced after finishing the repair and
maintenance work.
Operators and technical sta must take attention of the
safety and operating instructions in this manual.

11
INSTRUCTION BOOK VETRON 5000 13
INSTRUCTION BOOK
09. MACHINE START
Press the main switch at the control box to power up the machine.
01. Wait some seconds until the machine is initialized.
DANGER!
Make sure that no sewing material or other items are below the sewing feet
before pushing the pedal.
02. Push the pedal. The sewing feet are moving and finally positioning on the needle plate.
NOTE: The red and white control lights 1 at the machine head are flashing
during automatic movement.
03. The sewing light is automatically switched on.
04. The machine is now ready for use.

ESC
000
SE T
30%P
T10
14 INSTRUCTION BOOK VETRON 5000
INSTRUCTION BOOK
10. PROGRAM CHANGE
NOTE!
Inside the seam it is not possible to change the program. Press the pedal back to thread trimming
position to activate the function if necessary.
Push the JOG KEY 10 .
The current program number is fl ashing.
01. Turn the JOG KEY to the left or right to choose the desired program number.
02. Confi rm your choice by pushing the JOG KEY again.
03. The machine is now ready for use.

ESC
000
SE T
30%P
T10
INSTRUCTION BOOK VETRON 5000 15
INSTRUCTION BOOK
11. DIRECT ACCESS
NOTE!
It is possible to create operator´s direct access to one program parameter via the control panel.
It is permanently shown in the display. The manipulations by the operator are not saved in the
program and will be reseted after program change or machine power o .
By turning the JOG KEY 10 the value can be adjusted directly.
The following parameters can be displayed:
OFF
»Thread tension
»Stitch length
»Maximum speed
»Top feed stroke
»Top feed pressure
»Bobbin thread counter (only display)
»Edge guide distance
»Current sewing speed (only display)
»Current needle position in degrees (only display).

3
1
2
16 INSTRUCTION BOOK VETRON 5000
INSTRUCTION BOOK
12. INSERTING THE NEEDLE (ONE NEEDLE MACHINE)
-1-2
CAUTION! RISK OF INJURY!
Push the X-button at the machine head, the red light illuminates showing the active
“blocked mode“, or power o the machine before inserting the needle. Failure to comply
produces a risk of injury in case of an unintentionally machine operation.
CAUTION!
Only use needles from the system intended for the machine.
(see at VETRON GENERAL INSTRUCTION MANUAL – TECHNICAL DATA)
01. Push the X-button at the machine head, the red light illuminates showing
the active “blocked mode”, or power o the machine.
02. Loosen the screw 1 .
03. Push the needle 2 fully in until it stop. Make sure that the groove 3
on the needle is to the right side.
04. Fasten the screw 1 again.
05. Push the X-button or switch on the machine again and follow the instructions
displayed in the control panel.
CAUTION:
Before activating the machine by the X-button make sure to remove sewing material
or other items below the sewing feet if necessary and follow the instructions displayed
in the control panel.

1
2
3
INSTRUCTION BOOK VETRON 5000 17
INSTRUCTION BOOK
12. INSERTING THE NEEDLE (TWO NEEDLE MACHINE)
-2-2
CAUTION! RISK OF INJURY!
Push the X-button at the machine head, the red light illuminates showing the active “blocked mode“,
or power o the machine before inserting the needles. Failure to comply produces a risk of injury in
case of an unintentionally machine operation.
CAUTION!
Only use needles from the system intended for the machine.
(see at VETRON GENERAL INSTRUCTION MANUAL – TECHNICAL DATA)
01. Push the X-button at the machine head, the red light illuminates showing
the active “blocked mode”, or power o the machine.
02. Loosen the screws 1 .
03. Push the needles 2 fully in until they stop. Make sure that the groove 3
of the right needle points to the right and the left needle to the left.
04. Fasten the screws 1 again.
05. Push the X-button or switch on the machine again and follow the instructions
displayed in the control panel.
CAUTION:
Before activating the machine by the X-button make sure to remove sewing material
or other items below the sewing feet if necessary and follow the instructions displayed
in the control panel.

1
18 INSTRUCTION BOOK VETRON 5000
INSTRUCTION BOOK
13. SEWING FEET EXCHANGE
CAUTION! RISK OF INJURY!
Push the X-button at the machine head, the red light illuminates showing
the active “blocked mode“, or power o the machine before you change the sewing feet.
Failure to comply produces a risk of injury in case of an unintentionally machine operation.
During „blocked mode“ the sewing feet have no pressure or position control.
They can be moved by the following method:
01. Press and hold the programmable button on the machine head (lowest button).
02. By turning the JOG KEY the sewing feet can be moved.
03. By loosing screws 1 the sewing feet can be exchanged.
NOTE!
Push the X-button or switch on the machine again and follow the instructions
displayed in the control panel.

1
INSTRUCTION BOOK VETRON 5000 19
CAUTION! RISK OF INJURY!
Push the X-button at the machine head, the red light illuminates showing the active
“blocked mode“, or power o the machine. Failure to comply produces a risk of
injury in case of an unintentionally machine operation.
Make sure that the thread takeup lever 1 in its uppermost position.
Put the thread as shown in the picture.
NOTE!
Push the X-button or switch on the machine again and follow the instructions
displayed in the control panel.
INSTRUCTION BOOK
14. THREADING THE MACHINE (ONE NEEDLE MACHINE)

1
20 INSTRUCTION BOOK VETRON 5000
INSTRUCTION BOOK
14. THREADING THE MACHINE (TWO NEEDLE MACHINE)
CAUTION! RISK OF INJURY!
Push the X-button at the machine head, the red light illuminates showing the active
“blocked mode“, or power o the machine. Failure to comply produces a risk of injury
in case of an unintentionally machine operation.
Make sure that the the thread takeup lever 1 in its uppermost position.
Put the threads as shown in the picture.
NOTE!
Push the X-button or switch on the machine again and follow the instructions displayed
in the control panel.
Other manuals for 5000
5
Table of contents
Other VETRON Sewing Machine manuals

VETRON
VETRON 5064 User manual

VETRON
VETRON 5000 User manual

VETRON
VETRON 5390 User manual

VETRON
VETRON 5000 User manual

VETRON
VETRON 5400 User manual

VETRON
VETRON 5374 User manual

VETRON
VETRON 5000 User manual

VETRON
VETRON Typical GC6890 User manual

VETRON
VETRON 5000 Owner's manual

VETRON
VETRON 5300 User manual