Viavi FVAi-2030 User manual

Multiple Application Platform
FVAi-2030 Benchtop Microscope
User Guide
22112369-339 R000, Standard
December 2021

FVAi-2030 Benchtop Microscope User Guide, 22112369-339 R000, Standard ii
Copyright
Copyright © 2021 VIAVI Solutions Inc. All rights reserved. VIAVI and FiberChekPRO™ are trademarks or registered
trademarks of VIAVI in the United States and/or other countries. All other trademarks and registered trademarks
are the property of their respective owners. No part of this guide may be reproduced or transmitted,
electronically or otherwise, without written permission of the publisher.
Every effort was made to ensure that the information in this manual was accurate at the time of printing.
However, information is subject to change without notice, and VIAVI reserves the right to provide an addendum
to this manual with information not available at the time that this manual was created.
Patents
Patented as described at www.viavisolutions.com/patents.
Terms and Conditions
Specifications, terms, and conditions are subject to change without notice. The provision of hardware, services,
and/or software are subject to VIAVI standard terms and conditions, available at www.viavisolutions.com/terms.
Warranty
VIAVI warrants this equipment to be free of defects in material and workmanship for one (1) calendar year from
the date of purchase. Any mishandling or unauthorized repairs will void this warranty. For additional warranty
terms and conditions, see www.viavisolutions.com/terms.
Disclaimer
The foregoing warranties are in lieu of all other warranties and conditions, expressed or implied. VIAVI specifically
disclaims all other warranties, either expressed or implied, on any hardware, documentation or services including
but not limited to warranties relating to quality, performance, non-infringement, merchantability or fitness for a
purpose, as well as those arising from any course of dealing, usage or trade practice. Under no circumstances will
VIAVI be liable for any indirect or consequential damages related to breach of this warranty.
California Proposition 65
California Proposition 65, officially known as the Safe Drinking Water and Toxic Enforcement Act of 1986, was
enacted in November 1986 with the aim of protecting individuals in the state of California and the state's drinking
water and environment from excessive exposure to chemicals known to the state to cause cancer, birth defects or
other reproductive harm. For the VIAVI position statement on the use of Proposition 65 chemicals in VIAVI
products, see the Hazardous Substance Control section of the VIAVI Policies & Standards web page.
Federal Communications Commission (FCC) Notice
Electronic test equipment is exempt from Part 15 compliance (FCC) in the United States.
EU WEEE and Battery Directives
This product, and the batteries used to power the product, should not be disposed of as unsorted municipal waste
and should be collected separately and disposed of according to your national regulations.
VIAVI has established a take-back processes in compliance with the EU Waste Electrical and Electronic Equipment
(WEEE) Directive, 2012/19/EU, and the EU Battery Directive, 2006/66/EC. Instructions for returning waste
equipment and batteries to VIAVI can be found in the WEEE section of the VIAVI Policies & Standards web page.
If you have questions concerning disposal of your equipment or batteries, contact the VIAVI WEEE Program
Management team at WEEE.EMEA@ViaviSolutions.com.
EU REACH
Article 33 of EU REACH regulation (EC) No 1907/2006 requires article suppliers to provide information if a listed
Substances of Very High Concern (SVHC) is present in an article above a certain threshold. For information on the
presence of REACH SVHCs in VIAVI products, see the Hazardous Substance Control section of the VIAVI Policies &
Standards web page.

FVAi-2030 Benchtop Microscope User Guide, 22112369-339 R000, Standard iii
EU CE Marking Directives (LV, EMC, RoHS, RE)
This product conforms with all applicable CE marking directives. Please request the EU Declaration of Conformity
for details.
China RoHS materials declaration
7047 E. Greenway Parkway, Suite 250
Scottsdale, AZ 85254, USA
22157638, Rev
000
“ѝѝഭRoHS”
lj⭥ᆀؑӗ૱⊑ḃ᧗ࡦ㇑⨶࣎⌅NJ˄ؑӗъ䜘ˈㅜ 39 ˅
䱴ᖅ (Additional Information required for the Chinese Market only)
ᵜ䱴ᖅ᤹➗Āѝഭ RoHSāⲴ㾱≲䈤᰾Ҷᴹޣ⭥ᆀؑӗ૱⧟؍֯⭘ᵏ䲀ⲴᛵߥˈᒦࡇࠪҶӗ૱ѝᴹ
Ⲵᴹ∂ǃᴹᇣ⢙䍘Ⲵ㊫઼ᡰ൘䜘ԦDŽᵜ䱴ᖅ䘲⭘Ҿӗ૱ѫփ઼ᡰᴹ䝽ԦDŽ
ӗ૱㌫ࡇ: FVAi Series Bench-Top Microscope with Integrated LCD Autofocus 30x
(Product Family)
⧟؍֯⭘ᵏ䲀˖
ᵜḷ䇶ḷ⌘Ҿӗ૱ѫփѻкˈ㺘᰾䈕ӗ૱ᡆަ䝽Ԧᴹᴹ∂ǃᴹᇣ⢙䍘˄䈖ᛵ㿱л
㺘˅DŽ
ަѝⲴᮠᆇԓ㺘൘↓ᑨᶑԦл㠣ቁ൘ӗ૱⭏ӗᰕᵏѻᮠᒤ䈕ӗ૱ᡆަ䝽Ԧ
ᴹⲴᴹ∂ǃᴹᇣ⢙䍘нՊᔲᡆ⋴┿DŽ䈕ᵏ䲀н䘲⭘Ҿ䈨ྲ⭥⊐ㅹ᱃㙇૱DŽ
ᴹޣ↓ᑨᶑԦˈ䈧৲㿱ӗ૱⭘ᡧDŽ
ӗ૱⭏ӗᰕᵏ䈧৲㿱ӗ૱Ⲵṑ߶䇱ҖDŽ
ᴹ∂ǃᴹᇣ⢙䍘Ⲵ㊫ර઼ᡰ൘䜘Ԧ
ᴹ∂ǃᴹᇣ⢙䍘઼ݳ㍐
ݳಘԦ
(Component)
䫵(Pb)
⊎(Hg)
䭹(Cd)
ޝԧ䬜
(CR
6+
)
ཊⓤ㚄㤟
(PBB)
ཊⓤҼ㤟䟊
(PBDE)
ӗ૱ѫփ
(Main Product)
ঠࡧ⭥䐟ᶯ㓴Ԧ
(PCB Assemblies)
X
O
O
O
O
O
䜘䝽㓯
(Internal wiring)
X
O
O
O
O
O
ᱮ⽪ಘ
(Display)
X
O
O
O
O
O
䭞ⴈ
(Keyboard)
O
O
O
O
O
O
⭥⊐
(Batteries)
O
O
O
O
O
O
⭥Ⓚ
(Power Supply)
X
O
O
O
O
O
c⭥ᐕ䴦Ԧ
(Electro-mechanical parts)
X
O
O
O
O
O
⺜ⴈ
(Hard Drive)
O
O
O
O
O
O
ݹ⁑ඇ / 䖵ࣙ⁑ඇ
(Optical modules) / (Auxiliary modules)
X
O
O
O
O
O
䠁ཆ༣䴦Ԧ઼㍗ᢓԦ
(Metal case parts and fixings)
X
O
O
O
O
O
ກᯉཆ༣䴦Ԧ
(Plastic case parts)
O
O
O
O
O
O
ḷㆮ઼㜦ᑖ
(Labels and tapes)
O
O
O
O
O
O
䝽Ԧ
(Accessories)
ཆ᧕⭥㔶઼䘲䝽ಘ
(External cables and adapters)
X
O
O
O
O
O
઼ަᆳঠࡧᶀᯉ
(Handbooks and other printed material)
O
O
O
O
O
O
㻵㇡઼㕊ᑖ
(Carrying case and strap)
O
O
O
O
O
O
ަᆳ䝽Ԧ
(Other accessories)
O
O
O
O
O
O
ᵜ㺘ᱟ᤹➗
S / T 11364
Ⲵ㿴ᇊ㕆ࡦⲴ
:
O
˖㺘⽪䈕ᴹᇣ⢙䍘൘䈕䜘Ԧᡰᴹ൷䍘ᶀᯉѝⲴ䟿൷൘ GB/T 26572 㿴ᇊⲴ䲀䟿㾱≲ԕлDŽ
X
˖㺘⽪䈕ᴹᇣ⢙䍘㠣ቁ൘䈕䜘ԦⲴḀа൷䍘ᶀᯉѝⲴ䟿䎵ࠪ GB/T 26572 㿴ᇊⲴ䲀䟿㾱≲DŽ

FVAi-2030 Benchtop Microscope User Guide, 22112369-339 R000, Standard iv
Contents
1 Overview.....................................................................................................................................1-1
Ordering information.......................................................................................................................... 1-2
Technical Assistance Center and Knowledge Base ............................................................................. 1-3
2 Getting started ............................................................................................................................2-1
Features .............................................................................................................................................. 2-2
Powering the FVAi-2030 microscope on or off................................................................................... 2-3
Mounting fiber adapters and connectors........................................................................................... 2-4
Navigating the Home screen .............................................................................................................. 2-6
Accessing Live view............................................................................................................................. 2-8
Applying a profile and an optical setting .......................................................................................... 2-10
Managing groups .............................................................................................................................. 2-12
Managing user information .............................................................................................................. 2-14
Managing microscope settings ......................................................................................................... 2-15
Managing the Fiber Centering Limit setting and marker ........................................................... 2-16
Managing image-save options.......................................................................................................... 2-18
Managing system settings ................................................................................................................ 2-19
Calibrating the touchscreen....................................................................................................... 2-20
Connecting and activating a supported USB device ......................................................................... 2-21
Activating a P5000i probe .......................................................................................................... 2-21
Activating an MP Series optical power meter............................................................................ 2-23
3 Fiber inspection during standalone operation..............................................................................3-1
Requirements for Pass/Fail tests ........................................................................................................ 3-2
Starting a Pass/Fail test from the FVAi-2030 ...................................................................................... 3-3
Viewing the fiber chamfer .................................................................................................................. 3-4
Capturing images................................................................................................................................ 3-5
Recalling test results and images........................................................................................................ 3-7
4 Using the FVAi-2030 microscope with FiberChekPRO...................................................................4-1
Connecting to FiberChekPRO.............................................................................................................. 4-2
Performing Pass/Fail tests and generating reports ............................................................................ 4-3
Viewing the fiber chamfer with FiberChekPRO .................................................................................. 4-5
Creating analysis profiles for the FVAi-2030 microscope ................................................................... 4-6
Appendix A Firmware update ........................................................................................................... A-1
Appendix B System reset .................................................................................................................. B-1
Appendix C Specifications ..................................................................................................................C-1
Appendix D Document revision history ............................................................................................ D-1

FVAi-2030 Benchtop Microscope User Guide, 22112369-339 R000, Standard v
About this guide
This guide provides information about the FVAi-2030 Benchtop Microscope. This is the first release of this user
guide. For a detailed revision history, see “Document revision history” on page D-1.
To access the latest version of this user guide, go to:
FVAi-2030 Benchtop Microscope User Guide, 22112369-339

FVAi-2030 Benchtop Microscope User Guide, 22112369-339 R000, Standard 1-1
1 Overview
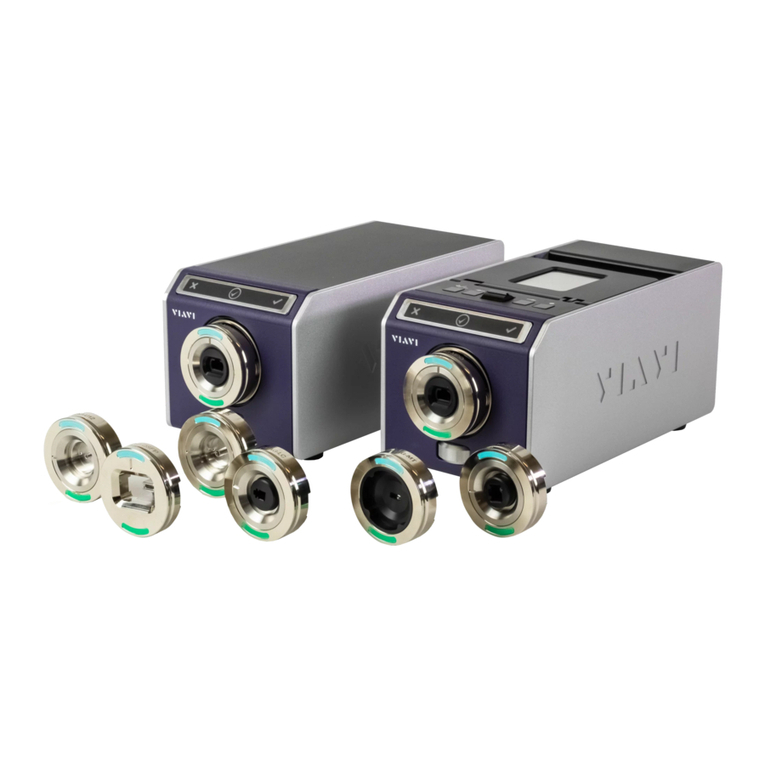
The FVAi-2030 Benchtop Microscope is the ideal microscope to control contamination during optical connector
manufacturing. Equipped with 30x optics, ultra-wide field-of-view, dual magnification, automatic focus, and built-
in end face analysis, the FVAi-2030 gives operators fast and complete visibility of the entire ferrule end face so
that any contamination on or near the fiber end face can be quickly found.
Operators can use the FVAi-2030 as a standalone device or in conjunction with the FiberChekPRO™ inspection
and analysis software.
Figure 1-1: FVAi-2030 Benchtop Microscope
FiberChekPRO Fiber Inspection and Analysis software
Designed to operate on a PC/laptop, FiberChekPRO instantly captures, analyzes, and grades fiber end-face images
to determine acceptability of the end faces. It identifies and characterizes defects and contamination, and then
provides a pass or fail result according to preconfigured criteria. In addition, users can customize settings, as well
as archive data and generate reports.
This section covers the following information:
•“Ordering information” on page 1-2
•“Technical Assistance Center and Knowledge Base” on page 1-3

FVAi-2030 Benchtop Microscope User Guide, 22112369-339 R000, Standard 1-2
Overview Ordering information
Ordering information
Table 1-1: FVAi-2030 Benchtop Microscope
Description Part Number
FVAi-2030 Large Field of View Benchtop Microscope1 with Integrated LCD, Autofocus 30x
1. Includes M5 hex screwdriver, power adapter, and USB cable.
FVAi-2030
Table 1-2: Supported fiber adapters
Description Part Number
LC/APC Duplex Fiber Microscope Adapter, 35-Degree Chamfer Angle FMAX-LCA-DUX-SL35
LC/APC Fiber Microscope Adapter, 35-Degree Chamfer Angle FMAX-LCA-SL35
LC/PC Duplex Fiber Microscope Adapter, 35-Degree Chamfer Angle FMAX-LC-DUX-SL35
LC/PC Fiber Microscope Adapter, 35-Degree Chamfer Angle FMAX-LC-SL35
SC/APC Fiber Microscope Adapter, 30-Degree Chamfer Angle FMAX-SCA-SL30
SC/APC Fiber Microscope Adapter, 41-Degree Chamfer Angle FMAX-SCA-SL41
SC/PC Duplex Fiber Microscope Adapter. 30-Degree Chamfer Angle FMAX-SC-DUX-SL30
SC/PC Fiber Microscope Adapter, 30-Degree Chamfer Angle FMAX-SC-SL30
Universal 1.25mm APC Fiber Microscope Adapter, 35-Degree Chamfer Angle FMAX-U12A-SL35
Universal 1.25mm PC Fiber Microscope Adapter, 35-Degree Chamfer Angle FMAX-U12-SL35
Universal 2.5mm APC Fiber Microscope Adapter, 30-Degree Chamfer Angle FMAX-U25A-SL30
Universal 2.5mm APC Fiber Microscope Adapter, 41-Degree Chamfer Angle FMAX-U25A-SL41
Universal 2.5mm PC Fiber Microscope Adapter, 30-Degree Chamfer Angle FMAX-U25-SL30
CS/APC Fiber Microscope Adapter, 35-Degree Chamfer Angle FMAX-CS-APC-SL35
CS/PC Fiber Microscope Adapter, 35-Degree Chamfer Angle FMAX-CS-SL35
MDC/APC Fiber Microscope Adapter, 35-Degree Chamfer Angle FMAX-MDC-APC-SL35
MDC/PC Fiber Microscope Adapter, 35-Degree Chamfer Angle FMAX-MDC-SL35
SN/APC Duplex Fiber Microscope Adapter, 35-Degree Chamfer Angle FMAX-SN-APC-SL35
SN/PC Fiber Microscope Adapter, 35-Degree Chamfer Angle FMAX-SN-SL35

FVAi-2030 Benchtop Microscope User Guide, 22112369-339 R000, Standard 1-3
Overview Technical Assistance Center and Knowledge Base
Technical Assistance Center and Knowledge Base
To find the Technical Assistance Center phone number and email in your region for the FVAi-2030 Benchtop
Microscope or to search the VIAVI Solutions Knowledge Base, visit the VIAVI Solutions Technical & Product
Support site at support.viavisolutions.com.

FVAi-2030 Benchtop Microscope User Guide, 22112369-339 R000, Standard 2-1
2 Getting started
This section covers the following information:
•“Features” on page 2-2
•“Powering the FVAi-2030 microscope on or off” on page 2-3
•“Mounting fiber adapters and connectors” on page 2-4
•“Navigating the Home screen” on page 2-6
•“Accessing Live view” on page 2-8
•“Applying a profile and an optical setting” on page 2-10
•“Managing groups” on page 2-12
•“Managing user information” on page 2-14
•“Managing microscope settings” on page 2-15
•“Managing image-save options” on page 2-18
•“Managing system settings” on page 2-19
•“Connecting and activating a supported USB device” on page 2-21

FVAi-2030 Benchtop Microscope User Guide, 22112369-339 R000, Standard 2-2
Getting started Features
Features
Figure 2-1: FVAi-2030 microscope features (without adapter)
Table 2-1: FVAi-2030 microscope features - rear panel
Label Description
Power switch (ON/OFF). See “Powering the FVAi-2030 microscope on or off” on page 2-3).
Power adapter receptacle
USB-B Interface (1x) for connecting the FVAi-2030 microscope to a computer for use with FiberChekPRO
inspection software. See “Using the FVAi-2030 microscope with FiberChekPRO” on page 4-1.
USB Interfaces (2x) for connecting supported USB devices to FVAi-2030 microscope. See “Connecting and
activating a supported USB device” on page 2-21.
VGA Interface for connecting the FVAi-2030 microscope to an external monitor.

FVAi-2030 Benchtop Microscope User Guide, 22112369-339 R000, Standard 2-3
Getting started Powering the FVAi-2030 microscope on or off
Powering the FVAi-2030 microscope on or off
Note: This section describes the procedure for powering on the microscope for standalone use. For information
about powering the microscope for use with the FiberChekPRO inspection software, see “Using the FVAi-
2030 microscope with FiberChekPRO” on page 4-1.
Step 1 Place the microscope on a flat, stable surface in a location close to an appropriate power source.
Step 2 Connect the power adapter to the receptacle on the rear panel of the microscope and then to the power
source.
Step 3 Set the power switch on the rear panel to the ON position.
The LCD touchscreen initializes.
If the microscope is not connected to a computer via a USB-B connection (see “Features” on page 2-2),
the Home screen appears.
If the microscope is connected to a computer via a USB-B connection, select the Home tile to access the
Home screen. For more information, see “Navigating the Home screen” on page 2-6.
Step 4 To power off the microscope, set the power switch to the OFF position.
Important: Always use the power button to power the microscope off. Do not power off by
disconnecting the power cable from either the device or the power source.
— End —
CAUTION
Use only the power adapter shipped with the FVAi-2030 microscope to power the
device.

FVAi-2030 Benchtop Microscope User Guide, 22112369-339 R000, Standard 2-4
Getting started Mounting fiber adapters and connectors
Mounting fiber adapters and connectors
Important: Store fiber adapters in dust-proof containers while not installed on a microscope.
Step 1 If present, unscrew the lens cap or fiber adapter from the adapter mount, and store it in a dust-proof
container.
Step 2 Place the required fiber adapter onto the mount, and finger-tighten the adapter to secure it. Do not
over-tighten the adapter.
Step 3 Power on the microscope, and access Live view on the LCD touchscreen (see “Accessing Live view” on
page 2-8).
Step 4 Clean the fiber connector to be inspected.
Step 5 Ensure that the fiber connector is correctly oriented, and then insert it into the fiber adapter.
Step 6 Ensure that the fiber end face is properly centered within the view.
Note: The message Auto Focus Error: Unable to locate the fiber will appear when you
attempt to use the Autofocus tool while the fiber end face is poorly centered.

FVAi-2030 Benchtop Microscope User Guide, 22112369-339 R000, Standard 2-5
Getting started Mounting fiber adapters and connectors
Step 7 If required, use the M5 hex screwdriver supplied with the microscope to adjust the vertical and
horizontal position of the lens.
Note: You can use the Fiber Centering Limit setting and marker as a reference for the adjustment. For
information, see “Managing the Fiber Centering Limit setting and marker” on page 2-16.
Insert the end of the M5 hex screwdriver into an adjustment pilot hole until it engages, and then
carefully turn the screwdriver in either direction, referring to the touchscreen as the position of the lens
changes.
— End —
CAUTION
• Use only the M5 hex screwdriver supplied with the microscope.
• Do not force the screwdriver beyond the adjustment limits.

FVAi-2030 Benchtop Microscope User Guide, 22112369-339 R000, Standard 2-6
Getting started Navigating the Home screen
Navigating the Home screen
Use the Home screen during standalone operation of the microscope to access tools on the FVAi-2030 microscope
(Table 2-2 on page 2-7).
Note: If touchscreen controls (such as tiles, menu options, and keyboard keys) do not respond as expected, you
can calibrate the active areas of the touchscreen. See “Calibrating the touchscreen” on page 2-20 for
information.
Figure 2-2: FVAi-2030 Home screen
Note: If supported devices, such as a P5000i Digital Analysis Probe and/or an MP Series Optical Power Meter,
are connected to the microscope via a USB connection (see “Features” on page 2-2), a tile for activating
the supported device appears on the Home screen. Select the tile for the device to use the device with
the microscope. See “Connecting and activating a supported USB device” on page 2-21 for more
information.
Figure 2-3: FVAi-2030 Home Screen example - connected USB devices

FVAi-2030 Benchtop Microscope User Guide, 22112369-339 R000, Standard 2-7
Getting started Navigating the Home screen
Figure 2-4: Home Screen menu example
Table 2-2: FVAi-2030 Home screen tools
Tool Description
Inspect (FVAi-2030) Activates the FVAi-2030 microscope and accesses Live view for fiber
inspection. See “Accessing Live view” on page 2-8.
More (Home Screen menu,
Figure 2-4)
RECALL IMAGE: See “Recalling test results and images” on page 3-7
REVIEW OPM DATA: See “Connecting and activating a supported USB
device” on page 2-21.
SYSTEM SETTINGS: See “Managing system settings” on page 2-19
USER INFO: See “Managing user information” on page 2-14
OUTPUT:
• During standalone operation, OUTPUT:LOCAL indicates local
operation via the touchscreen.
• While the microscope is connected to an external monitor via a
VGA connection (OUTPUT:VGA), and/or to FiberChekPRO via a
USB-B connection to the computer where FiberChekPRO is
installed, select to toggle output mode for working with the
microscope.
Note: While output mode is FiberChekPRO over a USB-B connection,
select the Home tile on the LCD touchscreen to access the Home
screen on the touchscreen. See “Powering the FVAi-2030 microscope
on or off” on page 2-3.

FVAi-2030 Benchtop Microscope User Guide, 22112369-339 R000, Standard 2-8
Getting started Accessing Live view
Accessing Live view
During standalone operation of the microscope, the Live view on the touchscreen displays a live view of the fiber
connector mounted on the fiber adapter and provides access to various fiber inspection and management tools.
Note: For information about Live view features available in FiberChekPRO, see the FiberChekPRO Automated
Fiber Inspection and Analysis Software User Manual.
Step 1 On the Home screen, select Inspect to access Live view.
The following image shows that a fiber connector is mounted on the microscope and the Focus-quality
meter is enabled.
Step 2 Tap the touchscreen to access the Live view tools, and then select a tool.
Live View Tool Description
Home Return to the Home screen (see “Navigating the Home screen” on page 2-6).
Magnification High/Low Increase or decrease magnification of the image displayed on the touchscreen.
Start Test See “Starting a Pass/Fail test from the FVAi-2030” on page 3-3.
Note: For information about starting a Pass/Fail test with FiberChekPRO, see
“Using the FVAi-2030 microscope with FiberChekPRO” on page 4-1.
Chamfer Focus See “Viewing the fiber chamfer” on page 3-4.
Note: For information about using FiberChekPRO to view the fiber chamfer, see
“Using the FVAi-2030 microscope with FiberChekPRO” on page 4-1.
Autofocus Automatically focus the view of the fiber end face on the touchscreen.
Note: If configured in the microscope settings, selecting Autofocus will trigger a
Pass/Fail test. See “Managing microscope settings” on page 2-15.

FVAi-2030 Benchtop Microscope User Guide, 22112369-339 R000, Standard 2-9
Getting started Accessing Live view
— End —
Inspection Settings menu PROFILE: See “Applying a profile and an optical setting” on page 2-10.
OPTICAL SETTING: See “Applying a profile and an optical setting” on page 2-10.
CREATE NEW GROUP/CLOSE GROUP : GROUP NAME: See “Managing groups” on
page 2-12.
RECALL IMAGE1: See“Recalling test results and images” on page 3-7.
USER INFO1: See “Managing user information” on page 2-14.
MICROSCOPE SETTINGS: See “Managing microscope settings” on page 2-15.
IMAGE SAVE OPTIONS: See “Managing image-save options” on page 2-18.
SYSTEM SETTINGS1: See “Managing system settings” on page 2-19.
OUTPUT LOCAL1: See “Navigating the Home screen” on page 2-6.
Capture See “Capturing images” on page 3-5.
1. Also available on the Home Screen menu (see “Navigating the Home screen” on page 2-6).
Live View Tool Description

FVAi-2030 Benchtop Microscope User Guide, 22112369-339 R000, Standard 2-10
Getting started Applying a profile and an optical setting
Applying a profile and an optical setting
The FVAi-2030 microscope provides factory-set analysis profiles and optical settings for use in Pass/Fail testing
(Table 2-3). A profile defines Pass/Fail thresholds for a fiber type, while an optical setting defines the lighting and
sizing calibration applied during a test.
Refer to Table 2-3 to ensure that the appropriate profile and optical setting for the fiber connector are applied
before performing a test during standalone operation of the microscope.
Note: FiberChekPRO provides tools that let you create customized profiles (see “Creating analysis profiles for
the FVAi-2030 microscope” on page 4-6) and optical settings. You can also manage factory-set and custom
profiles and optical settings with FiberChekPRO, making them available on or removing them from the
microscope as required. For information, including information about applying profiles and optical
settings using FiberChekPRO, see the FiberChekPRO Automated Fiber Inspection and Analysis Software
User Manual.
Step 1 In Live view, select Inspection Settings, and then do either of the following:
▪ Select PROFILE to access the profiles available on the microscope, select a profile, and then select
Back to return to the Inspection Settings menu.
Table 2-3: Factory-set analysis profiles and optical settings
With Analysis Profile... Use Optical Setting...
FVAi-2030 SM 1.25 mm UPC (Polish detect) FMAX-LC-SL35
FVAi-2030 SM 1.25 mm APC (Polish detect) FMAX-LCA-SL35
FVAi-2030 SM 2.5 mm UPC (Polish detect) FMAX-SC-SL30
FVAi-2030 SM 2.5 mm APC (Polish detect) FMAX-SCA-SL30
FVAi-2030 MM50 1.25 mm UPC (Polish detect) FMAX-LC-SL35
FVAi-2030 MM50 2.5 mm UPC (Polish detect) FMAX-SC-SL30

FVAi-2030 Benchtop Microscope User Guide, 22112369-339 R000, Standard 2-11
Getting started Applying a profile and an optical setting
▪ Select OPTICAL SETTINGS to access the optical settings available on the microscope, select an optical
setting, and then select Back to return to the Inspection Settings menu.
Step 2 Select another option on the Inspection Settings menu, or select Back to return to Live view.
— End —

FVAi-2030 Benchtop Microscope User Guide, 22112369-339 R000, Standard 2-12
Getting started Managing groups
Managing groups
Use groups during standalone operation of the microscope to organize and manage Pass/Fail data and captured
fiber images saved to the microscope. While a group is active, saved data and images are automatically added to
that group.
You can create a group and set it as the active group, or set an existing group as the active group. Closing the
active group allows you to save data and images without adding them to a group.
Note: For information about using and managing groups with FiberChekPRO, see the FiberChekPRO Automated
Fiber Inspection and Analysis Software User Manual.
Step 1 In Live view, select Inspection Settings, and then do one of the following:
▪ If the CLOSE GROUP : GROUP NAME option is available, select it to close the active group. The option
label changes to CREATE NEW GROUP.
Select Back to return to Live view, or select CREATE NEW GROUP to set an active group.
Note: The CREATE NEW GROUP option is available only while no other group is active.
▪ If the CREATE NEW GROUP option is available, select it to access the on-screen keyboard, and then go
to Step 2.
Step 2 To set the active group, type either a unique name for the group you want to create or the name of an
existing group.
Note: The microscope provides a default group name (GROUP-001) that automatically increments. For
example, if you create a group using the default group name GROUP-001 and then save data or
images to it while it is active, the group name GROUP-002 is automatically provided as a option
when you close GROUP-001 and select CREATE NEW GROUP. For information about changing the
default group base name, see “Managing image-save options” on page 2-18.
Table of contents
Other Viavi Microscope manuals

Viavi
Viavi P5000i Parts list manual

Viavi
Viavi FVAm Series User manual

Viavi
Viavi P5000i User manual

Viavi
Viavi P5000i Parts list manual

Viavi
Viavi FiberChek Parts list manual

Viavi
Viavi OneAdvisor ONA-800 Parts list manual

Viavi
Viavi FiberChek User manual

Viavi
Viavi INX 760 User manual

Viavi
Viavi P5000i Parts list manual

Viavi
Viavi FiberChek User manual