6
HOW TO REPLACE THE TURNTABLE NEEDLE
(Replacement Needle # ITNP-Y2)
Removing the Stylus from the Cartridge
1. Set a screwdriver at the tip of the stylus
and push down to the direction “A”.
WARNING: When applying force to stylus,
too much may damage or break the stylus.
2. Pull the stylus out toward the direction “B”.
Installing the Stylus
1. Hold the tip of the stylus and insert the other
edge by pressing toward direction “C”.
2. Push the stylus up toward direction “D”
until it locks at the tip.
Caution:
�Do not remove or bend the stylus needle.
�Do not touch the needle to avoid injury to your hand.
�Turn off the unit’s power before you replace the stylus.
�Keep out of reach of children.
Please note: The stylus should last about 50 hours under
normal use. It is recommended that the stylus be replaced
as soon as you notice a change in sound quality.
BLUETOOTH OPERATION
An external device with Bluetooth Connectivity can be wirelessly connected to this
turntable using the Bluetooth function.
1. Turn on the unit by switching the POWER ON/OFF SWITCH to the ON position.
2. Turn the FUNCTION SELECTION SWITCH to the BT (Bluetooth®) position, the
FUNCTION LED INDICATOR will begin to flash BLUE.
3. Turn your external device’s Bluetooth Setting ON. Wait a moment, then look for
the Bluetooth pairing name “ITUT-420”.
4. Select the Bluetooth pairing name, to connect the unit. Once connected, the
blue LED light will stop flashing.
5. You are now connected to your external device via Bluetooth.
6. Rotate the VOLUME CONTROL KNOB to adjust the sound level.
NOTE: If a password is required, enter “0000” and press enter to connect.
LINE-OUT OPERATION
This unit can connect to an external Hi-Fi Amplifier or Speaker System using RCA
Cables (not included). To connect to external speakers plug the RCA Cables into the
L/R RCA OUTPUT JACK on the back of the unit and the auxiliary input jacks on
your Hi-Fi Amplifier or Speaker System.
TURNTABLE OPERATION
SET UP
An AC/DC adaptor with an output of 12V DC 2.0A is included with the Modern
Bluetooth Stereo Turntable. This adaptor is required for operating the unit.
1. Connect the external speaker cables from the EXTERNAL SPEAKER JACK on
the back of the unit to each speaker.
NOTE: The external speaker cables are color coded, the red cable is plugged into
a red jack on both the unit and speakers (black cable into the black jacks).
2. Firmly and securely insert the DC plug of the adaptor to the DC IN Jack on the
back of the unit.
3. Plug the adaptor’s AC plugs into a power outlet rated at
220-240V AC ~ 50/60Hz.
4. Turn on the unit by switching the POWER ON/OFF SWITCH to the ON position.
The POWER/FUNCTION LED INDICATOR will turn on.
BASIC OPERATION
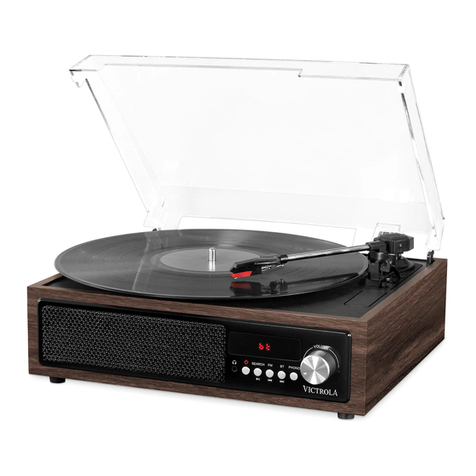
Before use, be sure to remove the white stylus guard off of the needle. Always
make sure that the tone arm is unlocked and free to move across the record while
operating. Lock the tone arm in place again when it is not in use.
1. Slide the FUNCTION SELECTION SWITCH to the PHONO position, the
FUNCTION LED INDICATOR will turn RED.
2. Place a record on the TURNTABLE PLATTER and select the desired speed
(33 1/3 / 45 / 78) by sliding the SPEED SELECTION SWITCH to the speed
according to the type of record.
NOTE: When playing a 45 rpm record, use the included 45 rpm adaptor located
inside the accessories bag.
3. Open the TONE ARM CLIP to release the TONE ARM. Push the LIFT LEVER
backwards to raise the arm. Gently move the tone arm to the desired position
over the record. The turntable will begin to spin only when the tone arm is moved
toward the record. To begin playing, push the lift lever forward to lower the arm
slowly onto the desired position of the record.
4. If the AUTO STOP SELECTION SWITCH is turned ON, the record will stop
automatically when finished.
PLEASE NOTE: If the Auto Stop is turned ON, the record will spin only when the
tone arm is moved over the record. If the Auto Stop is turned OFF, the record will
spin even when the tone arm is in resting position.
5.
To select the volume level, turn the VOLUME CONTROL KNOB to adjust the volume.

