TURNTABLE OPERATION
POWER SUPPLY
Insert the adaptor plug into the DC IN jack on the rear of the unit, then connect the
AC/DC adaptor (DC 5V/1.2A, AC 100-240V, 50/60Hz) to a AC/DC wall outlet.
BASIC OPERATION
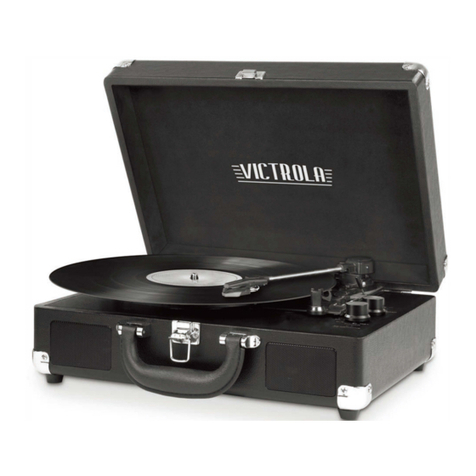
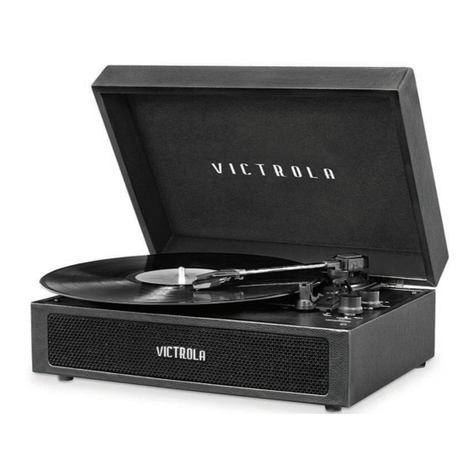
1. Lift the BUCKLE on the front of the turntable and open the lid.
2. Turn the FUNCTION KNOB to the PHONO position. Power ON the unit by
turning the VOLUME CONTROL KNOB clockwise. The red LED will light to
show that the turntable is turned ON.
3. Place a record on the TURNTABLE PLATTER and select the desired speed
(33 1/3 / 45 / 78) by sliding the SPEED SELECTION SWITCH according to the record.
NOTE: When playing a 45 RPM record, use the included 45 RPM ADAPTOR
located in the holder near the tone arm.
4. Open the TONE ARM CLIP to release the TONE ARM. Push the LIFT LEVER
backwards to raise the arm. Gently move the tone arm to the desired position
over the record. The turntable will begin to spin when the arm is moved toward
the record. Push the lift lever forward and lower the arm slowly onto the desired
position on the record to begin playing.
Please Note: The record will begin to spin only when the tone arm is moved over
the record if the Auto Stop is turned ON.
5. If the AUTO AND MANUAL STOP SELECTION SWITCH is turned ON, the record
will stop automatically when finished. If this switch is OFF the record will NOT
stop automatically when finished.
6. To select the volume level, turn the VOLUME CONTROL KNOB to adjust the volume.
NOTE: To play your record on external Bluetooth speakers (not included), see the
Bluetooth Out Operation section.
HOW TO REPLACE THE TURNTABLE NEEDLE
(Replacement Needle # ITNP-S1)
Removing the Stylus from the Cartridge
1. Set a screwdriver at the tip of the stylus
and push down to the direction “A”.
WARNING: When applying force to stylus,
too much may damage or break the stylus.
2. Pull the stylus out toward the direction “B”.
Installing the Stylus
1. Hold the tip of the stylus and insert the other
edge by pressing toward direction “C”.
2. Push the stylus up toward direction “D”
until it locks at the tip.
Caution:
�Do not remove or bend the stylus needle.
�Do not touch the needle to avoid injury to your hand.
�Turn off the unit’s power before you replace the stylus.
�Keep out of reach of children.
Please note: The stylus should last about 50 hours under
normal use. It is recommended that the stylus be replaced
as soon as you notice a change in sound quality.
FCC STATEMENT
Warning: Changes or modifications to this unit not expressly approved by the party
responsible for compliance could void the user authority to operate the equipment.
NOTE: This equipment has been tested and found to comply with the limits for Class B
digital device, pursuant to part 15 of the FCC Rules. These limits are designed to
provide reasonable protection against harmful interference in a residential installation.
This equipment generates, uses and can radiate radio frequency energy and, if not
installed and used in accordance with the instructions, may cause harmful interference
to radio communications. However, there is no guarantee that interference will not
occur in a particular installation. If this equipment does cause harmful interference to
radio or television reception, which can be determined by determined by turning the
equipment off and on, the user is encouraged to try to correct the interference by one
or more of the following measures:
- Reorient or relocate the receiving antenna.
- Increase the separation between the equipment and the receiver.
- Connect the equipment into an outlet on a circuit different from that to which the
receiver is connected.
- Consult the dealer or an experienced radio/TV technician for help.
This device complies with Part 15 of the FCC Rules. Operation is subject to the
following two conditions: (1) This device may not cause harmful interference, and (2)
this device must accept any interference received, including interference that may
cause undesired operation.
FCC Radiation Exposure Statement This equipment complies with FCC radiation
exposure limits set forth for an uncontrolled environment. This equipment should be
installed and operated with minimum distance 20cm between the radiator & your body.
IC STATEMENT
This device complies with RSS247 of Industry Canada. Cet appareil se conforme à
RSS247 de Canada d'Industrie. This device complies with Industry Canada
license-exempt RSS standard(s). Operation is subject to the following two conditions:
(1) this device may not cause interference, and (2) this device must accept any
interference, including interference that may cause undesired operation of the device.
Le présent appareil est conforme aux CNR d’Industrie Canada applicables aux
appareils radio exempts de licence. Son fonctionnement est sujet aux deux
conditions suivantes: (1) le dispositif ne doit pas produire de brouillage prejudiciable,
et (2) ce dispositif doit accepter tout brouillage recu, y compris un brouillage
susceptible de provoquer un fonctionnement indesirable.
The device must not be co-located or operating in conjunction with any other antenna
or transmitter. L'appareil ne doit pas être localisé ou fonctionner avec d'autres
antennes ou transmetteurs. This device complies with IC radiation exposure limits set
forth for an uncontrolled environment. Cet appareil est conforme aux limites
d'exposition aux rayonnements de la IC établies pour un incontrôlé environnement.
The device should be installed and operated with a minimum distance of 20cm
between the radiator and your body.
L'appareil doit être installé et utilisé avec une distance minimale de 20cm entre le
radiateu et votre corps.
CALIFORNIA PROP 65 WARNING
WARNING:
This product can expose you to chemicals including Lead, which
is known to the State of California to cause cancer, and Bisphenol A (BPA),
which is known to the State of California to cause birth defects or other
reproductive harm. For more information go to www.P65Warnings.ca.gov.
5
VINYL STREAM™- BLUETOOTH OUT OPERATION
The product supports Bluetooth wireless connection (BT OUT). It can be connected
with external Bluetooth-compatible headphones (not included) and Bluetooth
speakers (not included).
1. Power ON the unit by turning the VOLUME CONTROL KNOB clockwise.
2. Turn the FUNCTION KNOB to the BT OUT (Bluetooth Out) position, the red LED
light will begin to slow flash.
3. Turn ON your external Bluetooth receiver device (such as Bluetooth headphones
and Bluetooth speakers) and set to pairing mode.
4. When pairing is complete, you will hear a chime and the red LED light will stop
flashing. (This may take approximately 15-30 seconds)
5. You are now connected to your external Bluetooth device.
6. Place a vinyl record on the turntable. Then move the tone arm to desired playing
position on the vinyl record and sound will be heard from the external Bluetooth
speaker. (You can ONLY adjust the volume from your external Bluetooth device.)
• Place the Bluetooth device within 1m (3.3') of the product to perform
pairing correctly.
• The product stays in the pairing mode for 30 seconds. If pairing is not properly
completed, follow the above steps again from the beginning after turning all
devices OFF.
• "BT OUT" is only compatible with vinyl record playback. BT OUT will NOT work
in AUX or regular Bluetooth (BT) function modes.
BLUETOOTH OPERATION
An external device with Bluetooth Connectivity can be wirelessly connected to this
turntable using the Bluetooth function.
1. Power ON the unit by turning the VOLUME CONTROL KNOB clockwise.
2. Turn the FUNCTION KNOB to the BT (Bluetooth®) position, the blue LED light will
begin to flash.
3. Turn your external device’s Bluetooth Setting ON. Wait a moment, then look for
the Bluetooth pairing name “Victrola Journey +”.
4. Select the Bluetooth pairing name, to connect the unit. Once connected, the
blue LED light will stop flashing.
5. You are now connected to your external device via Bluetooth!
6. Rotate the VOLUME CONTROL KNOB to adjust the sound level.
AUX-IN OPERATION
An external (auxiliary) audio source (i.e. personal CD/MP3 Player/Mobile phone or
computer) can be connected to this apparatus via the LINE-IN JACK.
1. Plug a detachable Aux Cable (not provided) into the LINE-IN socket on the
function panel of the apparatus.
2. Turn the FUNCTION KNOB to the LINE-IN position, the LED will turn purple.
3. Plug the other end of the Aux Cable into the Headphone or Line Out socket of
your External Source.
4. Power ON the unit by turning the VOLUME CONTROL KNOB clockwise.
5. Rotate the VOLUME CONTROL KNOB to adjust the sound level.
HEADPHONE OPERATION
Plug the earphone jack into the earphone port on the function panel to listen to the
record. The built-in speaker will stop playing once the earphones are plugged in.
NOTE: For best performance and product maintenance, unplug the turntable when
not in use.
WARRANTY
Victrola is a registered trademark of Innovative Technology Electronics, LLC.
United States
Victrola (Innovative Technology Electronics, LLC) warrants to the original retail
purchaser that this product will be free from defective materials and workmanship
for one (1) year from the date of purchase, subject to the limitations below. This
warranty period is not extended if we replace the product.
To obtain a replacement under the terms of this warranty, you must contact the
dealer from which it was purchased with your original receipt. If assistance from
the dealer from which it was purchased is impossible, you may contact our
customer service for warranty assistance at victrola.com/contact.
Except as limited below, if the product proves defective in either material or
workmanship within one (1) year from the date of purchase, Victrola will replace
the product at no charge. If the product model is no longer available and cannot
be replaced with an identical model, Victrola will issue a merchandise credit for
the purchase price to be redeemed at victrola.com.
Limitations:
• This limited warranty does not cover failure of the product arising, in whole
or in part, from improper installation, storage, transportation, misuse, abuse,
accident, neglect, mishandling, unauthorized repair, modification, or wear
from ordinary use or environmental deterioration.
•
This limited warranty does not cover cosmetic damage, including paint damage,
or consequential damage to other components or premises which may result
for any reason from the failure of the product.
• This limited warranty is null and void for products not used in accordance
with Victrola’s instructions.
• This limited warranty terminates if the original retail purchaser sells or
otherwise transfers this product.
• This limited warranty is null and void for defects or damage caused by
installation or repair performed by any person or entity other than a Victrola
authorized installer or dealer.
This warranty gives you specific legal rights, and you may also have other rights
which vary from state to state, jurisdiction to jurisdiction or country to country. All
express and implied warranties for the product, including but not limited to any
implied warranties of merchantability and fitness for a particular purpose, are limited
in time to the term of this warranty. Some states, jurisdictions or countries do not
allow the exclusion of certain implied warranties or conditions, or limitations on how
long an implied warranty or condition lasts, so this limitation may not apply to you.
Victrola’s responsibility for malfunctions and defects in hardware is limited to
replacement or repair as set forth in this warranty statement. Victrola does not accept
liability for special, punitive, consequential or incidental damages or losses, whether
direct or indirect, including without limitation, any liability for third party claims against
you for damages or losses or for products not being available for use. The maximum
liability for which Victrola may be responsible will be no more than the amount you
paid for the product that is the subject of the claim. Some states, jurisdictions or
countries do not allow the exclusion or limitation of special, indirect, incidental or
consequential damages, so the above limitation or exclusion may not apply to you.
Canada and US Territories
The Warranty on this product shall comply with applicable law when sold to a
consumer in Canada or a US Territory. To obtain any applicable warranty service,
please contact the dealer from which you purchased the product, or the
distributor that supplied the product, with your original receipt. If assistance from
the dealer from which it was purchased is impossible, you may contact our
customer service for warranty assistance at victrola.com/contact.
If this product proves defective in either material or workmanship, Victrola will
replace the product at no charge. If the product model is no longer available and
cannot be repaired effectively or replaced with an identical model, Victrola at its
sole option may replace the unit with a current model of equal or greater value.
Outside the U.S, Canada, and US Territories
The Warranty on this product shall
comply with applicable law when sold to a consumer outside of the United States,
Canada, and US Territories. To obtain any applicable warranty service, please
contact the dealer from which you purchased the product, or the distributor that
supplied the product, with your original receipt.
