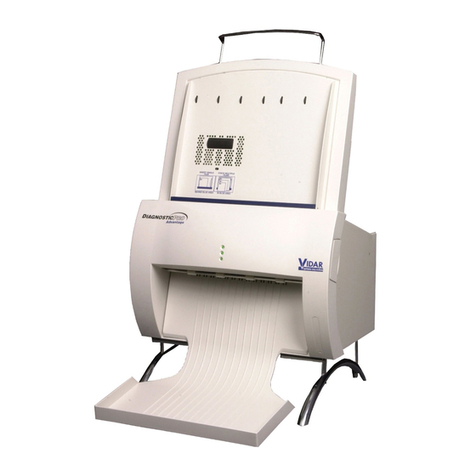
VIDAR DiagnosticPRO Edge User manual

User’s guide for
DiagnosticPRO™ Edge
Multi-film feeder
Serial numbers
380,000 to 389,999

19617-001 Rev. H DiagnosticPRO Edge User’s Guide 2
© Copyright November 2019 by VIDAR Systems Corporation. All rights reserved.
NOTE
The digitizers do not include application specific software (Picture Archiving and Communications
[PAC] system, Teleradiology, Oncology Systems, or Computer Aided Detection [CAD] software). The
manufacturer of the application software will determine specific indications for use. These third-party
software packages or complete systems are approved separately from a regulatory perspective.
The digitizers are marketed as a component to application software development companies, who will
incorporate the digitizer into their respective PACS or Teleradiology, CAD system(s). The software
developer is ultimately responsible for detailing the Contraindications for the PACS System (or
Teleradiology software package) or Oncology Systems as a whole, including the digitizer.
365 Herndon Parkway
Herndon, VA 20170 U.S.A.
Sales: 1-800-471-7070 or
1-800-471-7226
Phone: 1-703-471-7070
Fax: 1-703-471-7665
Internet: www.vidar.com
Technical Support:
1-800-471-7070 or 1-703-471-7070
Emergo Europe
Prinsessegracht 20
2514 AP, The Hague
The Netherlands
E-mail: [email protected]

19617-001 Rev. H DiagnosticPRO Edge User’s Guide 3
Caution: No operator-serviceable parts inside. Refer servicing to qualified personnel.
Achtung: Gehäuse nicht öffnen. Wartung uno reparatur nur durch eletrofachkräfte.
Attention: Aucune piece ne peut etre remplacee par l’utilisateur. Toute operation de
maintenance doit etre effectuee par une personne qualiee.
Atencion: Acceso interno solo autorizado a personal tecnico cualificado.
Attenzione: Non appire. Rivolgersi a personale qualificado.
Radio Frequency Emissions
This equipment has been tested and found to comply with the limits for a Class A digital
device, pursuant to Part 15 of the FCC Rules. These limits are designed to provide
reasonable protection against harmful interference when the equipment is operated in a
commercial environment. This equipment generates, uses, and can radiate radio
frequency energy and, if not installed and used in accordance with the instruction manual,
may cause harmful interference to radio communications. Operation of this equipment in
a residential area can cause harmful interference, in which case the user will be required
to correct the interference at his or her own expense.
Product compliance testing was conducted using VIDAR shielded cables. Modifications
to the digitizer or the VIDAR shielded cables or the use of cables other than those
available from VIDAR could void the user’s authority to operate the equipment.
Storage/Shipping conditions
Temperature: –18° to +60°C (0° to +140°F)
Relative humidity: 20% to 85%, non-condensing
Atmospheric pressure: 500 to 1060hPa (+18,000 to –1,200ft)
Operating conditions
Temperature: 10°C to 35°C (60°F to 95°F)
Relative humidity: 20% to 85%, non-condensing
Atmospheric pressure: 696 to 1013hPa (10,000 to 0 ft)
Electrical supply
Voltage: 100 to 240 VAC
Current: 0.75 to 1.5 A
Frequency: 47 to 63 Hz

19617-001 Rev. H DiagnosticPRO Edge User’s Guide 4
Safety and compliance information
MEDICAL –GENERAL MEDICAL EQUIPMENT AS TO ELECTRIC SHOCK, FIRE
AND MECHANICAL HAZARDS ONLY IN ACCORDANCE WITH: CSA CAN/CSA-
C22.2 NO. 60601-1:14, IEC 60601-1:2005+A1:2012 Edition 3.1. ANSI/AAMI
ES60601-1: A1:2012, C1:2009/(R)2012 and A2:2010/(R)2012.
Accessory equipment connected to the analog and digital interfaces must be certified
according to the respective IEC standards (i.e. IEC 60950 for data processing equipment
and IEC 60601-1 for medical equipment). Furthermore all configurations shall comply
with the system standard IEC 60601-1 Edition 3.1.
Everybody who connects additional equipment to the signal input part or signal output
part configures a medical system, and is therefore responsible that the system complies
with the requirements of IEC 60601-1 Editon 3.1. If in doubt, consult the technical
services department or your local representative.
This product is rated for continuous use.
This product is in the Ordinary Equipment Class. It provides no protection against the ingress of water.
This product is not suitable for use in the presence of flammable anesthetic mixtures with air or with oxygen or
with nitrous oxide.
Class I Medical Device; No Applied Parts. This product provides Class I medical device protection against
electrical shock.
WARNING: To avoid the risk of electric shock, this equipment must only be connected to a supply mains with
protective earth.
Grounding reliability can only be achieved when the equipment is connected to an equivalent receptacle marked
“HOSPITAL ONLY” or “HOSPITAL GRADE”.
WARNING: Do not modify this equipment without authorization of the manufacturer.
Do not position the product so that it is difficult to disconnect the product from the mains power supply.
Mains power may be removed from the product by disconnecting the power cable at the rear of the product. The
Mains power may also be disconnected by unplugging the power cord from the external power supply adapter or
unplugging the power cord from the wall outlet.
Power cords used with this device in North America must be rated by Underwriters Laboratories for hospital use.
Power cords used with this device in Europe must meet the requirements of IEC 227 Designation 53 or IEC 245
Designation 53.
Correct and safe operation of the digitizer requires familiarity with information
that is not marked on the product. The following symbol indicates the operator
should consult the manual for additional information:
This Class 1 LED device is safe under reasonably foreseeable conditions of
operation.
The LED illumination system consists of 20 Class 1 LEDs, a mirror system to
spread the light, and a diffuser to distribute the light approximately uniformly
across an area of 2.4 sq in (15.5 sq cm). Light from the LED illuminator may be
indirectly observed in the digitizer’s film entry and exit areas.

19617-001 Rev. H DiagnosticPRO Edge User’s Guide 5
Contents
Intended Use .............................................................................................................................6
Notice to Users .........................................................................................................................7
Operating...................................................................................................................................8
Apply power.........................................................................................................................8
About films...........................................................................................................................9
Using the multi-film feeder.................................................................................................10
Digitizing films longer than 17”.............................................................................................12
Setting up films longer than 17”.........................................................................................12
Handling films over 17”......................................................................................................14
Converting back for standard films....................................................................................14
Troubleshooting .....................................................................................................................16
Normal operation ...............................................................................................................16
Power adapter information ................................................................................................16
In case of difficulty .............................................................................................................17
Error conditions...........................................................................................................17
Operational problems..................................................................................................18
Turning the digitizer on and off..........................................................................................20
Cleaning and maintaining ......................................................................................................21
Maintenance Frequency ....................................................................................................21
Cleaning the multi-film feed tray........................................................................................21
Cleaning the diffuser..........................................................................................................22
Replacing the LED cartridge .............................................................................................26
Appendix: Electromagnetic guidance..................................................................................27
Appendix: Symbols ...............................................................................................................31

19617-001 Rev. H DiagnosticPRO Edge User’s Guide 6
Intended Use
The DiagnosticPRO Edge digitizer is used for making digital copies of medical x-ray film, including
printed and radiographic film. The target users of these devices are medical professionals or trained staff
for use as secondary capture images for consultation, review and final interpretation.
The devices are indicated for the digitization of mammography images for review and analysis, but not as
the sole basis for screening or diagnosis.
Note:
The DiagnosticPRO Edge with ClinicalExpress or other DICOM standard
software meets or exceeds ACR and DICOM standards for use of
secondary capture images for consultation, review and final interpretation.
Images captured as DICOM MG are to be used as reference or
comparison only, and not for primary diagnosis.

19617-001 Rev. H DiagnosticPRO Edge User’s Guide 7
Notice to Users
In the event of any serious incident occurring in relation to the device please
report to the manufacturer and the competent authority of the Member State in
which the user and/or patient is established.

19617-001 Rev. H DiagnosticPRO Edge User’s Guide 8
Operating
the DiagnosticPRO Edge film digitizer
Apply power
If the film digitizer is already on and ready to scan (LED on the front of the digitizer is
solid green), then skip this section.
1. Ensure the PC is turned off.
Note: Always apply power to the digitizer before turning on the
computer. This enables the computer to recognize the digitizer.
2. Turn on the digitizer (the switch is located front of the digitizer body).
To turn digitizer ON:
Press and release power switch.
To turn digitizer OFF:
Press and hold for two seconds.
3. Observe the LED on the front of the digitizer: the LED should flash light blue for
several minutes. This indicates the digitizer is performing internal tests and
calibration.
4. When the LED stops flashing and remains solid green, turn on the PC and launch your
scanning software.
The digitizer is now ready to scan films.
CAUTION: X-ray images displayed on a computer monitor are
representative only. Dimensional and grayscale inaccuracies
may result from the build-up of tolerances in the digitizer, the
display board and the computer. For this reason, special
precautions must be exercised when taking measurements from
the digitized image. Please refer to the user’s manual for your
digitizing software for more information.

19617-001 Rev. H DiagnosticPRO Edge User’s Guide 9
About films
The DiagnosticPRO Edge handles standard radiograph films up to 14" x 17" (35.5cm x
43cm). Longer films can be digitized, however this is dependent on the software, and
films longer than 17" must be fed manually and supported during digitization.
With multi-film DiagnosticPRO Edges, you can feed multiple films (up to 25), and you
can mix film sizes ranging from 7" x 8" (17.8cm x 20.32cm) to 14" x 17" (35.5cm x
43cm) in one stack—as long as you follow the rules below.
IMPORTANT: Remove stickers, tape, staples, paper clips, etc.
from films before scanning. These may cause serious film
feeding problems. Failure to remove extraneous items from
films will void your warranty.
Load films just as you would view them on a light box, with
these qualifications:
Films 8" x 10" (20.5cm x 24.5cm) or larger should be fed in portrait
orientation, as shown here.
Films smaller than 7" x 8" (17.8cm x 20.32cm) must be fed
one at a time.
Proper orientation of the film during loading depends
on the scanning application program you are using.
Some scanning programs rotate images 180° for
display. If images appear upside down, you may be
able to set the default orientation in the scanning
application. If this option isn’t available, then insert
films into the digitizer upside down, as shown here.

19617-001 Rev. H DiagnosticPRO Edge User’s Guide 10
Using the multi-film feeder
The DiagnosticPRO Edge with multi-film feeder can accept stacks of up to 25 films of
mixed sizes. It can also accept single films.
Note: The digitizer cannot scan films smaller than 5" x 7"
(12.7cm x 17.8cm). When loading small films, the vertical
dimension must be at least 7" (17.8cm).
CAUTION: Do not load more than 25 films at one time.
1. Ensure the LED on the front of the digitizer is solid green.
2. Hold the film stack (or single film) in front of you
as you would view the films on a light box.
Films at the back of the stack are digitized first.
3. Align the left edge of the film stack with the film
guide on the left edge of the feeder.
4. Place the film stack in the door’s film loading
channel.
The film loading channel is along the top of the
digitizer’s door in front of the feed tray.
Note: If you are digitizing a single film, place the film either in
the door film loading channel (as you would for a stack of films),
or insert the film directly into the digitizer, depending on the
instructions from your scanning application. If no instructions
are given, place the film in the door’s film loading channel.
Note: When a film has been staged, it is in the digitizer’s light
path. The ADC (Automatic Digitizer Calibration) feature requires
that the light path be clear of the film for proper background
calibration of the digitizer. The digitizer will automatically adjust
the film’s position to properly proceed with ADC. Depending on
the location of the film’s leading or trailing edge, and the length
of time the film has been blocking the light path, the film will be:
a) pushed up, b) pushed down, or c) ejected to remove the film
from the light path.
5. Using your scanning software, execute the Digitize or Scan command.
The LED will flash green rapidly, indicating the first scan is in progress.
When the first scan is complete, the second film will be scanned and so forth, until the
last film has been scanned.
When the entire batch has been scanned, the LED will return to solid green.

19617-001 Rev. H DiagnosticPRO Edge User’s Guide 11
Note: After the scan, the last film may or may not be ejected—
your scanning software determines what happens. If the
software’s Auto Eject function is activated, the film will drop
into the exit tray. Otherwise, the lower rollers in the digitizer will
hold the film until one of the following occurs:
Another film is detected.
You manually eject the film from the software.
The ADC process begins by ejecting the film.

19617-001 Rev. H DiagnosticPRO Edge User’s Guide 12
Digitizing films longer than 17”
With the DiagnosticPRO Edge film digitizer
Setting up films longer than 17”
1. Remove the exit tray:
a. Lift the exit tray up to disconnect it from the internal pins.
b. Pull the exit tray out from the digitizer.
Internal pin

19617-001 Rev. H DiagnosticPRO Edge User’s Guide 13
2. Move the film deflector:
a. Pull the film deflector forward and hold it…
Film deflector
b. while you slide the two retainers (one on each side) to hold the film deflector in
place.
Retainer
When the film deflector is in this position, long films can be directed (with your help)
out toward the front of the digitizer.
3. Position the digitizer with its front near the edge of the table if you want films to exit
off the edge of the counter. Otherwise, position the digitizer so films will exit onto the
table.

19617-001 Rev. H DiagnosticPRO Edge User’s Guide 14
Handling films over 17”
Feed longer films one at a time.
When feeding long films, you may need to support them as they are pulled into the
digitizer.
As a film exits the digitizer, use your hand to direct the film toward the front of the
digitizer.
Converting back for standard films
1. Hold the film deflector while you slide the two retainers (one on each side) toward the
center.
Retainer
2. Allow the film deflector to return to its normal position.
When the film deflector is in this position, films leaving the digitizer are directed into
the exit tray.

19617-001 Rev. H DiagnosticPRO Edge User’s Guide 15
3. Slide the exit tray into the digitizer, keeping it high, then drop it down and slide it
back toward you so the notches fit over the internal pins.
Notch Internal pin
4. When properly positioned, the exit tray will protrude a small distance from the
digitizer, and it can’t be pulled out without lifting it off the internal pins.
Exit tray in position

19617-001 Rev. H DiagnosticPRO Edge User’s Guide 16
Troubleshooting
the DiagnosticPRO Edge film digitizer
Normal operation
LED indication Condition
Flashing light blue Digitizer calibrating, please wait.
Flashing amber See “Error conditions” in the “In
case of difficulty” section, later in
this chapter.
Solid green Ready to scan.
Flashing green Scan in progress.
Power adapter information
CAUTION: Power the digitizer only with the power supply
adapter provided by your Service Provider or Vidar Systems Corp.
AC inDC out

19617-001 Rev. H DiagnosticPRO Edge User’s Guide 17
In case of difficulty
How to use this section:
1. Look through the left columns to find a description of the problem you are having.
2. Follow the instructions (in order) in the “Corrective action” column. If the one
corrective action doesn’t solve the problem, then carry out the next corrective action.
3. When the instruction is “Get qualified technical help,” then:
a. Contact your system integration specialist (the company or person that installed
your VIDAR film digitizer).
b. If your system integration specialist isn’t available, then contact VIDAR Customer
Support (medtech@3dsystems
.com). Please record system serial number before calling, and have it available when
calling.
Tip: Check www.vidar.com for current troubleshooting
information, tools and software updates.
Error conditions
LED indication Condition Corrective action
Flashing amber. Normalization error. 1. Clean lamp diffuser (see “Cleaning the diffuser” in the “Cleaning and
maintaining” chapter, later in this manual).
or if that doesn’t solve the problem...
2. Replace lamp (instructions are provided with the Lamp Cartridge
Replacement Kit.
or if that doesn’t solve the problem...
3. Get qualified technical help.
No LED... and digitizer
functions correctly.
Get qualified technical help.
No LED... and digitizer
does not function.
1. Ensure that power cable is properly plugged into digitizer (power
cable connects to rear of digitizer). If digitizer then appears normal,
wait for solid green LED, then reboot PC.
or if that doesn’t solve the problem...
2. Ensure that electrical power cord is properly plugged into power
adapter. If digitizer then appears normal, wait for solid green LED,
then reboot PC.
or if that doesn’t solve the problem...
3. Get qualified technical help.
continued

19617-001 Rev. H DiagnosticPRO Edge User’s Guide 18
Operational problems
Symptom Corrective action
Film tilts or skews during scanning. 1. Ensure individual films are loaded properly: bottom edge of film
parallel to rollers, left edge of film up against digitizer body—as far
left as it will go. (Review “Loading a single film” in “Operating”
chapter.)
2. (Multi-film feeder only) Ensure multiple films are loaded properly:
place films in front of blue area.
3. Ensure pickup roller is clean (see “Cleaning the multi-film feed tray,”
later in this chapter).
4. Ensure idler rollers in multi-film feeder spin freely.
5. If problem persists, get qualified technical help.
6. Remove any foreign matter from film entrance slot.
After film is loaded and staged
properly, a few minutes later film is
pushed out of staging area.
When film is staged, it is over digitizer’s light path. DiagnosticPRO’s
ADC (Automatic Digitizer Calibration) feature requires that light path be
clear for proper background calibration. Thus, if film remains in digitizer
for more than 5 minutes, it will be pushed up 1/4" (0.6cm) to clear light
path. Later, when you execute your software’s Scan command, film will
be re-staged before it is digitized.
Digitizer has been off for several days.
First film misfeeds or jams.
Run three or four films through digitizer: load films one at a time, then
eject each one (or perform a scan on each film, but this takes longer).
Multi-film feed tray won’t feed films. The multi-film feed tray must be connected to the digitizer with the multi-
film feed tray cable. The cable is located above the digitizer body, on
the left side (when viewed from the front). Ensure the cable is present.
Ensure one end of the cable is plugged into the jack on the multi-film
feed tray, and the other end is plugged into the digitizer. After checking
cable and connections, restart digitizer, then restart PC after LED turns
green.
After applying power, LED on front
keeps flashing light blue.
After power is applied, digitizer normally requires about 7 minutes to
normalize and calibrate, during which time the LED will flash light blue.
If LED flashes light blue for more than 15 minutes, turn digitizer power
off and on again (as described later in this chapter), then reboot PC.
Solid Amber or white LED on front Hardware failure during normalization. Please contact qualified
technical assistance.
Streaks in image Clean LED cartridge diffuser (see “Cleaning the diffuser” in the
“Cleaning and maintaining” chapter, later in this manual).
continued

19617-001 Rev. H DiagnosticPRO Edge User’s Guide 19
Symptom Corrective action
LED is off, in spite of using proper
power-on procedure described later in
this chapter.
1. Ensure wall outlet is providing AC power: obtain another electrical
device known to be working, and plug it into that AC wall outlet.
If other device doesn’t work, AC power is not available at that wall
outlet. Get help from building services.
If other device does work, AC power is available from that outlet.
Go to step 2.
2. With power applied to digitizer, look into digitizer film entrance slot. If
you see light coming from inside digitizer, power is on. For this
condition (LED off, internal light on), get qualified technical help.
3. If you have another DiagnosticPRO Edge film digitizer, try its power
adapter.
If digitizer works with other power adapter, original power adapter
is defective. Obtain replacement VIDAR DiagnosticPRO Edge
power adapter from your system integration specialist.
DiagnosticPRO Edge film digitizers with serial numbers 380,000
through 389,999 require VIDAR part number 40360-001. Do not
substitute any other power adapter.
If digitizer does not work with a known good power adapter, get
qualified technical help.
CAUTION: Using a non-approved power adapter will void the
warranty.
Film starts and stops during scanning. 1. Increase memory allocation for scanning software. (Especially if
scanning at high resolutions, memory allocation must be sufficient to
accept data stream from digitizer.)
2. If scanning to disk, ensure sufficient space is available on disk drive.
3. Ensure PC has enough memory available to support scanning
application. Close applications not needed for image acquisition
from digitizer.
4. If problem persists, get qualified technical help.
Digitizer stops scanning and PC locks
up.
1. Reset entire system.
a. Turn digitizer off.
b. Shut down PC and turn it off.
c. Turn digitizer on.
d. After digitizer LED turns solid green, turn on PC.
2. Launch scanning software on PC, then try scanning again. If
problem persists, get qualified technical help.
3. Check for correct device driver installation.
Digitizer is not listed in Windows
Control Panel > Scanners and
Cameras.
or
VIDARINFO does not work.
1. Update to or reinstall VIDAR drivers. See the “Install device drivers
and toolkit” chapter of the “Installation Guide for DiagnosticPRO
Edge.”
2. Check all USB cables and connectors.
continued

19617-001 Rev. H DiagnosticPRO Edge User’s Guide 20
Turning the digitizer on and off
WARNING
Do not apply power by plugging the DC power connector into
the digitizer while the power adapter is live. Do not remove
power by unplugging the DC power connector from the digitizer
while the power adapter is live. Either of these actions could
permanently damage the digitizer, the power adapter or both.
Note: DiagnosticPRO Edge was designed to be powered
continuously. Under normal conditions, the digitizer should
remain on at all times.
Use only the power switch to turn the digitizer on or turn it off:
The power switch is located on the front of the digitizer.
To turn digitizer ON:
Press and release power switch.
To turn digitizer OFF:
Press and hold for two seconds.
Other manuals for DiagnosticPRO Edge
2
Table of contents
Other VIDAR Medical Equipment manuals
Popular Medical Equipment manuals by other brands

Tandem
Tandem t:slim X2 user guide

General Sleep
General Sleep Zmachine Insight Patient guide

STIHLER ELECTRONIC
STIHLER ELECTRONIC ASTOPAD Instructions for use

GETINGE GROUP
GETINGE GROUP Maquet SERVO-s VENTILATOR SYSTEM V7.0 user manual

Invacare
Invacare Alegio Service manual

Bard
Bard Avitene Ultrafoam Instructions for use