manuals.online logo
Brands
  1. Home
  2. •
  3. Brands
  4. •
  5. Viessmann
  6. •
  7. Boiler
  8. •
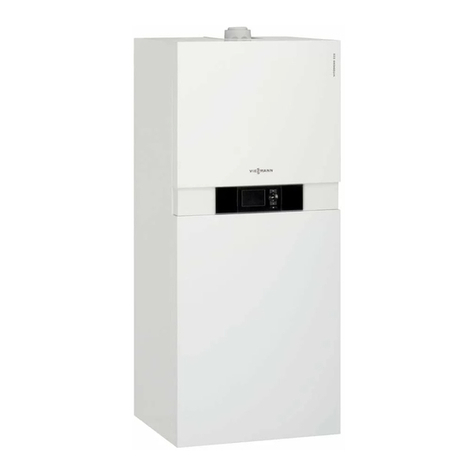
  9. Viessmann Vitodens 222-W B2LB User manual

Viessmann Vitodens 222-W B2LB User manual




Installation Instructions Viessmann Vitodens 222-W B2LB + Vitotronic 200 HO2B
These are your installation instructions to connect your tado° Extension Kit to your boiler. Please follow the instructions                 
carefully and only confirm the successful installation once you have finished all steps for all devices.

If you have any question regarding the use or installation of tado° please consult our Help Center at www.tado.com/support

 
Version 4.3

For support please visit: www.tado.com/support 


Switching off your boiler and corresponding circuit breaker
Make sure that you take steps to ensure that the power          
supply to your boiler is completely switched off and        
remains switched off during the installation process. In       
addition it is compulsory to remove the breaker/fuse that        
your boiler is connected to, or turn of the corresponding         
switch in your circuit breaker box.
If you are not 100% sure which is the        
correct switch/breaker/fuse then you   
must remove all breakers/fuses or turn     
off the main power switch in your circuit       
breaker box.

Please leave a message at the circuit breaker box such to          
inform everyone not to turn anything back on.
Please make sure that all residents of the       
home are aware that you are going to turn        
off and that you are the only one who is         
allowed to switch it on again.


Please be aware that your desktop computer      
and lighting will turn off when you switch off        
the mains power circuit breaker switch.

To provide safe lighting for the installation you       
can use the flashlight function of your      
smartphone or a torch.




 

1

For support please visit: www.tado.com/support 


Open your boiler to get access to its control unit
Access the boiler control by opening the boiler. Since every boiler has a different opening method, take a look at our examples below to get an idea how your boiler can be                               
opened. All wiring connection terminals are found on the control unit. You will be looking for the place where lots of wires connect to the boiler. Look for the terminal where a room                                
thermostat can be connected. The installation manual of your boiler very often helps.





2

For support please visit: www.tado.com/support 


Make sure the power is off
Use the voltage tester to check if there is still power on           
any wiring terminal.
If there is any light it means that there is still power on the             
wiring. Before continuing, switch off the circuit breaker.
If there is no light, power is off and it is safe to proceed.





3

For support please visit: www.tado.com/support 


Documenting the wiring of the existing setup
As soon as you have removed the cover please take detailed photos of the existing wiring with the cables still attached. Try your best to make the terminal numbering legible.

This step is very important, you will definitely       
need this information in the future. Should      
you need help, it will be difficult for our        
Technical Support Team to assist you     
without the photos of all of the current       
wiring.

You will need these photos to restore      
your old system if you move house in       
order to take your tado° with you. Please       
save them in a place where you will find        
them again in this case.



 

4

For support please visit: www.tado.com/support 


Identifying the terminal block to connect to
Please identify the terminal block labeled X14



 

5

For support please visit: www.tado.com/support 


Connecting the tado° cable
Please take the cable provided with the tado° Extension Kit. Use the cable to connect              
your boiler with the tado° Extension Kit.

Please connect the cable as follows to the boiler:
Connect the Blue wire to the terminal labelled 1.
Connect the Brown wire to the terminal labelled 2.


Interface Activation
FInd the terminal block 96 . Make sure the bridge wire is present between L-1 .

 

6

For support please visit: www.tado.com/support 


Preparing the labels
Using only a pen, add the wire colors to the labels as           
shown on the right.
Write into the blank areas of the labels as shown below.          
Please double check your work.

Please attach the labels to the cables as shown in the          
image. Matching the cable colors with the colors written        
on the stickers is mandatory. Please double check your        
work now.

Write “ Blue ” on the label - .
Write “ Brown ” on the label + .




 

7

For support please visit: www.tado.com/support 


Leading the cable out and closing the boiler
Carefully thread the tado° cable out of you boiler. Please check that there are no sharp               
edges that could damage or trap the cable.
Carefully close the boiler and its control panel by reversing the sequence in which you              
opened it.


 

8

For support please visit: www.tado.com/support 


Selecting the location for the tado° Extension Kit
The following steps describe how to mount the tado° Extension Kit on the wall.


Please do not mount the tado° Extension Kit to the boiler itself.



 

9

For support please visit: www.tado.com/support 


Mounting the tado° Extension Kit - Step 1
Take scissors or a knife and remove one of the latches at the bottom of the tado°                
Extension Kit backplate along the predetermined breaking points.


Remove one of the latches on the right side if you have labelled the cables             
with + , - or A otherwise remove one of the latches on the left side.



 

10

For support please visit: www.tado.com/support 


Mounting the tado° Extension Kit - Step 2
Please prepare a power drill with a 5 mm drill bit.

Use a spirit-level to align the tado° backplate horizontally        
on the wall.
Use a pencil to mark two holes at the place of your           
intended installation.

Please ensure that the terminal block of the       
tado° Extension Kit should be on the top.






11

For support please visit: www.tado.com/support 


Mounting the tado° Extension Kit - Step 3
Drill two holes with a diameter of 5 mm at the positions           
you previously marked.
Now push the rawplugs supplied into the holes you have         
drilled. Ensure the holes are deep enough so that the         
rawplugs do not protrude from the wall and therefore        
prevent the correct mounting of the tado° Extension Kit        
backplate.
Now use the screws supplied to attach the tado°        
backplate to the wall.





12

For support please visit: www.tado.com/support 


Connecting the wires to the tado° Extension Kit
Please note that the wires are to be inserted between the two metal plates to ensure               
good connectivity. You might have to loosen some of the screws to properly fit in the               
wires.
Next, please connect the cables to the tado° Extension Kit. Please pay attention that             
the blue labels match the labeling of the terminals.




13

For support please visit: www.tado.com/support 


Closing the tado° Extension Kit
Hook-up the lid to the upper edge of the housing box.

Click the bottom of the lid into place until the lid retention           
mechanism locks.
Tighten the two small screws at the bottom of the         
Extension Kit.
Please note that the tado° Extension Kit has to        
be closely aligned to the wall to close properly.






14

For support please visit: www.tado.com/support 


Switching the boiler and circuit breaker switch back on
You can now turn the power back on. Please reverse the steps that you took to turn the power to the boiler off.



15

For support please visit: www.tado.com/support 


Activate Pairing of the Internet Bridge
Press pairing button until the LED blinks to activate pairing mode. Pairing allows            
other devices to connect to the Internet Bridge.
If the “pairing” LED is blinking, the pairing mode is already active and does not              
need to be activated again.

In case you have a Bridge without pairing button, active pairing is indicated            
by a blinking “link” LED.

To activate the pairing mode via the tado° app, select Devices in the main             
menu. Select your bridge from the appearing device list and tap afterwards           
on Activate Pairing.




 

16

For support please visit: www.tado.com/support 


Establishing a first connection of the tado° Extension Kit
Please press and hold the button on top of the Extension Kit for around 3 seconds until it starts blinking rapidly . While the LED is blinking rapidly, the Extension Kit is looking for                                
a connection to the tado° Internet Bridge. Successful pairing is indicated by 4x flashing with a pause or a slowly pulsing LED.



If the LED is shortly blinking 2x followed by a pause it means that pairing has failed.
Restart the process by pressing and holding the button for around 3 seconds until the LED starts blinking rapidly.


 

17

For support please visit: www.tado.com/support 


Configuration of Vitotronic 200HO2B
Get access to Parameter level 2


1. Click on “Menu”
2. Click on “Service”
3. Enter password “viservice“ .
4. Click on “System configuration“
5. Click on “Parameter level 2”
6. Enter password “viexpert“
7. Choose “ Heating circuit X ”, the circuit you would like tado° to
control
8. Change the values according to the table on the right.
Use the “ arrows ” to change the settings and confirm with “OK” .

Parameter Beschreibung
Parameter
Value
Remote Detection
A0:
1
Room Temperature Hook-up
b0:
3
Room Influence Factor
b2:
20
Saving Function Room Temperature
b5:
5 




If you want to control another heating circuit than heating
circuit 1 with tado° please contact our support and do not
start the configuration.



The passwords above are standard passwords which can be
changed. If the passwords does not work and you have not
changed them yourself please contact the heating engineer
that performed the installation of your boiler.



If parameter level 2 is not displayed, please contact our
customer support


You have now successfully completed the installation of your tado° Extension Kit. Please log back into your account and continue with the installation as displayed there.


18

This manual suits for next models

1

Other Viessmann Boiler manuals

Viessmann VITODENS 050-W User manual

Viessmann

Viessmann VITODENS 050-W User manual

Viessmann Vitola 200 User manual

Viessmann

Viessmann Vitola 200 User manual

Viessmann Vitorond 200 Series User manual

Viessmann

Viessmann Vitorond 200 Series User manual

Viessmann VITOCROSSAL 300 Operating instructions

Viessmann

Viessmann VITOCROSSAL 300 Operating instructions

Viessmann Vitodens 222-F B2TB User guide

Viessmann

Viessmann Vitodens 222-F B2TB User guide

Viessmann VITODENS 343-F WS4A Quick guide

Viessmann

Viessmann VITODENS 343-F WS4A Quick guide

Viessmann Vitola 200 User manual

Viessmann

Viessmann Vitola 200 User manual

Viessmann Vitodens 222-F Quick guide

Viessmann

Viessmann Vitodens 222-F Quick guide

Viessmann KOB PYROMAT DYN Manual

Viessmann

Viessmann KOB PYROMAT DYN Manual

Viessmann Vitodens 200-W System Quick start guide

Viessmann

Viessmann Vitodens 200-W System Quick start guide

Viessmann VB2 Series User manual

Viessmann

Viessmann VB2 Series User manual

Viessmann Vitodens 100-W Quick guide

Viessmann

Viessmann Vitodens 100-W Quick guide

Viessmann VITODENS 200 User manual

Viessmann

Viessmann VITODENS 200 User manual

Viessmann VITROND 200 User manual

Viessmann

Viessmann VITROND 200 User manual

Viessmann VITOCROSSAL 300 Operating instructions

Viessmann

Viessmann VITOCROSSAL 300 Operating instructions

Viessmann VITOPLEX 200 Type SX2A User manual

Viessmann

Viessmann VITOPLEX 200 Type SX2A User manual

Viessmann VITOCROSSAL 200 Operating instructions

Viessmann

Viessmann VITOCROSSAL 200 Operating instructions

Viessmann VITORONDENS 200-T User manual

Viessmann

Viessmann VITORONDENS 200-T User manual

Viessmann Vitopend 100-W Quick guide

Viessmann

Viessmann Vitopend 100-W Quick guide

Viessmann VITOLADENS333-F Operating instructions

Viessmann

Viessmann VITOLADENS333-F Operating instructions

Viessmann Vitocell 100-E Quick guide

Viessmann

Viessmann Vitocell 100-E Quick guide

Viessmann VITOTRANS 300 Operating instructions

Viessmann

Viessmann VITOTRANS 300 Operating instructions

Viessmann Vitodens 200-W System User manual

Viessmann

Viessmann Vitodens 200-W System User manual

Viessmann VITOCROSSAL 300 Operating instructions

Viessmann

Viessmann VITOCROSSAL 300 Operating instructions

Popular Boiler manuals by other brands
Indol Supreme 200SA++ quick start guide

Indol

Indol Supreme 200SA++ quick start guide

Unical KONe R 18 Installation and Servicing Manual

Unical

Unical KONe R 18 Installation and Servicing Manual

Rinnai Q175S Specifications

Rinnai

Rinnai Q175S Specifications

FULTON VMP Series Installation, operation and maintenance manual

FULTON

FULTON VMP Series Installation, operation and maintenance manual

Chaffoteaux & Maury Centora green Maintenance and service guide

Chaffoteaux & Maury

Chaffoteaux & Maury Centora green Maintenance and service guide

Buderus 600-19R Installation and servicing instructions

Buderus

Buderus 600-19R Installation and servicing instructions

Immergas MINI NIKE 24 4 ERP Instruction and warning book

Immergas

Immergas MINI NIKE 24 4 ERP Instruction and warning book

Weil-McLain SlimFit 550 User's information manual

Weil-McLain

Weil-McLain SlimFit 550 User's information manual

Lochinvar 45 Installation and service manual

Lochinvar

Lochinvar 45 Installation and service manual

Bosch ED12-2S operating instructions

Bosch

Bosch ED12-2S operating instructions

Buffalo GL346 instruction manual

Buffalo

Buffalo GL346 instruction manual

Baxi Bermuda SP Installation & servicing instructions

Baxi Bermuda

Baxi Bermuda SP Installation & servicing instructions

BURNiT WBS-A 20 Installation and operation manual

BURNiT

BURNiT WBS-A 20 Installation and operation manual

Halstead iHeat 25c User instructions

Halstead

Halstead iHeat 25c User instructions

Biasi M110.24SM/E Service manual

Biasi

Biasi M110.24SM/E Service manual

Sime MURELLE EQUIPE 100 BOX ErP User, installation and servicing instructions

Sime

Sime MURELLE EQUIPE 100 BOX ErP User, installation and servicing instructions

Potterton envoy 30 Installation & service instructions

Potterton

Potterton envoy 30 Installation & service instructions

Potterton Kingfisher Mf Installation & service instructions

Potterton

Potterton Kingfisher Mf Installation & service instructions

manuals.online logo
manuals.online logoBrands
  • About & Mission
  • Contact us
  • Privacy Policy
  • Terms and Conditions

Copyright 2025 Manuals.Online. All Rights Reserved.