manuals.online logo
Brands
  1. Home
  2. •
  3. Brands
  4. •
  5. Viking
  6. •
  7. Trash Compactor
  8. •
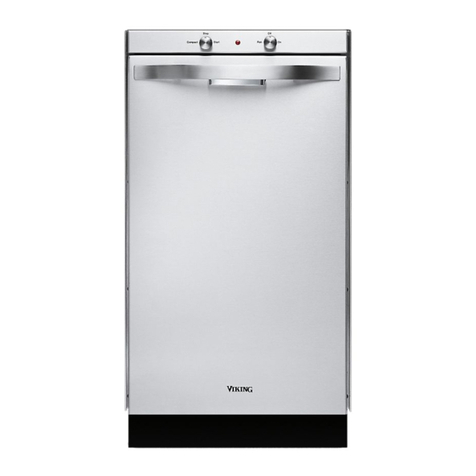
  9. Viking F1213F User manual

Viking F1213F User manual

F1213G EN (070609J)
Viking Use & Care Manual
Viking Range Corporation
111 Front Street
Greenwoo , Mississippi 38930 USA
(662) 455-1200
For pro uct information,
call 1-888-VIKING1 (845-4641)
or visit the Viking Web site at
vikingrange.com
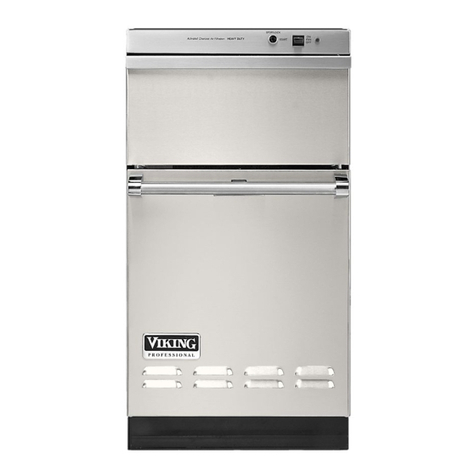
Professional Series
Undercounter Trash Compactor
32
Congratulations
Your purchase of this pro uct attests to the importance you place upon
the quality an performance of the major appliances you choose. With
minimal care, as outline in this manual, this pro uct is esigne to
provi e you with years of epen able service. Please take the few
minutes necessary to learn the proper an efficient use an care of this
quality pro uct.
We appreciate your choosing a Viking Range Corporation pro uct, an
hope that you will again select our pro ucts for your other major
appliance nee s.
Table of Contents
Important Safety Instructions . . . . . . . . . . . . . . . . . . . . . . . . . . . . 2
CompactorFeatures................................... 4
Loa ingYourCompactor ............................... 5
Use of Break-Away Trash Basket Without Bag . . . . . . . . . . . . . . . 6
Use of Break-Away Trash Basket With Bag . . . . . . . . . . . . . . . . . 7
BagRemoval ........................................ 8
Operating Your Trash Compactor . . . . . . . . . . . . . . . . . . . . . . . . 9
CharcoalAirFilterWithFan .............................11
SpecialUseTips ......................................12
CaringforYourCompactor .............................13
ServiceInformation....................................15
Warranty ...........................................16
FOR YOUR SAFETY
DO NOT STORE OR USE GASOLINE OR OTHER
FLAMMABLE VAPORS AND LIQUIDS IN THE VICINITY
OF THIS OR ANY OTHER APPLIANCE. THE FUMES
CAN CREATE A FIRE HAZARD OR EXPLOSION.
IMPORTANT SAFETY INSTRUCTIONS
1. Rea all instructions.
2. This compactor must be properly connecte to electricity.
3. Use the compactor only for its inten e use.
4. DDoo NNoott allow to be use as a toy, or to run unatten e at any
time. Close supervision is necessary when use by or near
chil ren. Lock when not in use an store key out or reach of
chil ren.
5. DDoo nnoott operate with a amage cor , plug, motor, or after
compactor has been amage in any manner. Have the compactor
examine , repaire , or a juste by an authorize servicer.
6. DDoo nnoott take compactor apart. Incorrect reassembly can cause
electrical shock when next use .
7. DDoo nnoott touch moving parts.
8. DDoo nnoott overloa compactor. DDoo nnoott overloa trash with heavy
material such as glass.
9. AAllwwaayyssplace glass bottles, etc., on their si es in the center of the
rawer so the wastepaper below an besi e the bottle can help
keep broken glass near the center of the bag, away from the si es.
10. DDoo nnoottcompact any container or material which might contain
poisonous or explosive pro ucts.
11. DDoo nnoott compact cloths or cans containing paint liqui s, thinners,
etc., which coul create a hazar .
12. Do not shove items own into the compactor with han s or feet.
To avoi being cut, let the compactor o the compacting.
13. DDoo nnoottlift a trash bag by the si es. Sharp objects can pierce the
bag an cause injury. Always carry a fille trash bag by the top.
14. AAllwwaayysswipe off any broken glass before touching the ram cover.
15. DDoo nnoott use the compactor as a counter for electrical cooking
appliances nor as a cutting boar .
16. DDoo nnoott set hot pans, etc., on the compactor top.
17. DDoo nnoott compact toxic or volatile flammable material such as oily
rags an insect sprays. DDoo nnoottcompact lighte cigarettes, cigars
or other hot or burning items.
18. DDoo nnoottspill any liqui s on the compactor top.
19. DDoo nnoott use accessories other than those recommen e by the
manufacturer.
SAVE THESE INSTRUCTIONS
WARNING
To r duc th risk of fir , l ctrical shock, or injury
wh n using your compactor, follow basic
pr cautions, including th following saf ty
instructions
54
Compactor Features
Control Panel
Built-In Small
Litter Area
Break-Away
Trash Basket
Basket Wall
Support Channel
Basket Release
Handle
Trash
Drawer
Built-In Storage
Compartment
Charcoal Air
Filter with Fan
(not shown)
Your compactor has a built-in interlock an will not operate unless you
have:
1. Close the trash rawer.
2. Turne the key to start.
STOP/LOCK will stop the ram movement at any point. After stopping
the unit, turn the key to START an ram will return to original “up”
position.
WWAARRNNIINNGG:: Do not allow chil ren to operate the compactor. We
recommen that you remove the key when not in use. The unit will not
operate without it. The trash rawer cannot be locke . Therefore, before
running a compactor cycle, always check to be sure that no item has
been mistakenly place in the trash rawer.
Loading Your Compactor
BBuuiilltt--iinn SSmmaallll LLiittttrr AArraa
Small cans, paper scraps, small boxes an
containers may simply be roppe into the
oor, rather than opening the large trash
rawer. Trash will rop automatically into
the large trash rawer when pulle open.
LLaarrgg CCaappaacciittyy TTrraasshh DDrraawwrr
Large, bulky items shoul be place irectly
into the rawer. It is not necessary to run a
compaction cycle everytime you place trash
into the rawer. However, the more you run
a cycle, the more compact the trash will be.
BBrraakk--AAwwaayy TTrraasshh BBaasskktt
Your trash compactor is equippe with a
versatile two-piece, polypropylene basket.
It is esigne for easy use an removal of
compacte trash. The break-away basket
may be use with or without the enclose
complimentary supply of trash bags.
NOTE: Bask t wall support chann ls must
b in plac prior to op rating compactor.
Basket Wall
Support Channels
76
Use of Break Away Trash Basket Without Bag
1. Place basket release han le in upright
position.
2. Put trash irectly into the basket. We
recommen placing several thicknesses of
newspaper at the bottom of the basket when
bags are not use . This will minimize clean-up of the basket after
emptying compacte trash.
NNOOTTEE:: Compacting a fol e newspaper on top of loose trash will
keep the ram clean of trash or broken glass.
TToo RRmmoovv BBrraakk--AAwwaayy TTrraasshh BBaasskktt
We recommen removing the basket when trash is compacte to four or
five inches below the top of the basket. If you fin this too heavy,
compact less trash next time. RREEMMEEMMBBEERR - the weight of the compacte
trash will vary with the contents. Cans an bottles may weigh more than
paper pro ucts.
1. Place basket release han le in own
position. Lift built-in storage compartment
cover up.
2. Grasp both han les of basket an remove
from rawer. Carry basket to trash storage
area.
3. Remove basket wall support channels.
4. Pull han les of basket away from each
other.
5. Dump compacte trash from half basket into
waste receptacle.
6. Replace support channels after umping.
WWAARRNNIINNGG:: PPEERRSSOONNAALL IINNJJUURRYY HHAAZZAARRDD
Compacte trash may contain broken glass, metal cans an other sharp
objects. Always use the half basket to ump trash. DDOO NNOOTT UUSSEE BBAARREE
HHAANNDDSS..
Use of Break Away Trash Basket With Bag
1. Lift built-in storage compartment
cover.
2. Pull basket release han le own.
3. Place fol e bag insi e Break-Away
trash basket.
4. Open bag. Pull top e ges of bag
over top of rawer.
98
5. Lock bag in place by pulling four pre-
punche holes over buttons on
rawer si es. Holes will expan over
buttons without amaging bag.
6. Sprea bag to fit interior of basket.
Closing storage compartment cover.
Pull basket release han le up.
Bag Removal
We recommen removing bag when trash is compacte to four or five
inches below top of basket. If you fin this is too heavy, compact less
trash next time.
1. Pull basket release han le own.
2. Lift storage compartment cover up.
Release bag from buttons. Pull up top
e ges of bag.
3. Close bag with twist-ties provi e .
4. Grasp han les an remove from rawer.
Carry basket with bag to trash storage
area.
5. Pull han les of basket
away from each other to
loosen bag.
6. Lift bag out.
WWAARRNNIINNGG:: PPEERRSSOONNAALL IINNJJUURRYY HHAAZZAARRDD
Sharp objects may protru e through bag after removal from trash basket.
Han le carefully by the top to avoi injury.
Operating Your Trash Compactor
TToo SSttaarrtt::
1. Close large trash rawer.
2. Turn key to START position an HOLD
momentarily. Release key.
1110
CCoommppaaccttiioonn CCyyccll
The compactor ram will move own insi e the trash rawer, reverse, an
return to original position, completing the cycle in approximately 35
secon s. As the basket is fille , the ram travels a shorter istance an
cycle time ecreases.
DDUURRIINNGG TTHHEE CCOOMMPPAACCTTIIOONN CCYYCCLLEE,, TTHHEE RRAAMM DDOOEESS NNOOTT TTOOUUCCHH
TTHHEE BBOOTTTTOOMM OOFF TTHHEE DDRRAAWWEERR.. TTHHEERREEFFOORREE,, YYOOUU CCAANN EEXXPPEECCTT TTOO
CCYYCCLLEE SSEEVVEERRAALL LLOOOOSSEE TTRRAASSHH LLOOAADDSS BBEEFFOORREE CCOOMMPPAACCTTIIOONN IISS
EEVVIIDDEENNTT.. TTHHIISS IISS NNOORRMMAALL AANNDD NNOOTT AA CCAAUUSSEE FFOORR CCOONNCCEERRNN..
As the ram compacts ifficult to break items, you may notice a ownwar
movement of the compactor rawer. This in normal an will not cause
amage. The spring-loa e rawer is specially esigne to move own
freely an return to original position. The force of the ram uring a
compaction cycle is absorbe by the heavy gauge steel frame of the
compactor.
TToo SSttoopp CCyyccll aanndd OOppnn DDrraawwrr
You may stop or interrupt a compaction cycle at any time an raise the
ram to its original position.
1. Turn the key to STOP/LOCK position to
stop the ram.
2. Turn the key to START position an
HOLD momentarily to return the ram to
original position. The rawer may then
be opene .
3. Turn key to START position an HOLD
to start another cycle.
Charcoal Air Filter with Fan
Your trash compactor features an activate charcoal air filter an fan
which absorbs an minimizes o or. The charcoal filter is locate in the
left rear section of the compactor.
The egree of o or in your compactor will epen upon the type of
trash you place in it. Since o ors are absorbe into the pores of the
charcoal filter, it may nee to be replace once or twice a year. Length
of time before filter replacement is necessary varies with the types of
trash compacte .
CChhaarrccooaall AAiirr FFiilltteerr FFaann
OONN-- The fan creates fast air
movement for greater o or
removal. While the fan is on,
a fan “on” light will glow on
the control panel.
OOFFFF --Even when the fan isn’t
running, the filter is working
to remove o or.
TToo RRmmoovv FFiillttrr::
1. With trash rawer in open position,
reach into left rear corner where
filter is locate .
2. Release filter from bottom clip, pull
own.
TToo RReeppllaaccee FFiilltteerr::
Push replacement filter into place behin top clip. Snap securely into
bottom clip.
1312
Special Use Tips
-Your compactor is esigne to han le most ry trash. The compactor is
not a substitute for a foo waste isposer. We urge you to continue to
ispose of garbage through a foo waste isposer. Most foo waste will
sour an become o orous when hel at room temperature.
-Liqui or messy items shoul be wrappe ina newspaper or several
thicknesses of paper toweling to help keep the ram an Break-Away
basket clean.
-More trash can be compacte if you stop the ram in the “ own”
position an allow it to well there overnight. This will result in heavier
bags of compacte trash.
-Place glass bottles on their si e in the center for compacting rather than
upright. Bottles an cans may nest in lightly compacte paper. When
sufficient loa is accumulate , most will be crushe . However, ue to
the resiliency of paper, some bottles may not break. Don’t be alarme
by the popping noise ma e when bottles are crushe . This is normal
an will not amage compactor. Placing a newspaper over bottles
before compacting will help muffle noise.
WWEE DDOO NNOOTT RREECCOOMMMMEENNDD CCOOMMPPAACCTTIINNGG TTHHEESSEE IITTEEMMSS
-Trimmings from cleaning fish or chicken
-Grapefruit or cantaloupe rin s
-Paint, oil, gasoline or turpentine cans or rags which have been use
with these materials
-Aerosol cans
-Insectici e, toxic or caustic containers
-Woo scraps, rocks, soli metal or large quantities of newspaper.
These items are alrea y in their compacte form.
WARNING: FIRE/HEALTH HAZARDS
DDoo nnoott ccoommppaacctt ccoonnttaaiinneerrss ooff ffllaammmmaabbllee oorr ttooxxiicc mmaatteerriiaallss oorr aaeerroossooll ccaannss..
Vacation Care
-If you are planning a weeken vacation, you may not want to remove
compacte trash if basket is not full. We recommen you simply lock the
compactor. On your return, you may wish to run the charcoal air filter for
a short time before opening the rawer.
-If you are planning to be away for more than a weeken , we recommen
that you remove an iscar the compacte trash, replace basket an
lock the compactor. Before running a compaction cycle, aallwwaayysscheck
that no item has been mistakenly place in the trash rawer.
Caring for Your Compactor
CCOOMMPPAACCTTOORR IINNTTEERRIIOORR
BBuuiilltt--iinn SSmmaallll LLiitttteerr DDoooorr aann AArreeaa::
Wipe clean with a cloth or sponge an a mil etergent or ammonia an
water. Rinse with clear water an ry. Do not use abrasive or harsh
cleaners.
BBrreeaakk--AAwwaayy TTrraasshh BBaasskkeett
Clean as necessary after emptying compacte trash. Wearing rubber
gloves an using paper towels, remove any small pieces of ebris from
basket such as crushe glass. AAVVOOIIDD CCOONNTTAACCTT WWIITTHH BBAARREE HHAANNDDSS.
Light soil may be wipe away with a amp sponge or cloth. Heavy soil
may require use of mil etergent an water. Rinse with clear water an
ry.
RRaamm
Clean as necessary. Wearing rubber gloves an using paper towels,
remove any small pieces of ebris from ram, such as paper or crushe
glass. AAVVOOIIDD CCOONNTTAACCTT WWIITTHH BBAARREE HHAANNDDSS..Light soil may be wipe
clean with a cloth an mil etergent an water. Heavy soil may require
the use of a ampene scouring pa . Rinse with clear water an ry.
MMeettaall DDrraawweerr LLiinneerr::
Clean as necessary using a cloth or sponge an mil etergent an
water. Rinse with clear water an ry. Do not use abrasive cleaners.
MMeettaall DDrraawweerr::
Occasionally the rawer latch ro an sli e hoo locate on both si es
of the rawer opening shoul be lubricate . This will prevent the oor
latch from squeaking or sticking an help insure an exten the life of
the latch mechanism. We suggest soap or a soli stick lubricant which
can be purchase at auto supply or har ware stores.
BBeehhiinn MMeettaall DDrraawweerr::
Occasionally check the area behin the trash rawer an remove any
small pieces of trash. Placing a fol e newspaper on top of trash will
help prevent small items from sticking to the ram an falling behin the
rawer.
1514
NOTE: Drawer may be remove to facilitate the cleaning surroun ing
areas.
1. Disconnect power supply to compactor before removing rawer.
2. Be sure ram is in “up” position.
3. Open rawer to fully exten e position.
4. Remove any rawer retaining screws which hol rawer to track
assembly. Carefully remove rawer from track assembly, making
sure that the full weight of the rawer is supporte at all times.
CCOOMMPPAACCTTOORR EEXXTTEERRIIOORR
FFrroonntt PPaanneellss::
Wipe clean with a cloth or sponge an mil etergent an water. Rinse
with clear water an wipe ry. Do not use abrasive cleaners. On stainless
steel mo els, use a stainless steel cleaner an polish.
UUSSEE EENNEERRGGYY WWIISSEELLYY
A trash compactor uses a negligible amount of energy. Total energy
requirements associate with the trash compactor will be minimize by
following the recommen ations in the Use an Care Gui e.
Service Information
It is assume that your trash compactor has been properly installe in
accor ance with all specifications an local co es an that the appliance
has been properly groun e . If your trash compactor shoul fail to
operate, check the troubleshooting gui e before calling your ealer. You
coul save the cost of a service call.
If your trash compactor should fail to operate:
--Have you rea an followe the instructions provi e with this unit?
-Is a fuse blown or the circuit breaker open?
-Is the trash rawer tightly close ? It is possible for a cycle to be
incomplete when the rawer has not been firmly close before turning
the key to START. If this occurs, the unit will shut-off, but the rawer
cannot be pulle open. Close the rawer firmly an turn the key to
START. The ram will return to the original “up” position. Drawer will
open only when ram is all the way up.
-Compacting works best when only a few items are loa e . Use the
compacting cycle frequently.
-Not all bottles will break every time, epen ing upon trash loa below.
If you are unable to obtain the name of an authorize service agency,
or continue to have service problems, call Viking Range Corporation,
1-888-VIKING1 (845-4641), or write to:
VIKING RANGE CORPORATION
PREFERRED SERVICE
1803 Hwy 82W
Gr nwood, Mississippi 38930 USA
Recor the information in icate below. You will nee it if service is ever
require . The serial an mo el numbers for your oven are locate on an
i entification plate mounte on the bottom left si e of the oven oor
opening.
Mo el Number Serial Number
Date Purchase Date Installe
Dealer’s Name
A ress
If service requires installation of parts, use only authorize parts to
ensure protection un er the warranty.
TThhiiss mmaannuuaall sshhoouull rreemmaaiinn wwiitthh tthhee ttrraasshh ccoommppaaccttoorr ffoorr ffuuttuurree
rreeffeerreennccee..
1716
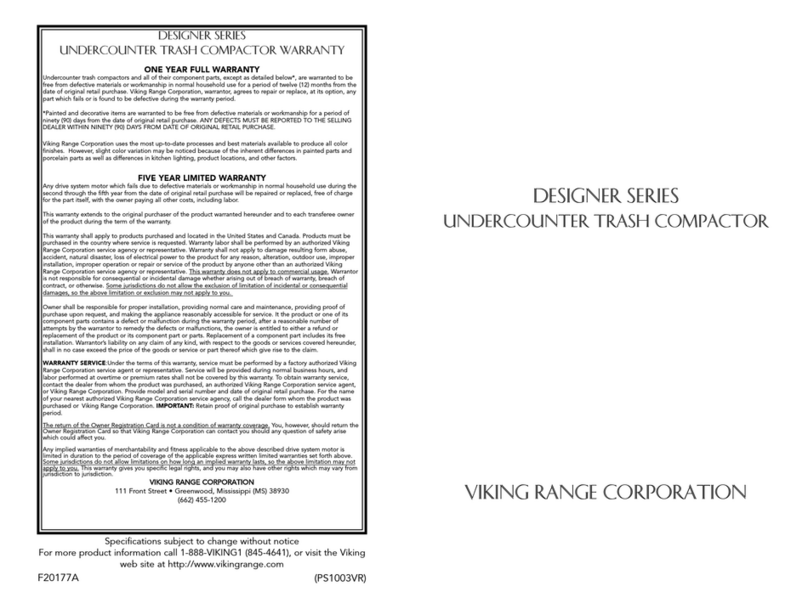
VUC PROFESSIONAL SERIES
UNDERCOUNTER TRASH COMPACTOR WARRANTY
ONE YEAR FULL WARRANTY
Un ercounter trash compactors an all of their component parts, except as etaile below*, are warrante to be
free from efective materials or workmanship in normal househol use for a perio of twelve (12) months from the
ate of original retail purchase. Viking Range Corporation, warrantor, agrees to repair or replace, at its option, any
part which fails or is foun to be efective uring the warranty perio .
*Painte an ecorative items are warrante to be free from efective materials or workmanship for a perio of
ninety (90) ays from the ate of original retail purchase. ANY DEFECTS MUST BE REPORTED TO THE SELLING
DEALER WITHIN NINETY (90) DAYS FROM DATE OF ORIGINAL RETAIL PURCHASE.
FIVE YEAR LIMITED WARRANTY
Any rive system motor which fails ue to efective materials or workmanship in normal househol use uring the
secon through the fifth year from the ate of original retail purchase will be repaire or replace , free of charge
for the part itself, with the owner paying all other costs, inclu ing labor.
NINETY (90) DAY RESIDENTIAL PLUS WARRANTY This warranty applies to applications where use of the
pro uct exten s beyon normal resi ential use. Examples are, but not limite to, be an breakfasts, fire stations,
private clubs, churches, etc. This warranty exclu es all commercial locations such as restaurants, foo service
locations, an institutional foo service locations.
This warranty exten s to the original purchaser of the pro uct warrante hereun er an to each transferee owner
of the pro uct uring the term of the warranty.
This warranty shall apply to pro ucts purchase an locate in the Unite States an Cana a. Pro ucts must be
purchase in the country where service is requeste . Warranty labor shall be performe by an authorize Viking
Range Corporation service agency or representative. Warranty shall not apply to amage resulting form abuse,
acci ent, natural isaster, loss of electrical power to the pro uct for any reason, alteration, out oor use, improper
installation, improper operation or repair or service of the pro uct by anyone other than an authorize Viking
Range Corporation service agency or representative. This warranty oes not apply to commercial usage. Warrantor
is not responsible for consequential or inci ental amage whether arising out of breach of warranty, breach of
contract, or otherwise. Some juris ictions o not allow the exclusion of limitation of inci ental or consequential
amages, so the above limitation or exclusion may not apply to you.
Owner shall be responsible for proper installation, provi ing normal care an maintenance, provi ing proof of
purchase upon request, an making the appliance reasonably accessible for service. It the pro uct or one of its
component parts contains a efect or malfunction uring the warranty perio , after a reasonable number of
attempts by the warrantor to reme y the efects or malfunctions, the owner is entitle to either a refun or
replacement of the pro uct or its component part or parts. Replacement of a component part inclu es its free
installation. Warrantor’s liability on any claim of any kin , with respect to the goo s or services covere hereun er,
shall in no case excee the price of the goo s or service or part thereof which give rise to the claim.
WARRANTY SERVICE:Un er the terms of this warranty, service must be performe by a factory authorize Viking
Range Corporation service agent or representative. Service will be provi e uring normal business hours, an
labor performe at overtime or premium rates shall not be covere by this warranty. To obtain warranty service,
contact the ealer from whom the pro uct was purchase , an authorize Viking Range Corporation service agent,
or Viking Range Corporation. Provi e mo el an serial number an ate of original retail purchase. For the name
of your nearest authorize Viking Range Corporation service agency, call the ealer form whom the pro uct was
purchase or Viking Range Corporation. IMPORTANT: Retain proof of original purchase to establish warranty
perio .
The return of the Owner Registration Car is not a con ition of warranty coverage. You, however, shoul return the
Owner Registration Car so that Viking Range Corporation can contact you shoul any question of safety arise
which coul affect you.
Any implie warranties of merchantability an fitness applicable to the above escribe rive system motor is
limite in uration to the perio of coverage of the applicable express written limite warranties set forth above.
Some juris ictions o not allow limitations on how long an implie warranty lasts, so the above limitation may not
apply to you. This warranty gives you specific legal rights, an you may also have other rights which may vary from
juris iction to juris iction.
Specifications subject to change without notice.
1918

Other Viking Trash Compactor manuals

Viking Designer Series User manual

Viking

Viking Designer Series User manual

Viking Professional  VUC181 Service manual

Viking

Viking Professional VUC181 Service manual

Viking Designer DFC180 User manual

Viking

Viking Designer DFC180 User manual

Viking Professional  VUC181 User manual

Viking

Viking Professional VUC181 User manual

Viking Designer DUC180 User manual

Viking

Viking Designer DUC180 User manual

Viking FCU150 Installation guide

Viking

Viking FCU150 Installation guide

Viking FCU150 User manual

Viking

Viking FCU150 User manual

Viking FCU150 User manual

Viking

Viking FCU150 User manual

Viking Professional  VUC181 User manual

Viking

Viking Professional VUC181 User manual

Viking Designer DUC180 User manual

Viking

Viking Designer DUC180 User manual

Viking Designer DFC180 User manual

Viking

Viking Designer DFC180 User manual

Popular Trash Compactor manuals by other brands

Whirlpool 800 SERIES Use & care guide

Whirlpool

Whirlpool 800 SERIES Use & care guide

third coast equipment SP3410 Operator's manual

third coast equipment

third coast equipment SP3410 Operator's manual

Whirlpool MASHER installation instructions

Whirlpool

Whirlpool MASHER installation instructions

GE Monogram Compactor user manual

GE

GE Monogram Compactor user manual

KitchenAid KUCK03ITBL0 parts list

KitchenAid

KitchenAid KUCK03ITBL0 parts list

GE GCG1700P Dimensions and installation information

GE

GE GCG1700P Dimensions and installation information

IMC F90/010 installation manual

IMC

IMC F90/010 installation manual

KitchenAid KUCS03FTPA0 parts list

KitchenAid

KitchenAid KUCS03FTPA0 parts list

Glasdon ELECTRA CUP RECYCLING Operator instructions

Glasdon

Glasdon ELECTRA CUP RECYCLING Operator instructions

Whirlpool trash masher installation instructions

Whirlpool

Whirlpool trash masher installation instructions

Viking Range Designer Series Use & care manual

Viking Range

Viking Range Designer Series Use & care manual

KitchenAid KCCC151B Use and care guide

KitchenAid

KitchenAid KCCC151B Use and care guide

Vestil HDC-900 manual

Vestil

Vestil HDC-900 manual

KitchenAid KUCC151 Use and care guide

KitchenAid

KitchenAid KUCC151 Use and care guide

KitchenAid KFCK03IT Specification sheet

KitchenAid

KitchenAid KFCK03IT Specification sheet

Whirlpool Trash Masher JTF8500XL user guide

Whirlpool

Whirlpool Trash Masher JTF8500XL user guide

Whirlpool 800 SERIES Use & care guide

Whirlpool

Whirlpool 800 SERIES Use & care guide

NuTone 1050L Use and care guide

NuTone

NuTone 1050L Use and care guide

manuals.online logo
manuals.online logoBrands
  • About & Mission
  • Contact us
  • Privacy Policy
  • Terms and Conditions

Copyright 2025 Manuals.Online. All Rights Reserved.