Vimar ELVOX PIXEL UP 40405 Owner's manual

Programming manual
PIXEL UP
40405
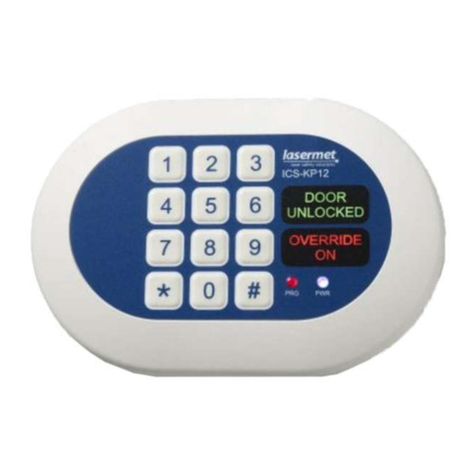
Panel with Due Fili Plus audio/video electronic unit, display and alphanumeric keyboard
MI_40405_49401379A0_MI_00_P103E_en.indd 1 22/01/2019 18:42:53

1. Video entryphone panel with Due Fili Plus audio/video electronic
unit, display and alphanumeric keyboard
Outdoor video entryphone unit with call from contacts list.
The device is supplied with a display and keyboard used to make calls using the contacts list or by directly entering the extension
number to be called.
The contacts list can be navigated by remembering the names and using the lters, by letter or by system structure.
The display also provides visual feedback on the operating phases of the outdoor unit, such as the indications for "call in progress"
and "talking", in addition to that associated with the entry control modules.
The display module is equipped with an installation menu with which the basic outdoor unit conguration parameters can be man-
aged.
The keyboard module is supplied with two congurable relays.
Front view
2
PIXEL UP: 40405
(UP), (OK), (DOWN)
3.5” display
Alphanumeric
keyboard
Speaker
Microphone
Camera
(Cancel),
(Key)
LED for light signals:
On: bus busy / Flashing No
communication
Door opened
On: Communication in progress /
Flashing: Call in progress
MI_40405_49401379A0_MI_00_P103E_en.indd 2 22/01/2019 18:42:56

2. Description
The AV module is equipped with:
- interfacing to acoustic devices used by the hard-of-hearing;
- voice synthesis, for signalling the call state;
- full-duplex audio with Larsen effect removal;
- Front LEDs, for signalling the call state;
- automatic gain control (AGC), to stabilise the speaker output level, whatever the type of installation;
- AGC on the microphone level, used to compensate the distance between the outdoor unit used and the tone of voice used in
the communication
- noise suppression, used to eliminate the background noise in the environment surrounding the outdoor unit
- automatic con guration of internal and outdoor unit addresses.
- light sensor function for automatically adjusting the brightness according to the ambient light.
- zoom & scan function, used to zoom in an scan the areas shown by the camera;
- electric lock command, connected directly to the terminals S+ and S- or to the contacts supported by the keyboard relays;
- connection for an additional local push button to open the lock or for a “Door open” signalling sensor, to the CA+ and CA- ter-
minals (con gurable via SaveProg);
- input for optional local additional power supply unit (with power supply unit 6923);
The display module provides call functions from the contacts list, extension numbers and to switchboard.
The device provides visual feedback on the operating phases of the outdoor unit, such as the indications for "call in progress" and
"talking", in addition to that associated with the entry control modules.
The display module is equipped with an installation menu with which the basic outdoor unit con guration parameters can be
managed.
2.1 Teleloop and control voice synthesis function
The device allows persons with disabilities to listen to the call
audio and receive call status signals via an appropriate hearing
aid.
Enable the hearing aid, referring to its instruction manual.
Control voice synthesis can be disabled with SaveProg.
30/40cm
30/40cm
2.2 Zoom & Scan function
This function lets you zoom and scroll through the areas framed
by the camera, as shown in the following gure, with the buttons
of an indoor unit.
Please refer to Save Prog for the remaining details.
2.3 Picture control
3
PIXEL UP: 40405
MI_40405_49401379A0_MI_00_P103E_en.indd 3 22/01/2019 18:42:56

The standard mode provides optimal operation in typical environmental conditions, while the enhanced portrait mode highlights the
caller in a backlit situation (such as at dawn).
Can be selected with Save Prog.
2.4 Dusk/dawn function
This lets you enable automatic brightness control of the entrance panel backlighting according to the ambient light brightness.
Can be selected with Save Prog.
4
PIXEL UP: 40405
MI_40405_49401379A0_MI_00_P103E_en.indd 4 22/01/2019 18:42:56

3. Conguration
The electronic module can be congured directly from the display or from the “SaveProg” programming software.
3.1 Advancedconguration(viaPC)
The advanced conguration of the electronic module is performed via a PC, using the “SaveProg” Due Fili system management
software, available from the website www.vimar.com, and connecting the electronic module to the PC via a USB-MiniUSB cable.
Take care, when the PC is connected to the USB port the control panel is disconnected and disabled.
3.2. CongurationviaPC
For conguration use the conguration software on the PC “SaveProg”, connecting to the electronic module via USB.
3.2.1. ProgrammingtheContactsListandentrycontrolcodes
The contacts list (up to 8192 items) and the access control codes (up to 2000 codes for 2-Wire Plus installations) can be programmed
using a PC with conguration software, or directly from the relative display conguration menu.
Follow the instructions of the PC conguration software.
3.2.1.1. Standby views
When rst switching on, without having programmed any contacts list, the device looks like this:
Home Screen
5
PIXEL UP: 40405
MI_40405_49401379A0_MI_00_P103E_en.indd 5 22/01/2019 18:42:57

3.2.2. Settingcontactslistlters
PC conguration software is used to enable a set of lters for targeted access to the sub-sets of the contacts list.
The available lters are described below.
3.2.2.1. Initialspre-lter
This lter lets you access a section of the contacts list identied by the names that start with the chosen letter.
A-B-C
D-E-F
G-H-I
J-K-L
M-N-O
3.2.2.2. Buildinglter
This lter lets you access the subset of users paired with a specic building.
Lybra
Tutti
The Building lter can be combined with the names pre-lter.
Lybra
Tutti
A-B-C
D-E-F
G-H-I
J-K-L
M-N-O
6
PIXEL UP: 40405
MI_40405_49401379A0_MI_00_P103E_en.indd 6 22/01/2019 18:42:58

3.2.2.3. Stairlter
The Stair lter lets you access the subset of users paired with a specic stair or all users.
It can be combined with the two previous lters.
In particular, with the buildings lter you obtain:
Lybra
Tutti
Tutti
Scala A
Scala B
Scala C
Scala D
With the buildings and names lter
Lybra
Tutti
Tutti
Scala A
Scala B
Scala C
Scala D
A-B-C
D-E-F
G-H-I
J-K-L
M-N-O
3.2.3. Additional information
Additional information is displayed on a contacts list entry when the user hovers over it for more than 3 s.
In order of priority:
• if present, the string of the User Information eld is displayed
• if there is no string in the Information eld, but there is one in the Secondary Name eld, then the latter is displayed;
• if there are no strings in either User Information or Secondary Name, and there is another user with the same ID then the name
of this second user is displayed;
OK
7
PIXEL UP: 40405
MI_40405_49401379A0_MI_00_P103E_en.indd 7 22/01/2019 18:42:58

3.3. Congurationfrommenu
The display provides the ability to congure the basic parameters of the outdoor unit.
There are two menus:
1. administrator: the administrator side lets you modify the display module interface;
2. installer: lets you change some of the functional parameters of the outdoor unit.
You access the menu by simultaneously pressing (UP) + (DOWN) for 5 secs and entering the respective passwords.
The passwords have a xed length and are composed of a sequence of the “ (UP)” “ (DOWN)” “ (OK)” buttons.
The default passwords are:
Administrator: (UP) + (UP) + (UP) + (UP) + (UP)
Installer: (DOWN) + (DOWN) + (DOWN) + (DOWN) + (DOWN)
The passwords can be modied from the conguration software on the PC or directly from the conguration menu on the display.
8
PIXEL UP: 40405
MI_40405_49401379A0_MI_00_P103E_en.indd 8 22/01/2019 18:42:59

3.3.1. Installer menu
The structure is shown below:
Level 0 Level 1 Level 2 Level 3 Level 4 Settings
Contacts List Edit Select “Name”,
to scroll and
search
ID
id 2f
Name
Enter name
Information
Enter info
Secondary info
Enter info
Visible
YES/NO
Main
YES/NO
Remapping
Remapping code
Add ID
id 2f
Name
Enter name
Information
Enter info
Secondary Info
Enter info
Visible
YES/NO
Main
YES/NO
Remapping
Remapping code
Delete Select “Name”,
to scroll and
search
Conrm/Delete
Del. All
Conrm/Delete
Access Access Codes Edit Select
“Description”,
to scroll and
search
Select “Code”,
to scroll
Edit code
Add Select
“Description”,
to scroll and
search
Enter code
Delete Select
“Description”,
to scroll and
search
Select “Code”,
to scroll
Conrm/Delete
Delete all
Conrm/Delete
Actuators Edit Select
“Description”,
to scroll and
search
Type Actuation type selection
Device Device selection
Description Enter description
Add Type
Actuation type selection
Device
Device selection
Description
Enter description
Delete Select
“Description”,
to scroll and
search
Conrm/Delete
Del. All
Conrm/Delete
9
PIXEL UP: 40405
MI_40405_49401379A0_MI_00_P103E_en.indd 9 22/01/2019 18:42:59

Display Language
Italian, English, French, German,
Spanish, Greek, Portuguese,
Russian, Swedish, Dutch and Polish
(Default: French)
Menu Font
Normal/Large (Default: Large)
Navigation Direct, Navigable, Expanded
LCD Brightness
1-5 (Default:5)
Colours
B/W, BLUE, GREEN (Default: BLUE)
Standby
ON/OFF (Default: ON)
Outdoor unit Audio Speaker
5 levels
Microphone
2 levels
Addressing Indoor units
State screen
Outdoor units
State screen
Man. address. Outdoor unit UD
id 2f
Type of
installation
Vertical/Horizontal
Timing Lock
10 values
Talk
10 values
Response
10 values
Self-start
10 values
No. of call digits
Natural / up to 4 / up to 8
Info
AV FW Ver xxxxx
LCD FW Ver xxxxx
KP FW Ver xxxx
Type of installation: Vertical /
Horizontal
outdoor unit ID
System Reset Settings
Conrm/Delete
Reset Sp.Unit
Conrm/Delete
Reboot Sp.Unit
Conrm/Delete
Reboot
Installation
Conrm/Delete
External
memory reset
Conrm/Delete
Password Administr.
Enter PWD (twice)
Installer
Enter PWD (twice)
The items are accompanied by the current value of the set parameter.
10
PIXEL UP: 40405
MI_40405_49401379A0_MI_00_P103E_en.indd 10 22/01/2019 18:42:59

3.3.2. Contacts List
This section is used to edit or add to the user contacts list stored in the outdoor unit.
The administrator can only edit some elds of a user while the installer can edit all elds, enter a new user, delete a user or the
whole contacts list.
The elds that can be set for each user are:
• ID,
• Name;
• Information,
• Secondary Information,
• Visible (Indicates if the user must be visible in the contacts list)
• Main (Indicates if the user must be considered main if there are two identical IDs)
• Remapping (Code used to call the user if the remapping is active)
3.3.3. Access
This section is used to manage the system actuations and the associated codes.
The administrator can edit only the access codes while the installer can also manage the section relating to the actuations.
The editable/settable elds for actuations are:
• Type (Indicates the type of actuation)
• Device (Indicates which device the actuation acts on)
• Description (Alphanumeric eld used to identify the actuation unambiguously)
As regards the access codes on the other hand you can:
• Edit an existing caution associated to an actuation
• Enter a new code, associating it to an actuation
• Delete a code associated to an actuation
• Delete all the codes of all the actuations
3.3.4. Display
“This section is used to congure the display functions”
3.3.4.1. Language
This lets you choose the language of the messages of the user and installer menus.
• Language: Italian, English, French, German, Spanish, Greek, Portuguese, Russian, Swedish, Dutch and Polish
11
PIXEL UP: 40405
MI_40405_49401379A0_MI_00_P103E_en.indd 11 22/01/2019 18:42:59

3.3.4.2. Menu
It is used to select:
• Font: Normal/Large
Changes the font size, to improve readability.
Recherche
Par Nom
Appel
Par N°
Ouverture
Par Code
Appel
Gardien
Normal Large
• Navigation: Direct/Navigable/Expanded
Edits the style of the home page viewed and relative access modes to the available functions.
Navigable Direct Extended
12
PIXEL UP: 40405
MI_40405_49401379A0_MI_00_P103E_en.indd 12 22/01/2019 18:42:59

3.3.4.3. LCD
This lets you dene the operating parameters of the display
• Brightness: 0-5
Brightness level. When there are high internal temperatures, the display is automatically dimmed.
• Colours: B/W, BLUE, GREEN
Lets you select one of the predened colour schemes for viewing the menu, according to readability.
B/W BLUE GREEN
• Standby: ON, OFF
Lets you disable display standby mode, i.e. not decreasing the brightness level of the LCD when it is not being used.
3.3.5. Outdoor unit
This section lets you set the basic parameters of the audio/video module of the outdoor unit.
3.3.5.1. Audio
This lets you set the operating levels of the loudspeaker and microphone.
• Speaker
• Microphone.
3.3.5.2. Addressing.
This lets you start the outdoor unit and internal unit addressing procedures.
• Indoor Units
Starts the indoor unit address assignment procedure.
• Speech Units
Starts the (non secondary) outdoor unit address assignment procedure.
• Manual addressing
The ID of the outdoor unit and type of system can be changed for the segment it is connected to.
13
PIXEL UP: 40405
MI_40405_49401379A0_MI_00_P103E_en.indd 13 22/01/2019 18:42:59

3.3.5.3. Timing
This lets you choose the times for:
• Lock
Lock command duration
• Talk
Maximum talk duration
• Answer
Time available for answering a call after the ringtone cycles have ended.
• Self-start
Maximum duration of the self-start time.
3.3.5.4. CalldigitsNo.
Used to select the mode and if required the maximum number of digits used to call an internal unit.
• Natural: up to 3 digits, remapping not active.
• 4 digits: up to 4 digits, remapping active.
• 8 digits: up to 8 digits, remapping active.
3.3.6. Info
This section gives the release information for the devices installed on the outdoor unit.
Av fw ver = audio video module version
lcd fw ver = display module version
Kp. fw ver = keypad version
3.3.7. System
This section lets you restore the factory settings of the various devices or restart the outdoor unit.
• Reset Settings: OK/Delete
Restores the factory default settings of the display module, after conrmation.
• Reset Sp.Unit: OK/Delete
Restores the factory default settings of the outdoor unit, after conrmation.
• Reboot Sp.Unit: OK/Delete
Restarts the outdoor unit.
• Reboot Installation: OK/Delete
Restarts the entire Due Fili installation.
After the reboot, the display shows the screen described in paragraph 3.5.6.
• External memory reset: OK/Delete
Conrming the external memory reset deletes any names in the Contacts list, access codes and push button remapping.
3.3.8. PASSWORD
This section is used to change the passwords associated to the installer and/or administrator to access the settings menu. To validate
the password change, enter the new password twice consecutively.
14
PIXEL UP: 40405
MI_40405_49401379A0_MI_00_P103E_en.indd 14 22/01/2019 18:42:59

3.3.9 Noticationmessages
The device displays a variety of notication messages, whose meanings are summarized in the following table.
Notication Action required
Loading... Wait for the start-up phase to complete
Communication Timeout Check the module connections and restart the electronic unit.
Registration Error Check the module connections and restart the electronic unit.
UPGRADE THE MODULES Upgrade the display module and the audio video module to the latest FW release, which
can be downloaded from the Vimar website, along with SaveProg.
Comm. Error If the problem persists, please contact customer service.
UPGRADE TO FONTS v.1 Update the fonts on the display to version 1 using SaveProg, using SaveProg version
3.1.1.12 or later.
CHECK THE CONNECTIONS Check the connection to the electronic module and restart the device.
INCORRECT INSTALLATION Incorrect installation. Check the guidelines provided in the instructions.
For example, the following screen appears in the device start-up phase and requires waiting for the start-up phase to complete.
Starting
15
PIXEL UP: 40405
MI_40405_49401379A0_MI_00_P103E_en.indd 15 22/01/2019 18:42:59

4. Updating
The devices are updated via a USB connection.
• To update the AV module, connect the USB as indicated in the gure in chapter 3.1 and run the update.
• To update the display module disconnect the device from the other modules and connect the USB to the module.
The update must be run within 30 s. After 30s the device automatically exits the update phase. During the update the LED of
the OK button will remain lit and the display will not show any images.
• To update the keyboard connect the USB to the AV module and from the list of available devices in the updating software,
select the required keyboard.
Run the update with the PC suitably powered.
16
PIXEL UP: 40405
MI_40405_49401379A0_MI_00_P103E_en.indd 16 22/01/2019 18:43:00

17
PIXEL UP: 40405
MI_40405_49401379A0_MI_00_P103E_en.indd 17 22/01/2019 18:43:00

18
PIXEL UP: 40405
MI_40405_49401379A0_MI_00_P103E_en.indd 18 22/01/2019 18:43:00

Installation rules
Installation must be carried out by qualied persons in compliance with the current regulations regarding the installation of
electrical equipment in the country where the products are installed.
Regulatorycompliance
EMC directive
Standards EN 60065, EN 61000-6-1, EN 61000-6-3 and EN 60118-4
The instructions manual can be downloaded from the website www.vimar.com
WEEE - User information
The crossed bin symbol on the appliance or on its packaging indicates that the product at the end of its life must be
collected separately from other waste. The user must therefore hand the equipment at the end of its life cycle over to
the appropriate municipal centres for the differentiated collection of electrical and electronic waste. As an alternative to
independent management, you can deliver the equipment you want to dispose of free of charge to the distributor when purchasing
a new appliance of an equivalent type. You can also deliver electronic products to be disposed of that are smaller than 25 cm for
free, with no obligation to purchase, to electronics distributors with a sales area of at least 400 m2. Proper sorted waste collection
for subsequent recycling, processing and environmentally conscious disposal of the old equipment helps to prevent any possible
negative impact on the environment and human health while promoting the practice of reusing and/or recycling materials used
in manufacture.
This product was developed using FreeRTOSTM software - http://www.freertos.org/
19
PIXEL UP: 40405
MI_40405_49401379A0_MI_00_P103E_en.indd 19 22/01/2019 18:43:00

Viale Vicenza 14
36063 Marostica VI - Italy
www.vimar.com
49401379A0_MI_EN 00 1901
MI_40405_49401379A0_MI_00_P103E_en.indd 20 22/01/2019 18:43:00
Other manuals for ELVOX PIXEL UP 40405
3
Table of contents
Other Vimar Keypad manuals
Vimar
Vimar Elvox 8016 Assembly instructions
Vimar
Vimar ELVOX 41020 User guide
Vimar
Vimar By-alarm 01705 User manual
Vimar
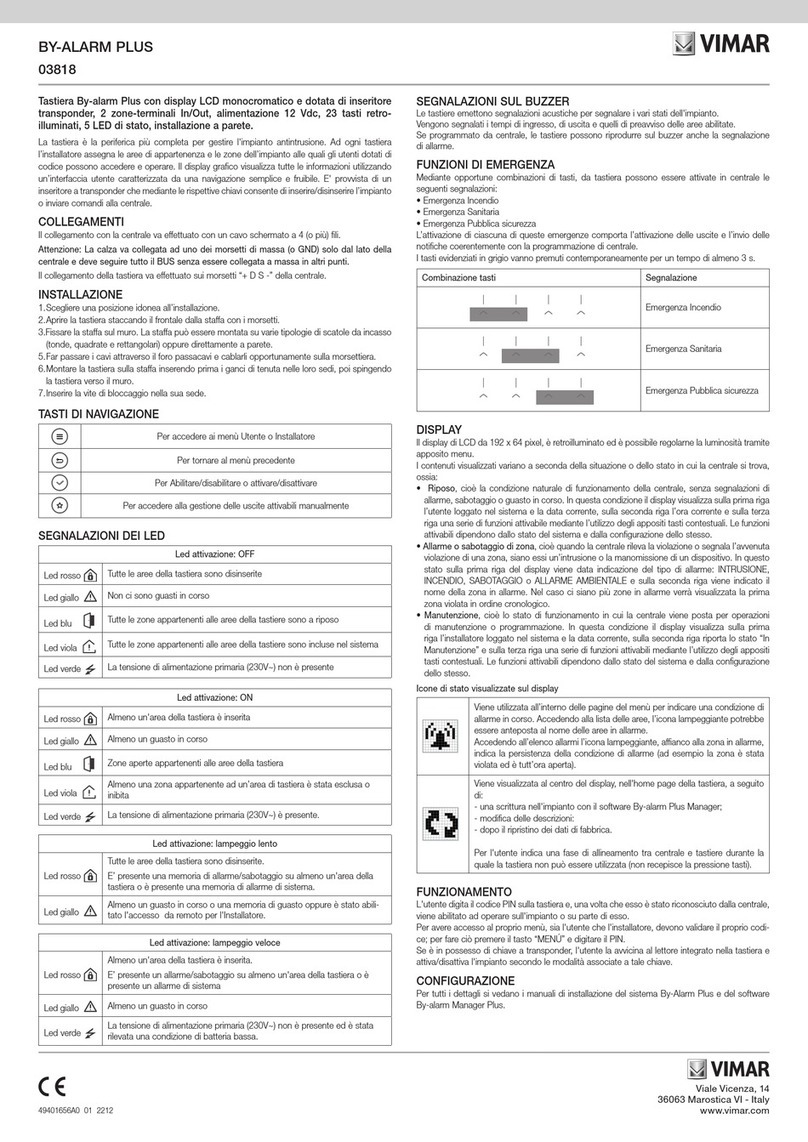
Vimar BY-ALARM PLUS 03818 User manual
Vimar
Vimar ELVOX 13F4 Assembly instructions
Vimar
Vimar ELVOX 41019 Assembly instructions

Vimar
Vimar ELVOX 41019 User guide

Vimar
Vimar ELVOX 41020 Assembly instructions
