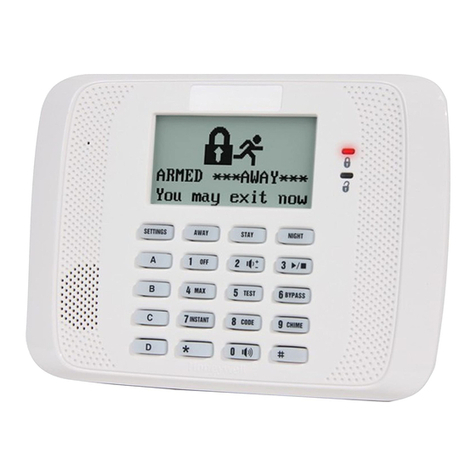
Vimar By-alarm 01705 User manual

User Manual
By-alarm
01705
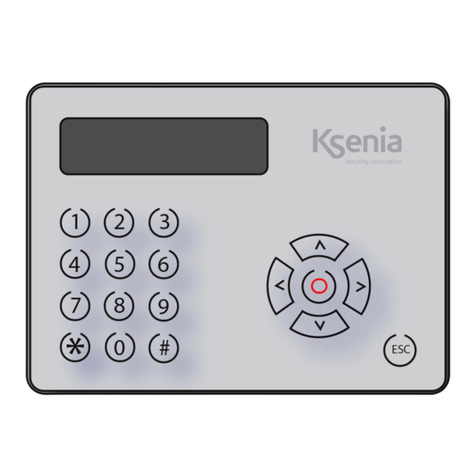
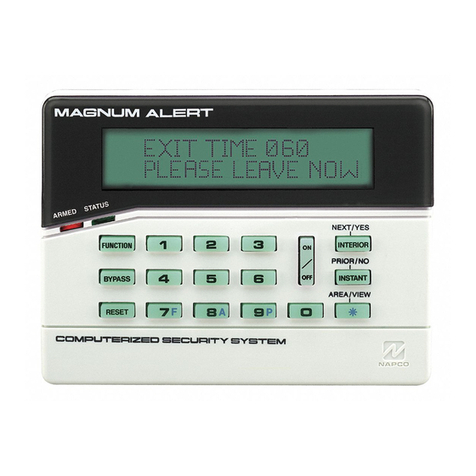
LED backlit keypad with display


1
1. User activations …………………………………………………………………………………………………………… 2
1.1 Buttons, controls and indicators on the keypad …………………………………………………………………… 2
1.2 Direct warnings on the display………………………………………………………………………………………… 3
1.3 Keypad locking ………………………………………………………………………………………………………… 4
1.4 Keypad unlocking ……………………………………………………………………………………………………… 4
1.5 Indicators on display with User Code. ……………………………………………………………………………… 4
1.6 Total switch-on with Code …………………………………………………………………………………………… 5
1.7 Switching off from total switch-on with Code. ……………………………………………………………………… 5
1.8 Internal or partial switch-on with Code ……………………………………………………………………………… 6
1.9 Switching off from internal or partial switch-on with Code ………………………………………………………… 6
1.10 Switching on the control panel in “FAST MODE” ………………………………………………………………… 7
1.11 Switching off the control panel in “FAST MODE” ………………………………………………………………… 7
1.12 Switching on different systems with Code ………………………………………………………………………… 8
1.13 Switching off different systems with Code. ………………………………………………………………………… 9
1.14 Switching on multiple systems in “FAST MODE” (if programmed) ……………………………………………… 10
1.15 Switching off multiple systems in “FAST MODE” (if programmed) ……………………………………………… 11
1.16 How to activate direct alarm calls…………………………………………………………………………………… 12
2. Functions and settings ………………………………………………………………………………………………… 13
2.1 Primary Menu diagram ………………………………………………………………………………………………… 14
3. Function tree ……………………………………………………………………………………………………………… 15
3.1 Events Memory ………………………………………………………………………………………………………… 16
3.1.1 Consulting the Events Memory………………………………………………………………………………… 16
3.1.2 Resetting alerts ………………………………………………………………………………………………… 17
3.2 Zone management …………………………………………………………………………………………………… 17
3.2.1 Exclude zone …………………………………………………………………………………………………… 17
3.2.2 Reinclude zone ………………………………………………………………………………………………… 17
3.3 User management……………………………………………………………………………………………………… 18
3.3.1 Changing your own User Code ……………………………………………………………………………… 18
3.3.2 Changing other Codes ………………………………………………………………………………………… 18
3.4 Phone numbers ………………………………………………………………………………………………………… 19
3.4.1 Change phone numbers ……………………………………………………………………………………… 19
3.5 Operations ……………………………………………………………………………………………………………… 19
3.5.1 Activate and deactivate outputs ……………………………………………………………………………… 19
3.5.2 Activate Macro instructions …………………………………………………………………………………… 20
3.5.3 Activate and deactivate Programmable Time Switch ……………………………………………………… 21
3.5.4 Activate Overtime ……………………………………………………………………………………………… 21
3.6 Set Date and Time …………………………………………………………………………………………………… 22
3.7 System test …………………………………………………………………………………………………………… 22
3.7.1 Phone calls ……………………………………………………………………………………………………… 22
3.7.2 Walk test ………………………………………………………………………………………………………… 23
3.7.3 Keypad buzzer management ………………………………………………………………………………… 23
3.7.4 Activate Relay 1 and Relay 2 ………………………………………………………………………………… 23
3.7.5 Check Remaining Credit on GSM …………………………………………………………………………… 24
3.7.6 SIM expiry ……………………………………………………………………………………………………… 24
3.7.7 Deactivation of Remote Controls …………………………………………………………………………… 24
4. RFA control panels art. 01700-01703 ……………………………………………………………………………… 25
5. By-alarm system remote function access ………………………………………………………………………… 27
Contents
By-alarm

2
1. USER ACTIVATIONS
1.1 Buttons, controls and indicators on the keypad
By-alarm
User activations
amber LED: if on, it indicates the presence of control panel mains voltage.
green LED: if off, it indicates charging trouble with the control panel battery.
green LED: if on, it means that all the zones are active and closed.
if off, it means that at least one zone is open.
if blinking, it means that at least one zone is excluded.
red LED: if on, it means that the system is switched on.
if off, it means that the control panel is switched off.
if blinking, it means that an alarm occurred in the previous ON
state. The next time you switch on the control panel,
the LED will automatically stop blinking.
ON button ON
ON button INTERNAL
ON button PARTIAL
ENTER button to confirm the data entered
CLEAR button to delete the data entered

3
1.2 Direct warnings on the display
• Normally, the display shows the day of the week, the date and time and a second line of information.
TH 08 JUN 19:32
MARGARET'S HOME
Control panel fault statuses, when they occur, appear directly on the display:
• No mains voltage
• Battery level
• Control panel anti-tampering
Similarly, the states of the control panel appear directly on the display and on the keypad; for example:
• Control panel on
• Zone alarm
By-alarm
User activations
CONTROL PANEL ON
TH 08 JUN 19:32
NO MAINS
FR 09 MAY 20:12
MALFUNCT. BATTERIES
SA 10 MAY 23:37
TAMPER
SA 10 MAY 21:28
ENTRANCE SENSOR

4
1.3 Keypad locking
You can lock each keypad with a simple operation to avoid inadvertently pressing buttons or activating the related
functions.
a) Press the INT and 7 buttons simultaneously.
TH 08 MAY 19:32
MARGARET'S HOME
TH 08 MAY 19:32
TERMINAL DISAB.
1.4 Keypad unlocking
To unlock the keypad you need to perform the same procedure as for locking the keypad.
a) Press the INT and 7 buttons simultaneously.
TH 08 MAY 20:30
terminal disab.
TH 08 MAY 20:30
MARGARET'S HOME
1.5 Indicators on display with User Code
The indicators for any open or excluded zones are displayed, for security reasons, after entering an enabled
User Code.
• On entering the User Code, the display will indicate whether some zones are open or have been excluded:
• Open zone
• Excluded zone
OPEN ZONE 2
ENTRANCE SENSOR
EXCLUDED ZONE 2
ENTRANCE SENSOR
By-alarm
User activations

5
1.6 Total switch-on with Code
a) The display shows the current date and time.
b) Enter the User Code.
c) The display will show all the information relating to the open or excluded zones.
d) Press the button corresponding to total switch-on: ON.
e) The display must not indicate any open zones and the green circuit test LED must be ON.
If it is off, it means that at least one zone is open. In this case, do not continue with switching on the control
panel or you will trigger a control panel alarm status. The zones indicated as open must be checked and,
then, closed or excluded (see "Zone management" on page 17).
f) Press the ENT button to confirm switching on the control panel in ON mode.
The red LED on the keypad will light up.
MARGARET'S HOME
READY (MENU 9)
SWITCHING ON
ENT=yes ESC=no
control panel on
1.7 Switching off from total switch-on with Code
a) The display shows the current date and time.
b) Enter the User Code.
c) The display will confirm recognition of the User Code and show the status of control panel switch-on;
then, press the OFF|0button.
• The red LED will go out on the keypad.
If it blinks instead, it means there has been an alarm in the previous switch-on state; in this case the display
will also indicate which zone caused it. This alarm memory will be automatically reset the next time you
switch on.
After 1 minute the display
will show the date and
time.
Press the ESC|button
to exit immediately
TH 08 MAY 20:30
margaret's home
control panel on
TH 08 MAY 20:30
margaret's home
By-alarm
User activations

6
By-alarm
1.8 Internal or partial switch-on with Code
a) The display shows the current date and time.
b) Enter the User Code.
c) The display will give all the information relating to the open or excluded zones.
d) Press the button corresponding to INTernal or PARtial switch-on.
e) The display must not indicate any open zones and the green circuit test LED must be ON or blinking
to signal the excluded zones.
If instead it is off, it means that at least one zone is open. In this case, do not continue with switching on the
control panel or you will trigger a control panel alarm status. The zones indicated as open must be checked
and, then, closed or excluded (see "Zone management" on page 17).
f) Press the ENT button to confirm switching on in INTernal or PARtial mode.
• N.B.: Press button 1 to activate special switch-on; this switch-on mode automatically clears all the output
delays related to the timed lines.
The red LED on the keypad will light up.
MARGARET'S HOME
READY (MENU 9)
Ent 1 = special
ENT=yes ESC=no
control panel on
1.9 Switching off from internal or partial switch-on with Code
a) The display shows the current date and time.
b) Enter the User Code.
c) The display will confirm recognition of the User Code and show the status of control panel switch-on; then,
press the OFF|0 button.
• The red LED will go out on the keypad. If it blinks instead, it means there has been an alarm in the
previous switch-on state; in this case the display will also indicate which zone caused it; this alarm memory
will be automatically reset the next time you switch on.
After 1 minute the display
will show the date and
time.
Press the ESC|button
to exit immediately
TH 08 MAY 20:30
margaret's home
control panel on
MARGARET'S HOME
READY (MENU 9)
User activations

7
By-alarm
1.10 Switching on the control panel in “FAST MODE”
If you enabled fast switch-on, you can switch on the control panel without having to enter the User Code.
a) The display shows the current date and time.
b) Press the button corresponding to the desired switch-on 3 times:
TH 08 MAY 20:30
MARGARET'S HOME
TH 08 MAY 20:30
MARGARET'S HOME
TH 08 MAY 20:30
MARGARET'S HOME
With fast INTernal and PARtial switching
on, the exit and re-entry times for the timed
lines will always be available
• Switching ON
• Switching on INTernal
• Switching on PARtial
1.11 Switching off the control panel in “FAST MODE”
a) The display shows the current date and time.
b) Enter the User Code.
c) The control panel will switch off immediately, showing the current date and time.
The red ON LED will go out on the keypad. If it blinks instead, it means there has been an alarm in the previous
switch-on state; in this case the display will also indicate which zone caused it; this alarm memory will be auto-
matically reset the next time you switch on.
TH 08 MAY 20:30
MARGARET'S HOME
TH 08 MAY 20:30
MARGARET'S HOME
User activations

8
By-alarm
1.12 Switching on different systems with Code
a) The display shows the current date and time.
b) Enter the User Code.
c) Only on the keypad where you are working, the display will show only the Areas associated with the entered
Code and faults will only be shown on the display if they occur, by means of graphic symbols.
TH 08 MAY 20:30
margaret's home
areas 1 2
on _ _
areas 1 2
status
areas 1 2
status ¢
• The code is associated with Areas
1 and 2
• Zone open in Area 2; in this case,
press button 2 to check which zone
of Area 2 is open
•Zone excluded in Area 1; press button
1 to check which zone of Area 1 is
excluded
d) If you want to switch on Area 1, press button 1 to select the Area.
e) The display will show “System Name READY”.
f) Press the ON, INTernal or PARtial button to switch on the selected Area.
g) Press the ENT button to confirm. Switch-on in the selected mode will be indicated on Area 1. [O] for ON, [I]
for INTernal and [P] for PARtial.
h) Proceed in a similar fashion to switch on the other Areas.
TH 08 MAY 20:30
margaret's home
areas 1 2
on _ _
margaret's home
ready (menu 9)
switching ON
ent=yes esc=no
areas 1 2
on 0 _
Example of switching on Area 1 in ON mode
User activations

9
By-alarm
1.13 Switching off different systems with Code
a) The display shows the current date and time.
b) Enter the User Code.
c) Only on the keypad where you are working, the display will show only the Areas associated with the entered
Code and the switch-on modes for each single Area. [O] for ON, [I] for INTernal and [P] for PARtial.
d) If you want to switch off Area 1, press button 1 to select the Area.
e) The display will show “CONTROL PANEL ON”.
f) Press the OFF|0 button to switch off the Area. The display will return to showing the status of all the systems.
g) In a similar manner, you can switch off the other Areas.
TH 08 MAY 20:30
margaret's home
areas 1 2
on 0 0
control panel on
areas 1 2
on _ 0
After 1 minute the display
will show the date and
time.
Press the ESC|button
to exit immediately
User activations

10
By-alarm
1.14 Switching on multiple systems in “FAST MODE” (if programmed)
a) The display shows the current date and time.
b) Enter the User Code.
c) The display will show only the Areas associated with the entered Code and faults will be displayed, by means
of graphic symbols, only if they occur.
TH 08 MAY 20:30
margaret's home
areas 1 2
on _ _
areas 1 2
status
areas 1 2
status ¢
• The code is associated with Areas
1 and 2
• Zone open in Area 1; in this case,
press button 1 to check which zone
of Area 1 is open
•Zone excluded in Area 1; press button
1 to check which zone of Area 1 is
excluded
d) If you want to switch on all the Areas in a single mode (ON, INTernal or PARtial), you need to press the button
corresponding to the chosen mode.
TH 08 MAY 20:30
margaret's home
areas 1 2
on _ _
active in int
ent=yes esc=no
areas 1 2
on I I
TH 08 MAY 20:30
margaret's home
areas 1 2
on _ _
active in int
ent=yes esc=no
areas 1 2
on p p
TH 08 MAY 20:30
margaret's home
areas 1 2
on _ _
switching ON
ent=yes esc=no
areas 1 2
on 0 0
• Switching ON
• Switching on INTernal
• Switching on PARtial
User activations

11
By-alarm
1.15 Switching off multiple systems in “FAST MODE” (if programmed)
a) The display shows the current date and time.
b) Enter the User Code.
c) The display will show only the Areas associated with the entered Code and the switch-on mode for each single
Area; [O] for ON, [I] for INTernal and [P] for PARtial.
f) Press the OFF|0 button to switch off all the Areas simultaneously.
• Examples of general shutdown:
TH 08 MAY 20:30
margaret's home
areas 1 2
on 0 _
areas 1 2
on _ _
TH 08 MAY 20:30
margaret's home
TH 08 MAY 20:30
margaret's home
areas 1 2
on 0 I
areas 1 2
on _ _
TH 08 MAY 20:30
margaret's home
TH 08 MAY 20:30
margaret's home
areas 1 2
on 0 0
areas 1 2
on _ _
TH 08 MAY 20:30
margaret's home
User activations

12
By-alarm
1.16 How to activate direct alarm calls
There are particular emergency situations that, at any time, should trigger the corresponding telephone com-
munications extremely quickly; for this reason, simply by pressing certain buttons, you can invoke emergency
functions:
Keeping the ON and 4buttons pressed activates the outputs programmed
as “panic message” and a phone call is made to the programmed numbers,
communicating a PANIC ALARM, that can be associated with an emergency
status for attempted robbery.
Keeping the ON and 5buttons pressed activates the outputs programmed
as “fire message” and a phone call is made to the programmed numbers,
communicating a FIRE ALARM.
Keeping the ON and 6buttons pressed activates the outputs programmed as
“doctor message” and a phone call is made to the programmed numbers,
communicating a DOCTOR CALL.
PANIC:
FIRE:
DOCTOR:
User activations

13
By-alarm
Functions and settings
2. FUNCTIONS AND SETTINGS
Directly from the keypad you can activate functions of control and customization.
To reach the User functions menus:
With Code associated with a system
a) The display shows the current date and time.
b) Enter the User Code.
c) Press button 9 to reach the first User menu.
• Using the arrow buttons INT|and PAR|you move forward or backward in viewing the various User
Functions; with theENT button you enter the function's configuration mode.
• All the functions are illustrated on the next page.
TH 08 MAY 20:30
margaret's home
margaret's home
ready (menu=9)
events memory
ent
With Code associated with multiple systems
a) The display shows the current date and time.
b) Enter the User Code.
c) Press the button that corresponds to an Area to "enter" the related system management.
d) Press button 9 to reach the first User menu.
• Using the arrow buttons INT|and PAR|you move forward or backward in viewing the various User
Functions; with theENT button you enter the function's configuration mode.
• All the functions are illustrated on the next page.
areas 1 2
on _ _
margaret's home
ready (menu=9)
events memory
ent

14
By-alarm
Functions and settings
2.1 Primary Menu diagram
margaret's home
ready [menu=9]
TH 08 MAY 20:30
margaret's home
events memory
ENT
ZONE MANAGEMENT
ENT
USER MANAGEMENT
ENT
PHONE NUMBERS
ENT
OPERATIONS
ENT
SET DATE/TIME
ENT
SYSTEM TEST
ENT
consult
ENT
NUM. ZONE: 1
ENTRANCE DOOR
YOURSELF
ENT
TELEPHONE: 1
335123123123****
OUTPUTS
ENT
HOUR
10 (MAX. 23)
CALL PHONE
ENT
Events
memory
Zone Management
User Management
Phone Numbers
Operations
Set Date/Time
System test
Page 17
Page 18
Page 19
Page 19
Page 22
Page 22
Page 16
Function of the buttons
ESC
|
button ENT button
INT|and PAR|
button
• takes you back a step.
• repeated pressing takes you
out of configuration mode
• takes you into the Menu
displayed at that time
• confirms the data entered
• take you respectively down
or up in the diagram of the
Menus

15
By-alarm
Function tree
3. FUNCTION TREE
3.1 Events Memory
3.1.1 Consult
3.1.2 Reset alerts
3.2 Zone management
3.2.1 Zone number
- Exclude
- Reinclude
3.3 User Management
3.3.1 Changing your own User Code
3.3.2 Other codes
3.4 Phone numbers
3.5 Operations
3.5.1 Outputs
3.5.2 Macro
3.5.3 Programmable time switch
3.5.4 Overtime
3.6 Set Date and Time
3.7 System test
3.7.1 Call phone
3.7.2 Walk test
3.7.3 Buzzer ON/OFF
3.7.4 Activate relay 1
3.7.5 Activate relay 2
3.7.6 Remaining credit
3.7.7 SIM expiry

16
By-alarm
Function tree
3.1 Events Memory
The control panel has a memory where everything that happens to the control panel is recorded with the date and
time; saved events are automatically updated, always deleting the oldest one. The control panel art. 01700 saves
up to 200 events, while the control panel art. 01703 saves up to 500.
• The arrow buttons INT|and PAR|are used for scrolling, viewing all the options in this menu.
• With the ESC|button you exit the menu.
3.1.1 Consulting the Events Memory
a) The display shows the Menu for consulting the Events memory.
g) Press the ENT button to enter.
c) If the code that allowed access is enabled for this function, the display will show the Menu for consulting
the internal memory of the control panel.
d) Press the ENT button to enter.
• The last of the saved events, the most recent one, is displayed; with the PAR|arrow you go back in
time in viewing the memory, whereas with the INT|arrow you move forward to the most recent event.
• With the CLR button you can view other data on the event shown.
e) Press the ESC|button to exit Consulting the Events Memory.
CONSULT
ENT
zone al 2
87° 12/03 15.30
activated relay
86° 12/03 15.30
zone al 2
ENTRANCE SENSOR
Event type
Event time
Event date
Event progressive number
Event description
Successful phone calls
PHONES 1 - 8
——————
TO OTHER
EVENTS

17
By-alarm
Function tree
3.1.2 Resetting alerts
a) The display shows the Menu for resetting alerts
b) Press the ENT button to reset the alarm alerts on the keypads.
c) Confirm with the ENT button if you want to continue.
d) Press the ESC|button to exit resetting the alerts.
RESET ALERTS
ENT
SURE ?
ENT=YES ESC=NO
3.2 Zone management
With this function you can exclude and reinclude the alarm management zones.
Caution: Excluded zones cannot generate any control panel alarm status.
3.2.1 Exclude zone
a) Scrolling with the navigation buttons INT|and PAR|, select the zone you want to exclude from the
alarm.
b) Confirm with the ENT button or press the ESC|button to exit without excluding.
ZONE MANAGEMENT
ENT
NUM. ZONE: 3
ROOM WINDOW
SYSTEM READY
EXCLUDE ?
NUM. ZONE: 3
[ESC] ROOM WINDOW
3.2.2 Reinclude zone
a) Scrolling with the navigation buttons INT|and PAR|, select the zone you want to reinclude in the
alarm.
b) Confirm with the ENT button or press the ESC|button to exit without reincluding.
ZONE MANAGEMENT
ENT
NUM. ZONE: 3
[ESC] ROOM WINDOW
excluded zone
reinCLUDE ?
NUM. ZONE: 3
ROOM WINDOW

18
3.3 User Management
The control panel can be managed by User Codes that can be changed by the User.
• The arrow buttons INT|and PAR|are used for scrolling, viewing all the options in this menu.
• With the ESC|button you exit the menu.
3.3.1 Changing your own User Code
a) If the code that allowed access is enabled for this function, the display will show the ability for you to
change your code.
g) Press the ENT button to enter.
c) Press the CLR button to delete the current code.
d) Enter the new Code.
e) Press the ENT button to confirm.
f) Press the ESC|button to exit changing your own code.
yourself
ENT
yourself:
——————
yourself
* * * * * *
3.3.2 Changing other codes
a) If the code that allowed access is enabled for this function, the display will show the ability for you to
change other Codes.
g) Press the ENT button to enter.
c) Select the Code that you want to change by scrolling with the INT|and PAR|buttons.
d) Press the ENT button to confirm.
e) Press the CLR button to delete the current code.
f) Enter your new Code.
g) Press the ENT button to confirm.
h) Press the ESC|button to exit changing the code.
other codes
ENT
code no.: 1
margaret
code no.: 1
——————
code no.: 1
* * * * * *
By-alarm
Function tree
Other manuals for By-alarm 01705
1
Table of contents
Other Vimar Keypad manuals
Vimar
Vimar ELVOX 41020 Assembly instructions
Vimar
Vimar ELVOX PIXEL UP 40405 Owner's manual
Vimar
Vimar ELVOX 41019 User guide
Vimar
Vimar ELVOX 13F4 Assembly instructions

Vimar
Vimar ELVOX 41019 Assembly instructions
Vimar
Vimar Elvox 8016 Assembly instructions

Vimar
Vimar ELVOX 41020 User guide
Vimar
Vimar BY-ALARM PLUS 03818 User manual
