manuals.online logo
Brands
  1. Home
  2. •
  3. Brands
  4. •
  5. Vintage view
  6. •
  7. Wine Cooler
  8. •
  9. Vintage view Evolution Series User manual

Vintage view Evolution Series User manual

Evolution Series
Evolution Series Wine Tower Installation Instructions
• (2) Acrylic Panels
• E1 Wine Rods
• E1-SCREW (included with base kits)
• Drill (with torque setting)
• 4mm driver tip
• A handy friend
Parts List Required Tools
• E1-STUD (included with extension kits)
• 4mm Allen Key (included with base kits)
• Threaded Insert (included in all Wine Rods)
Figure A
Figure B
Figure C
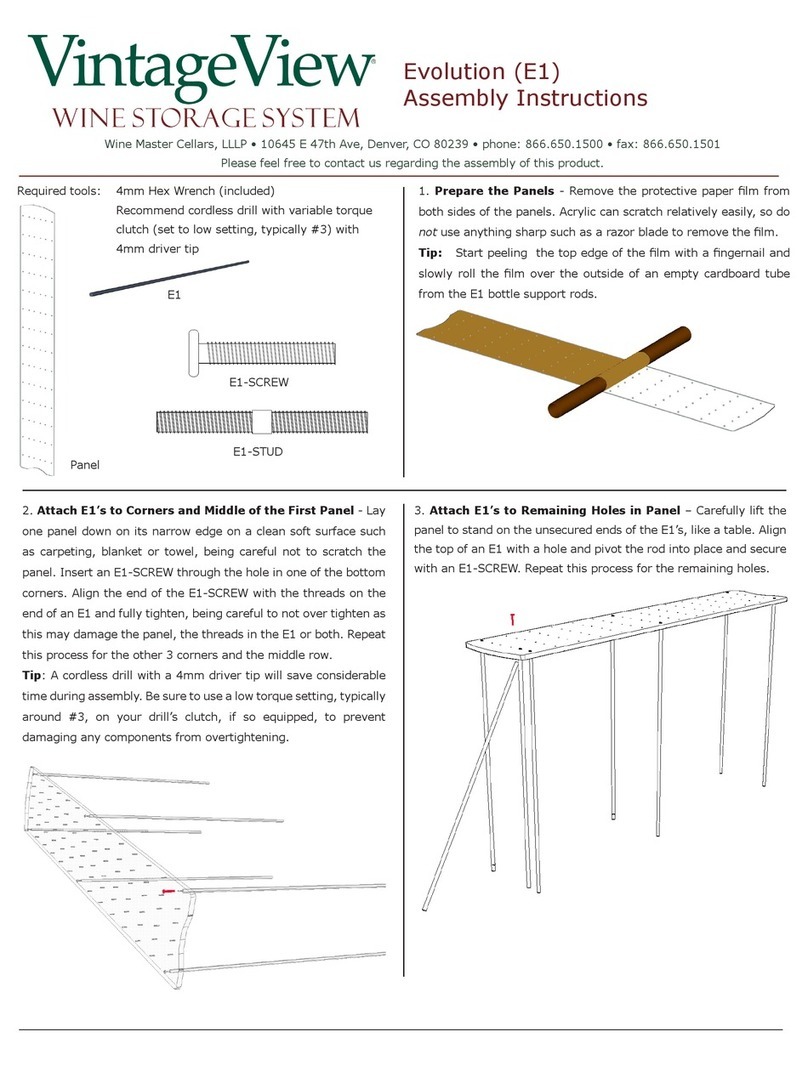
1: Prepare the Panels
Remove the protective paper lm from both sides of
the panels. Acrylic can scratch relatively easily, so
don’t use anything sharp such as a razor blade to
remove the lm.
Pro Tip: Start peeling the top edge of the lm with a
ngernail and slowly roll the lm over the outside of an
empty cardboard tube from the E1 bottle support rods.
2: Attach E1’s to Corners and Middle of
the First Panel
Lay one panel down on its narrow edge on a clean
soft surface such as carpeting, blanket or towel, being
careful not to scratch the panel. Insert an E1-SCREW
through the hole in one of the bottom corners. Align
the end of the E1-SCREW with the threads on the end
of an E1 and fully tighten, being careful to not over
tighten as this may damage the panel, the threads
in the E1 or both. Repeat this process for the other 3
corners and the middle row.
Pro Tip: A cordless drill with a 4mm driver tip will save
considerable time during assembly. Be sure to use a low
torque setting, typically around #3, on your drill’s clutch, to
prevent damaging any components from overtightening.
- E1Screw
- E1Stud
Instructions
Figure F Figure G
3: Attach E1’s to Remaining Holes in Panel
Carefully lift the panel to stand on the unsecured ends
of the E1’s, like a table. Align the top of an E1 with a
hole and pivot the rod into place and secure with an E1-
SCREW. Repeat this process for the remaining holes.
4: Afx the Second Panel
Carefully lift and rotate the partially assembled unit
to rest on the panel with the unsecured ends upright,
like a bed of nails. Lay the second panel on the ends
of the E1’s and one at a time, align each E1 with the
corresponding hole and secure it in place with an E1-
SCREW (Fig. A.). If assembling a multi-section unit, use
the E1-STUD instead (Fig. B.). It is recommended that the
E1’s be secured row-by-row working down the panel,
as this will allow the easiest alignment of the E1 with the
holes.
For single section units, the assembly is complete, skip to Step 6.
Pro Tip: The E1-STUD’s may be quickly screwed in by gently
tightening them in the chuck of a drill with approximately 3/4
of the stud exposed, screwing them in until the at spot in the
middle of the stud is just below the surface of the panel and
then releasing the end of the stud from the chuck.
5: Attach the E1’s to Exposed Studs (for
Extensions only)
With all of the studs installed, begin securing the
panel in place by installing E1’s along the top,
middle and bottom rows. Once the second panel is
rmly locked in place, the unit may be stood upright
for ease of access while installing the remaining
E1’s.
Pro Tip: The E1’s may be quickly installed by gently
tightening one end of the tube in the chuck of a drill
and screwing the other end onto the exposed E1-STUD.
Remember to keep the drill set at a low torque so as not
to overtighten or damage anything.
6: Secure to Wall
It is highly recommended that all units be secured
to a wall for optimal stability. This may be
accomplished by either directly fastening a panel to
the wall by pre-drilling a hole through the panel and
screwing or bolting into the wall or by using an “L”
bracket. Please contact your VintageView dealer for
information regarding brackets of custom shapes or
sizes.
7: Add wine
only the good stuff!
Other Vintage view Wine Cooler manuals

Vintage view IDR7 User manual

Vintage view

Vintage view IDR7 User manual

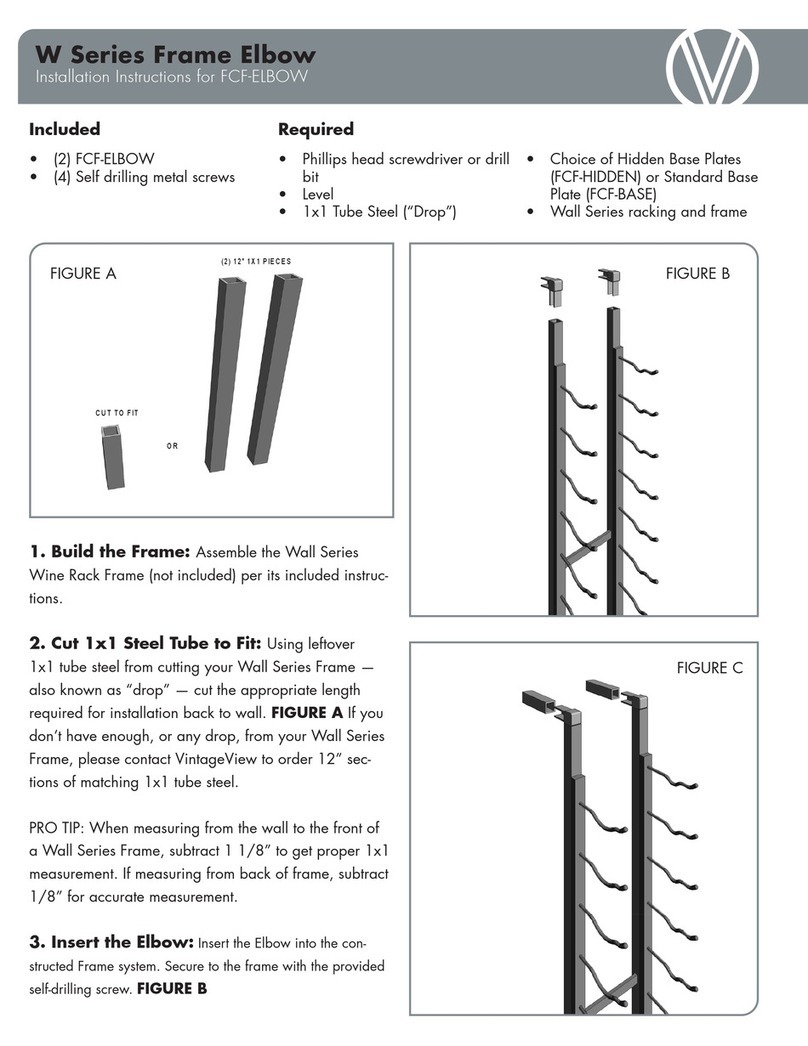
Vintage view W Series User manual

Vintage view

Vintage view W Series User manual

Vintage view W Series User manual

Vintage view

Vintage view W Series User manual

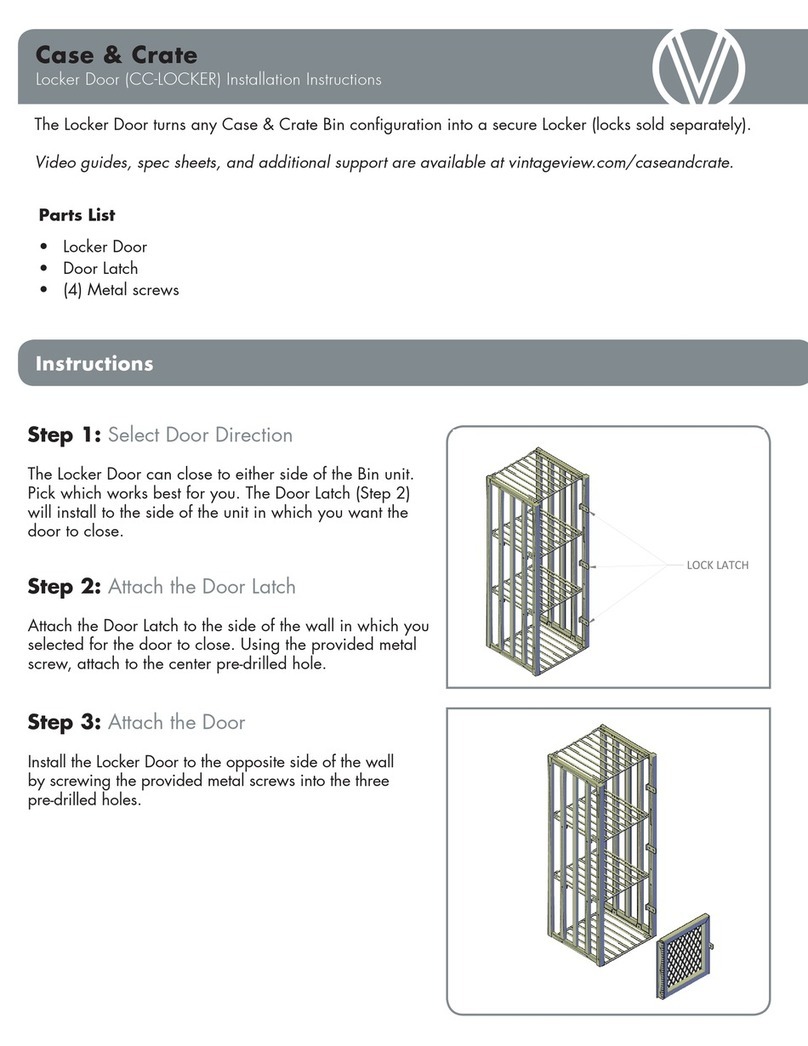
Vintage view CC-LOCKER User manual

Vintage view

Vintage view CC-LOCKER User manual

Vintage view Vino Pins Flex Series User manual

Vintage view

Vintage view Vino Pins Flex Series User manual

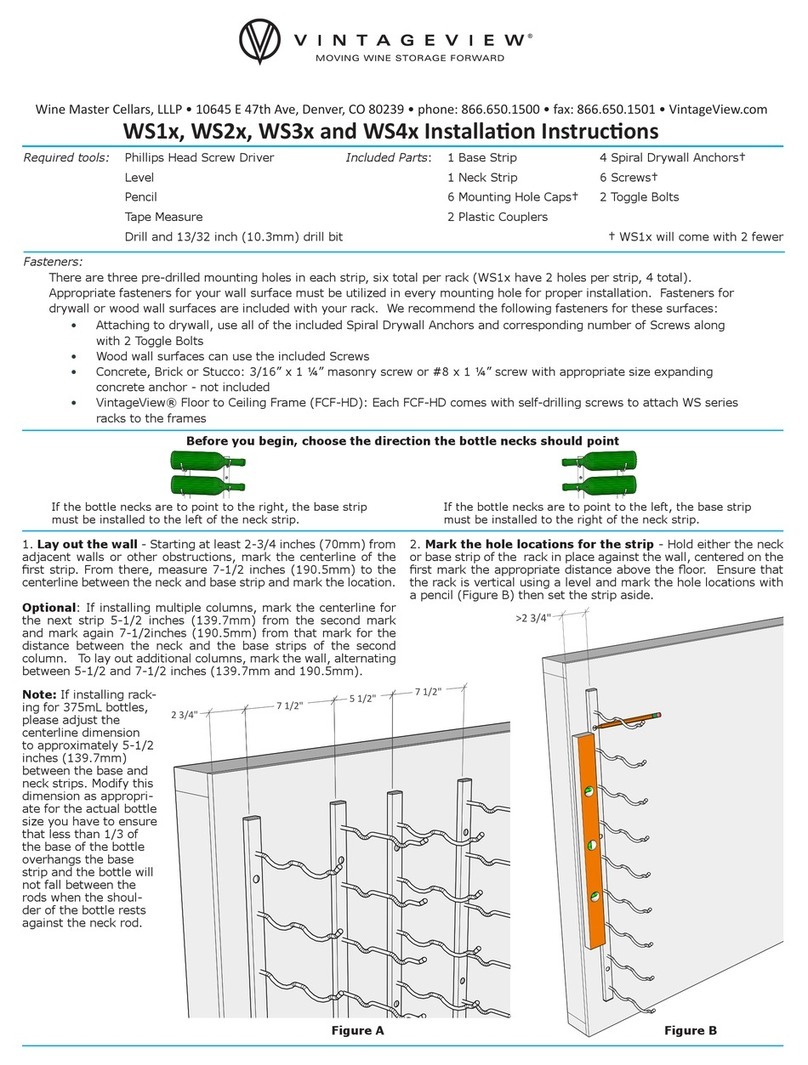
Vintage view WS1x User manual

Vintage view

Vintage view WS1x User manual

Vintage view E1 Quick setup guide

Vintage view

Vintage view E1 Quick setup guide

Popular Wine Cooler manuals by other brands

Danby DWC257BL owner's manual

Danby

Danby DWC257BL owner's manual

Miele KWT4154UG1 OPERATING AND INSTALLATION Manual

Miele

Miele KWT4154UG1 OPERATING AND INSTALLATION Manual

AEG EWUD040B8B user manual

AEG

AEG EWUD040B8B user manual

Avanti EWC18DZ instruction manual

Avanti

Avanti EWC18DZ instruction manual

Genuwine Cellars 32 32 Assembly instructions

Genuwine Cellars

Genuwine Cellars 32 32 Assembly instructions

KitchenAid KUWS246EBL02 cabinet parts

KitchenAid

KitchenAid KUWS246EBL02 cabinet parts

Caple WC6215 instruction manual

Caple

Caple WC6215 instruction manual

AEG SCE72716VM user manual

AEG

AEG SCE72716VM user manual

Viking Range VWUI5241 manual

Viking Range

Viking Range VWUI5241 manual

Eico VKG 671 W Instructions for use

Eico

Eico VKG 671 W Instructions for use

Danby DCW206S-SC owner's manual

Danby

Danby DCW206S-SC owner's manual

CDA FWC881BL Installation, use and maintenance

CDA

CDA FWC881BL Installation, use and maintenance

Nordcap TMV-C10 manual

Nordcap

Nordcap TMV-C10 manual

Vintec VWM306SBA-R user manual

Vintec

Vintec VWM306SBA-R user manual

Avanti WC34T2P instruction manual

Avanti

Avanti WC34T2P instruction manual

Baumatic BWC455BGL instruction manual

Baumatic

Baumatic BWC455BGL instruction manual

AEG SWB66001DG user manual

AEG

AEG SWB66001DG user manual

Eurocave PURE user manual

Eurocave

Eurocave PURE user manual

manuals.online logo
manuals.online logoBrands
  • About & Mission
  • Contact us
  • Privacy Policy
  • Terms and Conditions

Copyright 2025 Manuals.Online. All Rights Reserved.