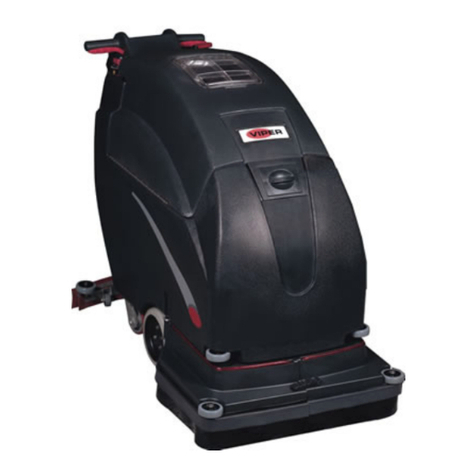
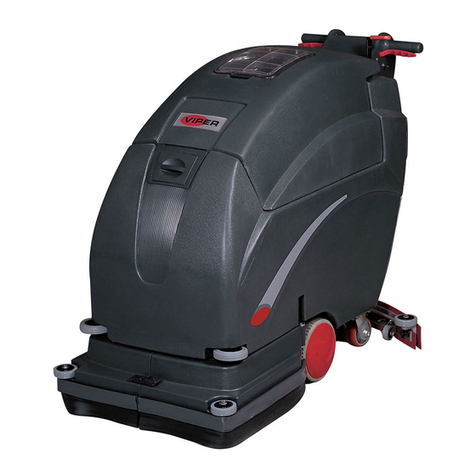
Viper VF18HD User manual

REV.03(2015-11-30)
www.vipercleaning.com
VF41141A

TABLE OF CONTENTS
SafetyPrecautions 3
MachineOperation 4
Machine Maintenance & Storage 4
Parts List 5---9
Directions For The Grinding And
Crystallization Processes 10
Directions For The Grinding And
Crystallization Processes (Chinese)11
Machine Operation (Chinese )12
WiringDiagram 13
2

SAFETY PRECAUTIONS
!!! This machine must be grounded!
Grounding provides a path of least resistance
for electrical current. To reduce the risk of
electrical shock should the machine
malfunction, the machine has a special
grounding plug. Don’t remove the ground pin
under any circumstances!
This machine is intended for commercial use.
It is constructed for use in an indoor
environment and is not intended for any other
use. Use only recommended accessories.
All operators shall read, understand and
exercise the following safety precautions:
1] Do not operate machine:
-Unless trained and authorized.
-Unless you have read and understand
operators manual.
-In flammable or explosive areas.
-With a damaged cord or plug.
-If not in proper operating condition.
-In outdoor areas.
-In standing water
-With the use of extension cords.
2] Before operating machine:
-Make sure all safety devices are in
place and operate properly.
3] When using machine:
-Do not run machine over cord.
-Do not pull machine by cord or plug
-Do not pull cord around sharp edges or
corners.
-Do not unplug by pulling on the cord.
-Do not stretch cord.
-Do not handle plug with wet hands.
-Keep cord away from heated surfaces.
-Do not pick up burning or smoking
debris such as cigarettes, matches or
hot ashes.
-Report machine damage of faulty
operation immediately.
4] Before leaving or servicing machine:
-Turn off machine.
-Unplug cord from outlet.
5] When servicing machine:
-Unplug cord from outlet.
-Use manufacturer supplied or approved
replacements parts.
3

Operation of Floor Machine
* Read operators manual thoroughly prior to
operating or servicing this machine.
GENERAL USE
1] Remove any obstructions or other
obstacles in the area which is to be cleaned.
2] Place the handle in the upright position and
tilt machine back until handle rests on the
floor.
lBe sure the machine is not plugged
into an outlet.
3] Attach the pad driver or brush to the machine
by placing the clutch plate over the gearbox
hub and turning the driver / brush 1/4 turn.
4] Place machine back into its upright position.
5] Plug power cord into grounded outlet.
* Never use an extension cord in
conjunction with the standard power cord.
6] The handle height may be adjusted by
lifting up on the handle release lever,
located on the right side of the switch
housing. Pull trigger and lower handle to
desired operating position. Release
trigger to lock the handle into position.
7] To start the machine, press the red safety
button on the top of the upper switch
housing, and then squeeze either of the
operating triggers. [the safety button must
be depressed prior to squeezing the
operating triggers].
8] When the machine is in operation, both
hands should be placed on the switch
housing [upper handle].
9] During operation, to make the machine go
right, gently raise the handle. To make the
machine to left, gently lower the handle.
10] To stop the machine at any time, simply
release the operating trigger [s] and the machine
will stop automatically.
MAINTENANCE
To keep the machine performing well for many
years, please follow the following maintenance
procedures.
*Always confirm that the machine is
unplugged prior to performing any
maintenance or repairs.
1] Unplug machine as soon as you are done
using it.
2] Tilt machine back and remove pad driver or
brush.
*Never store a low speed machine with the
pad driver or brush mounted to the
machine
3] Clean the outside of the machine with a mild
cleaner.
4] Check power cord for any damage. If
damage is detected, replace the cord
immediately.
5] Lubricate wheels with a water resistant
lubricant once a month.
6] Check machine for loose or missing nuts and
bolts, and replace as necessary.
7] If the machine is used in a dusty environment,
you may remove the motor cover and blow
the motor clean with compressed air. This
will ensure proper ventilation, and allow the
motor to run cooler.
STORAGE
1] Unplug machine from power source and wrap
cord on handle.
2] Tilt machine back and remove pad driver or
brush.
3] Store machine in upright position and in a dry
area.
4

5

2015-11-30
12# VF45127
HANDLE GROUP FOR VF18HD
DIA
NO PART
NO NO
REQ'D
1GV40229 密封端盖 1
2GV40228 "O"密封圈 2
3GV40227 尼龙垫片 2
4VF40104F 铝套座 1
5VF40125B 调位齿轮 1
6VF13502 防松丝母 M6 1
7VF47052 调位齿杆 1
8GT13013 六角螺母 M4 1
9VF40121 拉杆弹簧 1
10 VF40105 拉杆套 1
11 VF44004 长拉杆 1
手柄内电线 1
AS41901 防水内套 1
13 VF50120 电源线保护胶圈 1
14 GT13031 内六角螺钉 M6X35 2
15 VF44002-2 绕线架盖板 1
16 VF44002-1 绕线架 1
17 VF40117 主管 1
18 VF44018 放水拉把 1
19 VV13650 十字盘头镙钉 M4X10 3
20 VF48306 定位销 4
21 VF44016 左开关拉把 1
22 VF45118 电源线 1
23 VF44005 电源线保护套 1
24 VF30108 放水拉把垫 1
25 VF14223 十字沉头镙钉 M6X25 2
26 VF14218 十字盘头镙钉 M6X45 2
27 VF44015 手柄后盖 1
28 VF30107 调位拉把垫 1
29 VF48309 压线块 1
30 VF44017 右开关拉把 1
31 VF44203 电源开关 1
32 VF14212 十字盘头镙钉 M3X25 2
33 GT13014 防松丝母 M4 1
34 GT13017 平垫圈Φ41
35 VF44019 调位拉把 1
36 VF46705 保险键 1
37 VF48310 扶手护套 2
38 GV40218 开关弹簧片 1
39 VF44014 手柄前盖 1
40 VF47035A "VIPER"标牌 1
FRONT COVER
LOGO
PLUG PROTECTOR,LARGE FEMALE
HAND GRIP
SPRING,SAFETY BLOCK
WASHER,PLAIN Φ4
LEVELING ROD
SAFETY BOTTOM
LEVEL,RIGHT,SWITCH
SWITCH ASSY
SCREW M3X25
SCREW,M4X10
GASKET,HANDLE SOLUTION
STRAIN RELIEF,CORD
SCREW M6X25
NUT,LOCK,M4
SCREW M6X45
REAR COVER
GASKET,HANDLE LEVELING
CLAMP BLOCK
GROMMET
SCREW M6X35
HOOK,CABLE
COVER,HOOK
TUBE
LEVEL,SOLUTION
INSERT
NUT M4
SPRING LEVELING
RETAINER
ROD LEVELING
CORD,HANDLE
DESCRIPTION
PIN
LEVEL,LEFT,SWITCH
CORD,POWER SUPPLY
COVER
"O"RING,GEAR SEAT
WASHER,NYLON
SEAT,GEAR
GEAR
NUT,LOCK,M6
6

HANDLE GROUP FOR VF18HD
DIA
NO PART
NO NO
REQ'D
41 VF14222 十字盘头镙钉 M5X12 4
42 GV40241 防水胶套 1
43 VF14053 内六角螺钉 M6X25 1
44 VF40140 双头螺栓垫 2
45 VF40136 双头螺栓 2
46 VF40130 水箱 1
47 VF40141 水箱压板 2
48 VF13503 防松丝母 M8 4
49 VF99015 双头螺栓胶盖 4
50 VF40139 双头螺栓胶盖 1
51 VF40132 溶液管 1
52 VF40142 螺母 M14 1
53 VF41020 "O"密封圈 1
54 VF40131 阀体 1
55 VF40155 六角元台螺母 M5 1
56 VF40134 锥型密封堵 1
57 VF40138 铜垫圈 Φ51
58 VF40144 铜螺母 M5 2
59 VF40135 弹簧 1
60 VF40133 放水阀螺堵 1
61 VF40148 拉钩 1
62 VF40137 拉杆 1
63 VF40147 水箱拉杆密封套 1
64 VF40156 链条座 1
65 VF41021 链条 1
66 MF-VF001 水箱组件 1
SEAL,RUBBER
WASHER,PLAIN Φ5
SEAT CHAIN
CHAIN
SOLUTION TANK ASST
SCREW,M5,BRASS
SPRING
SCREW
LOWER PULLING ROD
UPPER PULLING ROD BRASS
SEAL,TANK
"O"RING
VALVE BODY
NUT,M5
CLAMP PLATE
NUT,LOCK M8
RUBBER CAP
HOSE,SOLUTION
BARN HOSE
NUT,M14
SEAL SEAT
SCREW M6X25
DESCRIPTION
GASKET
BOLT
TANK
SCREW M5X12
7

8
57
55
58
51
52
54
53
56
45
35

DIA
NO PART
NUMBER NO
REQ'D
1 GT13016 SCREW M8 X 60,HEX SOCKET 内六角螺钉 M8X60 3
2 GV40240H MOUNTING BASE,GEAR 铝套座支架 1
3 GT13081 SCREW M6 X 35,HEX SOCKET 内六角螺钉 M6X35 4
4 VF13514 WASHER,PLAIN Ø8 平垫圈 Φ83
5 VF13503 NUT,LOCK,M8 防松丝母 M8 3
6 VF44013 AXLE 轮轴 1
7 VF13520 WASHER,LOCK 开口挡圈 Φ12 2
8 VF50119 WASHER,LOCK 鞍型垫圈 2
9 GV40235 CLAMP BLOCK,AXLE 轮轴固定块 2
10 VV13621 SELF-TAPPING SCREW ST5 X 20 十字平尾自攻丝 4
11 VF40152 BARB HOSE 机体水管接头 1
12 VF32103 IRON BAR 配重块 3
13 VF13613 SCREW M5 X 20,HEX SOCKET 内六角螺丝 M5 X 20 2
14 VF13474A WASHER,PLAIN Ø5 不锈钢平介子 4
15 VA13474 SCREW M5 X 16,PH 十字盘头螺钉 M5 X 16 2
16 VF13524 WASHER,PLAIN Ø8 平介子 7
17 VF13519 WASHER,LOCK Ø8 不锈钢弹性垫片 4
18 VF14114 SCREW M8 X 55 外六角螺丝 4
VF32102 17"PAD HOLDER ASSY 17"针座 1
VF32104
17"GROUNDING DISC,HOLDER ASSY
17"翻新针座 1
20 VF32105 BUMPER 18" 18"防撞边 1
21
VF13503
NUT M8 X 5 7
防松丝母
M
8
3
BASE GROUP FOR VF18HD
DESCRIPTION
19
21
VF13503
NUT
,
M8
X
5
.
7
防松丝母
M
8
3
22 VF32106 PIN 定位轴 3
23 VF32101 FRAME 18" 18"底盘 1
24 VF99021 COULPING 电机轴连接器 1
25 VF999802B GEAR BOX 齿轮箱总成 1
26 MT01102 SLEEVE 隔套 1
27 VV13601 WASHER,LOCK Ø5 弹性垫片 6
28 VV13636 SCREW M5 X 30 内六角螺丝 M5x30 6
VF999790 MOTOR,220V,1.75HP 电机 1
YCQ12401 CENTRIFUGAL SWITCH 起动圈 1
YCQ12302 STATIONARY SWITCH 底板组件 1
30 VF32109 1
31 VF32201 ALUMINIUM BASE,MOTOR 铝电机座 1
32 YLQ14601 1
33 VV20509 SCREW M5 X 10 十字盘头螺丝 M5 X 10 4
34 VF48202 WHELL 5" 5"轮子 2
35 VF40994 READ MANUAL LABEL 贴纸 1
36 VF44012 SCREW,M6 X 12.7 防松螺钉 M6 X 12.7 2
37 VF13666 WASHER,Ø6 平垫片 2
38 VF13604 WASHER,LOCK,OUTER TOOTH 齿型垫片 4
39 YCQ10615
MOUTING FRAME(BIG),CAPACITOR
大电容罩 1
40 AS41902 PLUG PROTECTOR SAMLL MALE 电机防水外套 1
41 VF999849 1
42 YLQ17507 BOLT WITH WASHER KIT 垫圈套装 4
43 VF999791 MOTOR WITH GEAR BOX ASSY 电机连牙箱 1
44 VF44003 LABEL,MOTOR 银丝龙贴纸 1
45 VF41079 LABEL,VIPER "VIPER"冲字标牌 1
46 VF14222 SCREW M5 X 12 十字盘头螺丝 M5 X 12 3
47 VF30001 TOP COVER,MOTOR 电机盖组合件 1
48
VV20150
SCREW M5 X 12
开关盒固定螺丝
12
3
29
START-UP CAPACITOR(BIG),100UF/300V 起动电容
MOUNTING FRAME(SMALL),CAPACITOR 小电容罩
RUNNING CAPACITOR,20uf/500v,105
˚C 电容器 20UF/500V 105˚C
48
VV20150
SCREW
,
M5
X
12
开关盒固定螺丝
M5 X
12
3
49 VF30002 CLUTCH PLATE 刷盘固定座 1
50 VF47023 BUMPER 电机上盖密封圈 1
9
用于VF999791马达
用于VF999791马达
用于VF999791马达
用于VF999791马达
用于VF999791马达
用于VF999791马达
用于VF999791马达
用于VF999791马达
用于VF999791马达
用于VF999791马达
用于VF999791马达
用于VF999791马达
用于VF999791马达
用于VF999791马达
用于VF999791马达
用于VF999791马达
用于VF999791马达
用于VF999791马达
用于VF999791马达

1) Grinding process
Prepare the following tools and items:
grinding disc holder, grinding disc
(usually the granularity is 300#. 500#.
2000#), window squeegee, wet vacuum
cleaner, “caution wet floor” caution
signage.
Attach the base grinding disc to the
grinding disc holder (first use the
grinding disc with smallest granularity
(the smaller the granularity number, the
coarser the disc)) and then fit it onto the
machine. Fill the tank with water.
Turn on the machine, put clean water on
the floor. Grind slowly and evenly.
Remove the water on the stone surface
using a window squeegee. Repeat the
procedure as required until there are no
marks on the floor.
Pick up the powder thoroughly using
wet/dry vacuum cleaner, and replace
the grinding disc with the next larger
granularity. Use the above directions,
and continue grinding until the result is
acceptable.
The floor MUST be cleaned thoroughly
before beginning the crystallization
process.
granular to finely granular. You can’t
skip steps. There is coarse grind,
half-finishing grind and finishing grind,
During finishing grind, if you feel
resistance, you can reduce the quantity
of grinding.
2) Crystallization process.
Prepare the following tools and items:
pad driver. fiber pad (steel pad), dust
mop, K2 stone treatment, or K3 stone
shining plasm, or crystallization powder.
Fit the pad driver onto the machine,
then attach the fiber pad (steel pad).
Turn on the machine, grind and spray
K2 chemical simultaneously. Apply the
chemical on the floor uniformly, and
then spray K3 chemical. Rub to a high
gloss and enter the next area. If using
the crystallization powder, you can mix
the powder with water and then spray
this directly to the floor.
Caution: It’s best if there is no wax
application on the floor. The floor MUST
be free of water and dirt. The color of
the pad is white (or colorless). Replace
pad if dirty.
Directions for the grinding and crystallization processes.
10
Caution, Make sure there is no sand on
the floor. The grinding disc should be
installed uniformly. Be sure to grind
slowly and evenly with enough water.
You must completely remove the
powder from the last process before
beginning next process. Immediately
clean the floor with the vacuum cleaner,
replace the grinding disc from coarsely
DIA
NO
PART
NUMBER DESCRIPTION NO
REQ'D
1
1
51
1
52
1
53
1
54
1
55
1
1
VF75278 GEAR BOX 齿轮箱
VF75279 COUPLER 电机轴联接器
VF75280 SLEEVE 隔套
VF75284CENTRIFUGAL SWITCH 离心开关
VF75282 STATIONARY SWITCH 离心开关底板总成
AC MOTOR WITH GEAR BOX 电机连齿轮箱
VF75276 RUN CAPACITOR
VF75277 START CAPACITOR
VF75283
60uF/300VAC 运行电容
300uF/300VAC 起动电容
56
57
58
用于VF75890马达
用于VF75890马达
用于VF75890马达
用于VF75890马达
用于VF75890马达
用于VF75890马达
用于VF75890马达
用于VF75890马达
云石翻新与晶硬处理操作指引
<1> 翻新处理:
首先需准备下列工具与材料:翻新针座、金
钢石碟片(一般可准备粒度 300#、500#、
2000#)、玻璃刮、吸水机、“小心地滑”告
示牌。
将金钢石粘在翻新针座上(6 片粒度要一样,
先用牌号数小的金钢石碟),然后装在机器
上,水箱中要装水。
开启机器,在地面上放入大量清水,慢而均
匀的研磨,反复几次后,然后用玻璃刮清除
石面的水份,观看效果,直至无痕迹为止。
用吸水机将粉沫彻底吸净,并更换牌号数稍
大一点的金钢石碟,方法如上,直至满意为
止。将地面清洗干净后,方可做晶硬处理。
注意:地面不能有沙粒,金钢石碟安装
要均匀,研磨时要有足够的水份,并且慢而
均匀,同时每一道工序前都必须彻底清除上
一道工序留下的粉沫,及时用吸水机吸净地
面,更换金钢石碟须由粗到细,不能跳号,
要分粗磨、半精磨、精磨,精磨时,若发现
阻力较大,可对称的减少金钢石碟的数量,
或者减少加重块的数量。
<2> 晶硬处理:
首先需准备下列工具与材料:针座、天然
纤维垫(或钢丝垫)、尘堆、K2 晶面处理
剂及 K3 晶光亮剂或者晶硬粉。然后将随机
附件针座安装在机器上,放上纤维垫或钢
丝垫,开动机器,边磨边喷药水 K2,将药
水均匀地涂抹在地面上,接着喷药水 K3,
将地面磨亮即可。随后进入下一区域。若
使用晶硬粉,将晶硬粉加水调匀后,直接
喷洒在地面上即可。
注意:地面最好不要有腊层,地面的
水及尘埃应先清理掉,纤维垫要用白色(或
无色),粘有污物后要及时更换。
11

安全预防
本机必须接地!
为减少机器因故障而引起的触电危险,
本机电
源线插头带有一接地插脚,任何情况下不得去
除该插脚。
本机仅作商业用途,并限于户内使用。务必使
用推荐的附件,操作者应阅读,理解并掌握以
下安全预防措施:
1、以下情况不得操作本机:
z未经培训取得相应资格;
z未仔细阅读和理解操作手册;
z在易燃易爆场所;
z电源线或插头损坏;
z机器存在问题不适合操作;
z在户外时;
z在水中;
z使用延长线;
2、操作机器前:
z务必确保所有安全装置动作正常;
3、使用机器时:
z不得碾压电线;
z不得靠牵拉电线的方式移动机器;
z不得将电线置于物件锋利的边、角;
z不得用拉电线的方式拔取插头;
z切勿用湿手拔取插头;
z始终使电源线远离发热的物件表面;
z应立刻报告机器任何之异常及损坏情
况;
4、离开机器或进行维护前:
z务必关机并拔下电源插头;
5、进行维护时:
z应拔下电源插头;
z使用产商推荐的或认可的配件;
储存时
1、拔下电源插头;
2、取下针座或刷子;
3、直立存放于干燥的场所;
维护与保养
为使本机始终保持良好的性能,
请遵循以下程
序保养本机
进行任何维护、保养工作前,必须确保
机器已断开电源
1、机器一经使用完毕,立即拔下电源插头;
2、取下针座或刷子;
存放机器时,切勿忘记取下针座或刷子
3、用中性清洁剂清洁机器;
4、检查机器电源线有无破损,如有应立即进
行更换;
为避免危险,若电源线破损,必须联系
当地售后服务部进行更换;
5、每月用防水润滑剂润滑轮子、轴;
6、检查机器有否遗失螺母、螺栓并进行更换;
7、机器在粉尘的场所使用后,应取下电机顶
盖,用压缩空气吹净附着在电机上的灰尘
以保证良好的通风。
操作说明
使用或维护本机前务必仔细阅读说明书
1、使用前应清理工作区域内的杂物、纸屑等;
2、将手柄置于垂直位置后,将机器倾斜使手
柄靠在地面;
确认机器此时未接通电源;
3、松开螺母,取下中心定位器;
4、取合适的抛光垫粘在针座上,并用中心定
位器压紧;
5、将机器置于垂直位置;
6、将电源线插头插入带接地的插座中;
切勿使用与电源线不一致的延长电缆;
7、拉住调节拉把将机器手柄调节至合适操作
位置;
8、按下位于手柄上方的红色按钮同时拉住
左、右拉把即可启动机器;
9、操作时、双手必须牢牢握住操作手柄;
10、操作时,只要轻轻地抬起手柄,机器便
会向右移动,轻轻按下手柄,机器便会向
左移动;
11、停机时,只需松开左、右拉把即可;
12
Table of contents
Other Viper Scrubber manuals

Viper
Viper AS430B User manual

Viper
Viper TP24TSCRUB User manual

Viper
Viper DRAGON Series User manual

Viper
Viper AS380/15B-EU User manual

Viper
Viper AS710R User manual

Viper
Viper AS5160-US User manual

Viper
Viper Fang 32T User manual

Viper
Viper AS5160 User manual

Viper
Viper FANG 20 User manual

Viper
Viper AS710R User manual

Viper
Viper AS380/15B-AU User manual

Viper
Viper Fang15B User manual

Viper
Viper AS430C User manual

Viper
Viper FANG 20HD-EU User manual

Viper
Viper AS530R User manual

Viper
Viper AS5160 User manual

Viper
Viper AS510B User manual

Viper
Viper AS4335C Instruction Manual

Viper
Viper TP24TSCRUB User manual

Viper
Viper AS430B User manual