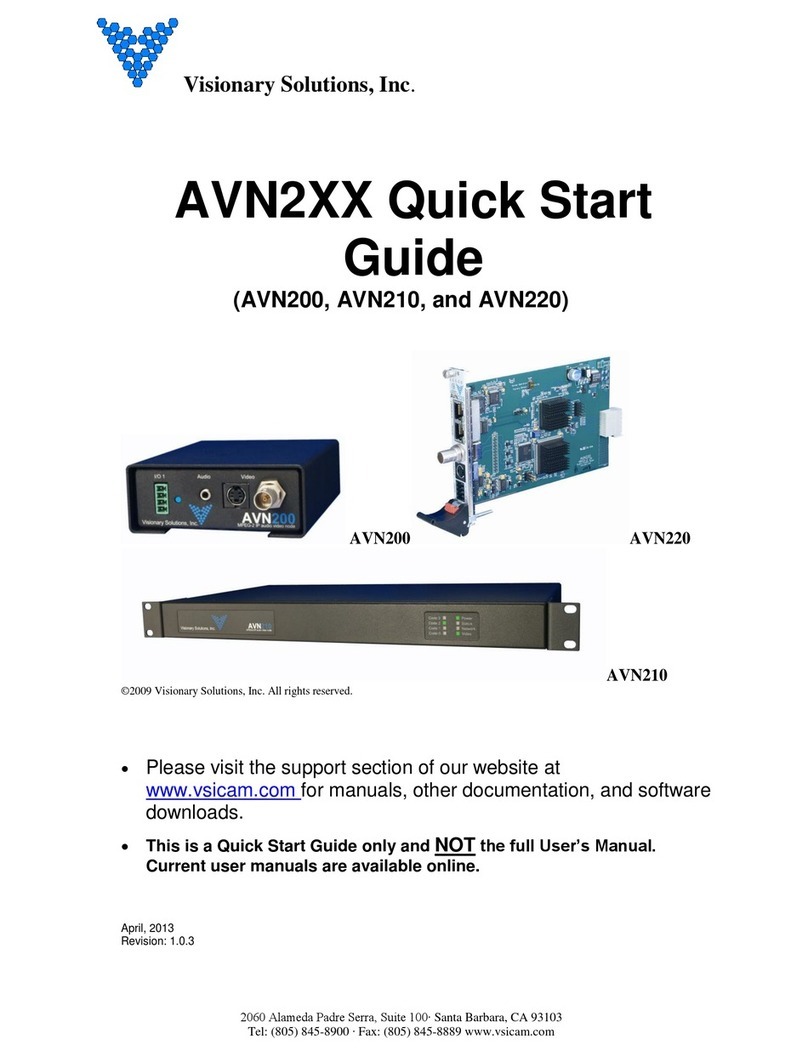
Visionary Solutions AVN210 User manual

Visionary Solutions, Inc.
2060 Alameda Padre Serra
Suite 100
Santa Barbara, CA 93103
T:805-845-8900
F:805-845-8889
www.vsicam.com
AVN210 MPEG-2 IP Audio Video Node
User’s Manual
©201Visionary Solutions, Inc. All rights reserved.
May 9, 2013
Revision 1.2.1(compatible with version 2.13 firmware)
Please visit the support section of our web site at www.vsicam.com
for manuals, other documentation, and software downloads.

About This Guide
VSI recommends that you download the most recent version of this Manual from
www.vsicam.com.
Legal Considerations
Intellectual Property Rights
Visionary Solutions, Inc. warrants that it, or its licensors, have good and clear title or
right to manufacture and distribute the AVN210, free and clear of all liens and
encumbrances.
No part of this document may be copied or reproduced in any form or by any means,
electronic or mechanical, for any purpose without the express written permission of
Visionary Solutions, Inc.
All rights, title, copyrights in and to the design, firmware object and source code of the
AVN210 belong exclusively to and are the property of Visionary Solutions, Inc.
Visionary Solutions, Inc., subject to the terms and conditions of an agreement with
the Licensing Administrator MPEGLA, L.L.C., has been granted sublicense under all
MPEG-2 Essential Patent(s) in the MPEG-2 Patent Portfolio to make, have made,
use, and sell, offer for sale or otherwise distribute the AVN210 (MPEG-2 Transport
Stream Product).
ANY USE OF THIS PRODUCT OTHER THAN CONSUMER PERSONAL USE IN
ANY MANNER THAT COMPLIES WITH THE MPEG-2 STANDARD FOR
ENCODING VIDEO INFORMATION FOR PACKAGED MEDIA IS EXPRESSLY
PROHIBITED WITHOUT A LICENSE UNDER APPLICABLE PATENTS IN THE
MPEG-2 PATENT PORTFOLIO, WHICH LICENSE IS AVAILABLE FROM MPEG LA,
L.L.C., 250 STEELE STREET, SUITE 300, DENVER, COLORADO 80206.
Limited Liability
In no event shall Visionary Solutions, Inc. be liable, whether in contract, tort, or
otherwise, to OEM or Customers for (a) any damages resulting from loss of use, data
or profits howsoever arising hereunder in relation to or in connection with Visionary
Solutions, Inc. Software, (b) any special, indirect, incidental or consequential
damages, even if Visionary Solutions, Inc. has been advised of the possibility thereof.
Visionary Solutions, Inc.’s total liability in contract, tort or otherwise arising out of, in
connection with or in relation to the Software or otherwise under this Agreement shall
be limited to the amount paid to Visionary Solutions, Inc. or and authorized Visionary
Solutions, Inc. reseller for the Visionary Solutions, Inc. Software or Hardware for a
Customer in the 12 month period immediately preceding the event which has given
rise to the liability.
The contents of this document are subject to revision without notice due to continued
progress in methodology, design, and manufacturing. Visionary Solutions, Inc. shall
have no liability for any error or damages of any kind resulting from the use of this
document.
Trademark Acknowledgements
All trademarks or registered trademarks are properties of their respective owners.
Visionary Solutions, Inc., Limited 12-Month AVN210
Warranty
We appreciate your purchase of this Visionary Solutions, Inc. product. We feel
confident that in normal use it will provide years of satisfactory performance.
Visionary Solutions, Inc. warrants to the original user that the video equipment
supplied by us will be free of defects in materials and workmanship for a period of
twelve (12) months from the date of purchase from Visionary Solutions, Inc. or an
authorized reseller of Visionary Solutions, Inc. Visionary Solutions, Inc.’s obligation
under this warranty shall be to the repair including any necessary parts and the cost
of labor connected therewith, or at its option, the exchange or the refund of the
purchase price, of any video equipment that is determined by us to have a
manufacturing defect within the warranty period.
Replacement parts furnished in connection with this warranty shall be warranted for a
period equal to the unexpired portion of the original equipment warranty.
Warranty Exclusions
This warranty does not apply to repairs or replacements necessitated by any cause
beyond the control of Visionary Solutions, Inc., including, but not limited to, acts of
nature, improper installation, misuse, lack of proper maintenance, accident, voltage
fluctuations, and unauthorized repairs or modifications.
This warranty becomes void in the event serial numbers are altered, defaced, or
removed.
Visionary Solutions, Inc. reserves the right to make changes in the design, or make
additions to, or improvements upon, this product without incurring obligations to
install the same on products previously manufactured.
The foregoing warranty is in lieu of all other warranties, expressed or implied,
including, but not limited to, the implied warranties of merchantability and fitness for a
particular purpose. Visionary Solutions, Inc. neither assumes nor authorizes any
person to assume for it any other obligations or liabilities in connection with the sale
of its products. In no event shall Visionary Solutions, Inc. or its authorized resellers be
liable for special or consequential damages arising from the use of its products, or
any delay in the performance of this warranty due to causes beyond its control.
IN THE U.S.A., SOME STATES DO NOT ALLOW LIMITATIONS ON HOW LONG
AN IMPLIED WARRANTY LASTS AND/OR THE EXCLUSION OR LIMITATION OF
CONSEQUENTIAL DAMAGES, SO THE PREVIOUSLY STATED LIMITATIONS ON
IMPLIED WARRANTY AND CONSEQUENTIAL DAMAGES MAY NOT APPLY TO
YOU.
Customer Obligations
The original, dated, bill of sale should be retained as proof of purchase and must be
presented to the Visionary Solutions, Inc. or a Visionary Solutions, Inc. Authorized
Service Center when this equipment is to be serviced under the provisions of this
warranty.
The cost of transportation to and from the Authorized Service Center is the
responsibility of the user.
How to Obtain Warranty Service
Should this equipment require warranty service you may obtain specific information
on how to obtain this service by directly contacting Visionary Solutions, Inc., or the
reseller who sold you this equipment.

AVN210 User’s Manual Contents
iii
Contents
Chapter 1 Introduction ......................................................................... 1
1.1 Features ............................................................................................. 1
Chapter 2 Hardware ............................................................................. 3
2.1 Product Description ............................................................................ 3
2.1.1 AVN210 Front Panel ............................................................... 3
2.1.2 AVN210 Real Panel ................................................................ 4
2.1.3 Shipping Inventory .................................................................. 4
2.2 Installation .......................................................................................... 5
2.3 AVN210 Rear Panel Connection Diagram ......................................... 5
Chapter 3 Using the Administrative Privileges ................................. 6
3.1 Connecting With a Terminal Emulation Program ............................... 6
3.2 Connecting With a Telnet Session ..................................................... 8
Chapter 4 Connecting to the Network .............................................. 10
4.1 Unicast and Multicast Transmissions over the Network ................... 10
4.2 IGMP Querying and IGMP Snooping ............................................... 10
4.3 DHCP IP Configuration .................................................................... 11
4.4 Static IP Configuration ..................................................................... 11
4.5 Viewing the AVN210 on the Network ............................................... 12
Chapter 5 Operating the AVN210 ...................................................... 13
5.1 The AVN2XX Configuration Utility .................................................... 13
5.2 AVN210 Console Interface Menus ................................................... 13
5.3 AVN210 Browser Interface Menus ................................................... 14
5.4 AVN Control Protocol (API) .............................................................. 14
Chapter 6 Using the Console Interface ............................................ 15
6.1 Main Menu ....................................................................................... 15
6.2 Video Menu ...................................................................................... 16
6.2.1 Video Settings Menu ............................................................. 17

Contents AVN210 User’s Manual
iv
6.2.1.1 AtoD Settings Menu ................................................ 18
6.2.1.2 Aux Stream Settings Menu ..................................... 19
6.2.2 Video Statistics Menu ............................................................ 20
6.3 Audio Menu ...................................................................................... 20
6.4 Network Menu .................................................................................. 21
6.5 Options Menu ................................................................................... 22
6.5.1 SAP Control Menu ................................................................ 23
6.6 Config Menu ..................................................................................... 24
6.6.1 TTY Menu ............................................................................. 26
6.6.2 TTY Ports 1 & 2 Config Menu ............................................... 26
6.6.3 Security Menu ....................................................................... 27
6.7 Low Latency Information .................................................................. 27
Chapter 7 Using the Browser Interface ............................................ 29
7.1 Browser Interface Menu Tree ........................................................... 29
7.2 Main Page ........................................................................................ 29
7.2.1 System Settings Section ....................................................... 30
7.2.2 Network Configuration Section .............................................. 31
7.2.3 Stream Parameters Section .................................................. 31
7.3 System Options Page ...................................................................... 33
7.3.1 Systems Options Section ...................................................... 33
7.3.2 TTY Options Section ............................................................. 34
7.3.3 Actions Section ..................................................................... 34
7.4 SAP Settings Page ........................................................................... 35
7.5 Audio Configuration Page ................................................................ 36
7.6 IP Configuration Page ...................................................................... 37
7.7 Network Statistics Page ................................................................... 38
7.8 Advanced Page ................................................................................ 39
7.8.1 Stream Structure ................................................................... 39
7.8.2 GOP Structure ....................................................................... 40
7.8.3 Forward Error Correction (no longer supported) ................... 40
7.8.4 Actions .................................................................................. 40
7.9 Auxiliary Stream Page ...................................................................... 41
7.10 Modify Username / Password Page ............................................... 42
7.11 Video Statistics Page ...................................................................... 42

AVN210 User’s Manual Contents
v
Chapter 8 Troubleshooting ............................................................... 43
8.1 Checking the Firmware .................................................................... 43
8.2 Support ............................................................................................. 43
8.3 AVN210 Power ................................................................................. 43
8.4 Factory Default Settings ................................................................... 43
8.5 AVN210 Advanced Audio Testing and Diagnostics ......................... 44
Chapter 9 Unit Connections .............................................................. 46
9.1 The D-Sub Connector ...................................................................... 46
Chapter 10 Technical Information .................................................... 47
10.1 Technical Specifications ................................................................. 47
10.2 Safety and Compliance Information ............................................... 48
10.3 Group of Pictures (GOP) ................................................................ 48
10.3.1 AVN GOP Environment ....................................................... 48
10.3.2 Modifying the AVN’s GOP Settings ..................................... 49
10.4 Virtual Serial Channels ................................................................... 49
10.4.1 Channel Modes .................................................................... 49
10.4.1.1 Monitor Mode ........................................................ 49
10.4.2 Camera Control Mode ......................................................... 49
10.4.2.1 Passive Tunnel Mode ............................................ 50
10.4.2.2 Active Tunnel Mode .............................................. 50
10.4.2.3 Disabled Mode ...................................................... 50
10.4.3 Selecting Modes .................................................................. 50
Glossary of Terms ............................................................................... 51

Contents AVN210 User’s Manual
vi

AVN210 User’s Manual Chapter 1 Introduction
1
Chapter 1 Introduction
Visionary Solutions, Inc., introduces the AVN210, a simple stand alone IP Audio Video Node for
full motion, high resolution MPEG-2 video transmission over IP. Plug any analog video source
directly into the node, plug into the network via the RJ-45 connection, and stream real time DVD
quality video over your LAN or WAN. This low cost network appliance is an effective solution for
Industrial Process Monitoring, Security Surveillance, Intra-Facility Communication, or any other
application that requires 30 fps high resolution video.
The AVN210 has a unique embedded platform that enables consistent full motion video
preserved from delay, jitter, packet losses, and packet out-of-order instabilities. This technology
is unrivaled for cost-to-performance value and features state-of-the-art core reliability proven
through countless hours of use in the demanding environment of commercial television
broadcasting.
1.1 Features
•Stand-Alone Operation. The AVN210 runs independently of any other server. To stream and
view live S-Video, all that is needed is an AVN210 encoder and any standards-compliant
MPEG-2 decoder (hardware or software). The AVN210 is easy to access and configure by
any of four methods: AVN2XX Configuration Utility, Console Interface, Browser Interface, or
the AVN Control Protocol (API). TCP/IP, HTTP, and other Internet-related protocols are
supported.
•AVN2XX Configuration Utility. This free software interface used to configure and control the
AVN2XX encoders (AVN200, AVN210, and AVN220) and their video streams on Windows-
based PCs. It has a Mass Configuration dialog that enables the configuration of encoder
settings on multiple AVN units at one time.
Download the application here:
http://www.vsicam.com/core/__downloads/AVN2XX_Configuration_Utility.zip.
•Superior Audio/Video Quality. MPEG-2 hardware compression and Visionary Solutions,
Inc.’s optimized transmission technology provides a superior video image at full frame rates
and resolution. The video stream can be viewed by an unlimited number of licensed clients
on a LAN and full frame rate (25 PAL to 30 NTSC frames per second) is assured, provided
that bandwidth is available. Available image resolutions are: 720x480, 480x480, 352x480,
and 352x240 NTSC; and 720x576, 480x576, 352x576, and 352x288 PAL. The bit rate is
configurable from 1.5 Mbps to 7.5 Mbps. The audio compression is MPEG-1 Layer 2 audio
encoding at either 256 or 384 kbps with a 48 kHz sample rate.
•Event Driven. The AVN210 can respond to external events such as motion and intrusion
detection. Possible actions include starting a video stream, activating a local switch closure,
or activating external devices over an RS-232C or RS-422 cable.
•Video Inputs. The AVN210 video inputs include one BNC composite, one RCA composite,
and one S-Video input for connecting S-Video cameras or other video equipment.

Chapter 1 Introduction AVN210 User’s Manual
2
•Audio Inputs. The AVN210 features user control of volume, muting, bass boost, tone control
(bass and treble), and balance. The audio input connectors consist of XLRs for balanced
audio and RCAs for unbalanced audio.
•Security. Administrators can create and modify accounts for authorized users, as well as
allow anonymous viewing.
•Closed Captioning (CC). VSI supports both ATSC EIA-608 and EIA-708 standards in the
AVN210encoder line. In accordance with EIA-708, the incoming analog signal may contain
encoded CC data during the Vertical Blanking Interval (VBI) on line 21 NTSC (EIA-608),
which the AVN210then extracts and “stuffs” into the encoded MPEG data stream for
transmission. A CC-compliant decoder, such as an Aminet, then extracts the EIA-708 data
and places it back in the VBI on line 21 (EIA-608), along with the normal video picture for the
display device.
•Program Clock Reference on Video Packet ID
— Effective with 2.13 firmware, VSI encoders support Program Clock Reference (PCR) on
the same Packet ID (PID) as the video. This support enables AVN encoders to be used
by various Telco operators.
— PCR support enables consumer and professional TVs and STBs to accept the AVN
encoder Transport Stream (TS) via QAM modulation. An external QAM Modulator is
required.
— Other IPTV remote content sources supported are PEG, off air, affiliate, special events,
front gate cameras, and other “additive” programming.
— PCR support was tested using a Technicolor COM-1000 QAM Modulator. The payload
of the TS is MPEG-2 Video with MPEG-1 layer 2 Stereo Audio.

AVN210 User’s Manual Chapter 2 Hardware
3
Chapter 2 Hardware
2.1 Product Description
2.1.1 AVN210 Front Panel
The AVN210 front panel features a system status interface with two columns of LEDs that display
unit diagnostics and error reporting information. The first column provides testing and diagnostics
modes and the second column display system status: Power, Status, Network, and Video.
— The Power LED indicates that the unit is powered up. It will illuminate green to show
that the unit is turned on.
— The Status LED indicates the overall status of the system. It will blink on and off at a
rate of approximately once a second to provide a system heart beat to indicate that the
AVN210 is operating. It will blink green if all elements of the system are operating
properly for its current configuration and operational state. It will blink orange if any
system error for the current operational state was detected during the heartbeat period.
This LED should always be blinking. If it remains off or on solid (either color), the
AVN210 is not operational.
— The Network LED indicates the Link state of the AVN210’s Ethernet. It will illuminate
green to indicate a 100 Mbit link or orange to indicate 10 Mbit links. If the LED is off, no
network link is detected. (Future versions of software may indicate network activity by
quickly blinking this LED on/off.)
— The Video LED indicates the activity and state of the Video/Audio encoder. If the LED is
off, no valid video source is detected on the selected video input. If it illuminates green,
a valid, error free video source is detected, and the encoder is operational and ready to
encode. If it illuminates orange, a valid video source is detected, but errors in the video
or setup of the encoder will not allow proper video encoding. Once video streaming is
started, this led will blink relative to the encoding rate to indicate that the AVN210 is
currently encoding video and audio and the bit rate of this encoding. While streaming,
the blinking LED will blink green to indicate proper operation. It will blink on orange to
indicate that an error was detected during that toggle period. This error also indicates
audio clipping (audio levels too high, causing distortion).
For a more detailed description of the LED indicators, refer to 8.5 AVN210 Advanced Audio
Testing and Diagnostics.

Chapter 2 Hardware AVN210 User’s Manual
4
2.1.2 AVN210 Real Panel
The AVN210 rear panel features the following components:
1. XLR Audio Connectors – right and left Balanced audio inputs.
2. RCA Audio Connectors – right and left Unbalanced audio inputs.
3. RCA Video Connector – composite video input.
4. BNC Video Connector – composite video input.
5. S-Video Connector – provides input for a Y/C video cable.
6. Ethernet Connector – an RJ-45 network connector, 10/100 base Tx.
7. RS-232C Serial Connector – full duplex, serial console port access.
8. Factory Reset button – restores the settings on the AVN210 to factory default settings.
9. LEDs system status panel – displays the same information as the front panel.
10. Power Supply Connector – 100V-240V AC, 0.25 Amp.
2.1.3 Shipping Inventory
Your AVN210 is shipped with the following:
•One AVN210
•One power cable
•One CAT 5 Ethernet cable, blue molded, 6 feet
•One Null Modem cable, 6 feet
•One Ethernet Crossover cable, red molded, 3 feet
•One Installation Guide
123456 7910
8

AVN210 User’s Manual Chapter 2 Hardware
5
•Four adhesive rubber feet
•One rack mount kit: 2 ears and 6 screws.
2.2 Installation
The minimum connections to the AVN210 should include a video source connected to either of
the composite video inputs or the S-Video input, the power cable, and an RJ-45 LAN connection
to the Ethernet connector.
To connect the AVN210:
1. Connect a video source to one or all of the video input connectors (composite RCA/BNC,
S-Video).
2. Connect an Ethernet cable to the Ethernet RJ-45 connector. The other end of the Ethernet
cable should be connected to a switch or hub on your LAN network.
3. Connect the power cable (included) to the AVN210.
2.3 AVN210 Rear Panel Connection Diagram

Chapter 3 Using the Administrative Privileges AVN210 User’s Manual
6
Chapter 3 Using the Administrative
Privileges
The administrative user has the capability of overriding all controls and actions of an AVN210.
The AVN210 is shipped with a default Administrative Username and Password (admin/admin). It
is recommended that you change the default values that are shipped with your AVN unit before
installing it on your network.
Note: The Administrative Username and Password can be up to 31 characters in length
and are case sensitive.
There are two methods that you can use to change the AVN210’s Administrative Username and
Password, depending upon your connection method:
1. If you have a serial connection on your PC, you can connect to the AVN210 using a terminal
emulation program. Refer to 3.1 Connecting With a Terminal Emulation Program below.
2. If you are able to connect to your AVN210 over the network, you have the option of opening a
Telnet session to access your AVN. Refer to 3.2 Connecting With a Telnet Session below.
3.1 Connecting With a Terminal Emulation Program
1. Connect the serial cable between the serial port of the AVN210 and a COM port on your PC
(typically the COM1 port). The AVN210 uses an RJ-45 to DB9-F serial cable (shipped with
the MPP chassis).
2. Launch a terminal emulation program, such as TeraTerm (google: teraterm download):
a. Create/Open a new serial connection.
b. Specify the PC port you are connected to (typically COM1), click OK.
c. Configure the Port Settings as follows: Bits per second (38400), Data bits (8), Parity
(None), Stop bits (1), Flow Control (None). Click OK.
d. Press Enter to get the login prompt for the encoder.
3. Power on your AVN210. The Main Admin Menu prompt will display on your monitor.

AVN210 User’s Manual Chapter 3 Using the Administrative Privileges
7
4. Select the Config Menu. Type 5and press Enter.
5. Select the Security Menu. Type 13 and press Enter.

Chapter 3 Using the Administrative Privileges AVN210 User’s Manual
8
6. At the Security Menu, to change the Username, type 1and the current Username will display.
Enter a new Username and press Enter, or, to keep the same Username, press Enter.
Note: Username and Password can be up to 31 characters in length and are case
sensitive.
7. To enter a password, type 2. The prompt will come up empty and your entry will be visible in
plain text. Type your new Password and press Enter. You will be asked to confirm your entry.
8. You must save your new settings in order for them to take effect. Type 3and press Enter.
9. Exit the terminal emulation program and continue installing your AVN210.
3.2 Connecting With a Telnet Session
Note: For users that will connect to an AVN210 via Telnet on a Windows XP-based PC:
If you have run and installed all of your Windows Critical Updates, this paragraph
will not apply and you may proceed to Step 1. If your Critical Updates are not
current, it may be necessary to precede ALL commands, except for the initial
Username entry, with a single blank space. This includes the initial Password and
all commands entered at the Telnet prompt.
1. Open a Telnet session. From the Windows Start menu, select Run and at the prompt type
telnet xxx.xxx.xxx.xxx, where xxx.xxx.xxx.xxx is the IP address of the AVN210 that you
want to connect to. For example: telnet 192.168.1.90.
2. Enter the Administrative Username of the AVN210.
3. Enter the Administrative Password of the AVN210. All characters should be hidden with the
asterisk ( *) character. If you are on a Windows XP-based PC and have not installed all
of your Windows Critical Updates, you must precede your password entry with a
single blank space. See Note above.

AVN210 User’s Manual Chapter 3 Using the Administrative Privileges
9
4. Navigate the AVN210 menus. Follow Steps 4. through 8. from3.1 Connecting With a Terminal
Emulation Program.
5. End the Telnet session. Click Ctrl + ] to return to the prompt, and then type quit.

Chapter 4 Connecting to the Network AVN210 User’s Manual
10
Chapter 4 Connecting to the Network
4.1 Unicast and Multicast Transmissions over the Network
A Unicast transmission sends IP packets to a single recipient on a network. A Multicast
transmission sends IP packets to a group of hosts on a network. If the streaming video is to be
distributed to a single destination, then you would start a Unicast stream by setting the
destination IP address and port on the AVN equal to the destination's values. If you want to view
the stream at multiple concurrent locations, then you would set the AVN's destination IP address
to a valid Multicast IP address (224.0.0.0 - 239.255.255.255).
Note that while the Multicast IP address range is from 224.0.0.0 - 239.255.255.255, the first octet
(224.xxx.xxx.xxx) is generally reserved for administration. VSI recommends setting the first octet
to 225 and the remaining three octets to the AVN's IP address. For example, if the AVN's IP
address is 192.168.1.53, then set the destination IP address to 225.168.1.53 for Multicast
streaming.
Since Multicasting is a relatively new technology, some legacy devices that are part of your
network might not support Multicasting.
Before using the AVN210 in Multicast streaming mode, check the functional specifications of your
network infrastructure to ensure that the Multicast stream will not create major traffic on your
network. Verify that your backbone switch supports Internet Group Messaging Protocol (IGMP)
snooping, which allows the core of your network to ignore the traffic streams that Multicasting
may generate.
4.2 IGMP Querying and IGMP Snooping
IGMP is a session-layer (Layer 3) protocol used to establish membership in a Multicast group
and can register a router to receive specific Multicast traffic. (Refer to RFC 1112 and RFC 2236
for information on IGMP versions 1 and 2.)
Multicast aware switches are slowly making their way into the network cores for businesses and
Universities with serious traffic to move through their networks. Multicast filtering is achieved by
dynamic group control management. By default, all Multicast traffic should be blocked until
requested by a Multicast group member (Default behavior depends on switch manufacturer). The
master of the IGMP filter lists is the router or switch configured to act as the IGMP Querier. The
responsibility of the Querier is to send out IGMP group membership queries on a timed interval,
to retrieve IGMP membership reports from active members and allow updating of the group
membership tables.
A Layer 2 switch supporting IGMP Snooping can passively snoop on IGMP Query, Report, and
Leave (IGMP version 2) packets transferred between IP Multicast routers/switches and IP
Multicast hosts to determine the IP Multicast group membership. IGMP snooping checks IGMP
packets passing through the network, picks out the group registration, and configures
Multicasting accordingly.

AVN210 User’s Manual Chapter 4 Connecting to the Network
11
Without IGMP Querying/Snooping, Multicast traffic is treated in the same manner as a Broadcast
transmission, which forwards packets to all ports on the network. With IGMP Querying/Snooping,
Multicast traffic is only forwarded to ports that are members of that Multicast group. IGMP
Snooping generates no additional network traffic, allowing a significant reduction in the Multicast
traffic passing through your switch.
If your network distribution core does not support IGMP Querying/Snooping, the AVN streams
will still function as designed but your network may be subjected to high traffic loads and
condensed collision domain due to the broadcasting action used by the older switch or hub. If this
is the case, you may wish to isolate the streaming nodes within the network so that the streams
may be viewed without crossing the normal network traffic along its path.
Otherwise, for a general performance improvement, you may consider upgrading your network
core to a switch that is Multicast aware.
4.3 DHCP IP Configuration
The AVN210 has Dynamic Host Configuration Protocol (DHCP) turned on as the factory default.
If your network has a DHCP server on it, the AVN210 will automatically acquire an IP address.
To view your AVN210’s IP address, and ensure that it is properly connected to your network,
follow these steps:
1. Launch the AVN2XX Configuration Utility. A list of AVNs will display in the AVNs on Network
list in serial number order.
2. Locate the AVN210 in question by its serial number. The DHCP-assigned IP address will be
listed.
If you do not see the AVN210 and you know that it is properly connected to the network, you may
have a switch or router on the network preventing the multicast message from properly getting
through, refer to 4.1 Unicast and Multicast Transmissions over the Network.
4.4 Static IP Configuration
If the AVN210 is not able to find a DHCP server, it will default to the IP Address, Subnet Mask
and Gateway that are configured into the unit. Factory Default is 192.168.1.253.
In order to configure your AVN210 with a static IP address, you will need to turn off its DHCP
functionality (see Steps 4 and 5 below).
To assign a static IP address to the AVN210, follow these steps:
1. Launch the AVN2XX Configuration Utility. A list of AVNs will display in the AVNs on Network
list in serial number order.
2. If there is more than one network connected to the PC, select the network from the drop-
down list and a new list of AVNs will display in the AVNs on Network list.

Chapter 4 Connecting to the Network AVN210 User’s Manual
12
3. Highlight the AVN and click Properties, or double-click the AVN on the list.
4. Set DHCP to Off.
5. Enter the IP Address, Netmask, and/or Gateway values for your AVN.
6. Enter the Administrative Username and Password values for the selected AVN.
7. Click OK to update the selected AVN with the newly entered values, or Cancel to prevent any
changes from taking effect.
For more information about using the utility, refer to 5.1 The AVN2XX Configuration Utility.
4.5 Viewing the AVN210 on the Network
If you have difficulty finding the AVN210 on your network, you may need to check the DHCP
setting and/or the AVN210’s IP properties.
1. Check to see if you can view the AVN210 on your network:
a. Launch the AVN2XX Configuration Utility, which will automatically discover and list all
AVNs on the LAN.
b. If the AVN210 you are expecting is not listed, verify that the correct network is listed in the
Network drop-down list.
2. Contact your network administrator to ensure that your client PC is properly connected to the
network.
3. Ensure that the DHCP setting is correct for your network. For a network that does not have a
DHCP server, follow the Static IP Configuration steps.
4. If you still do not see the AVN210 in the AVNs on Network list, you may have to move the
AVN unit to a local segment on the network. Follow the steps in 3.1 Connecting With a
Terminal Emulation Program or 3.2 Connecting With a Telnet Session to change the IP
Address, Netmask, and/or Gateway properties of the AVN210 and then return it to the
desired location.
If you still do not see the AVN210 and you know that it is properly connected to the network, you
may have a switch or router on the network preventing the Multicast message from properly
getting through. Contact the network administrator to allow for a multicast message for discovery.

AVN210 User’s Manual Chapter 5 Operating the AVN210
13
Chapter 5 Operating the AVN210
The AVN210 has four control interfaces that you can use to operate and configure the AVN units:
•AVN2XX Configuration Utility – GUI-based programs installed on a Windows-based PC.
•Console Interface – connects to an AVN unit using a terminal emulation program.
•Browser Interface – uses a browser interface.
•AVN Control Protocol Application Programming Interface (AVNCP API) – available upon
request from Visionary Solutions, Inc.
The Console Interface and the Browser Interface are the preferred methods of configuring the
AVN210, although a user will have nearly the same access to the AVN’s functionalities using any
of the four interface options.
5.1 The AVN2XX Configuration Utility
The AVN2XX Configuration Utility is a free software interface used to configure and control the
AVN2XX encoders (AVN200, AVN210, and AVN220) and their video streams on Windows-based
PCs. It can be used to update the firmware and has a Mass Configuration dialog that is able to
configure the encoder settings on multiple AVN units at one time.
Download the application here:
http://www.vsicam.com/core/__downloads/AVN2XX_Configuration_Utility.zip.
5.2 AVN210 Console Interface Menus
To access the AVN210’s Console Interface, establish a terminal emulation session or a Telnet
session.
•Refer to 3.1 Connecting With a Terminal Emulation Program or 3.2 Connecting With a Telnet
Session for connection instructions.
•Refer to Chapter 6 Using the Console Interface for information about the Console Interface
menus and their functionality.

Chapter 5 Operating the AVN210 AVN210 User’s Manual
14
5.3 AVN210 Browser Interface Menus
The AVN210 must be on a network in order to connect to its Browser Interface. Once connected:
1. Type the following URL (http://xxx.xxx.xxx.xxx) into your browser, where the
xxx.xxx.xxx.xxx corresponds to the AVN210’s IP address.
2. Click Enter/Go. The AVN210’s Web Management page will display.
3. Enter the Username and Password of the AVN210 and click the Login button. The AVN210’s
Browser Interface pages will display.
Refer to Chapter 7 Using the Browser Interface for information about the Browser Interface
pages and their functionality.
5.4 AVN Control Protocol (API)
For programmers who wish to integrate AVN control functionality into their own applications, the
AVN Control Protocol (API) offers all the "hooks" needed. Contact support@vsicam.com for
AVN210 API documentation. Available to prequalified customers only.
Table of contents
Other Visionary Solutions Media Converter manuals
Popular Media Converter manuals by other brands

Absolute Process Instruments
Absolute Process Instruments IsoSplitter APD 4930 quick start guide

ANTAIRA
ANTAIRA FCN-3112 Series Quick installation guide

Sumavision
Sumavision C150 user guide

Rocstor
Rocstor Y10C294-B1 user manual

TR-Electronic
TR-Electronic C H-110 Series user manual

Terrasat
Terrasat IBUC 3 Operation manual